Get organized and stay on top of your bidding process with PlanHub’s Bid Board. In this step-by-step guide, you'll learn how to add projects, track bids, collaborate with your team, filter and manage your board, and leverage new features to enhance your workflow.
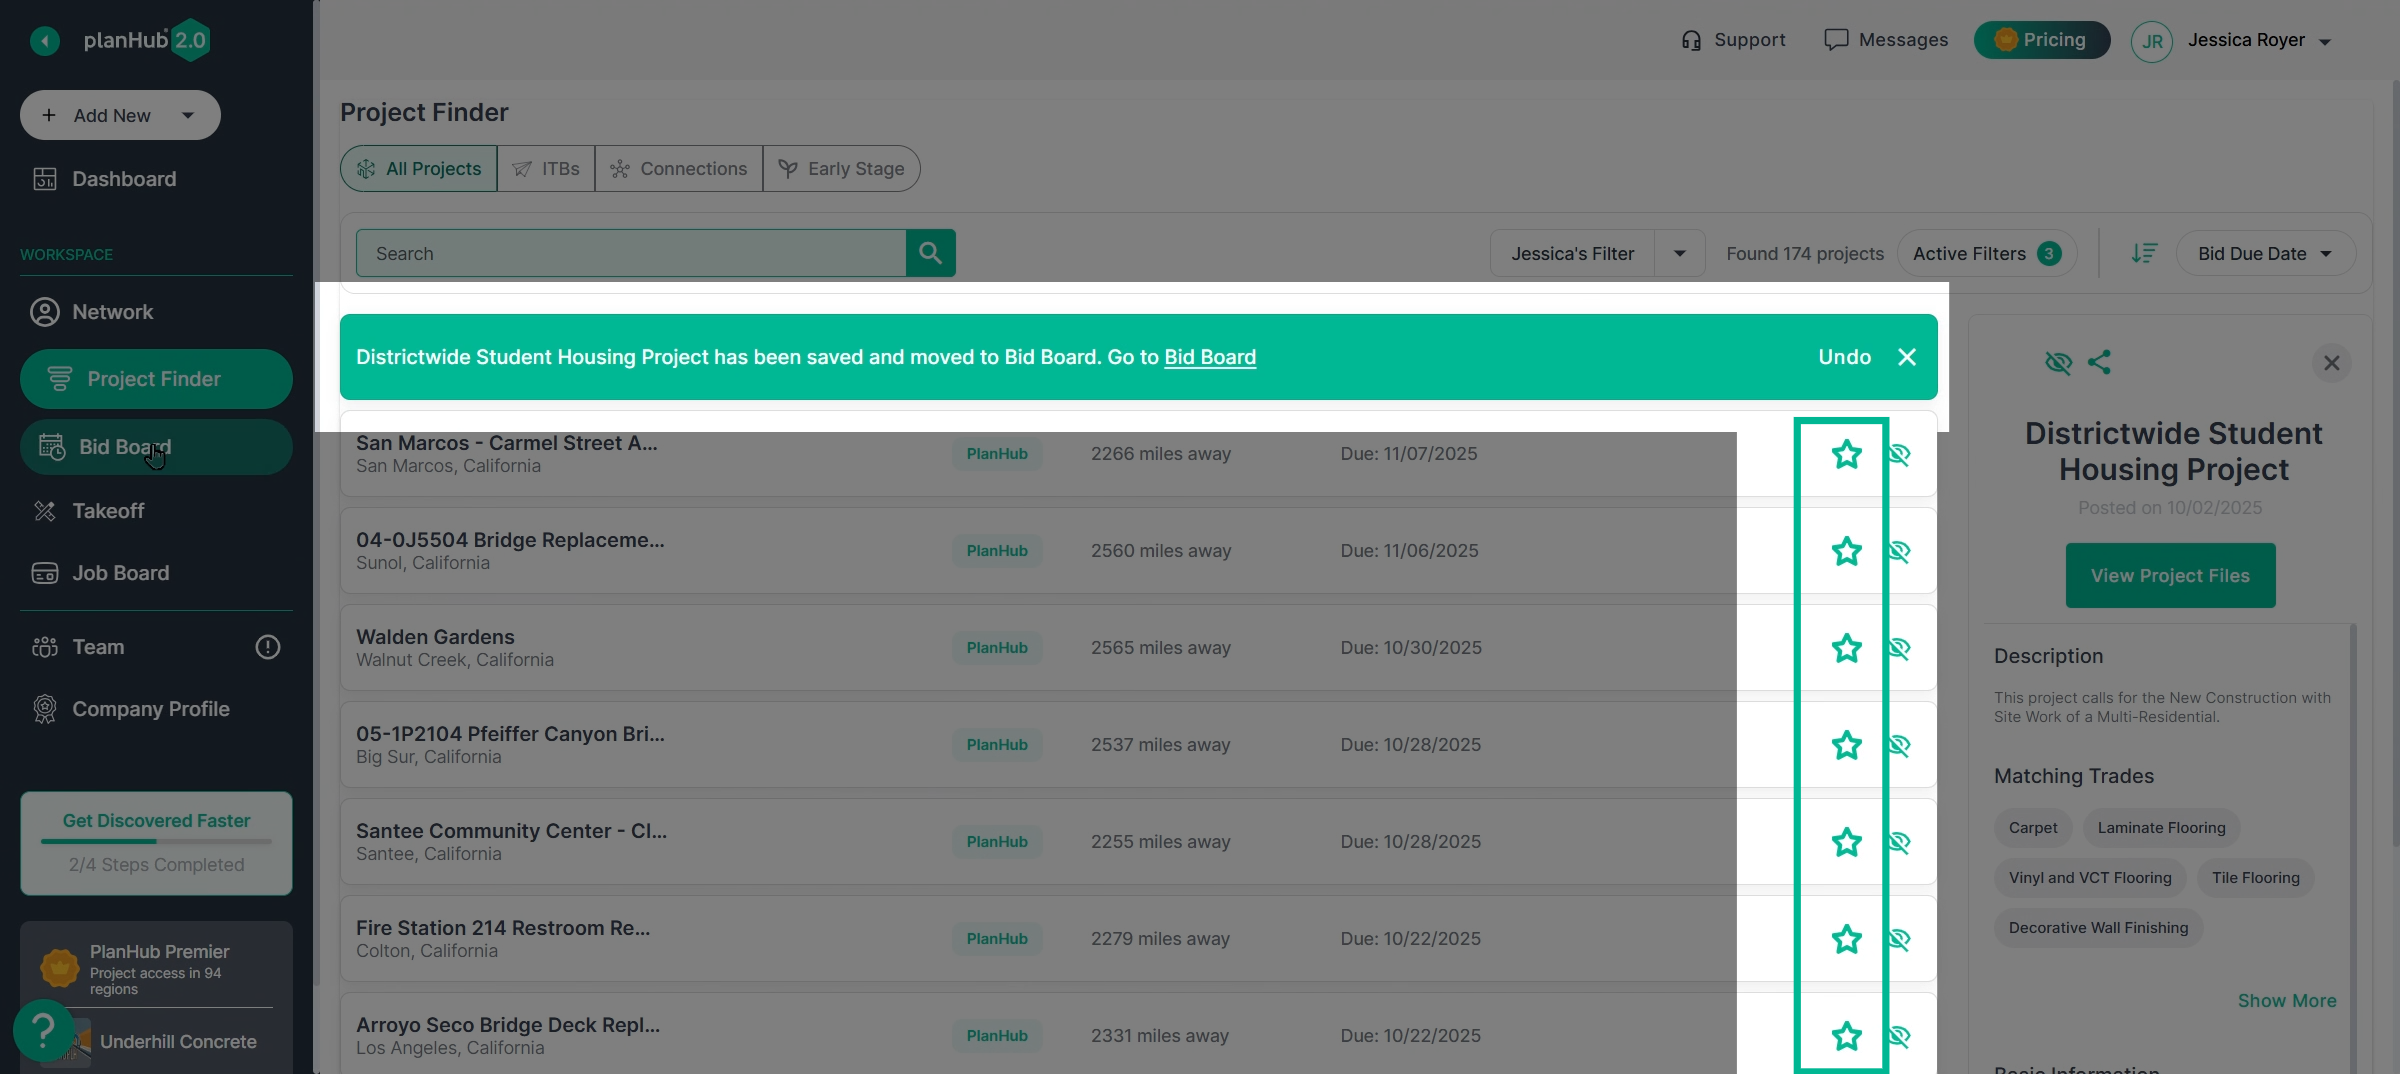
Step 1: Add a Project to the Bid Board
Mark projects with a star to save them for easy access on your Bid Board.
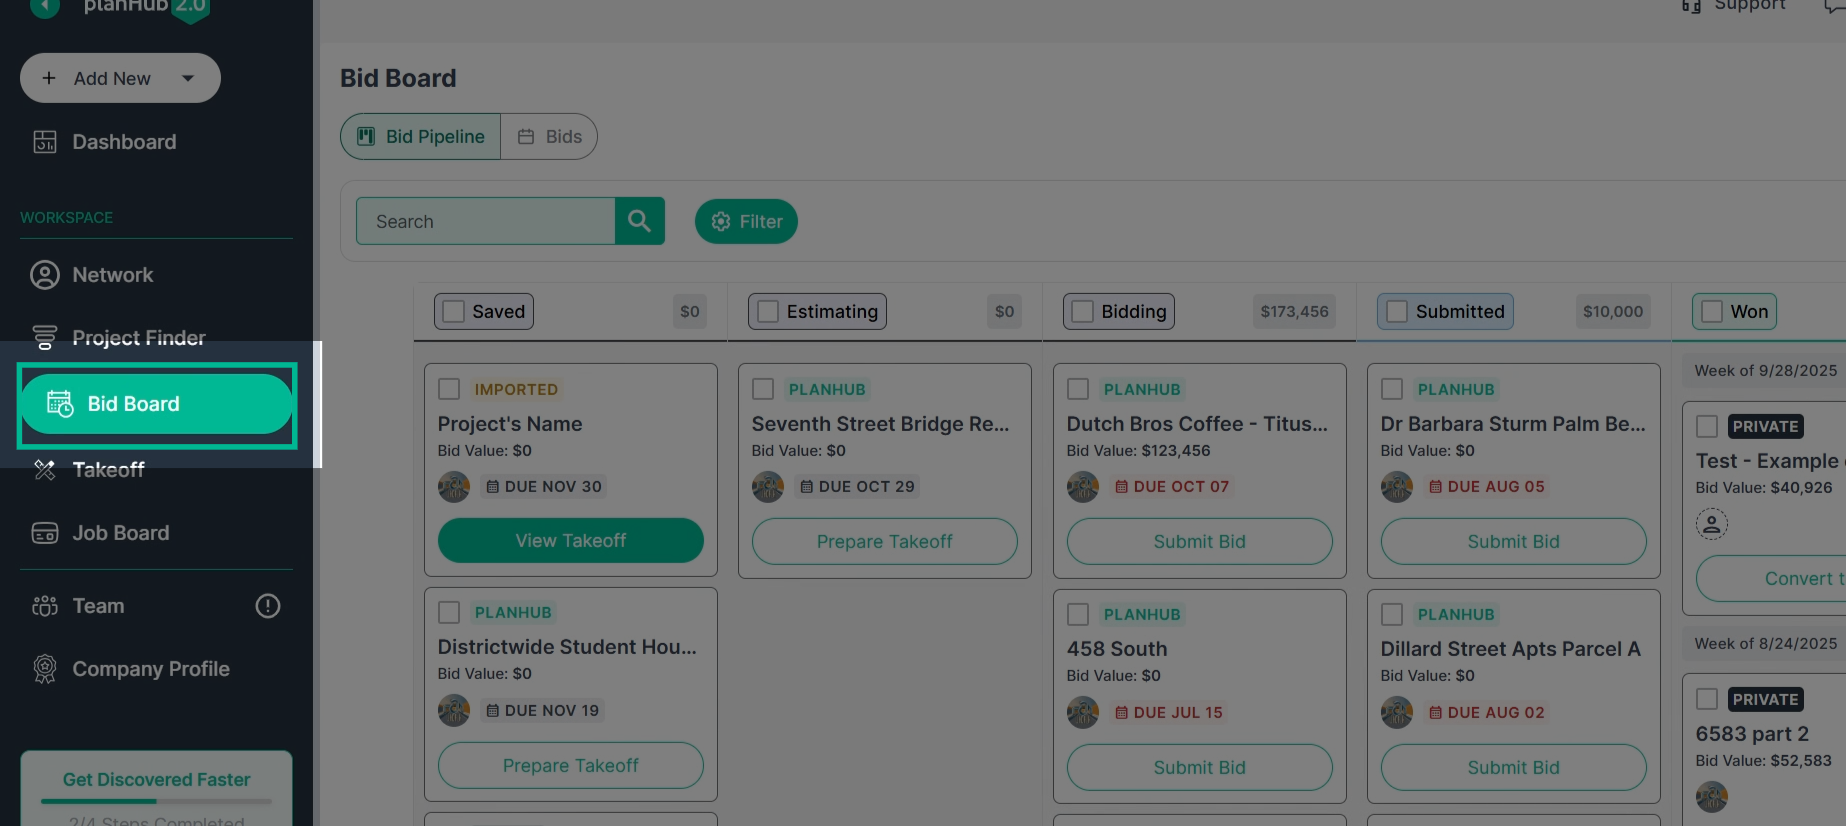
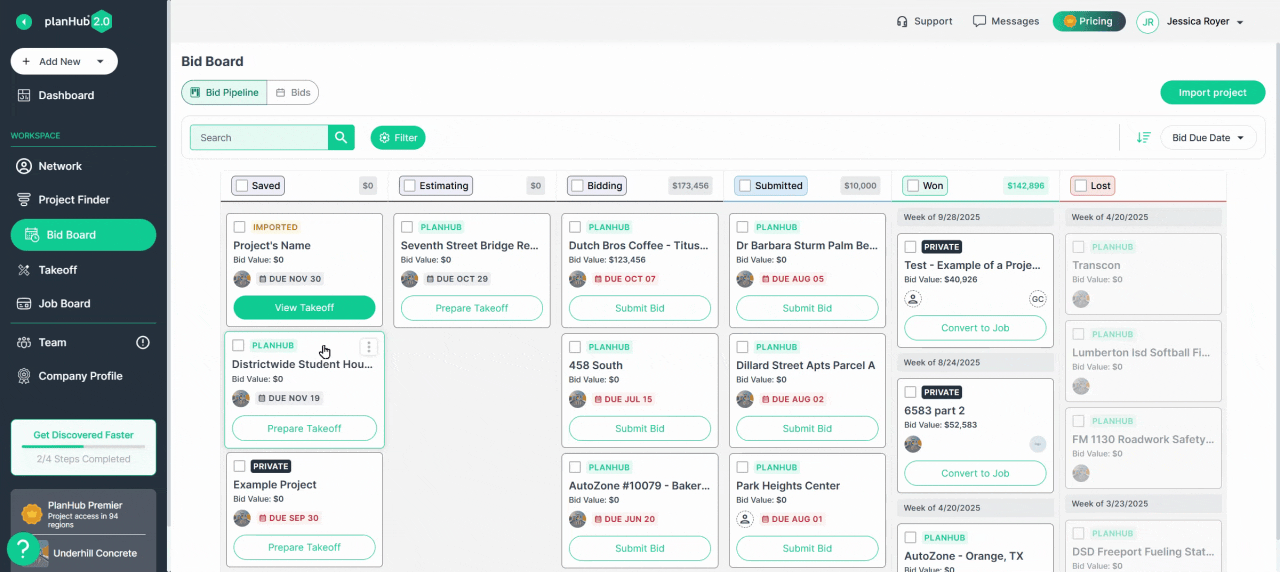
Step 2: Access the Bid Board
Select Bid Board from the main navigation panel.
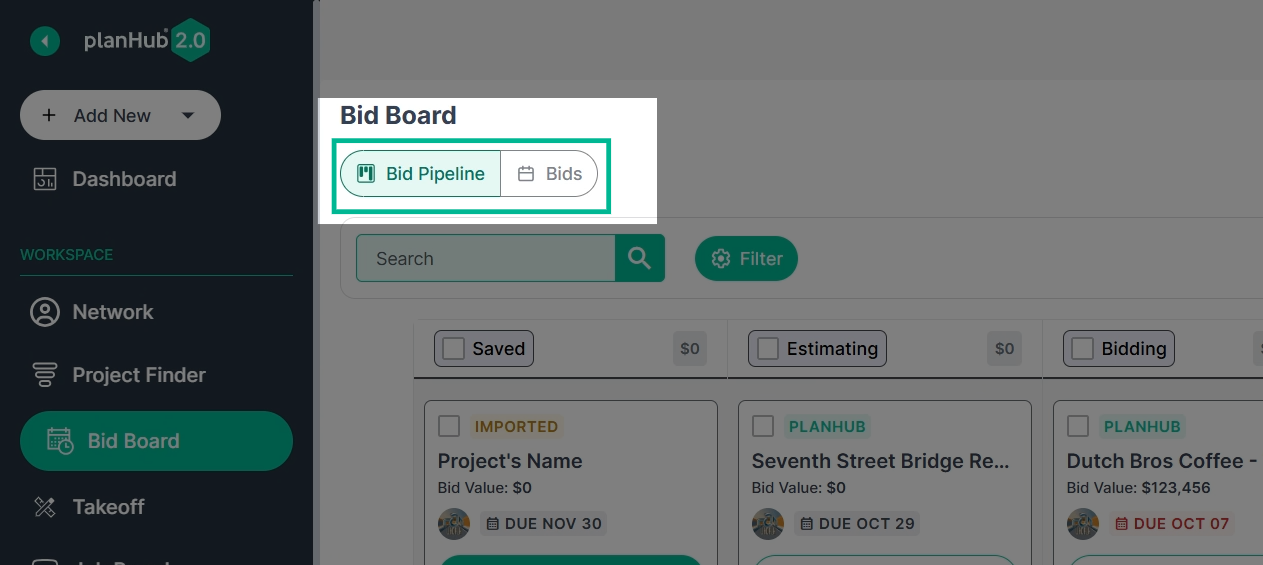
Step 3: Navigate Bid Board Tabs
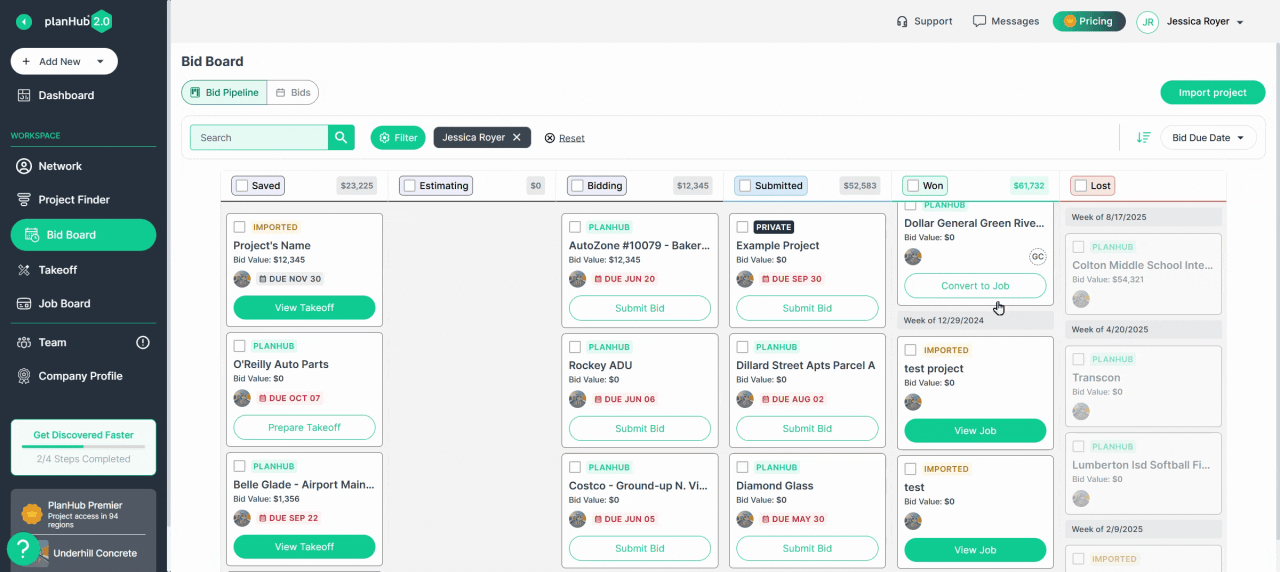
Two main tabs keep your work organized: - Bid Pipeline for tracking project stages - Bids for viewing your submitted bids
Step 4: Understand Pipeline Stages
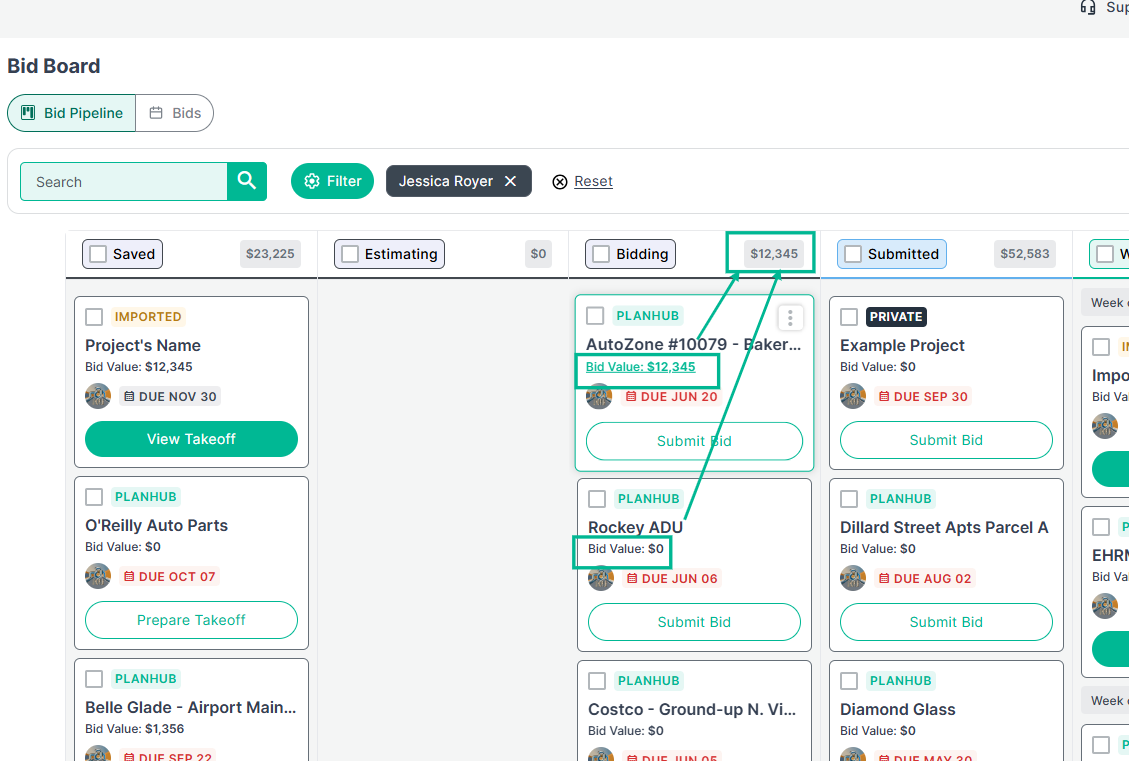
Monitor project progress using preset stages: - Saved - Estimating - Bidding - Submitted - Won - Lost
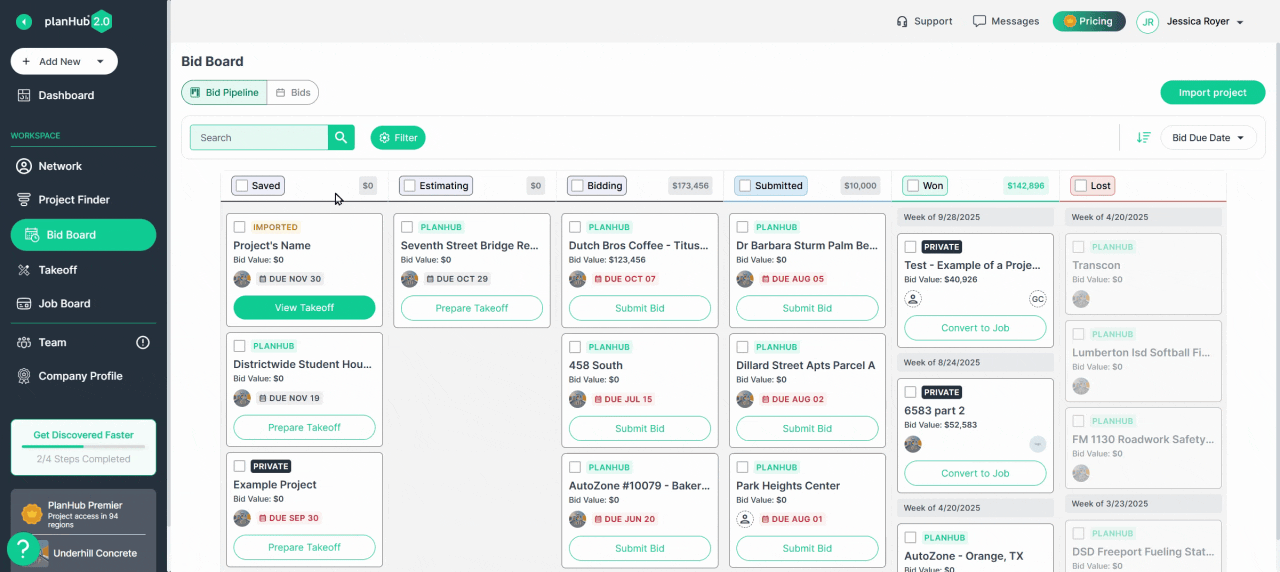
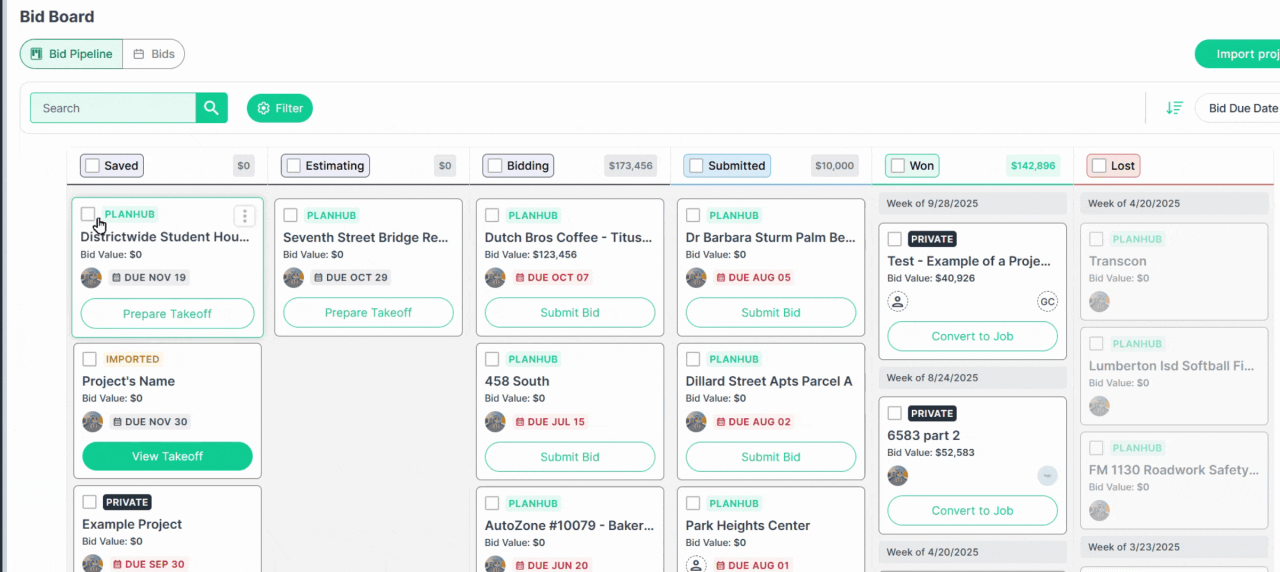
Step 5: Update Project Stages
Click and hold while you drag a project to a new stage column or use the three-dot icon to update its status.
Step 6: Make Bulk Updates
Select multiple projects—even across stages—for quick updates like assigning, removing, or changing status.
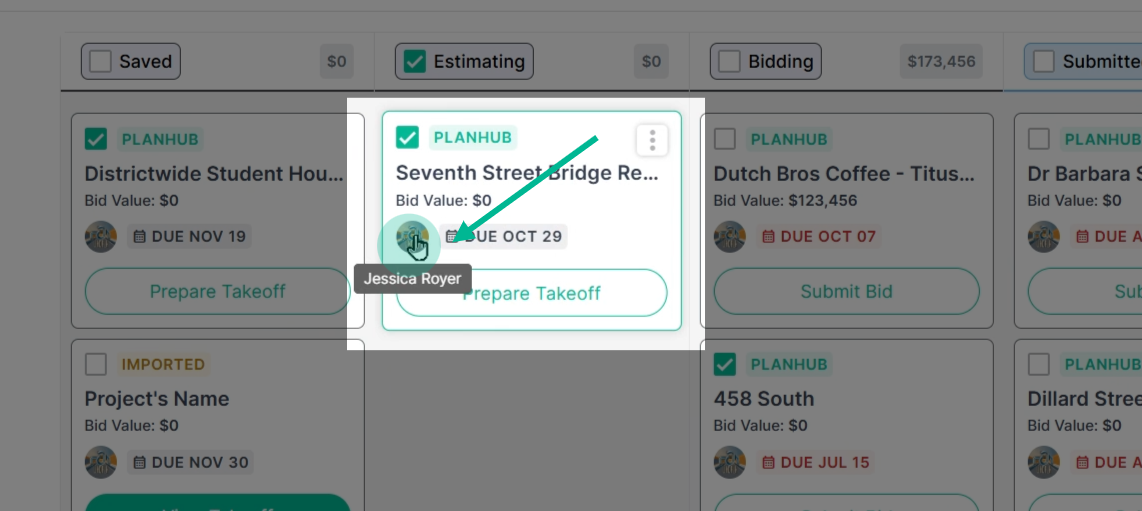
Step 7: View Team Assignments
Hover over your logos icons to see which teammate owns each project.
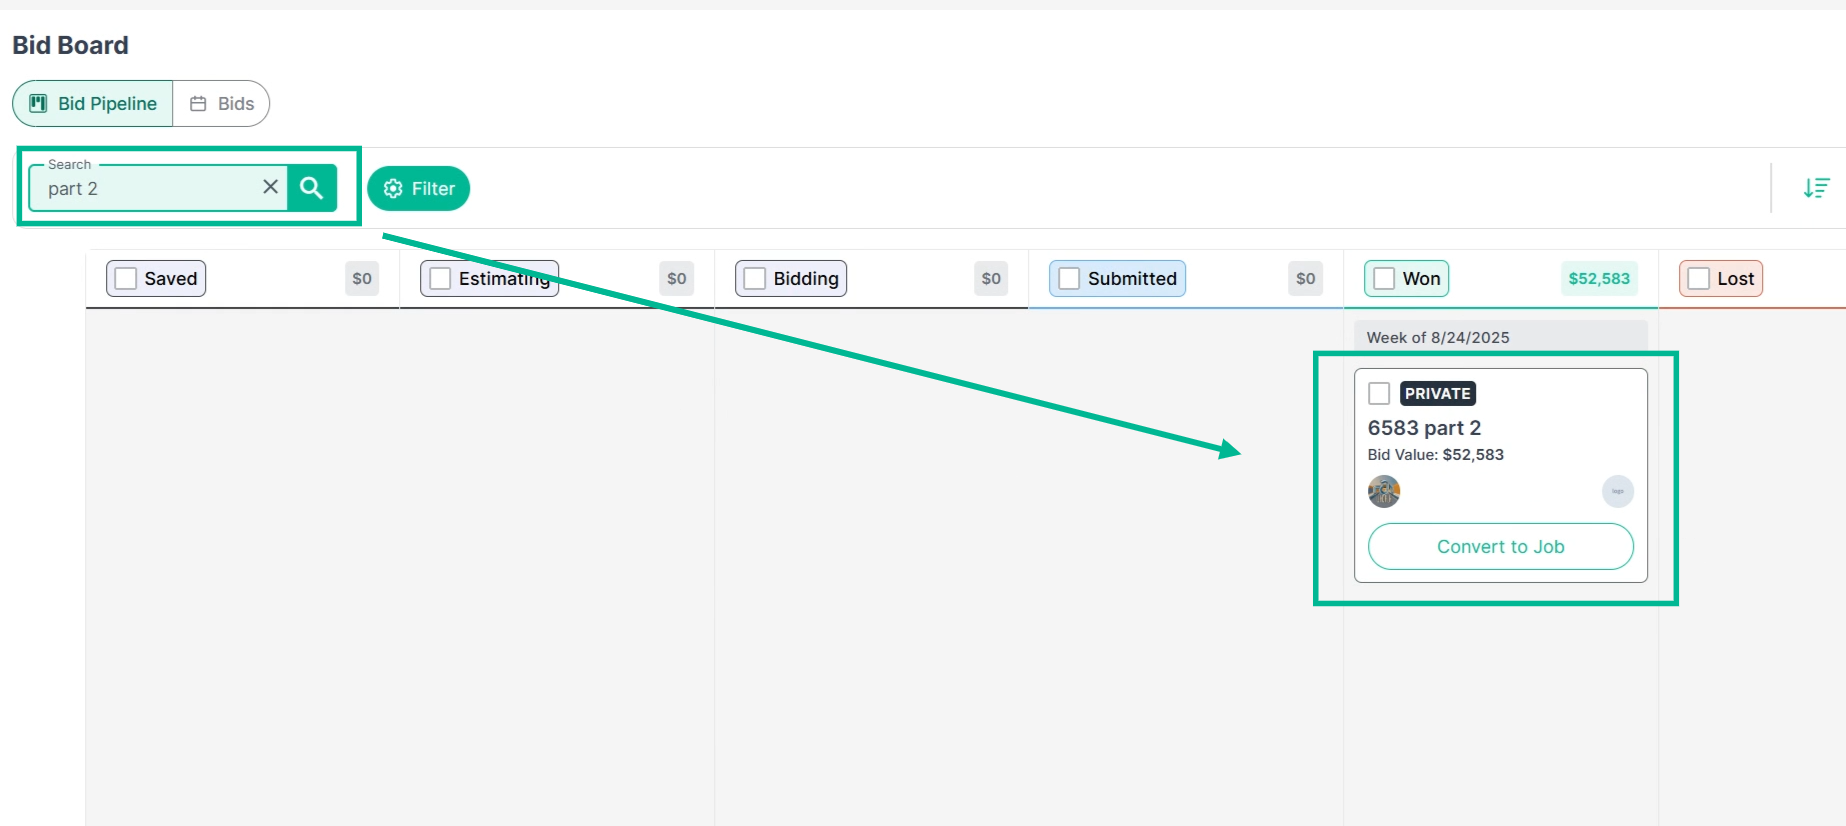
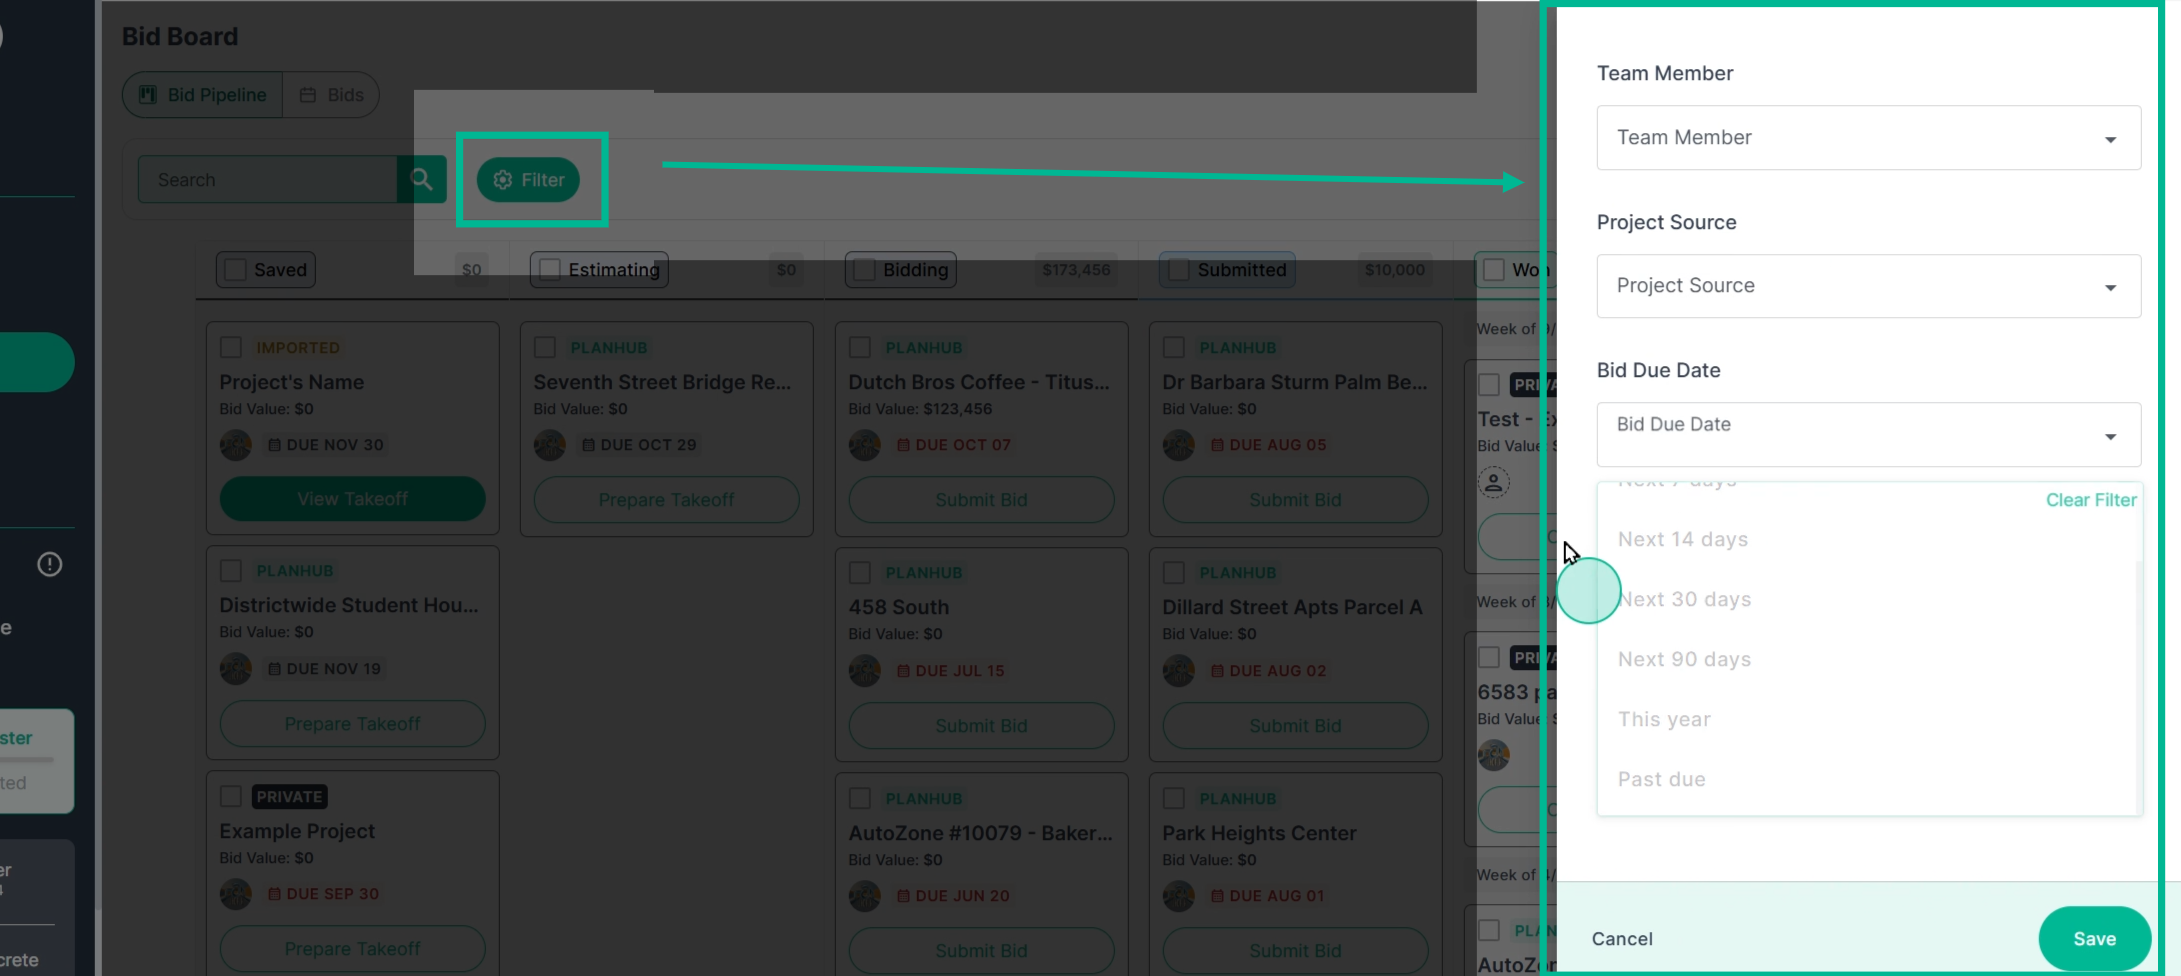
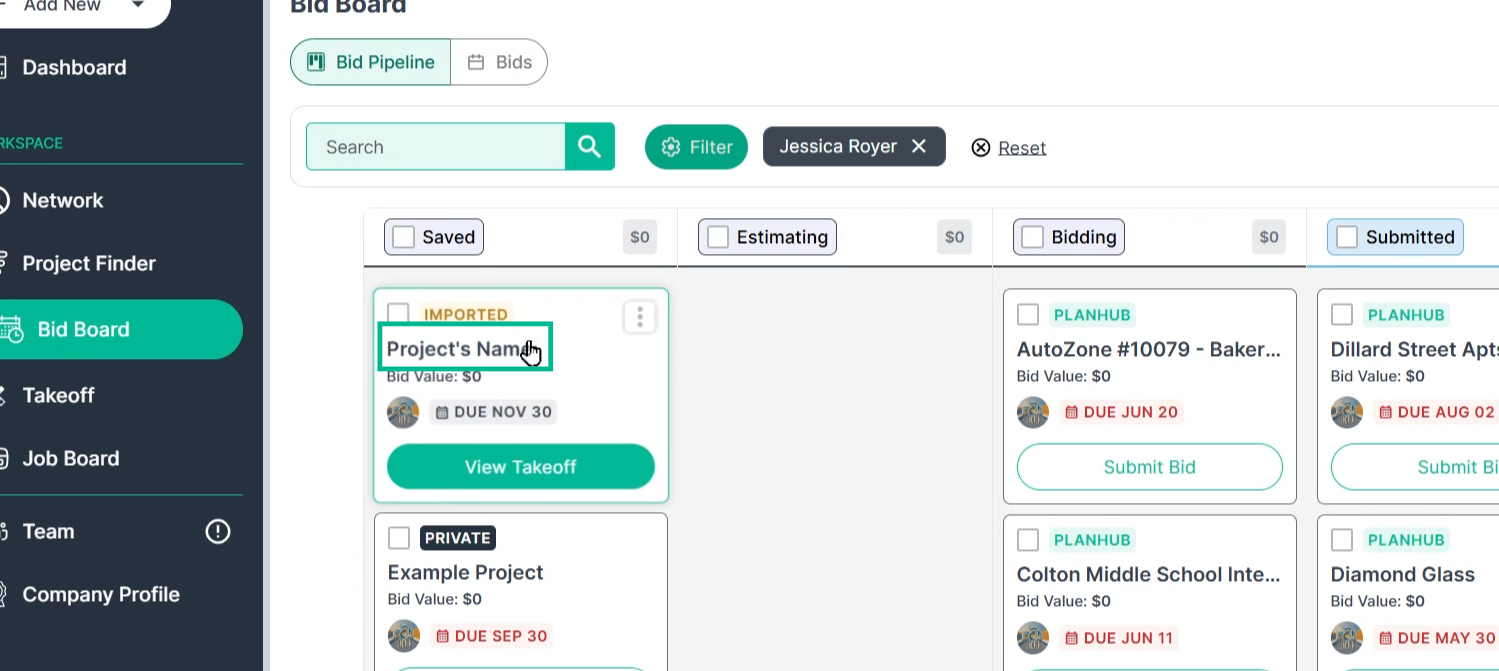
Step 8: Search and Filter Projects
Use the search bar to quickly locate specific projects by name.
Apply filters by team member, project source, or bid due date, then click Save to apply and update your board’s view.
Step 9: Open Project Details
Click any project name to jump to its detail page.
Return to the Bid Board anytime via the left navigation panel.
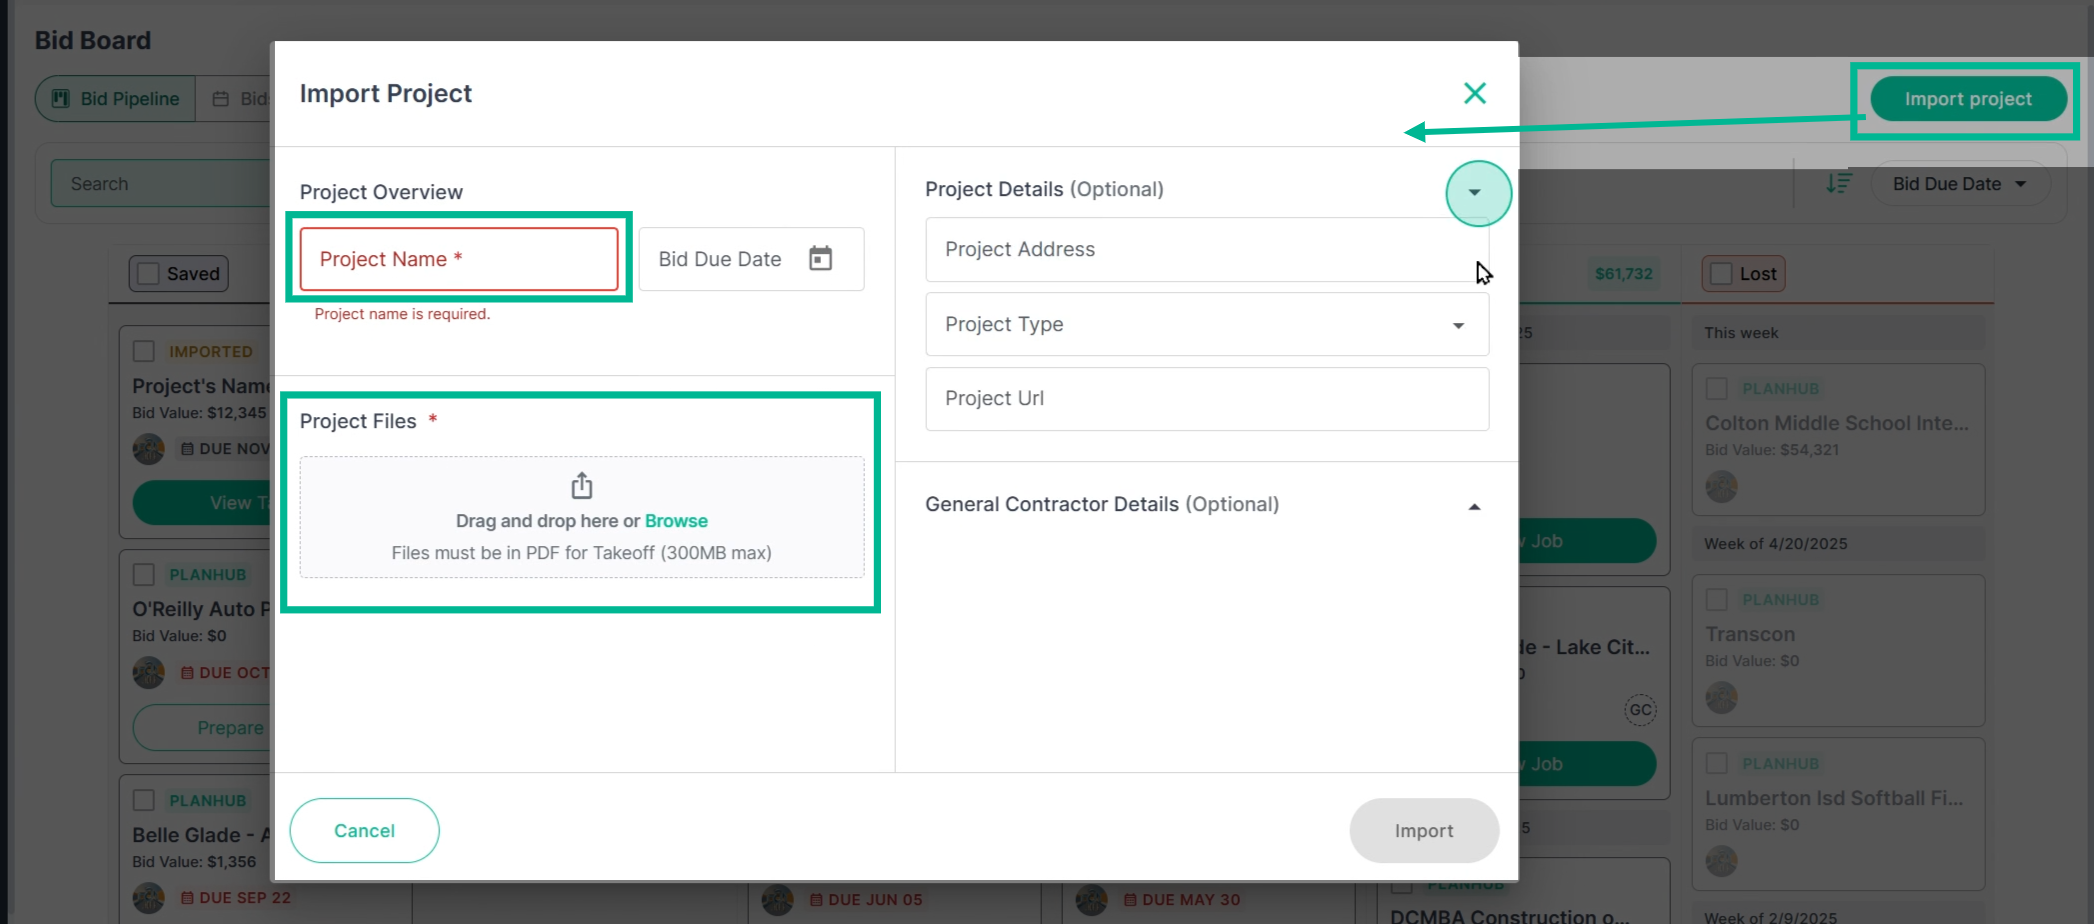
Step 10: Import Projects
You can import projects that are not in PlanHub to help keep all your company projects organized. Click on "Import Project".
You must give the project a name and upload at least one file; all other information is optional.
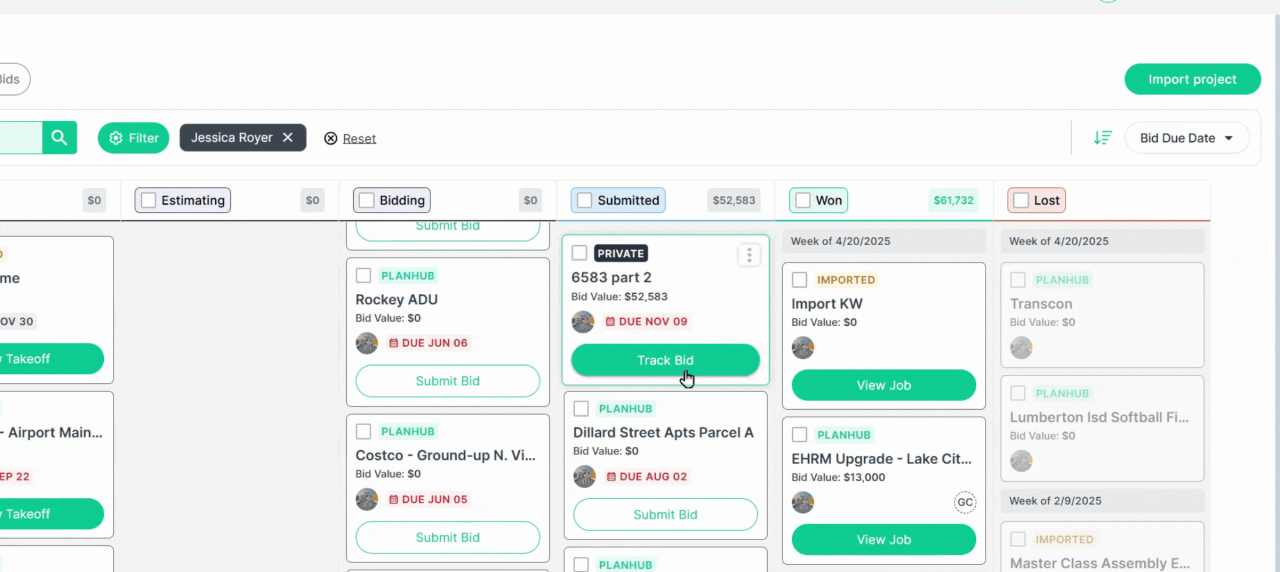
Step 11: Track Submitted Bids
In the Submitted column, use the Track Bid feature to monitor your submitted bids.
Click Track Bid to open the tracking panel displaying trades and amounts you bid, and the activity from the General Contractor.
See which general contractors received your bids and request feedback directly when needed. All feedback appears in the Feedback folder.
You should use this to monitor your results to help improve your bidding strategy over time.
Step 12: Update Bid Values
Enter your bid value for any project using Bid Value, and view the grand total for each pipeline stage.
Step 13: Convert Won Projects to the Job Board
If you use the Job Board, move Won projects over by clicking Convert to Job. This action transfers all details and lets you assign team members, set milestones, and attach documents as needed.
Keep everything organized with PlanHub’s Field app, centralizing communication and documentation for every job.

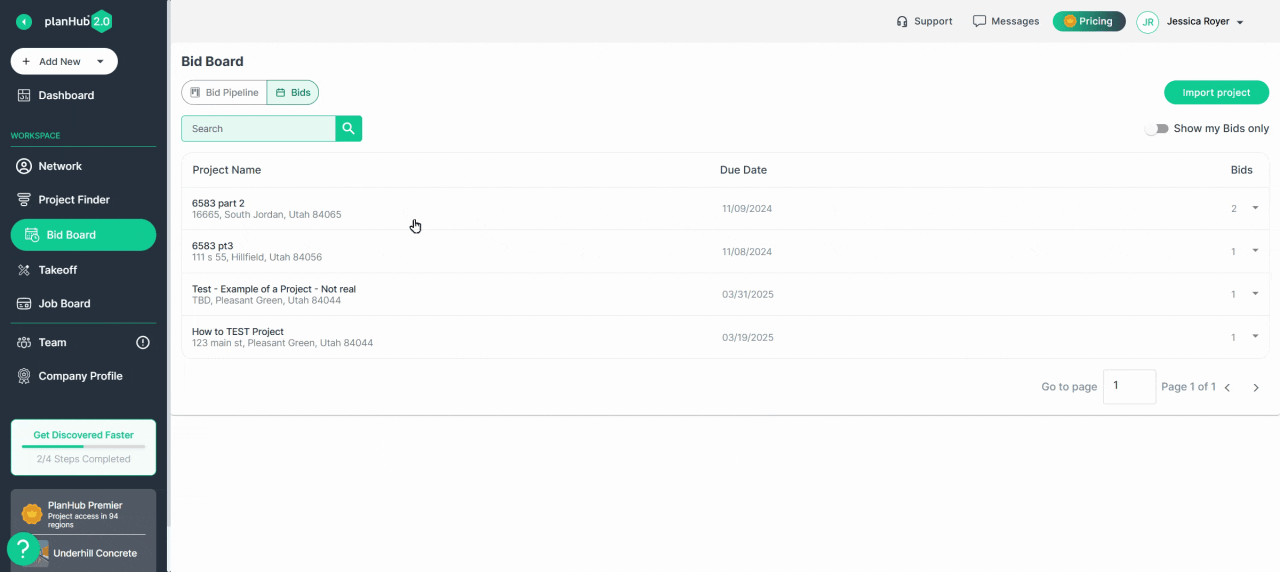
Step 14: Review the Bids Tab
The Bids tab lists every bid submitted by your team, showing the project name, address, due date, and linked documents.
Access project postings and bid files, view recipient details, selected trades, and overall bid amounts—all in one place.
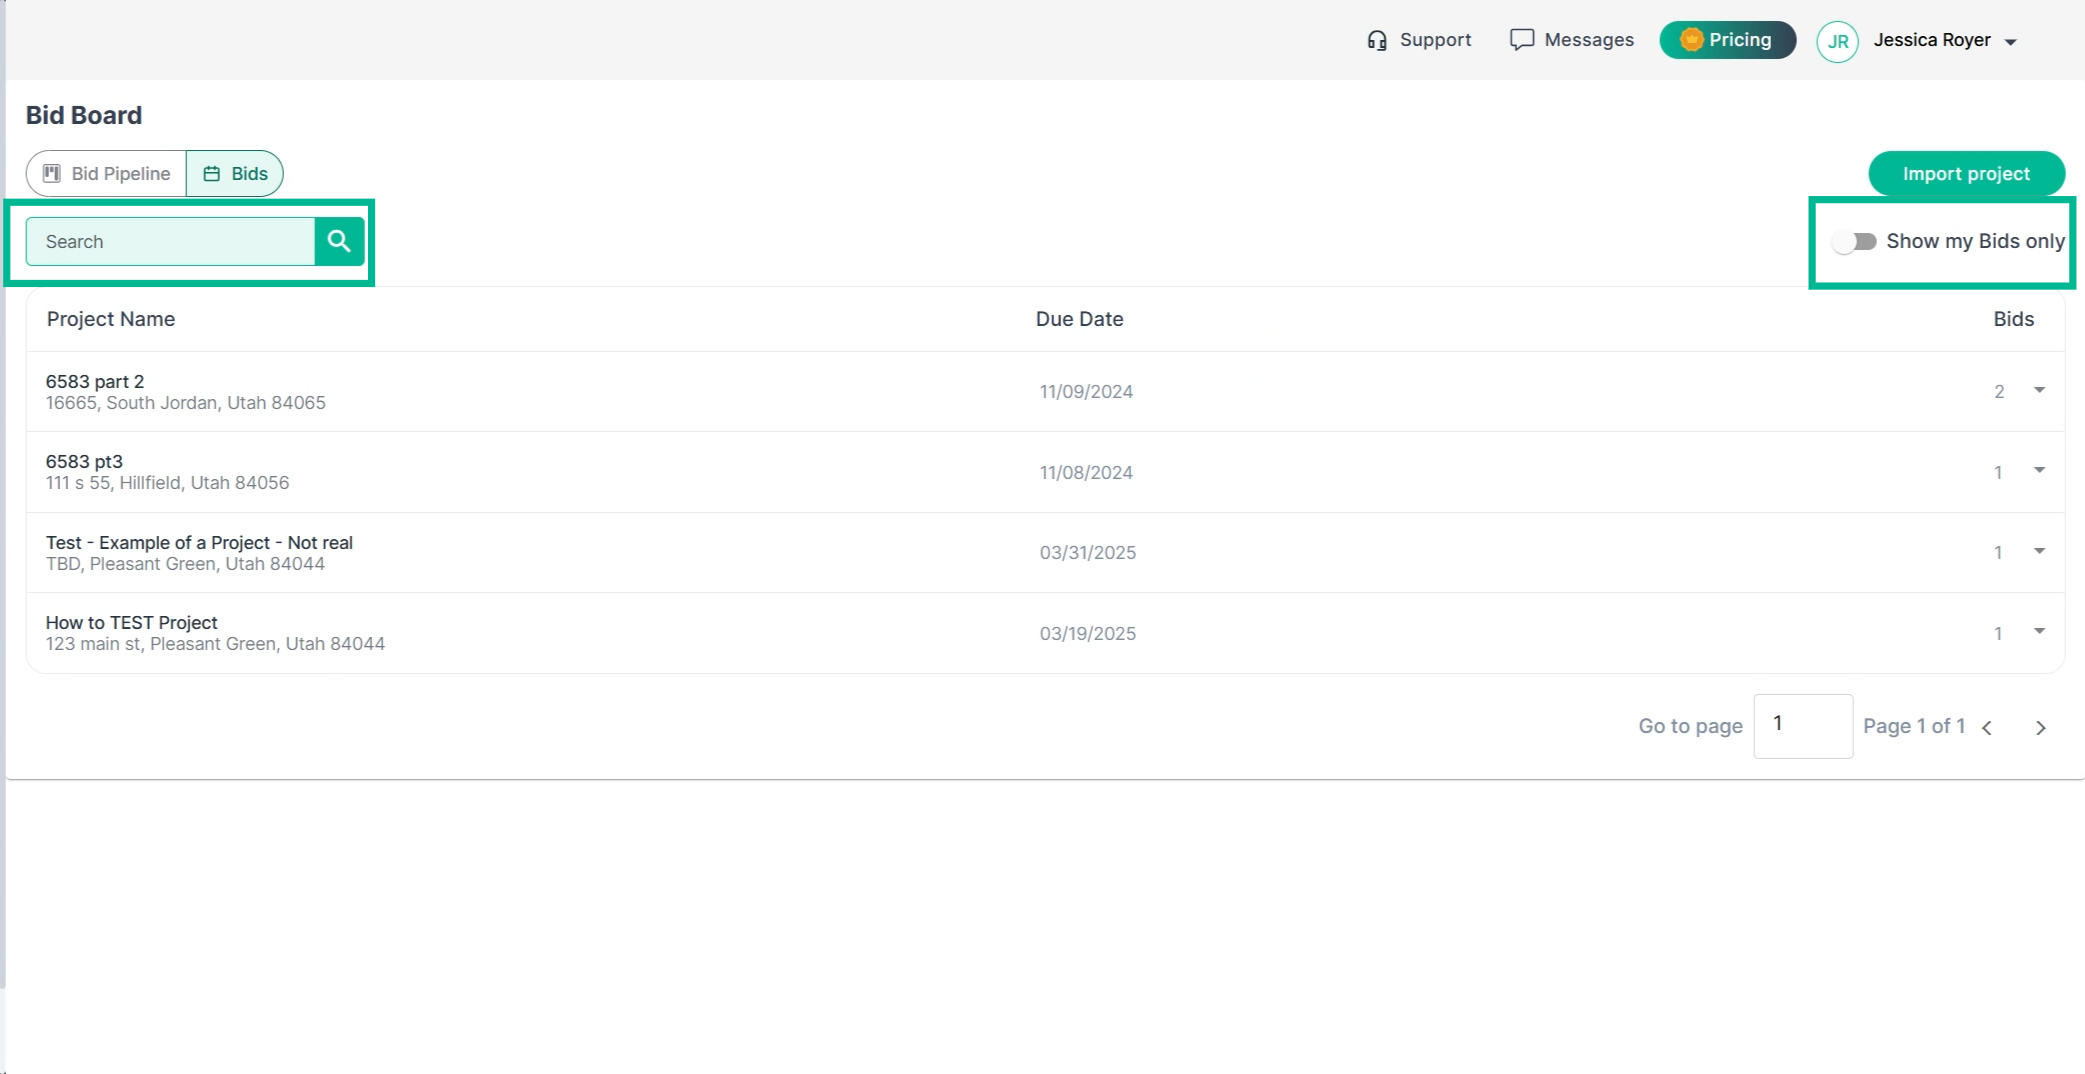
Step 15: Search and Filter Bids
Quickly locate bids by project name using the search bar.
Turn on Show My Bids Only to see just your submissions.
Step 16: Engage With General Contractors
Make sure you are reaching out to GCs for bid updates or feedback to strengthen connections and spot new opportunities.
Log in, start tracking your projects on the bid board, and keep your bidding process efficient and well-organized!