How to Take a Screen Shot (MacOS and PC/Windows)
In this article we will go over how to take a screenshot of your screen, on both Windows and Mac operating systems.
Taking a screenshot is not something you will use all the time, but it is useful when speaking with our Support Representatives. There will be times that you will be asked to take a screenshot of your screen in order for the Representative to see what you are seeing (ie, error that you are experiencing, or a portion of the website you have a question about). They will ask for this when they are unsure of the part of the website your question is about, or are unable to duplicate the error on their end as well.
On Mac OS or Apple computers, you will use the following steps in order to take a screenshot of your screen:

- To take a screenshot, press and hold these three keys together: Shift, Command, and 3.
- If you see a thumbnail in the corner of your screen, click it to edit the screenshot. Or wait for the screenshot to save to your desktop.
On PC/Windows computers, you will use the following steps in order to take a screenshot of your screen:

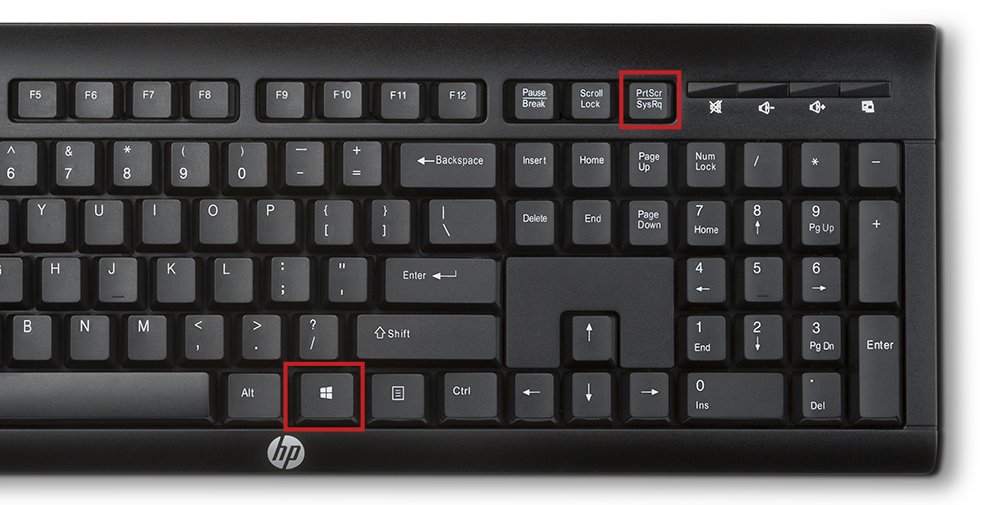
- To take a screenshot, you will press either just the "Print Screen" (PrtScn) button, or you will need to press the Control (CTR) button as well as the "Print Screen" button. Pressing the "Windows" button and the "Print Screen" button will also work.
- It will be saved in your clipboard after the keys are pressed. You will then "Paste" (Ctrl-V) the image where you want the image to appear; whether that is in a chat, or if you are emailing the image to someone.
Be advised, if you do have multiple screens and use a PC, when using the Print Screen function, it will screenshot all screens you have in use.