Prerequisites: A subscription or trial that includes Takeoff is required to measure plans, export a plan into TakeOff, and set the scale. Then you can begin measuring.
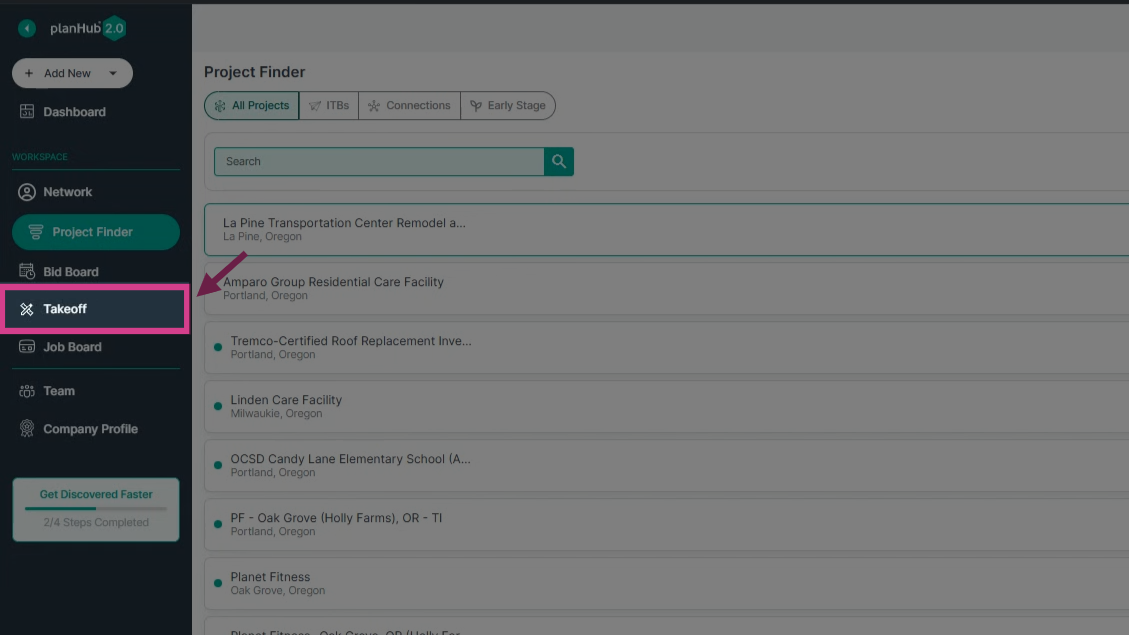
Step 1: Navigate to Takeoff from the Main Panel
After logging into your account, look for the main panel on the left side of the screen. Click on the Takeoff option.
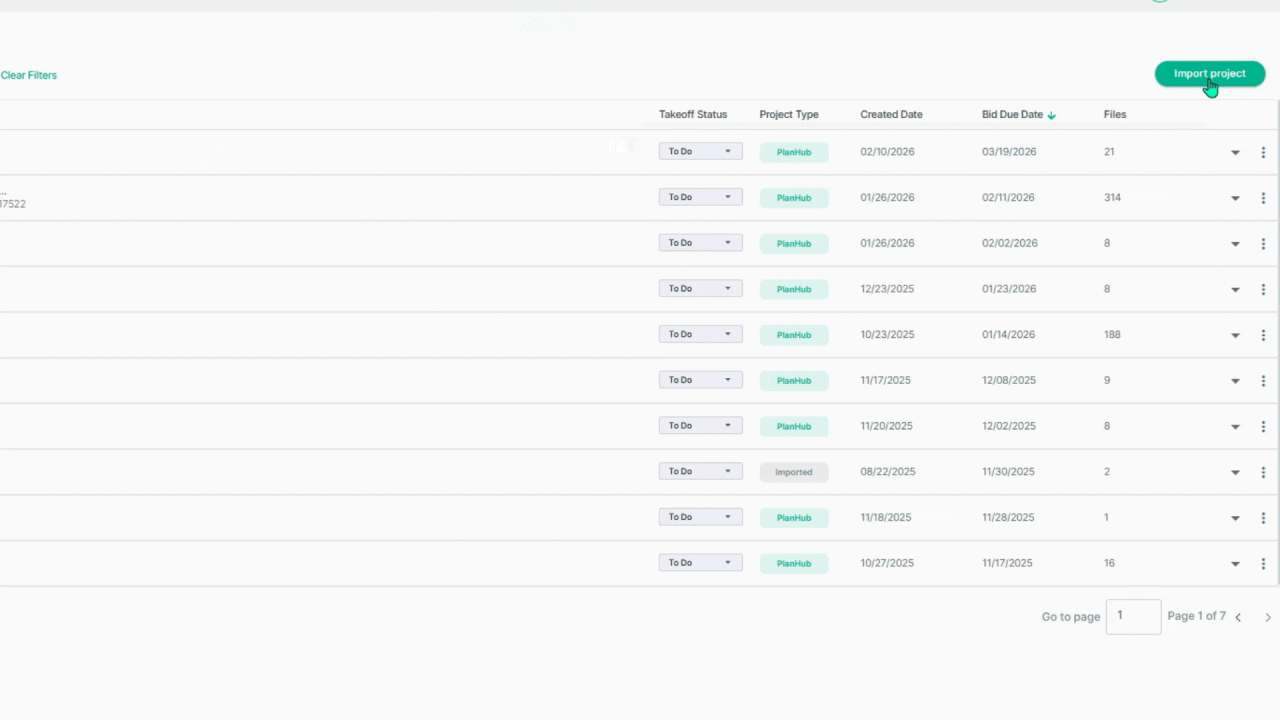
Step 2: Explore the Takeoff Window
You’ll see the takeoff dashboard. At the top, use the Keyword Search Bar to find projects by name, and apply filters using the Filters pop-up for more specific searches.
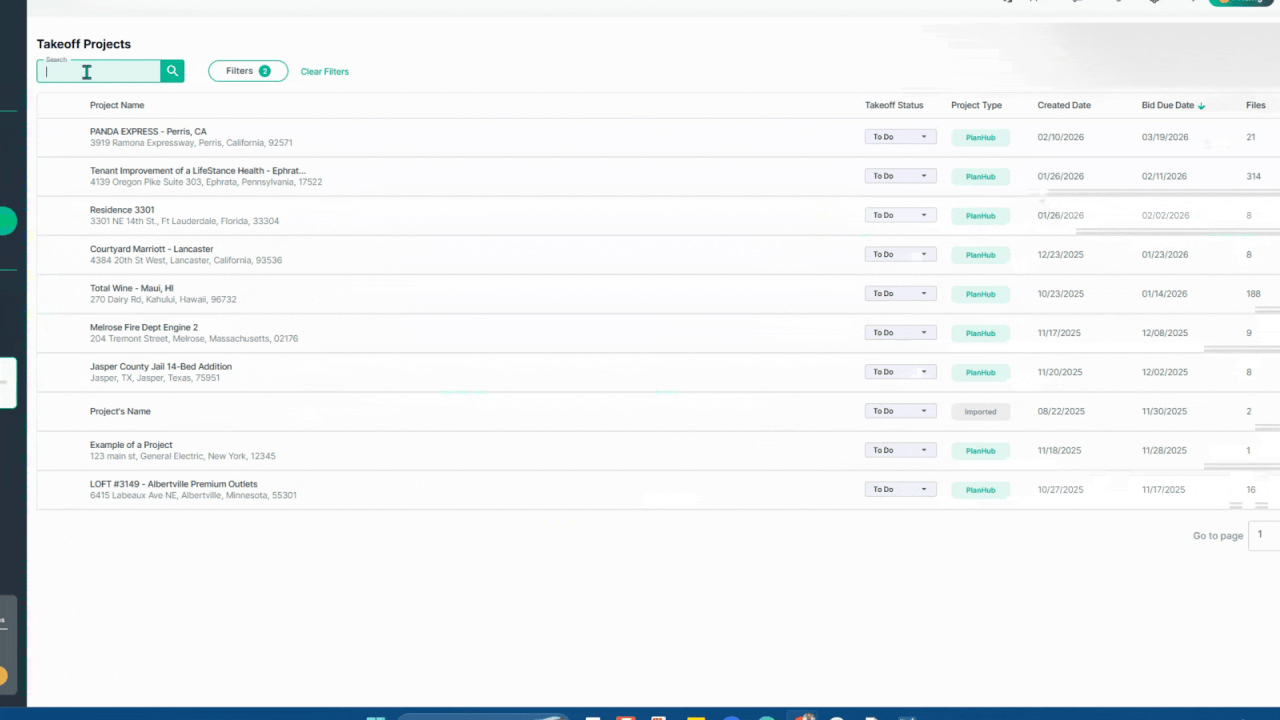

Step 3: Review Project Details
Browse through columns showing the Project Name, Takeoff Status (set via the dropdown), Project Type (planHub or Imported), Created Date, Bid Due Date, and the number of Files for each project. Click the arrows next to each header to sort your project order pertaining to each column.
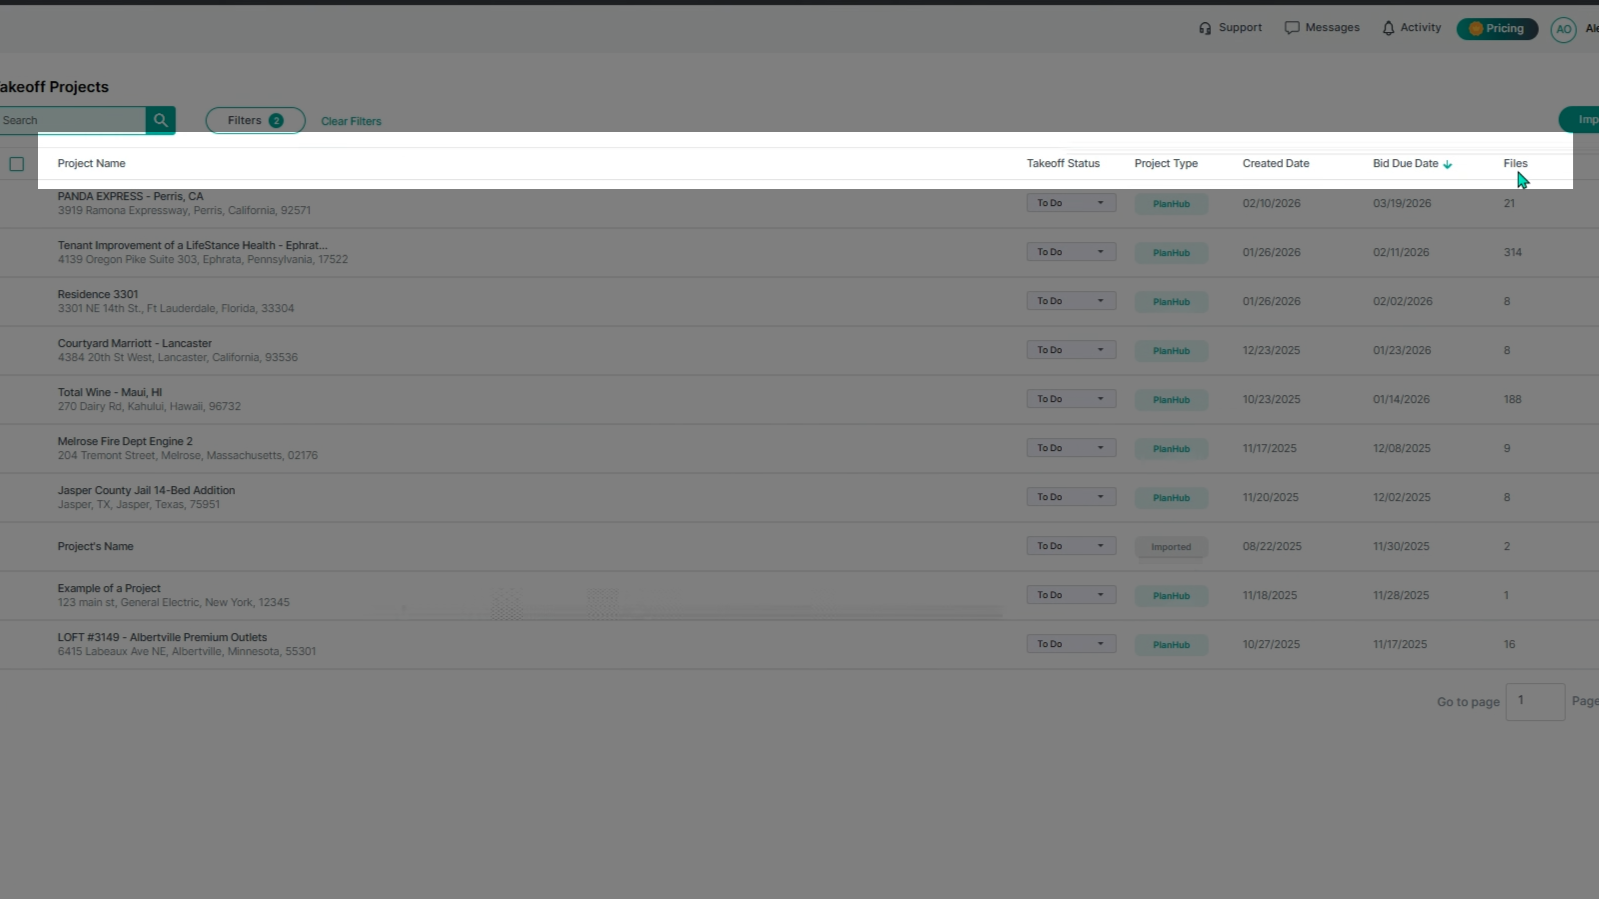
Step 4: Expand Projects to View More
Click the expansion arrow for a project to see its files list and access the View Project Details option at the bottom.
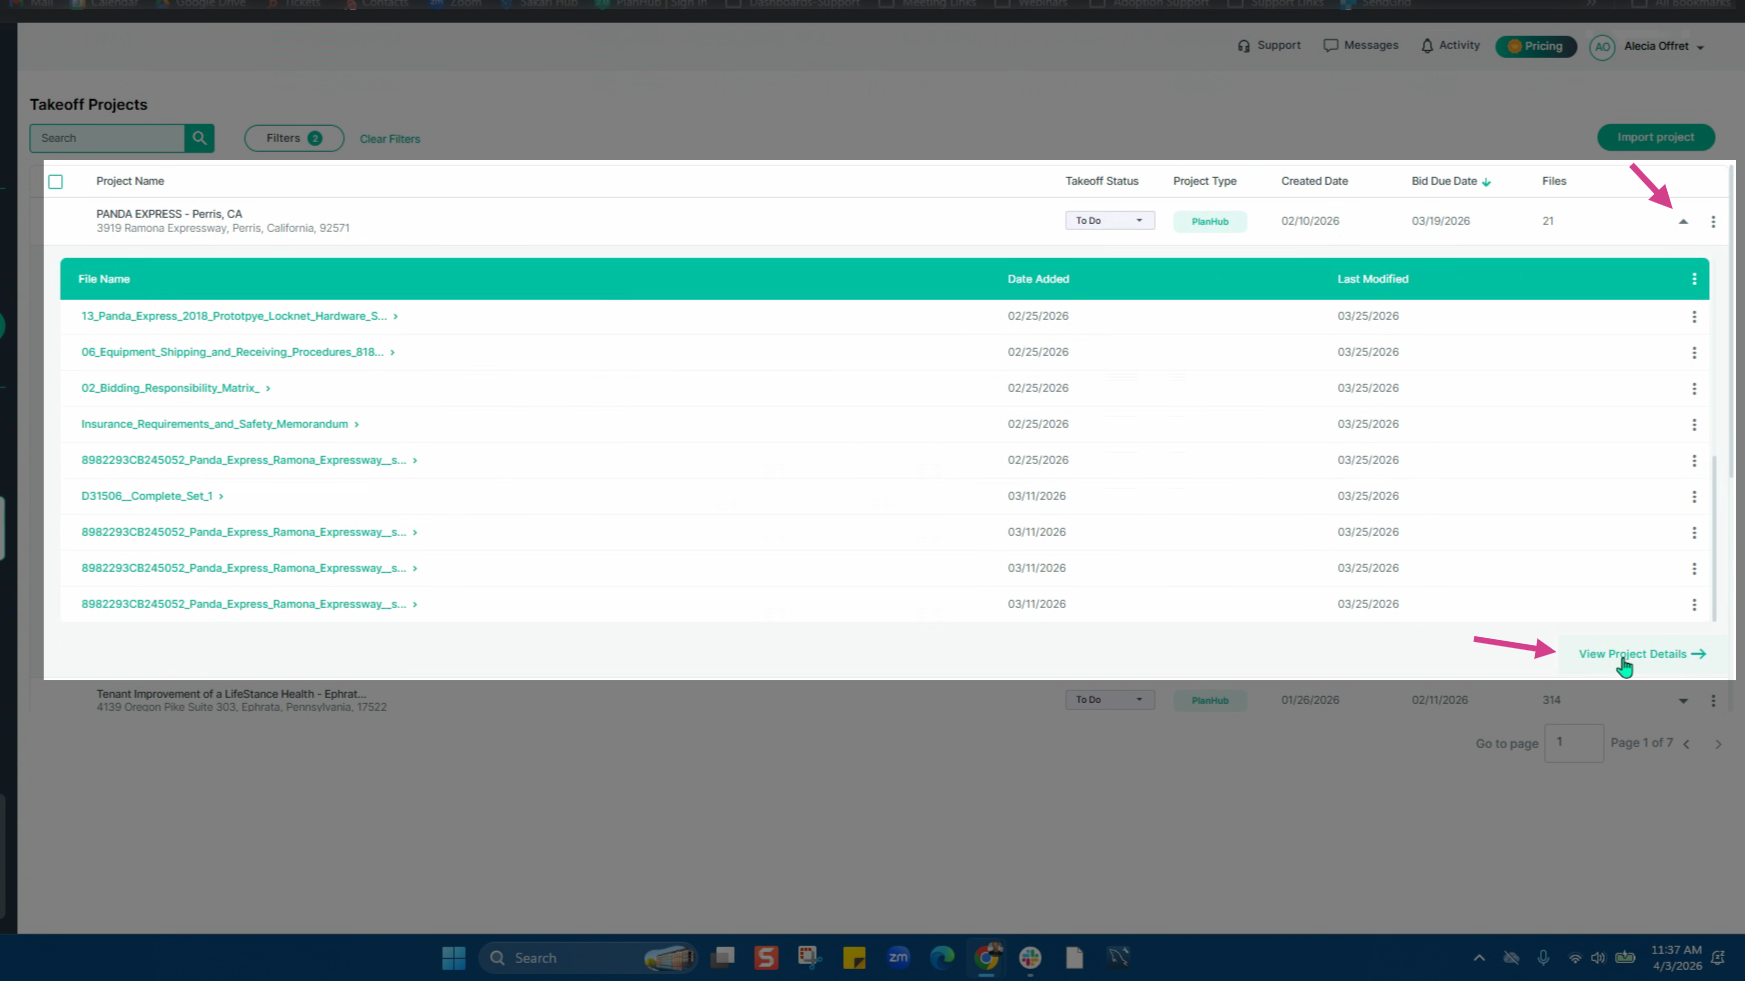
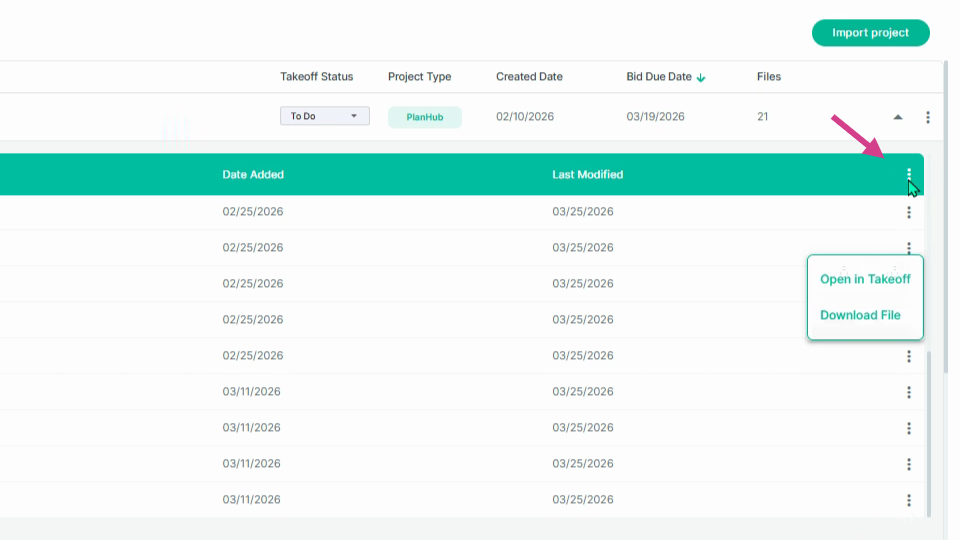
Step 5: Use the Actions Menu for Projects and Files
On each project row, click the three dots on the right for the actions menu. Hide, view, or open files in takeoff. Select the Action menu at the end of the project name row to open all files in Takeoff.
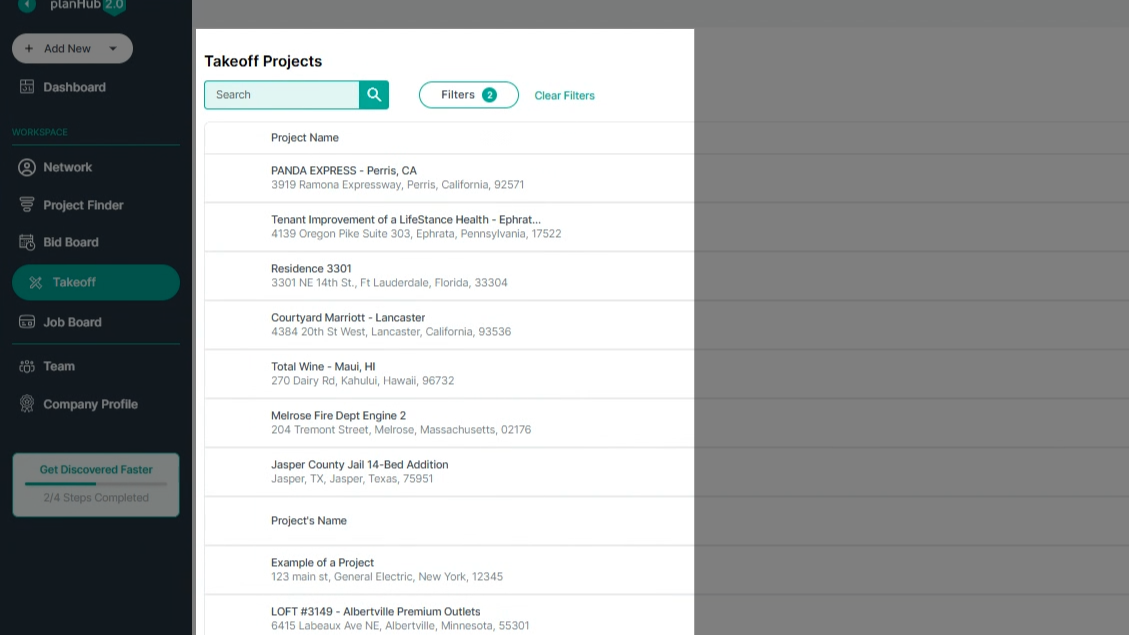
Step 6: Import a New Project
To import a project, click the Import Project button in the upper right corner. Fill out the project name, bid due date, and upload PDF files. Next, add project and general contractor details, then click on Import to import the project.
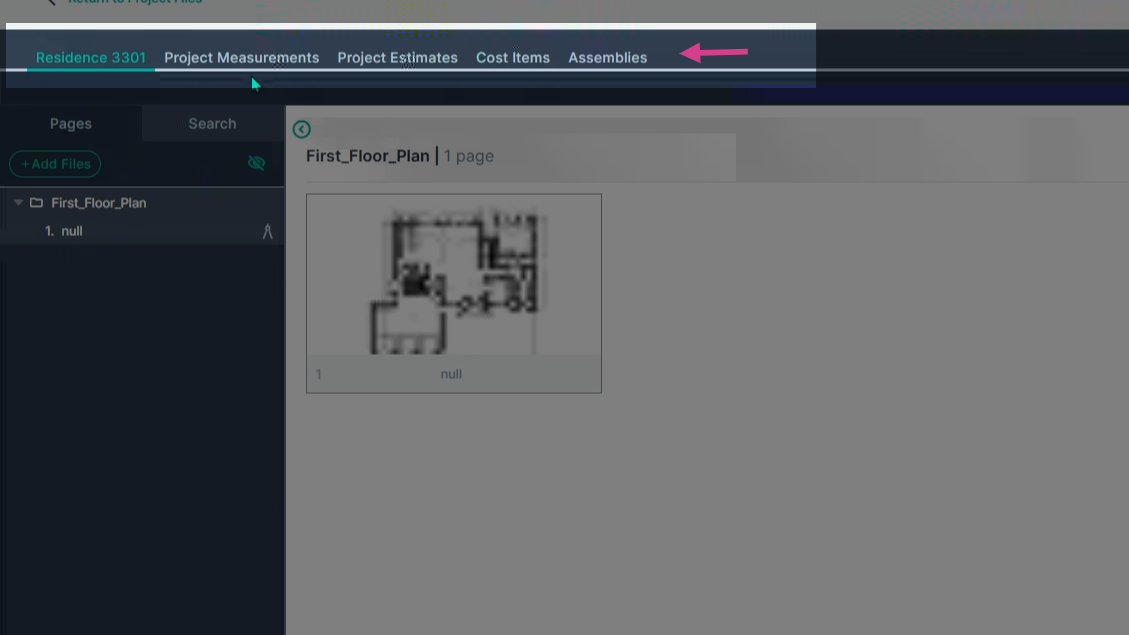
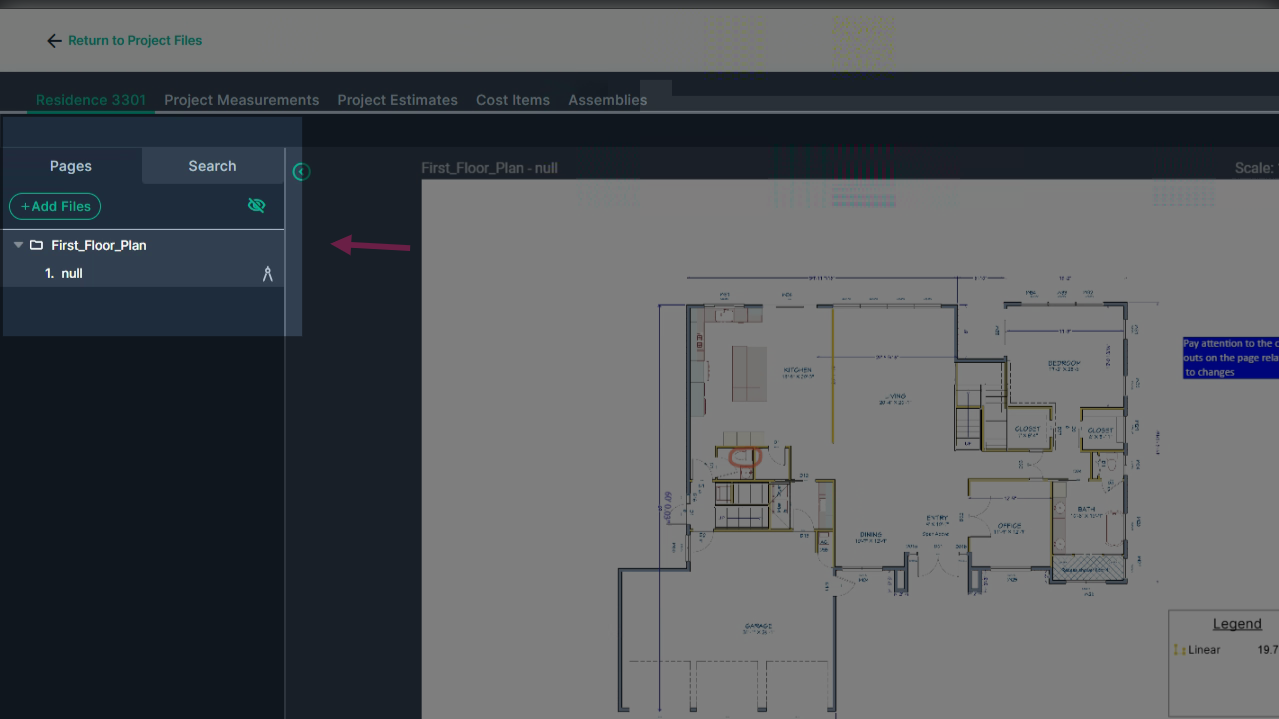
Step 7: Open and Work within a Project
Select a project to view in Takeoff by clicking on the name to enter its takeoff page. The top tabs allows you to switch between the project plans, project measurements list, project estimates, cost items, and assemblies.
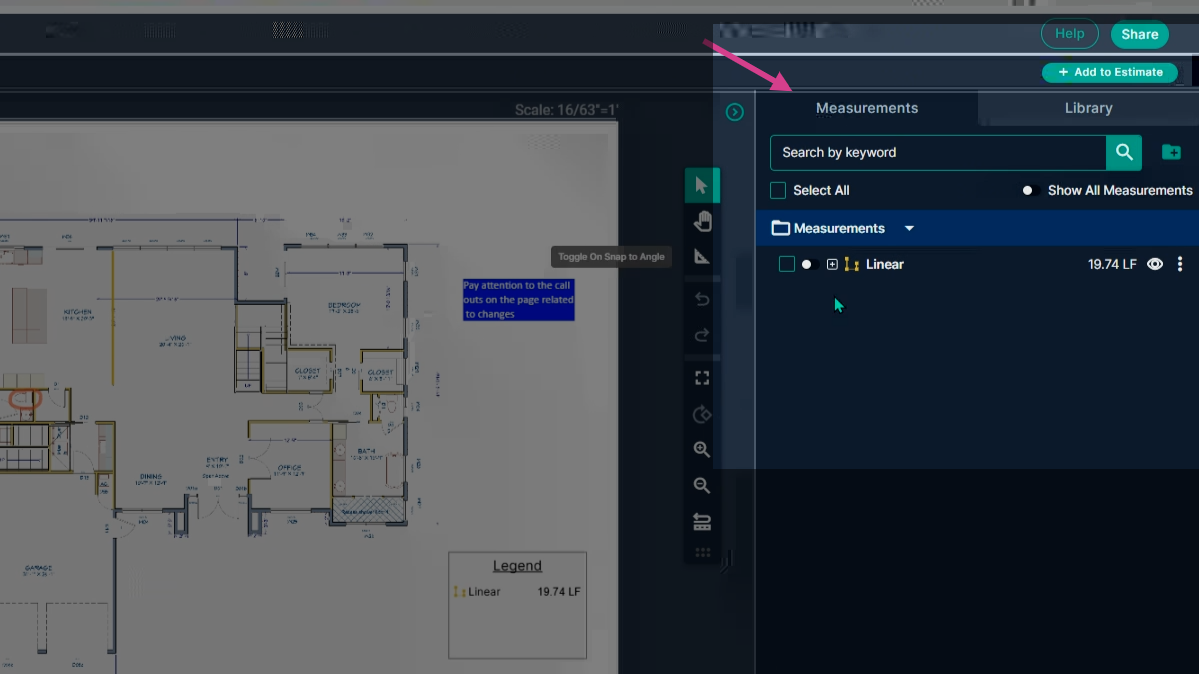
Step 8: Navigate Your Takeoff Workspace
-
On the left: View and name your Plan Sheets.
-
Center: Examine the currently selected plan sheet to begin your measurements.

-
Right: Access the Measurements panel showing your recorded measurements.
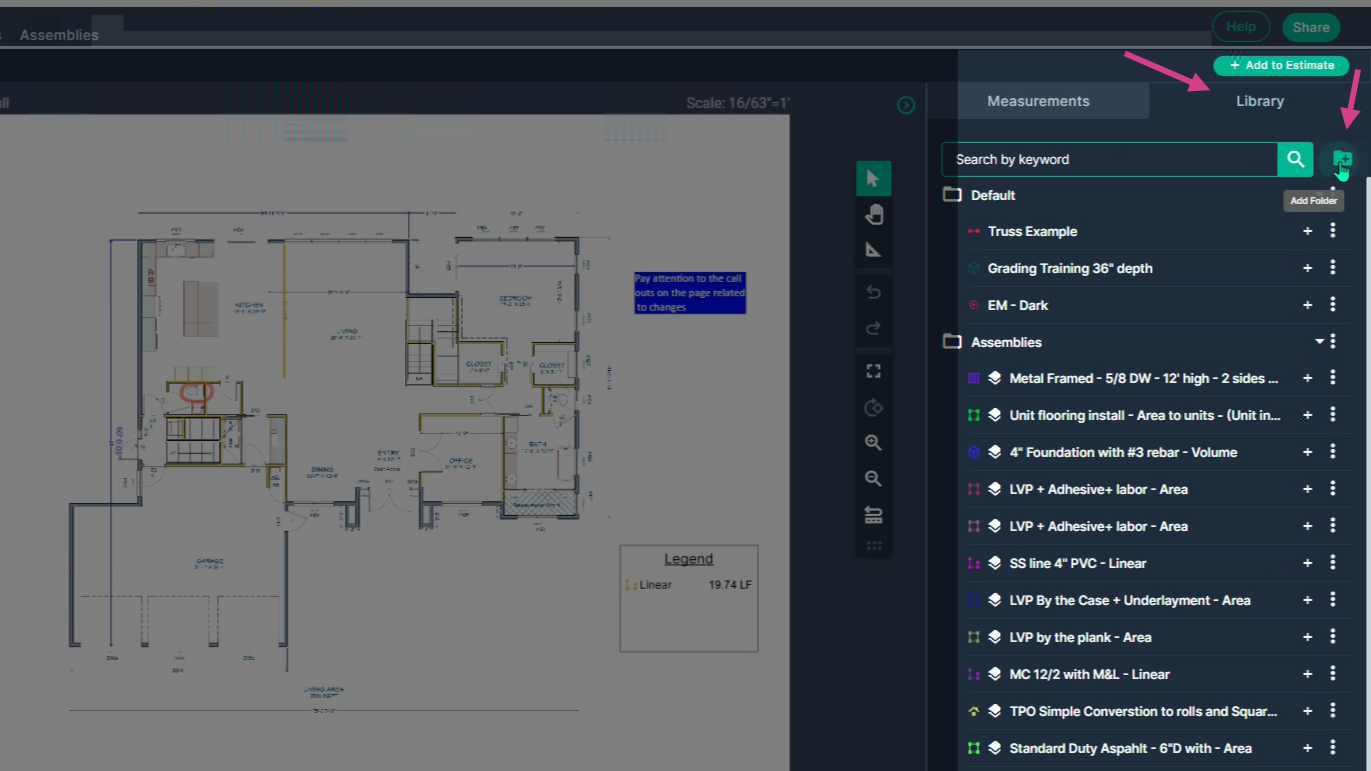
Step 9: Organize Measurements with the Library
In the measurements panel, create folders using the folder-plus icon. Right-click folders to rename or move measurements into them—organize your work for quick reference and reuse.
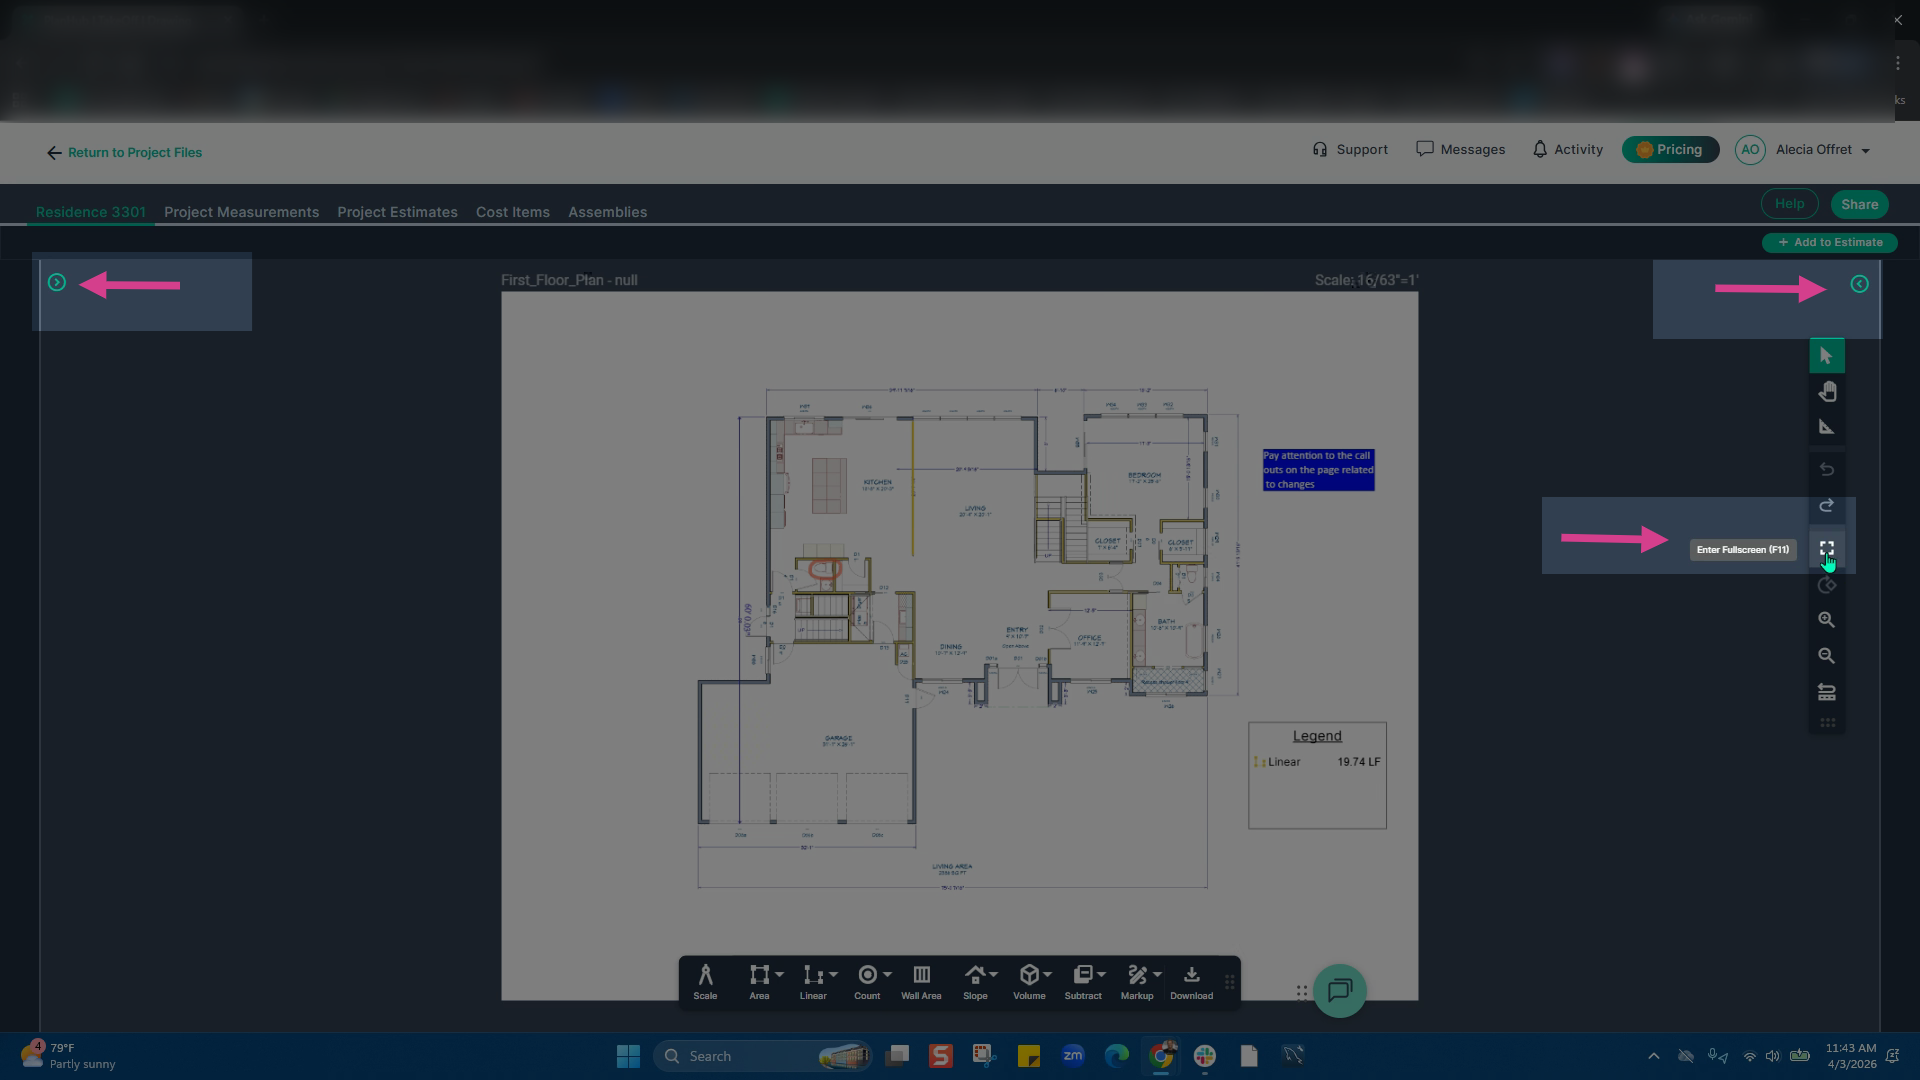
Step 10: Collapse and Expand Panels as Needed
Click the green arrow on either side to collapse or expand the Plan sheet and Measurements panels. Click the green arrows to reopen side panels and lock them in place. Enter full screen from the center toolbar, and exit using the Escape key or from the X that appears when moving the cursor to the top of the screen.
Step 11: Help Button
If you have questions about Takeoff, click the Help button in the top-right corner for assistance.

By using PlanHub’s Takeoff tools, you can efficiently organize projects, track statuses, and access files all in one place, helping your team stay aligned and productive.
For additional assistance with navigating Takeoff, schedule your one on one Takeoff training by clicking HERE.
Next Steps
Once you have completed taking all your measurements, you can:
- Download the measurements in a table from the Project Measurements page
- How To Download Project Measurements From Takeoff
Add a legend and download the PNG of your takeoff page - Using Legend Markup in Takeoff
If you have purchased the Estimation add-on tool, send measurements into the Project Estimate page or push them into an Assembly you have built. - Estimation - Exporting a Measurement from TakeOff to Estimation
- Estimation | How to Create an Assembly
- Share your Takeoff with anyone using the Share button in the upper right-hand corner.
Troubleshooting
Contact us if you need assistance or to report an issue:
- PlanHub Contact Page: https://planhub.com/contact/
- Customer Facing Support Ticket Link: https://knowledgebase.planhub.com/knowledge/kb-tickets/new
- Schedule a Free 1-on-1 Takeoff Training: https://meetings.hubspot.com/zac-low/takeoff-and-estimation