Measure precise linear distances with PlanHub's Linear Line and Curve tools in Takeoff. Quickly capture measurements around angled corners or curves for tasks like estimating baseboards or moldings.
Prerequisites:
- You need a subscription or trial that includes Takeoff to measure plans, export a plan into TakeOff, and set the scale. Then you can begin measuring.
- You need to set a scale on the page before measuring, if you need to learn hoe to set a scale click here: How to Set A Scale
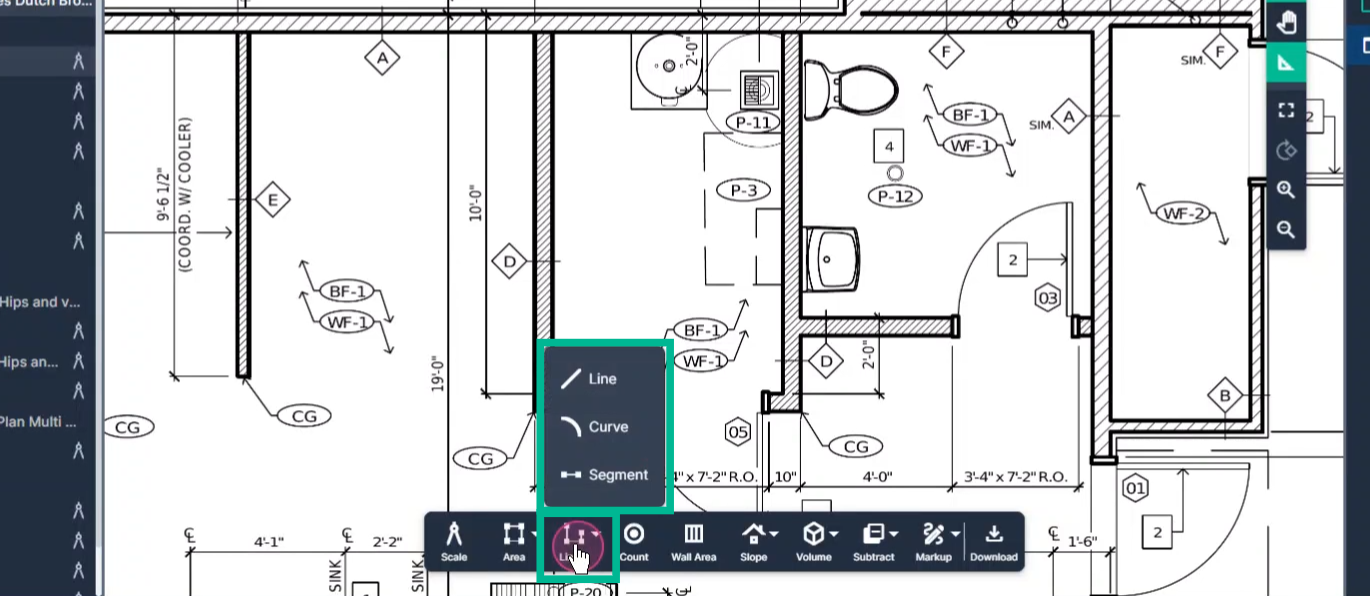
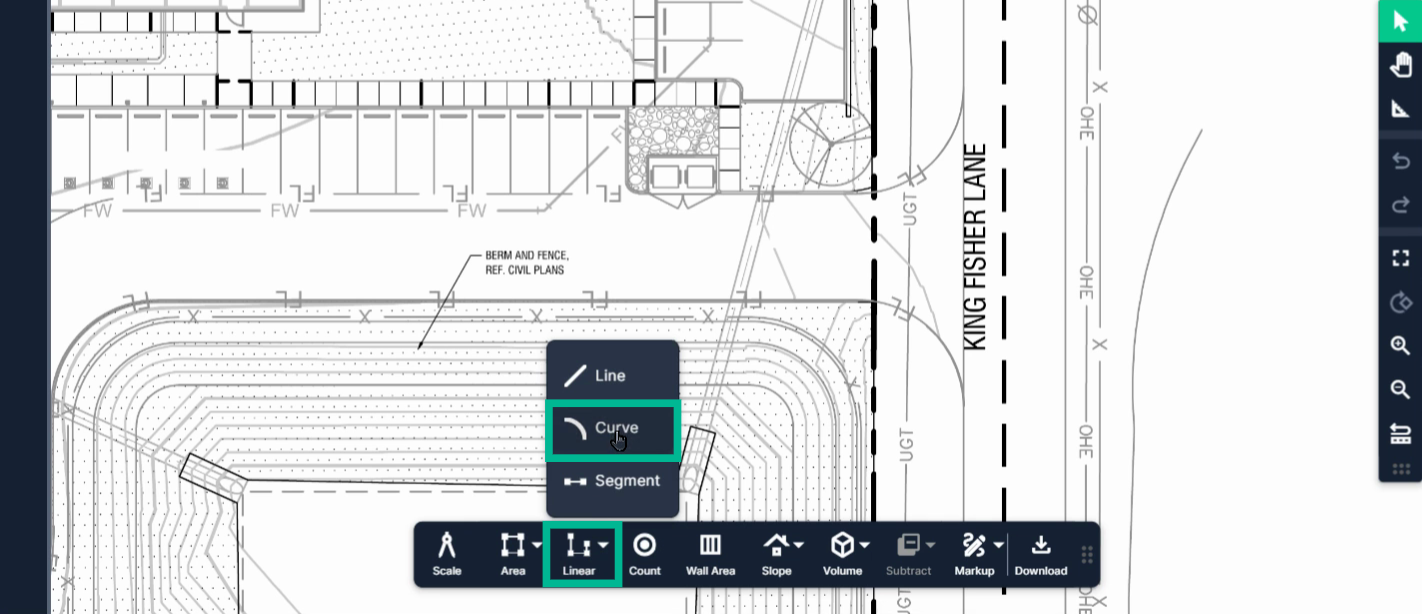
Step 1: Click the Linear Tool in your toolbar.
Step 2: Choose Line (for hard corners), Curve (for arches or rounded paths), or Segment (for straight lines).
Step 3: For angled corners, select Line when measuring around sharp angles.
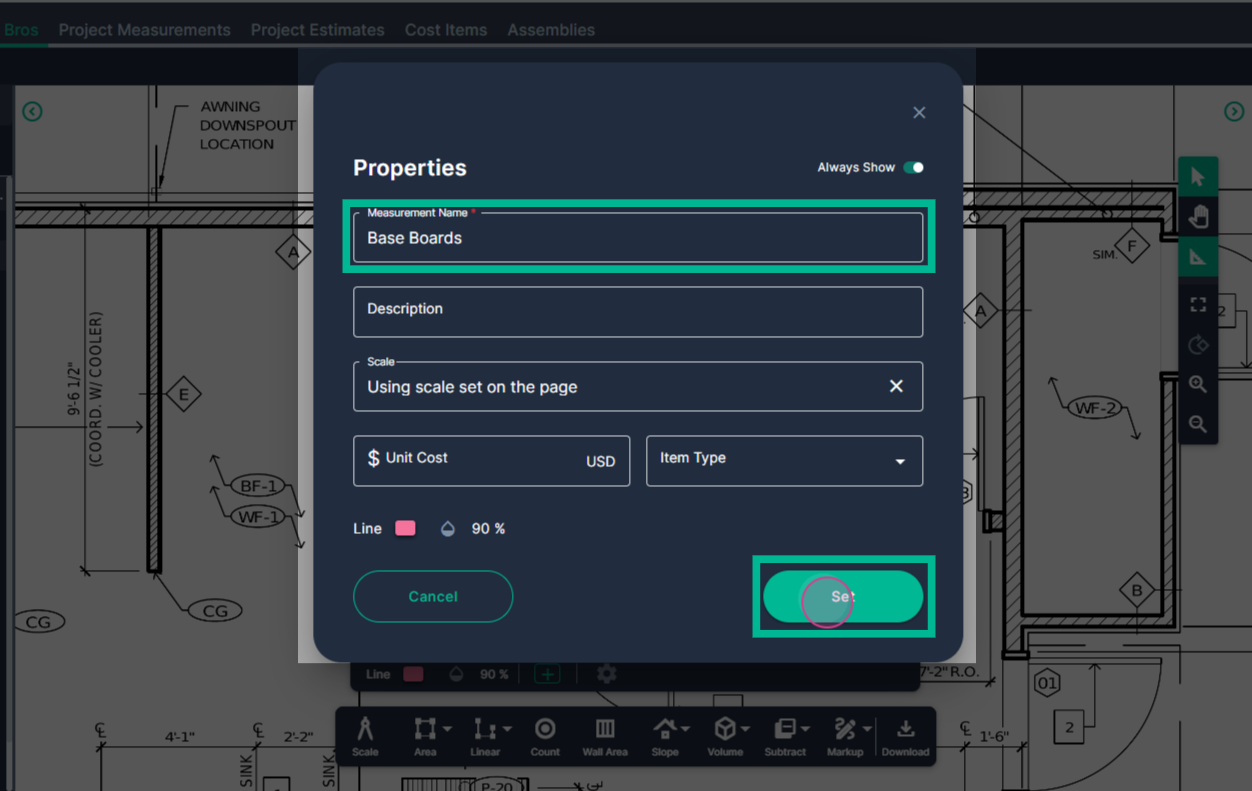
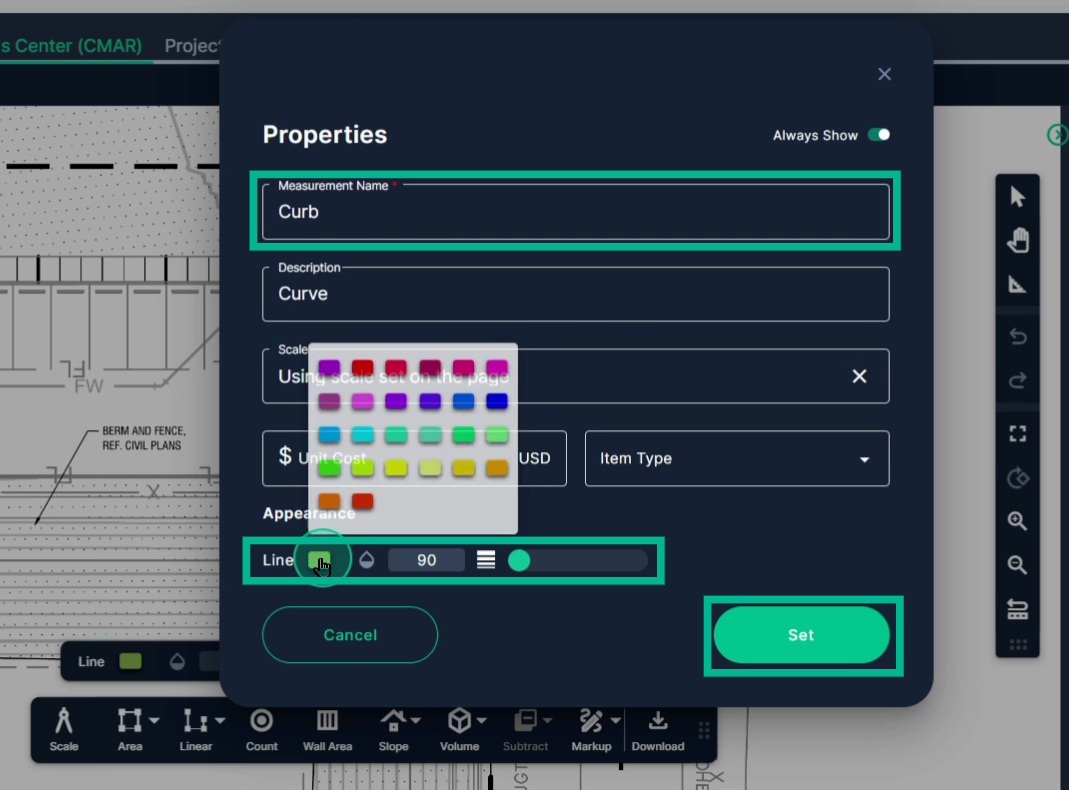
Step 4: Enter a descriptive name, such as "Baseboards." Fill in additional fields if needed.
Step 5: Click Set to confirm your measurement setup.
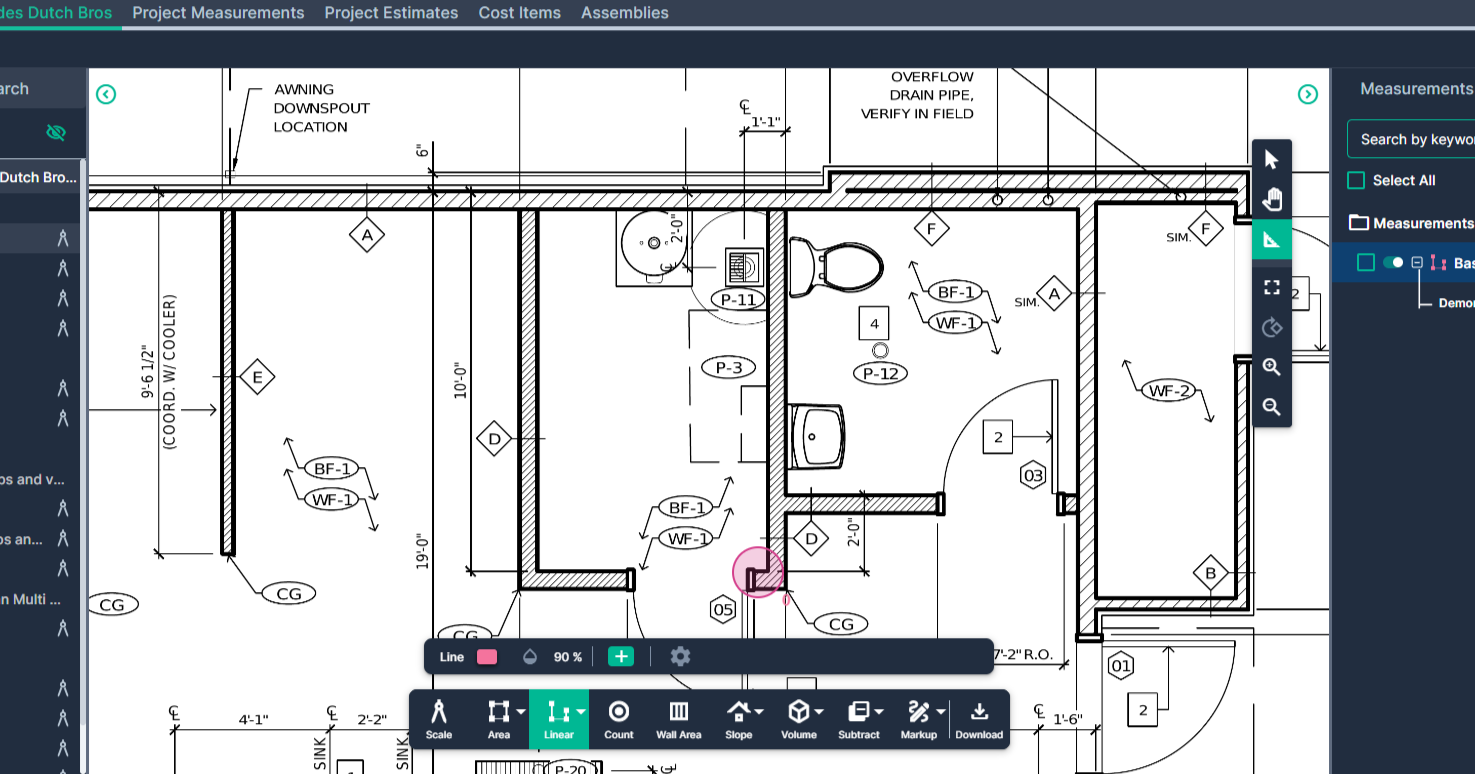
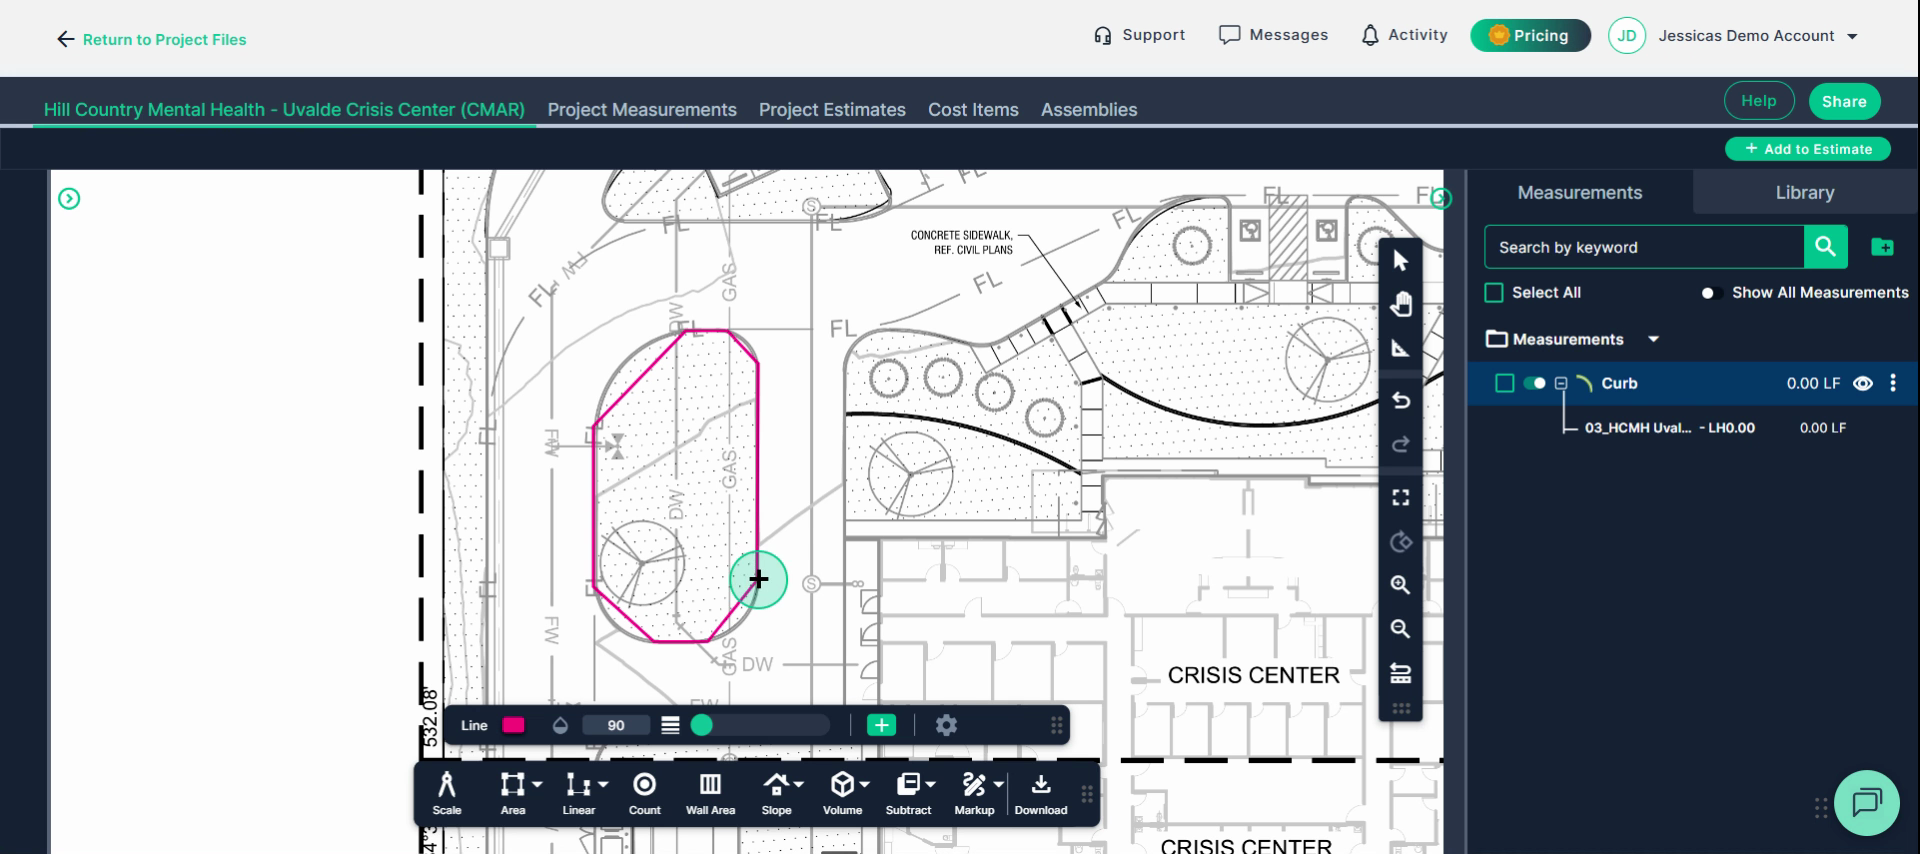
Step 6: Align your cursor at the starting point and click once to start the line.
Step 7: Move the cursor and click at every corner or change of direction.
Step 8: Double-click at your endpoint to finish the measurement.
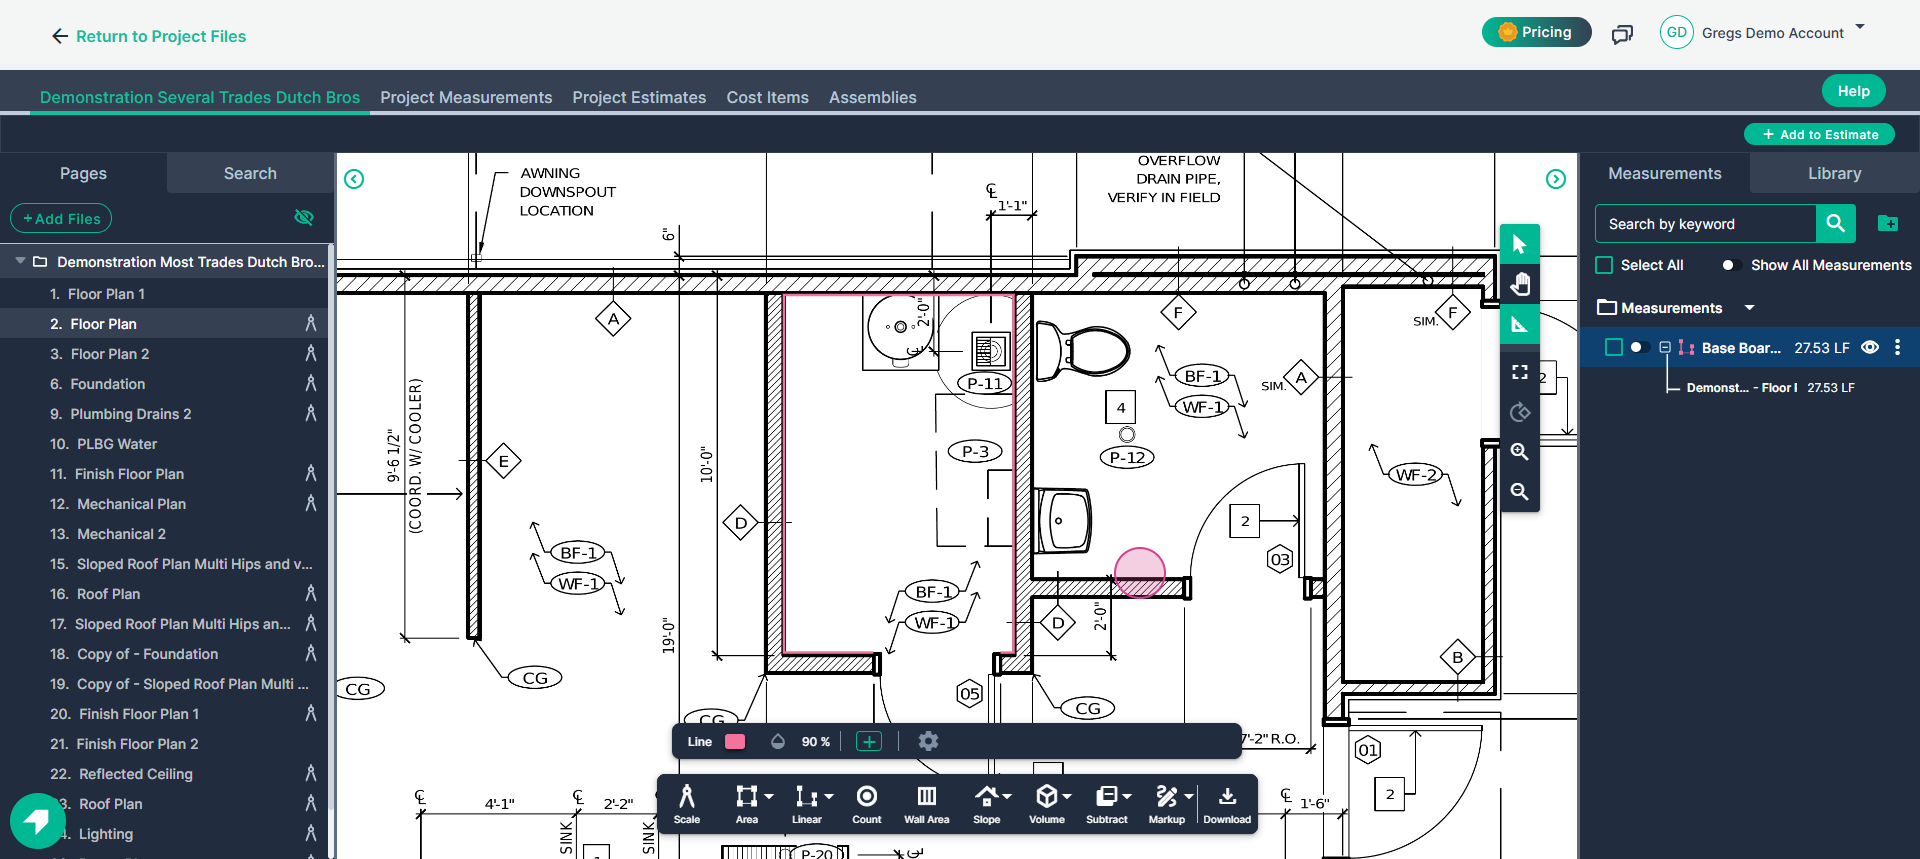
Step 9: To keep measuring connected areas, toggle the Continue switch next to your result and click to start a new section. Double-click when you’re done. Exit "Continue" mode or click on "Select" to stop measuring.
Measure curves easily with the Curve option.
Step 1: Select the Linear Tool and choose Curve.
Step 2: Name your measurement and adjust fields or color if desired.
Step 3: Click Set to start.
Step 4: Click at your starting point, then at the start and end of each curve or arch, and at each straight segment's transition.

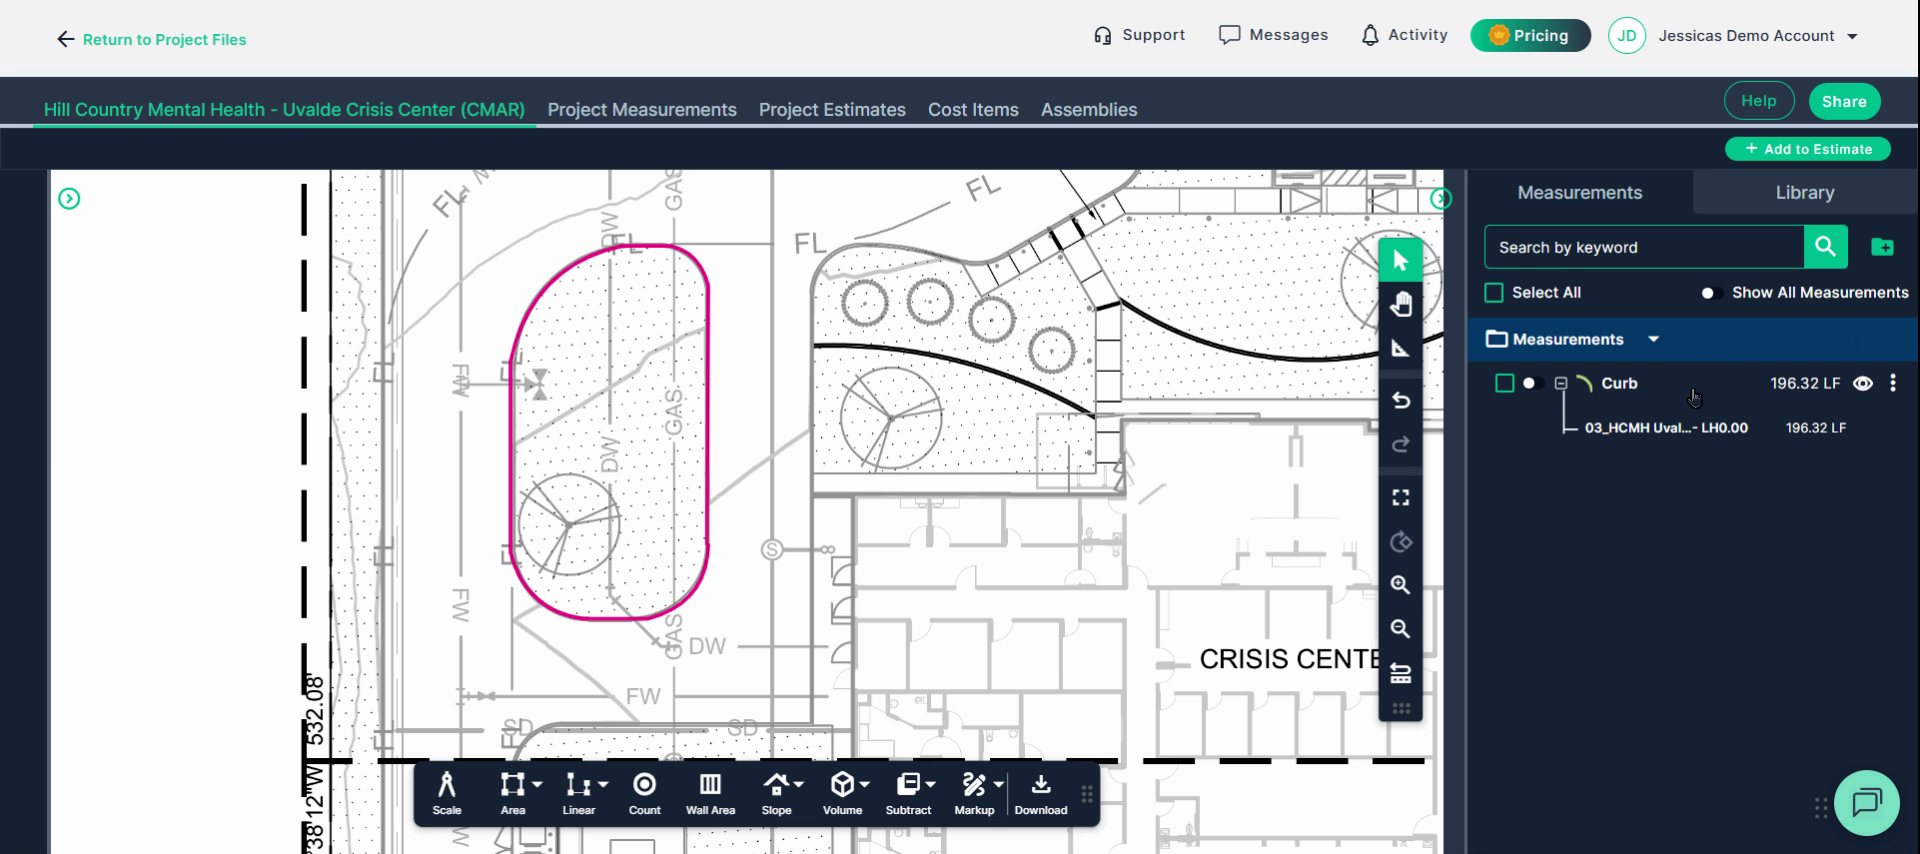
Step 5: Double-click to finish your curve measurement.
Step 6: To fine-tune a curved segment, click Select, choose your measurement, then drag the center nodes between points to shape the curve accurately.

Step 7: Click away to exit editing mode. Your linear result appears on the right.
Use these tools to measure any perimeter, angle, or curve in your project plans quickly and accurately. Streamlined switching and editing save you time, and your results update automatically as you draw or edit.
-
Next Steps
Once you have completed taking all your measurements, you can:
- Download the measurements in a table from the Project Measurements page
- How To Download Project Measurements From Takeoff
Add a legend and download the PNG of your takeoff page - Using Legend Markup in Takeoff
If you have purchased the Estimation add-on tool, send measurements into the Project Estimate page or push them into an Assembly you have built. - Estimation - Exporting a Measurement from TakeOff to Estimation
- Estimation | How to Create an Assembly
- Share your Takeoff with anyone using the Share button in the upper right-hand corner.
Troubleshooting
Contact us if you need assistance or to report an issue:
- PlanHub Contact Page: https://planhub.com/contact/
- Customer Facing Support Ticket Link: https://knowledgebase.planhub.com/knowledge/kb-tickets/new
- Schedule a Free 1-on-1 Takeoff Training: https://meetings.hubspot.com/zac-low/takeoff-and-estimation
- Download the measurements in a table from the Project Measurements page