Prerequisites: You need a subscription or trial that includes Takeoff to measure plans, export a plan into TakeOff, and set the scale. Then you can begin measuring.
Step 1: Enter your Takeoff workspace
- Log in to PlanHub and open your Takeoff Project list.
- Click your project name to open the Takeoff workspace.
- At the top, use page tabs to move between project areas. First, you will see your Project name; this is the Takeoff Workspace for this project.
- Click on other tabs to enter them, such as Project Measurements and (if purchased) Project Estimates, Cost Items, and Assemblies.
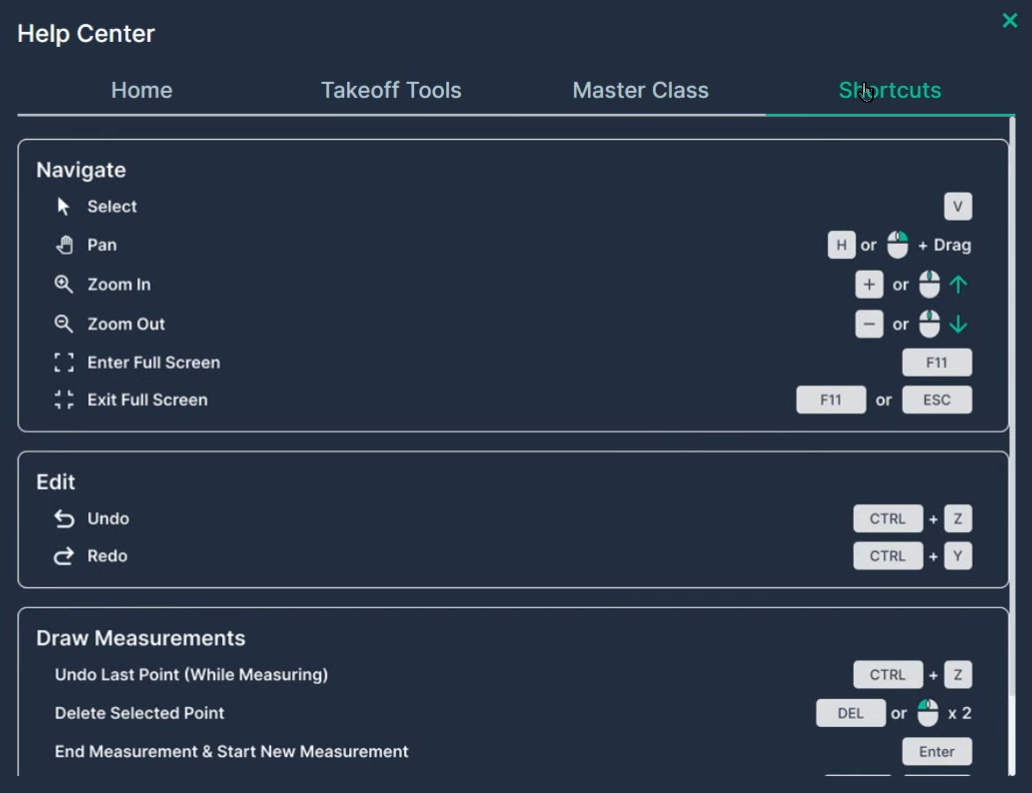
- Click the Help button to find training, resources, videos, and a list of keyboard shortcuts for the workspace.
- Use the Share button in the upper right to enable or disable read-only links for external viewers. Toggle sharing, copy the link, and send as needed.
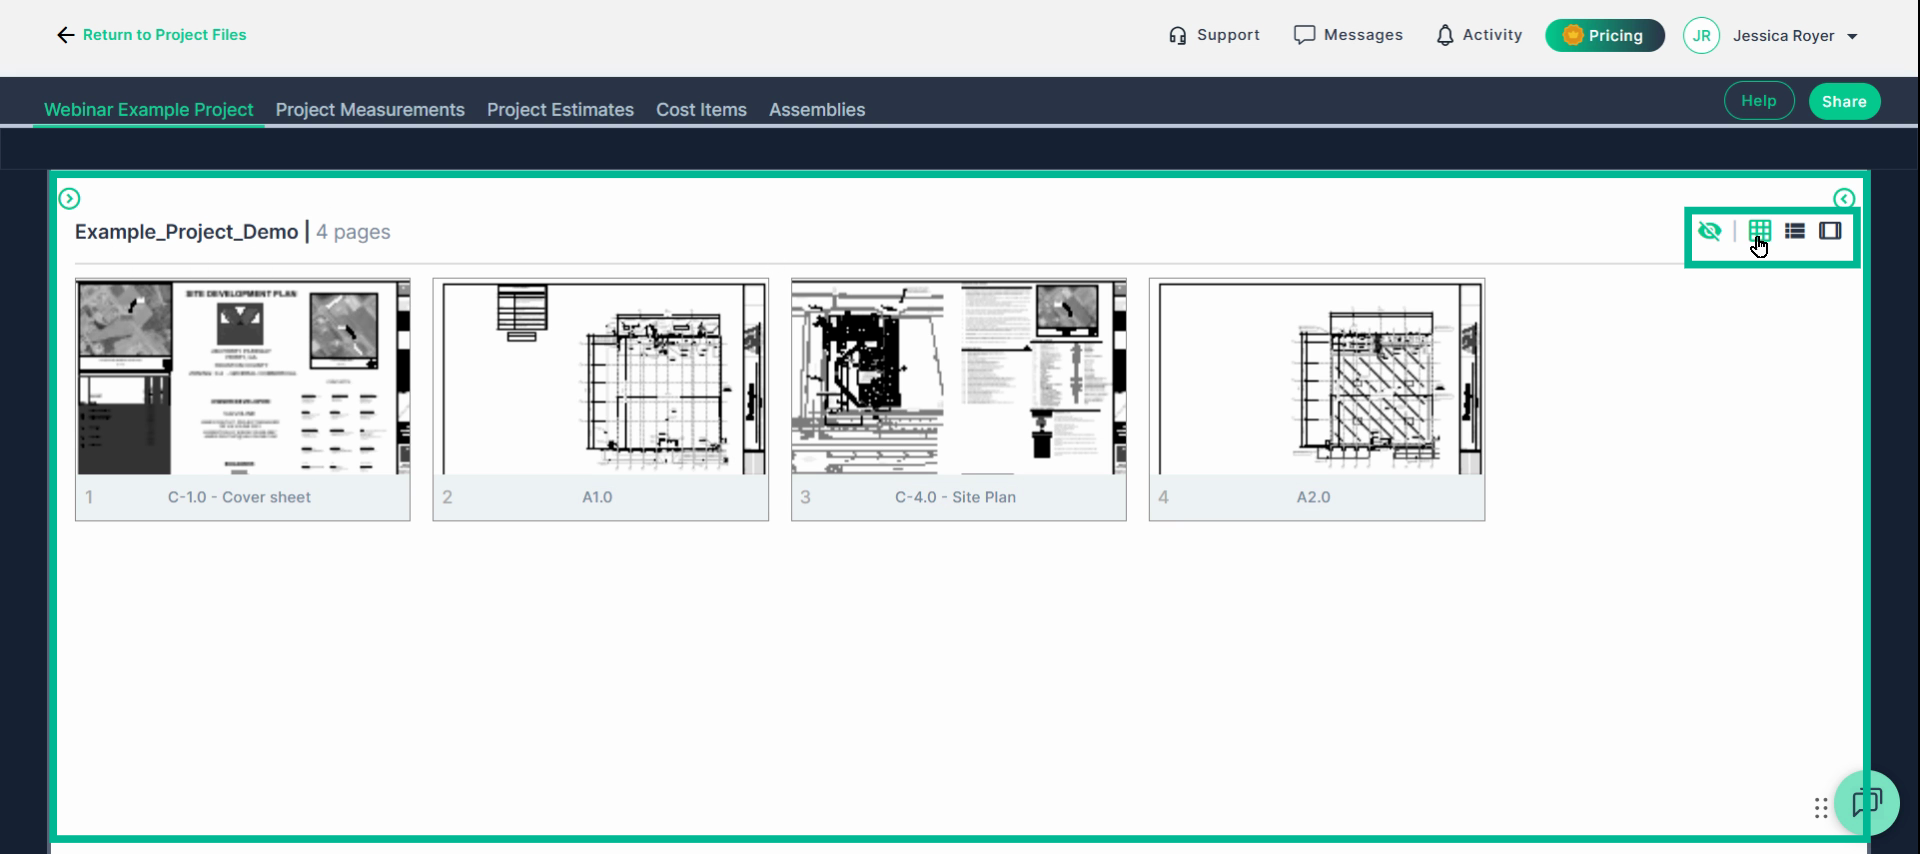
Documents Panel
Step 1: Manage documents from the Documents Panel on the left.
- Expand or collapse folders with the icon,
- Hide or Unhide pages as needed (using the Eye icon).
- Click a document name to preview it.
- Open the actions menu (three dots) or right-click to manage pages: open, duplicate, hide, download, or rename.
- Reorder or move pages by dragging and dropping.
- Hide entire files using the hide icon.
- Collapse or expand the Documents panel to save space as you work.
- Use the Search tab to find keywords inside documents.
Step 2: Add project files by clicking Add Files in the Documents panel. Choose files already attached or upload new ones if available.
Step 3: Switch between grid, list, or carousel layouts for document preview.
Use the list view to hide or show multiple pages at once.
Controls & Takeoff Tools
Step 1: Open a page by double-clicking its image or name in the Documents panel.
- Use Quick Controls to manage the page:
- Select: Left-Click
- Pan/recenter page: Right-click+drag and drop
- Controlled Zoom in and out:
- Mouse: Hover over the area, roll the scroll wheel on the mouse
- Trackpad (most laptops): Hover over the area, two-finger swipe up or down without clicking.
Step 2: Control Bar
- The control bar on the right provides tools for:
- Select: Ends measurements, allows you to select measurements, and edit them.
- Panning: Ends measurements, allows you to use your left-click + drag and drop to recenter the page.
- Snap-to-angle controls measurement corner angles (click to turn on or off) or hold down the spacebar.
- Undo, redo, and full screen are also accessible here.
- Rotation: If a sheet’s orientation is off, rotate it using the rotation icon on the right-side control bar. Remember, rotate before you set your scale.
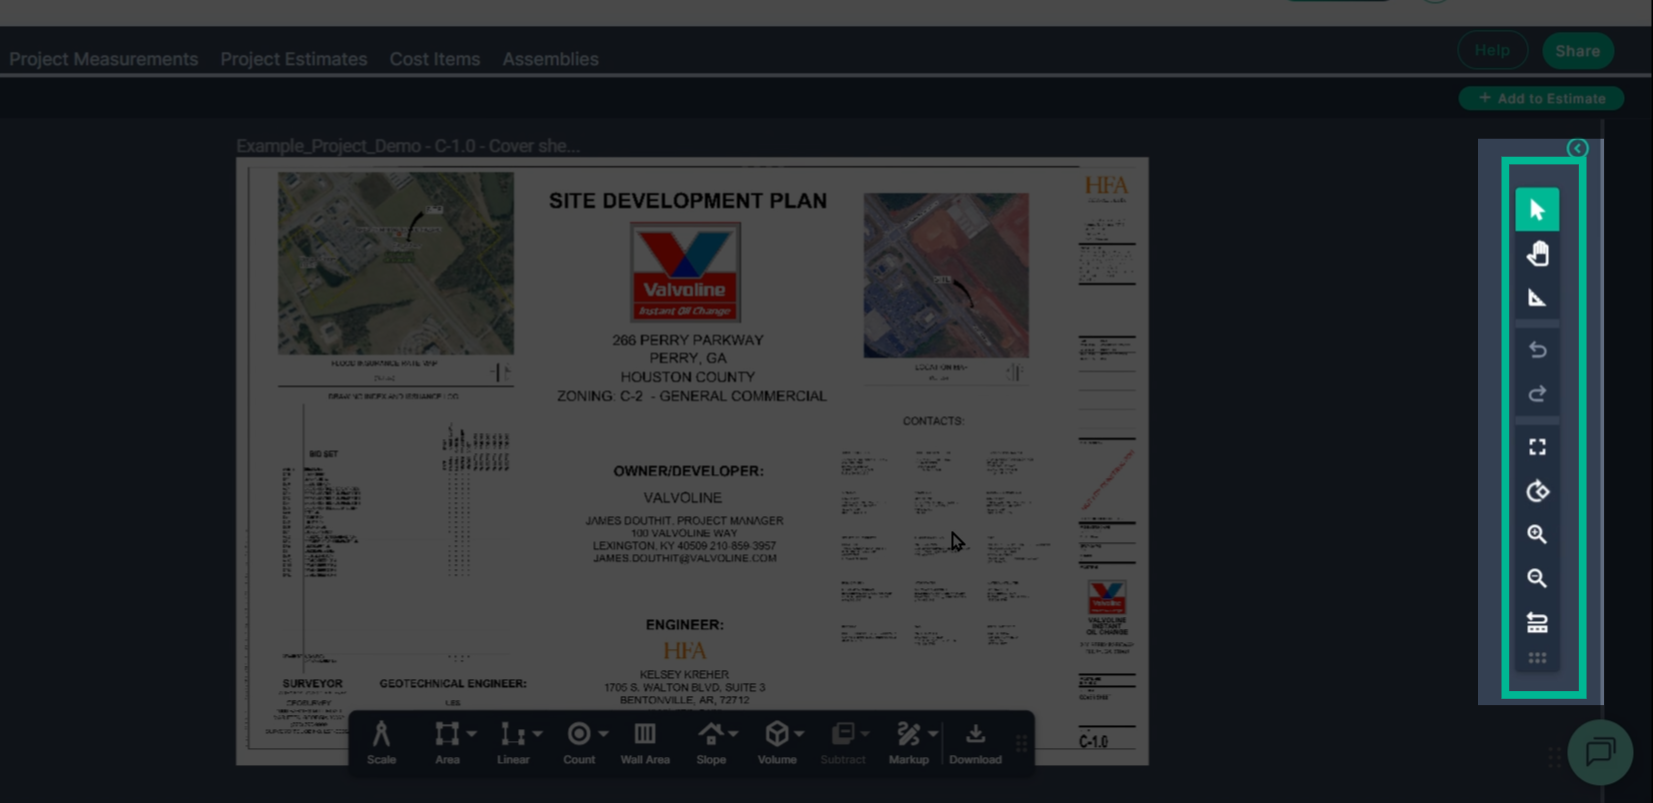
Step 3: Toolbar
Use the toolbar at the bottom for measurement tools: set scale, Area, Linear, Count, Wall Area, Slope, Volume, Subtract, and Markup options like Text or Draw. Download a PNG of your progress if needed.

Measurements panel
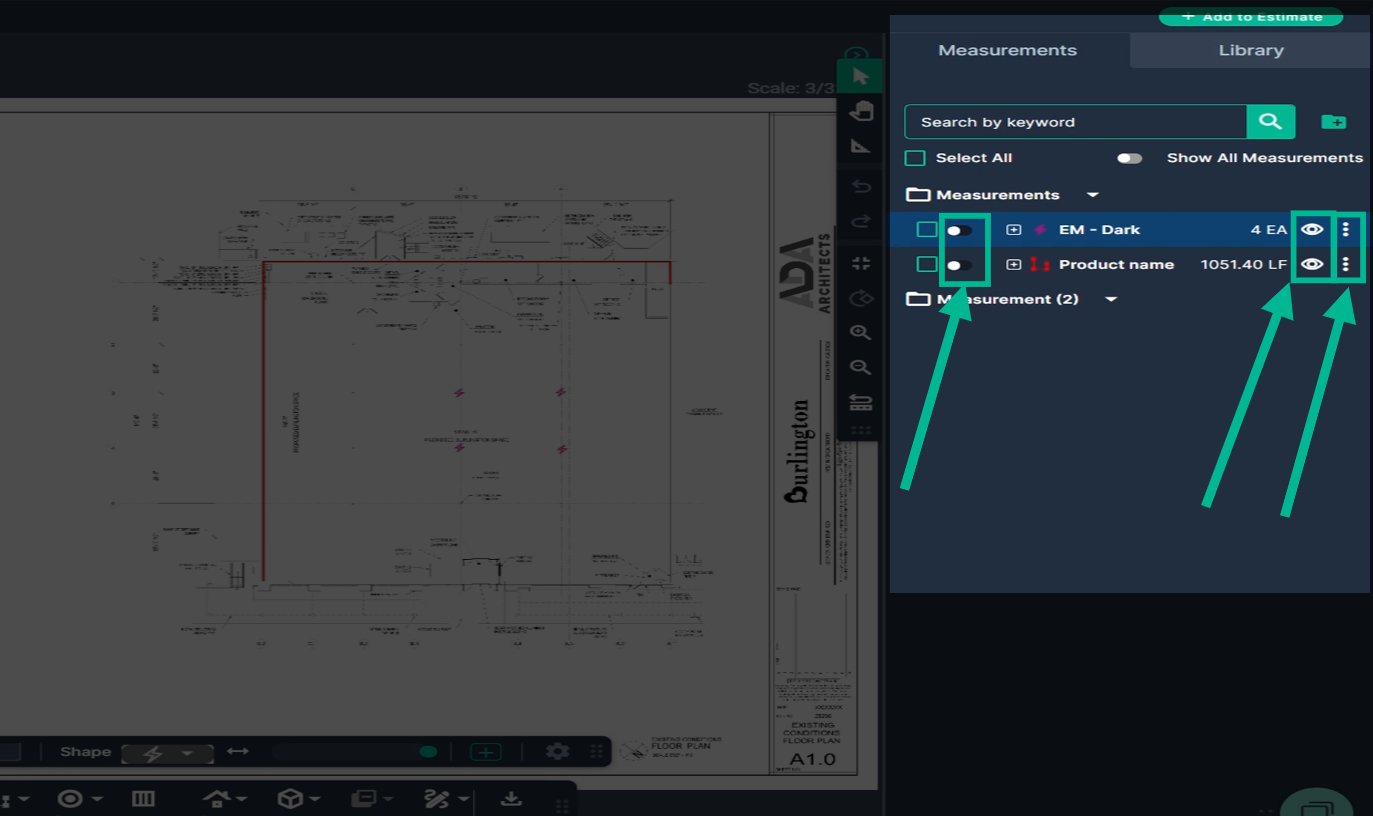
Step 1: The Measurements panel on the right lists all measurements for the current page.
- Measurements Tab
- Search using the search bar
- Organize using folders
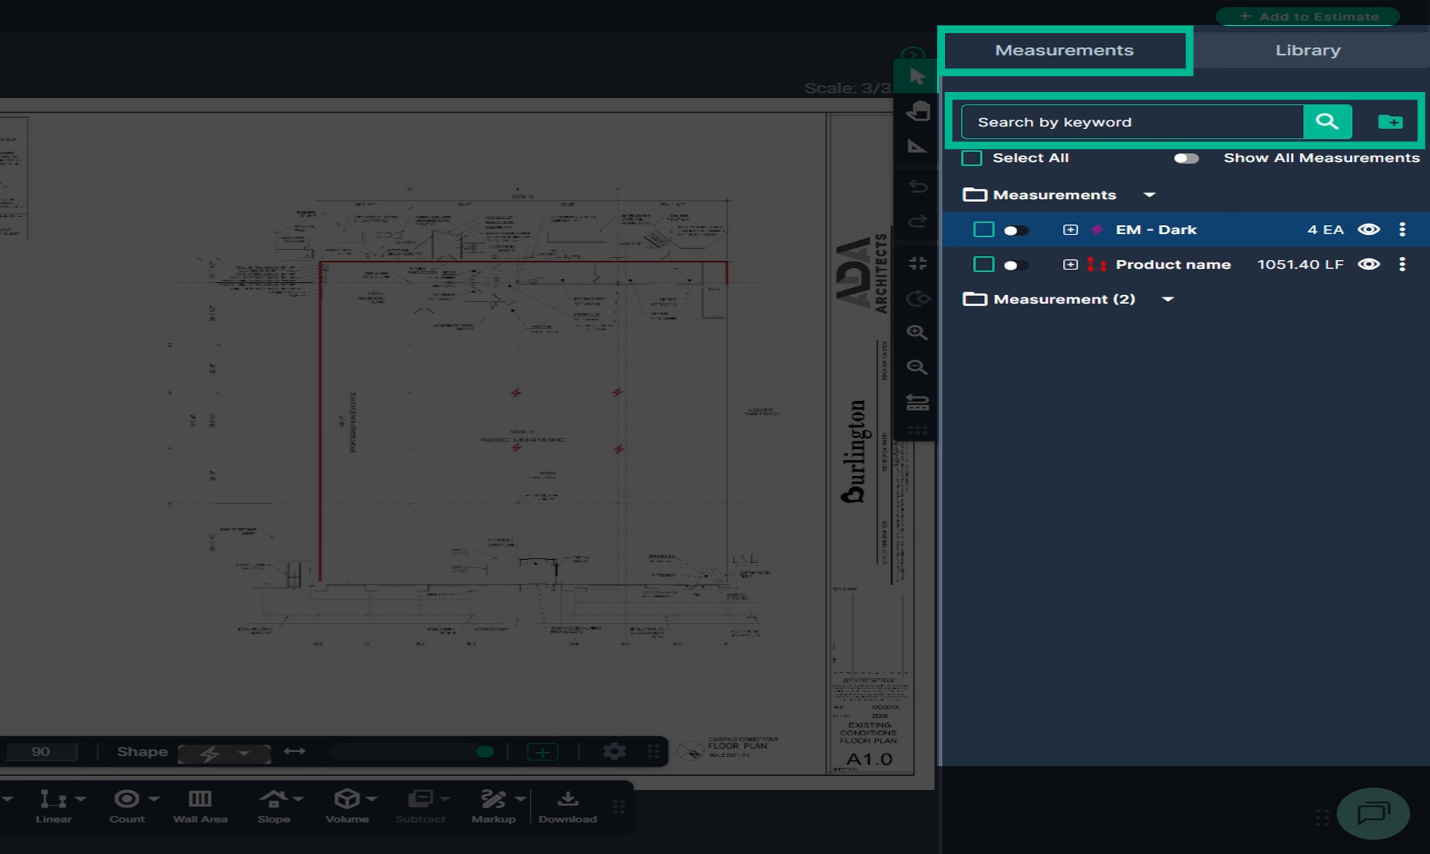
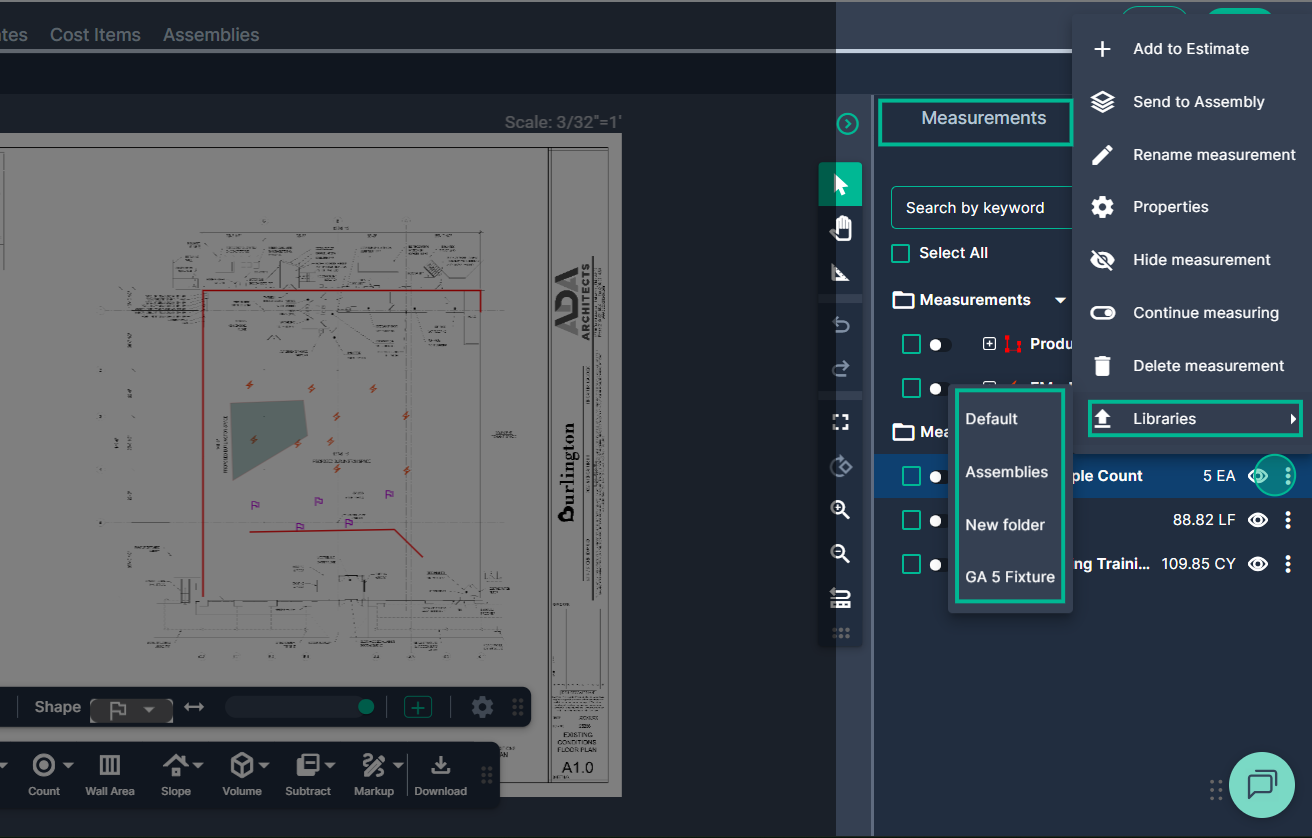
- Right-click on a measurement or click on the three dots to access a measurement's action menus
- Hide/show measurements using the eye icon.
- Continue adding to a measurement using the toggle feature for each measurement.
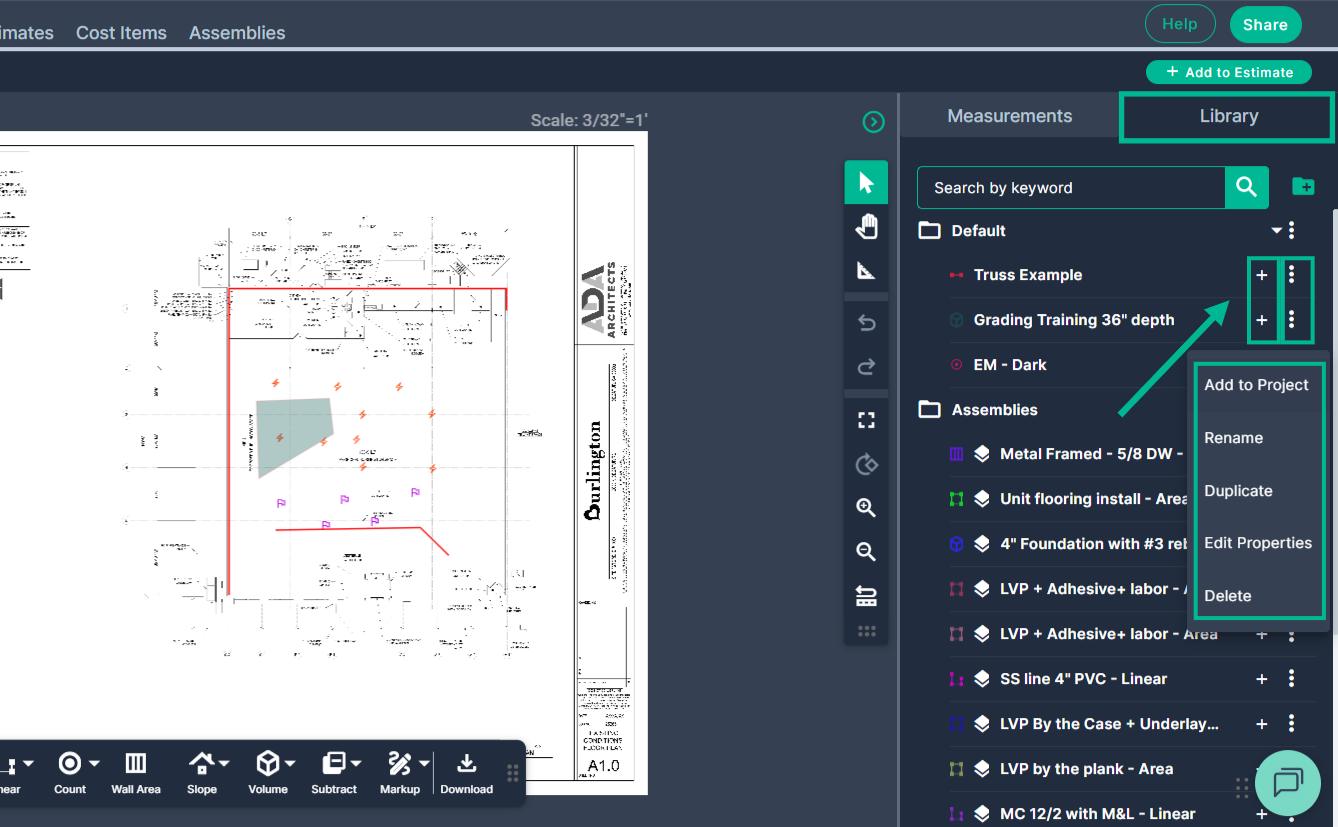
Step 2: Library Tab
- Use the actions menu to save measurements to your Library for future use on this or other projects.
- Engage a saved measurement by clicking on the Plus sign (+)
- Use the Actions Menu in the library to edit the properties for a saved measurement.
With these steps, you’ll navigate PlanHub Takeoff projects efficiently, streamline your workflow, and keep your documentation clean and organized. For more tips and training, visit the Help button anytime.
Next Steps
Once you have completed taking all your measurements, you can:
- Download the measurements in a table from the Project Measurements page
- How To Download Project Measurements From Takeoff
Add a legend and download the PNG of your takeoff page - Using Legend Markup in Takeoff
If you have purchased the Estimation add-on tool, send measurements into the Project Estimate page or push them into an Assembly you have built. - Estimation - Exporting a Measurement from TakeOff to Estimation
- Estimation | How to Create an Assembly
- How To Download Project Measurements From Takeoff
- Share your Takeoff with anyone using the Share button in the upper right-hand corner.
Troubleshooting
Contact us if you need assistance or to report an issue:
- PlanHub Contact Page: https://planhub.com/contact/
- Customer Facing Support Ticket Link: https://knowledgebase.planhub.com/knowledge/kb-tickets/new
- Schedule a Free 1-on-1 Takeoff Training: https://meetings.hubspot.com/zac-low/takeoff-and-estimation