![NEW_PlanHub_Logo_Navy.png]](https://knowledgebase.planhub.com/hs-fs/hubfs/Design/PH%20Logos/NEW%202024%20PH%20Logos/NEW_PlanHub_Logo_Navy.png?height=40&name=NEW_PlanHub_Logo_Navy.png)
Prerequisites:
- Create your planHub Subcontractor account (to learn how to create your account, view our Knowledge Base article: How To Sign Up & Create Your Subcontractor planHub Account
- Only related to specific instructions below where Takeoff is mentioned - Purchase of the Takeoff Add-On feature would be required for access
Step 1: Log into your planHub Subcontractor account.
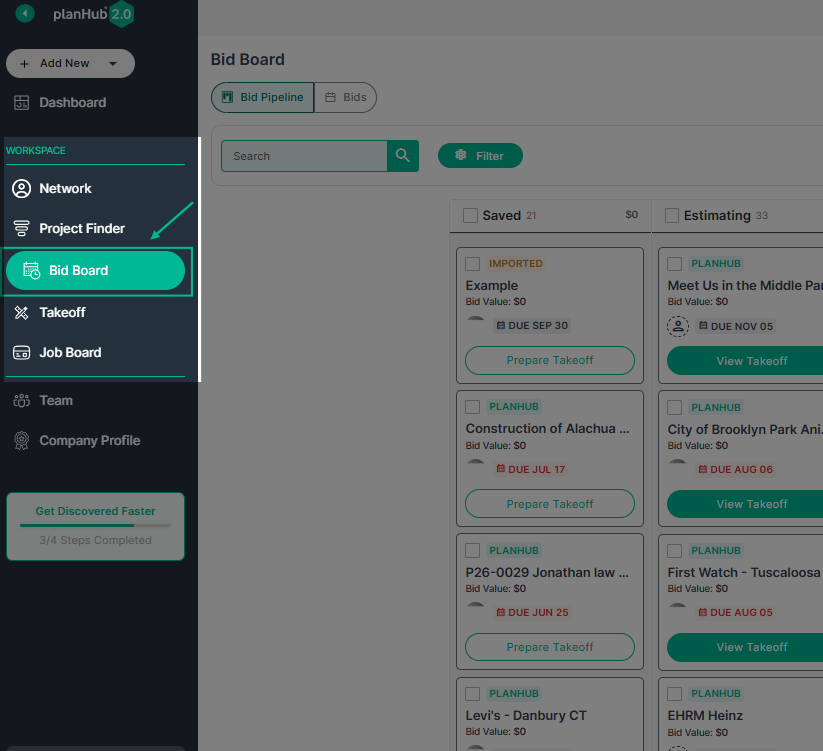
Step 2: View the main panel on the left-side. To view details for a saved project, click Bid Board.
Step 3: Then, select a project you want to review from your Bid Board.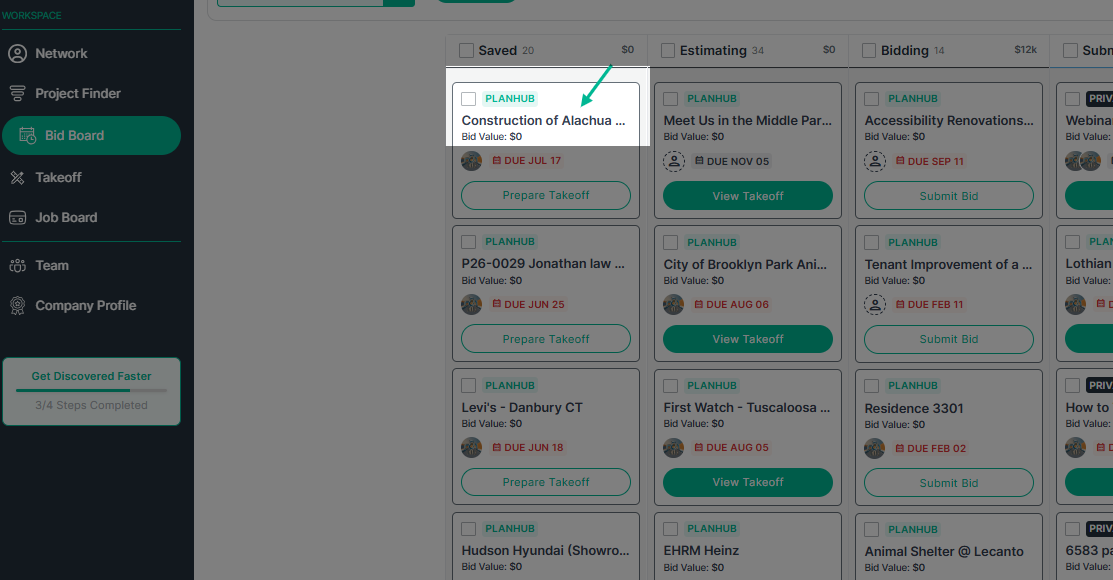
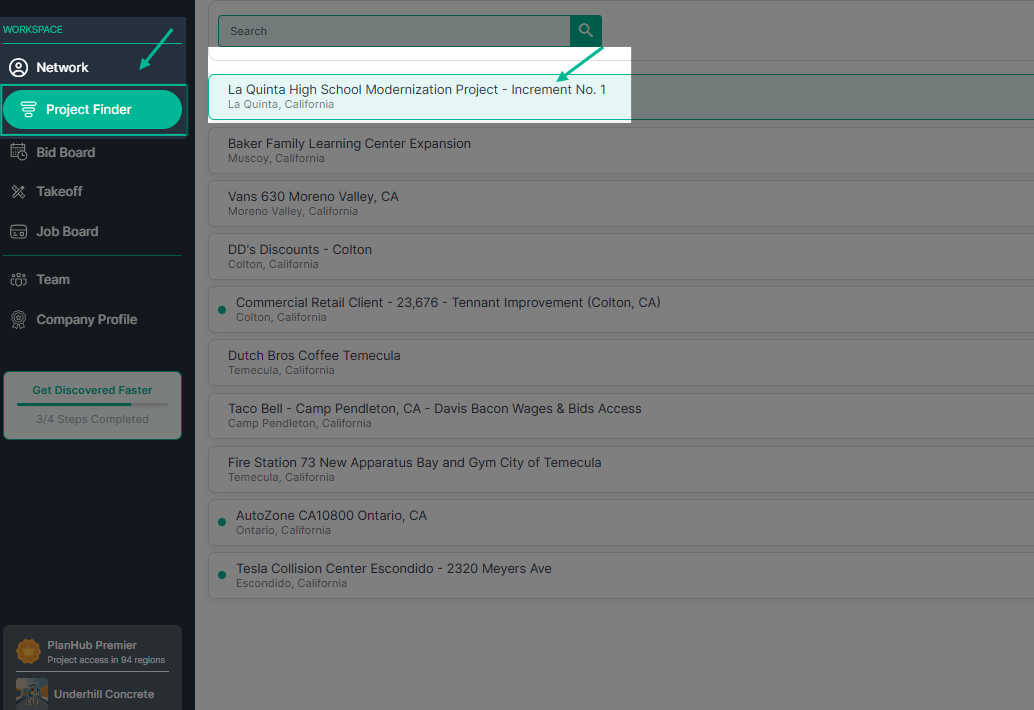
Step 4: Alternatively, if you’re searching for new opportunities, select Project Finder, and click on the project name.
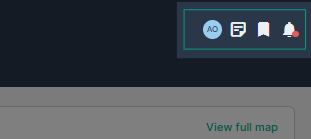
Step 5: On the project page, the header shows the project name at the top, and four action icons in the upper right corner. 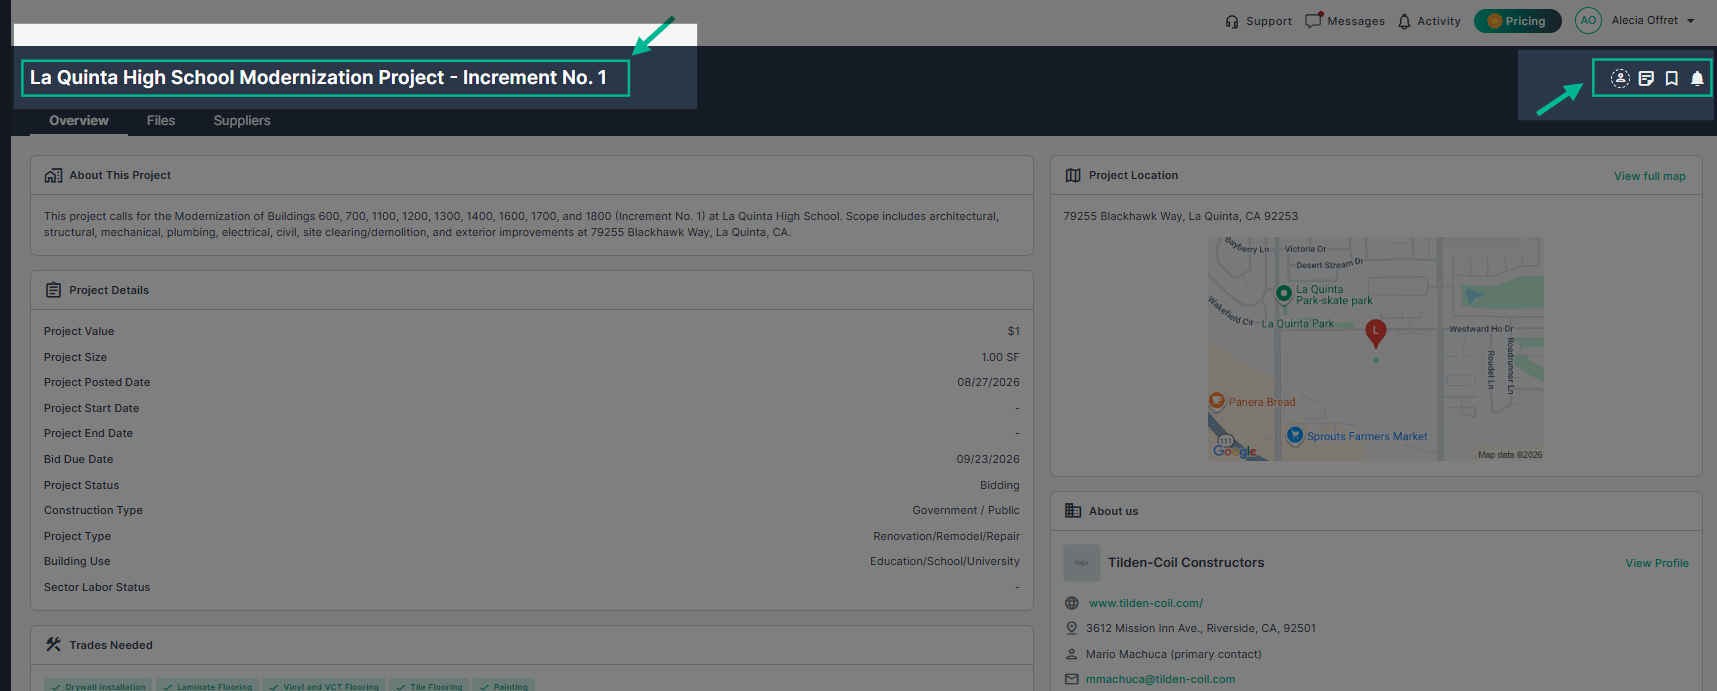
Step 6: From left to right, each icon indicates:
- Assign the project to a team member - click the first icon to assign the project to a team member to track the project
- Shared Notes - click on the 2nd icon to create and view notes in the pop up window. Please note that only team members in your planHub account can view these notes and they are private within your company.
- Save Project to Bid Board - click on the 3rd icon to save this project to the Bid Board for quick access and to add status updates
- Project Updates - Click the Bell icon to view project status updates when a red dot appears.
Step 7: Use the header tabs on the left side. Overview, Files, and Suppliers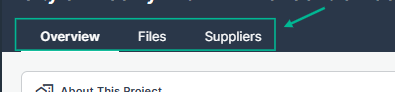
Overview Tab:
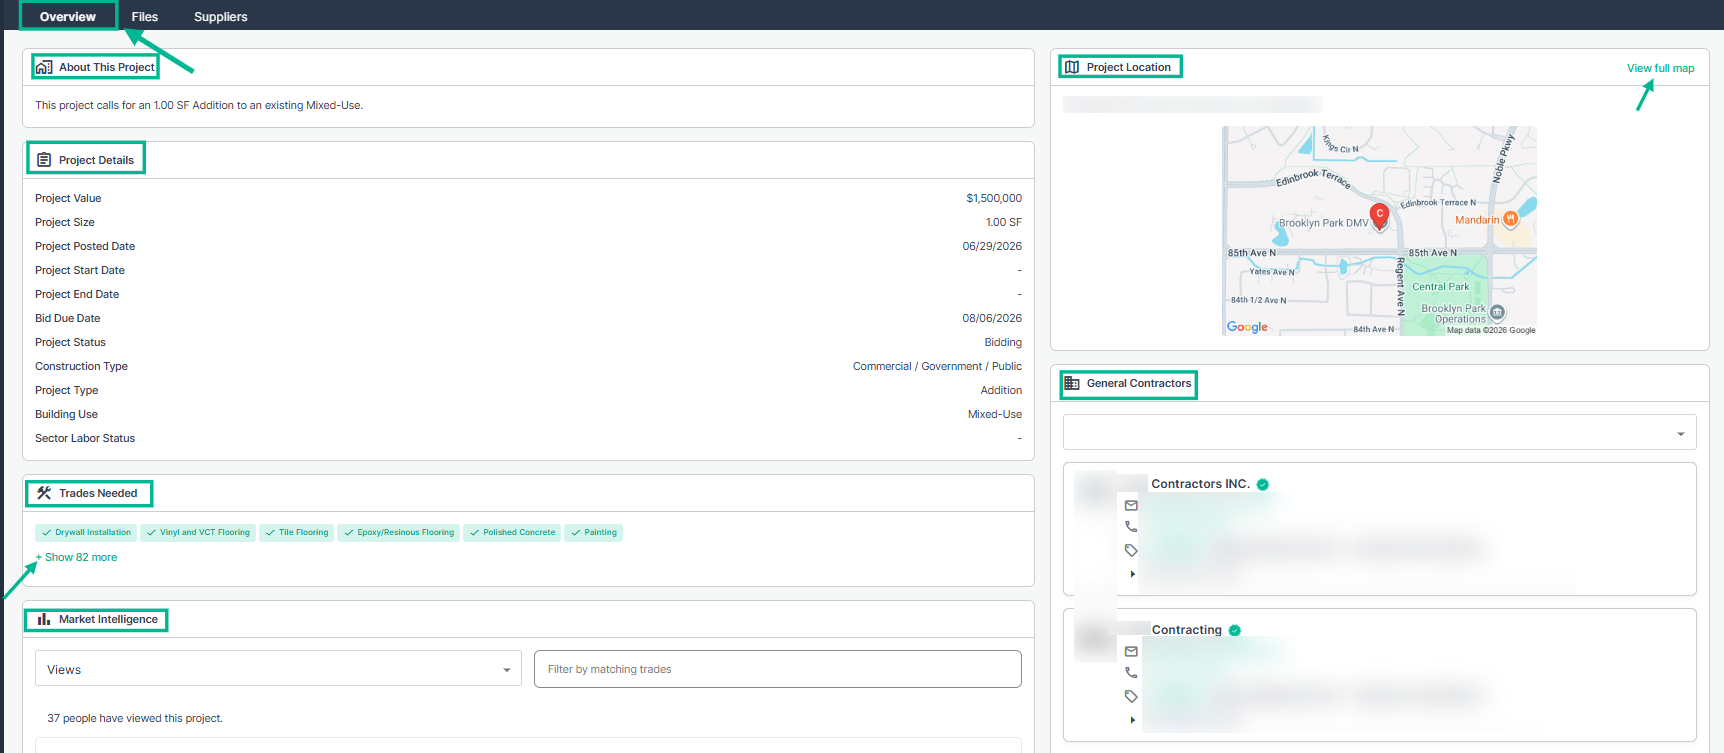
Select the Overview tab, which highlights essential project information.
You will see the following information on this page:
- About This Project - the first section shows information about the project, provided by the General Contractor, such as construction and building type.
- Project Details - this section provides information such as important dates, the project status and building use type
- Trades Needed - Next, are the trades required for this specific project. To view additional trades, click on the plus sign. Then scroll down to review the listed trades.
- Market Intelligence - Review how many subcontractors are competing within your trade on this project. Choose options from the dropdown for data such as how many subcontractors have viewed, downloaded, saved, or submitted a bid on the project. Then, filter by matching trades to view the results.
- Project Location - In the upper right corner, view the project’s location details. Select View Full Map to see the project location and surrounding area.
- General Contractors - View the list of GCs who have posted this project. Click on View Profile on their company card to view their company details and additional contact information.
Files Tab:
Select the Files tab to review the project files.
You will see the following information on this page:
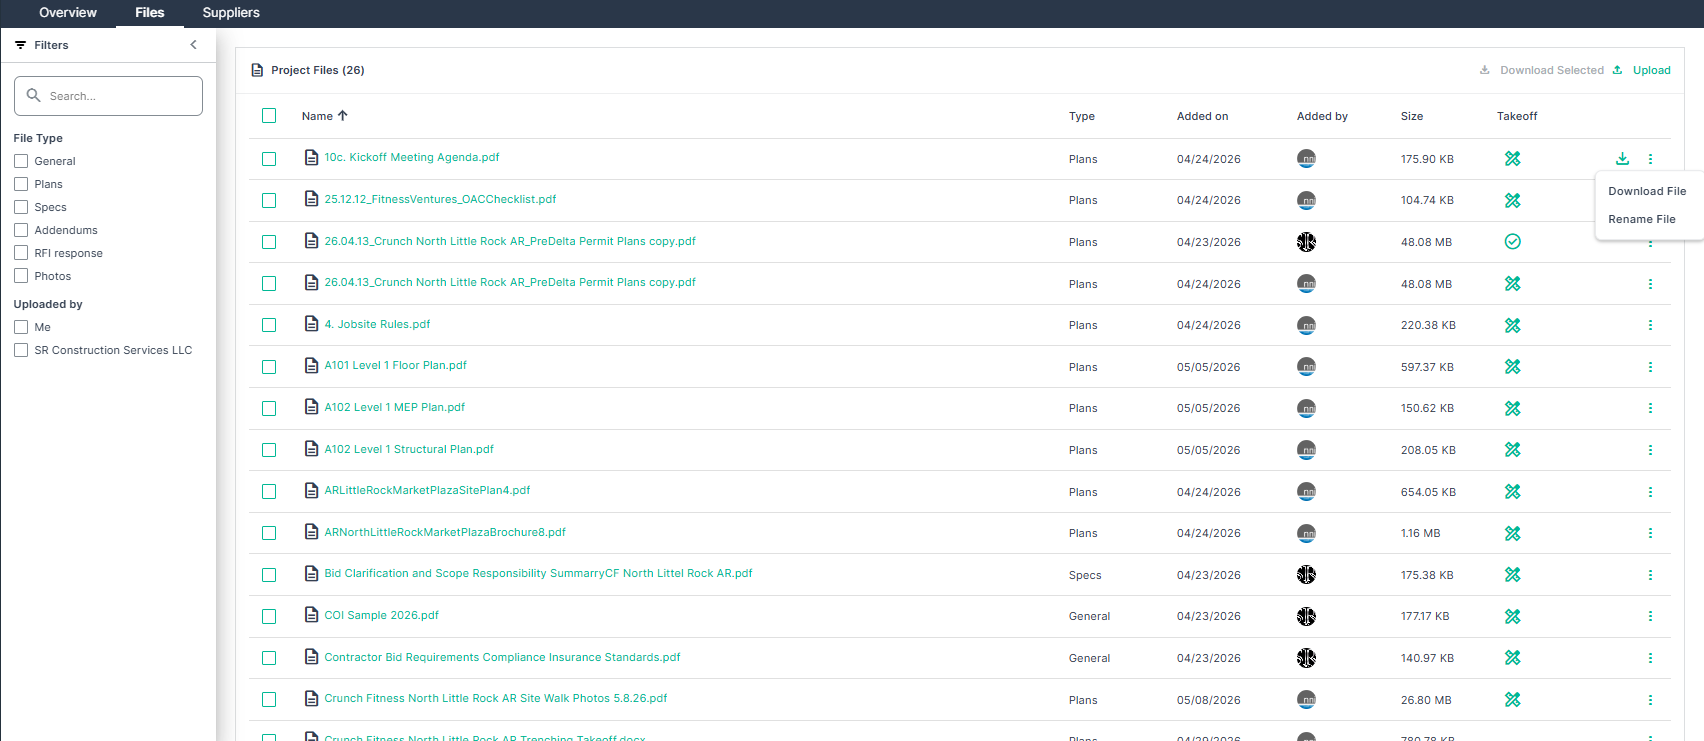
- Filters panel - On the left side, select the arrow at the top to open the Filters panel. Use the search bar to enter keywords such as trades, materials, product details, or other relevant terms. You can also narrow your results by selecting a File Type and/or a specific GC under Uploaded by. The file list will update to display documents matching your selected criteria.
- Project Files - The project files header shows:
- File name
- File type
- Date it was Added
- GC who uploaded the file
- File size
- the ability to export the file into the Takeoff tool (If you have purchased the Takeoff tools)
- Download the file (using the download icon)
- 3 dots action menu - click the 3 dots action menu to select to download or rename the file
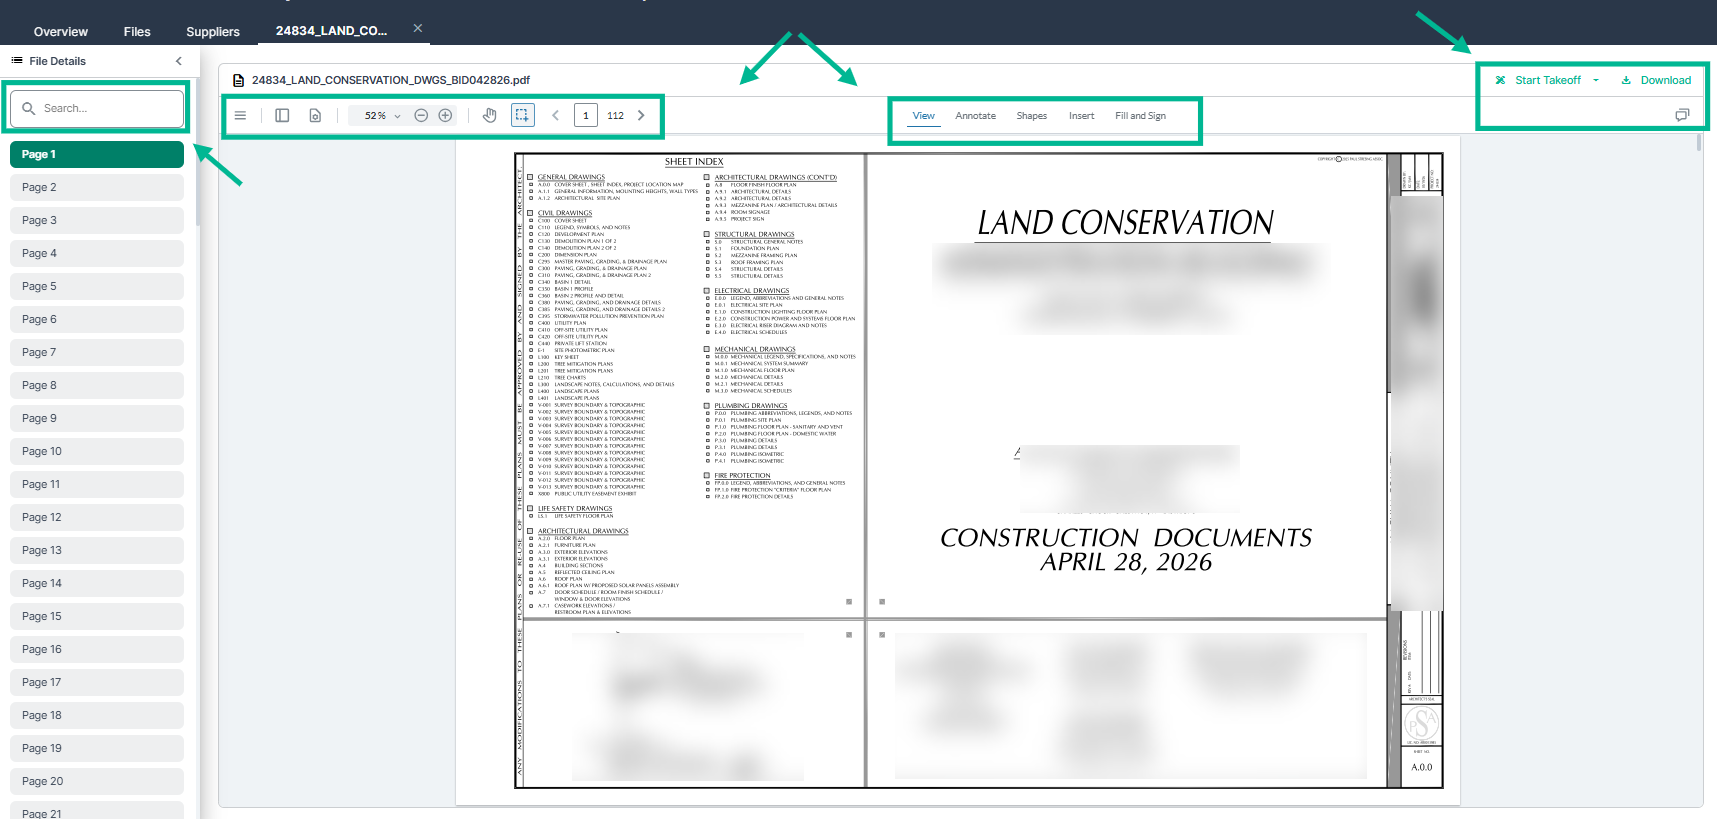
To view a file in the file viewer, click on the file name.
- On the left side, use the keyword search bar to enter keywords such as trades, materials, product details, or other relevant terms.
- Add annotations by selecting tools at the top center: add text, comments, shapes, images, attachments, and stamps.
- On the left side: use the Navigation Tools to navigate the plan sheets. View menu options, Zoom In/Out, Select items, and the Hand tool for panning across the page. You can also jump directly to a specific plan page or scroll through he pages.
- In the top right corner, take quick actions to send files to Takeoff (if you have purchased Takeoff), Download the file, or review comments. Annotations must be used in order to view comments.
Suppliers Tab:
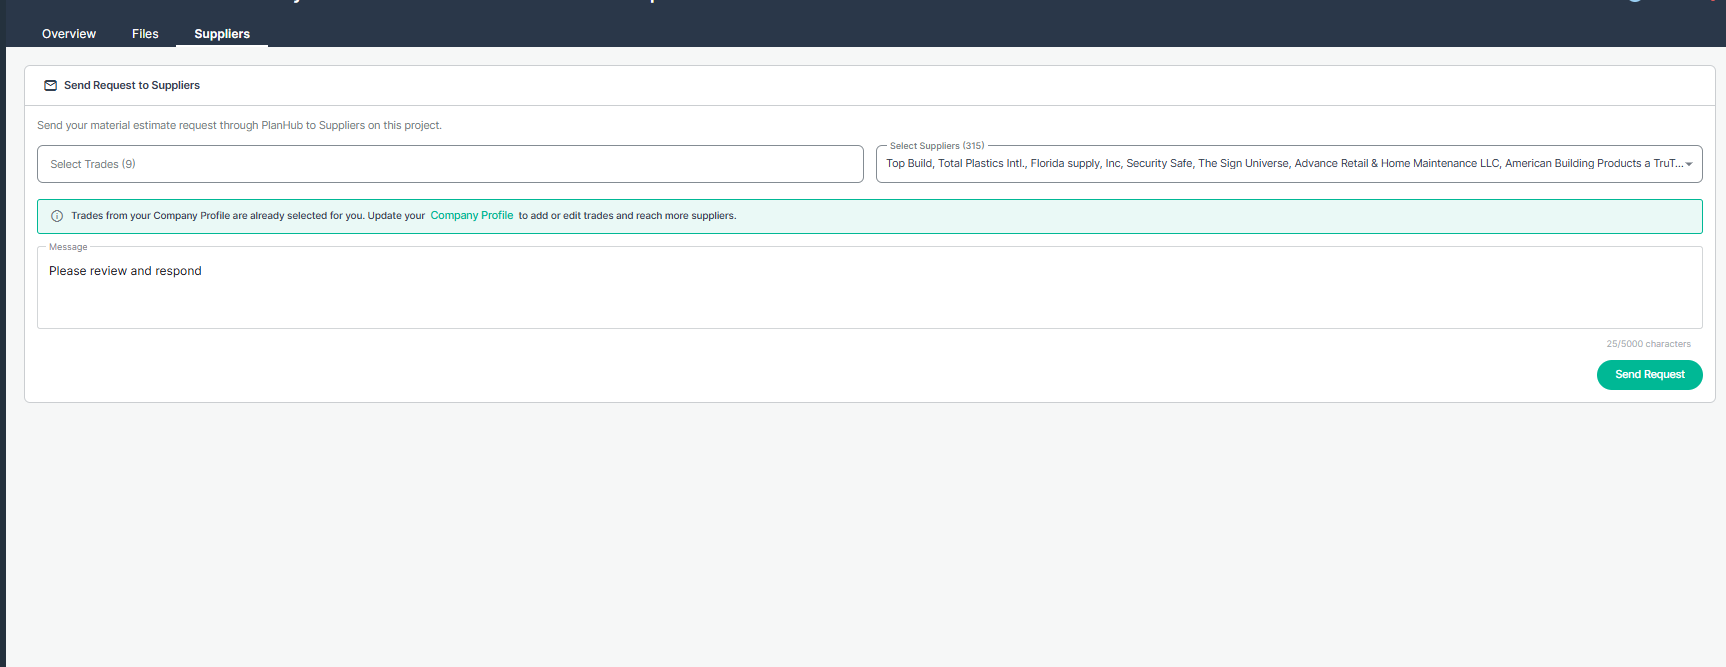
Select the Suppliers tab to request material estimates from suppliers.
You will see the following information on this page:
- Select Trades menu - Trades from your company profile will be preselected in this section. You can remove any trades or select additional trades for which you’d like to request an estimate. (Note: Update your Company Profile to add or edit trades and reach more suppliers.) To learn more about your managing your company profile, view the Knowledge Base article: How To Manage Your Public Profile
- Select Suppliers menu - view the list of preselected suppliers from the dropdown menu. You can remove any suppliers or select additional suppliers for which you’d like to request an estimate from.
- Message field - specify additional details, important dates or instructions suppliers will need to know for this project.
- Send Request - click on Send Request to request your estimates from the suppliers you have selected.
Note: Each supplier who receives the request can only view the information sent to them and cannot see other suppliers who also received the request.
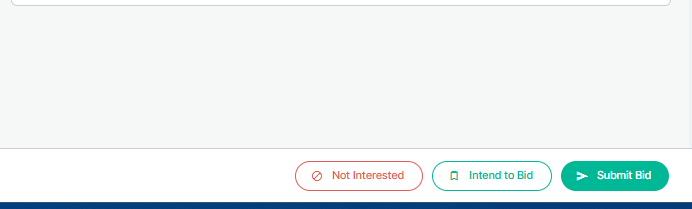
Step 8: At the bottom right, three bid options appear under the Overview tab.
- Not Interested: Click if you will not bid this project; the GC will be notified.
- Intend to Bid: Click if you plan to submit a bid, the GC will be notified.
- Submit Bid: Use this when ready to submit your bid.
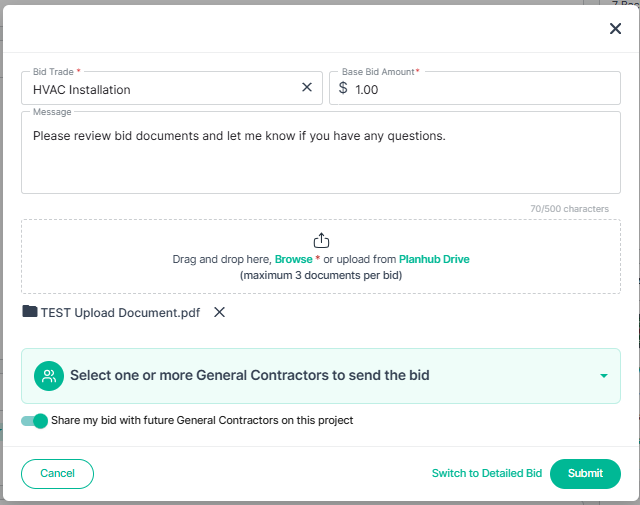
When submitting your bid: (Required fields show a red Asterisk)
- Bid Trade - select your trade
- Base Bid Amount - Enter your base bid amount
- Message - Enter a message to the GC
- Browse or upload bid documents from your Planhub Drive - Attach supporting bid documents from your computer or PlanHub Drive
- Choose the general contractors you’d like to submit your bid to from the dropdown menu
- Use the toggle to share this bid with GCs who are added to the project in the future.
- Toggle off - when sending individually addressed GC bids
- Toggle on - when sending bids that are not addressed to a specific GC
Turn on email notifications to stay updated when new GCs join projects
- If your bid is not addressed to a specific GC, toggle the option "On" to share your bid with GCs added to this project in the future.
- When finished, click Submit to send your bid, or select Cancel to exit without submitting.
Note: For individually addressed GC bids, you can toggle off the option to "Share my bid with future General Contractors on this project" to keep the bid from being shared with GCs added to the project. You can also turn on email notifications to stay informed when new GCs join the project. To learn more about email notifications, view our Knowledge Base article: Subcontractors | User Account and Notifications
Keeping GCs informed about your bidding intentions helps them track bid coverage and ensures clear, timely communication on every opportunity.
To learn more about the Takeoff tools, view our Knowledge Base article: How to Use Takeoff: A General Overview
Now that you know how to navigate the Project Page, put it to work. Find the right opportunities, submit quality bids, connect with general contractors, and turn more projects into more work.
Troubleshooting
Contact us if you need assistance or to report an issue:
- PlanHub Contact Page: https://planhub.com/contact/
- Customer Facing Support Ticket Link: https://knowledgebase.planhub.com/knowledge/kb-tickets/new
- Customer Success Team: CustomerSuccess@planhub.com