![NEW_PlanHub_Logo_Navy.png]](https://knowledgebase.planhub.com/hs-fs/hubfs/Design/PH%20Logos/NEW%202024%20PH%20Logos/NEW_PlanHub_Logo_Navy.png?height=40&name=NEW_PlanHub_Logo_Navy.png)
Keep your projects compliant and minimize risk by carefully reviewing and managing subcontractor qualifications and certifications. Follow these steps to filter, review, and connect with only the most qualified subcontractors in your network directory.
Prerequisite: To navigate the planHub Network directory, you will need to purchase the Network Add-On feature.
Step 1: Navigate to the Network tab in the main panel on the left side.
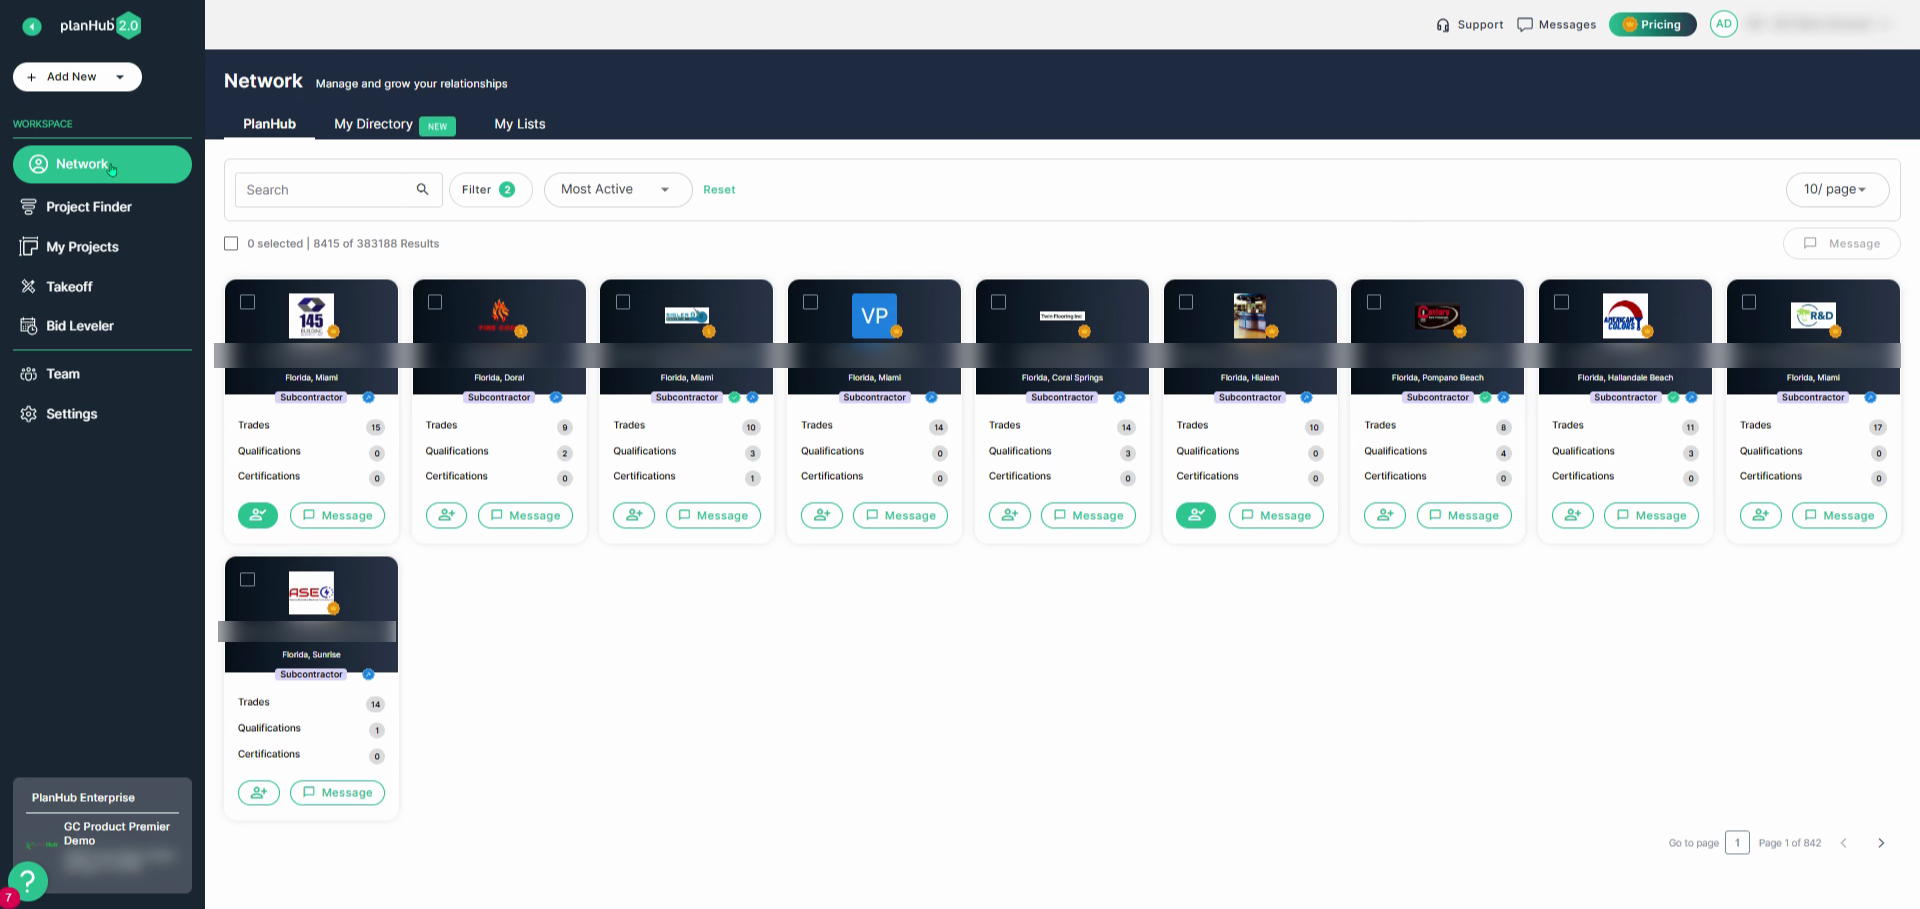
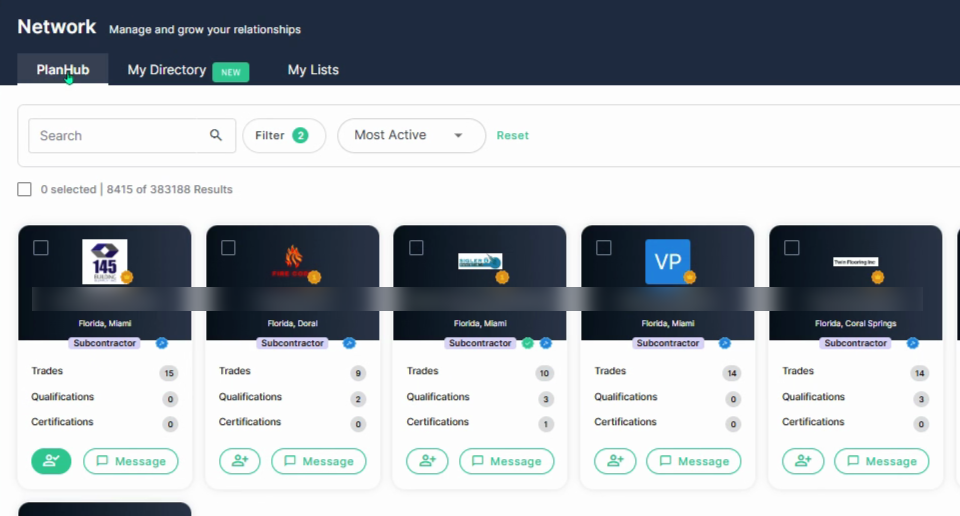
Step 2: Select the PlanHub tab at the top of the page.
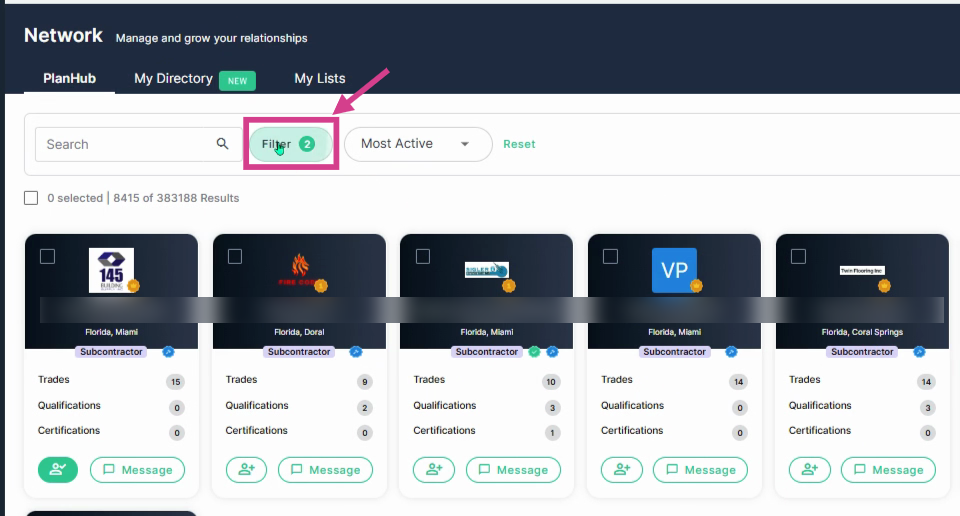
Step 3: Locate the filter menu then click Filter.
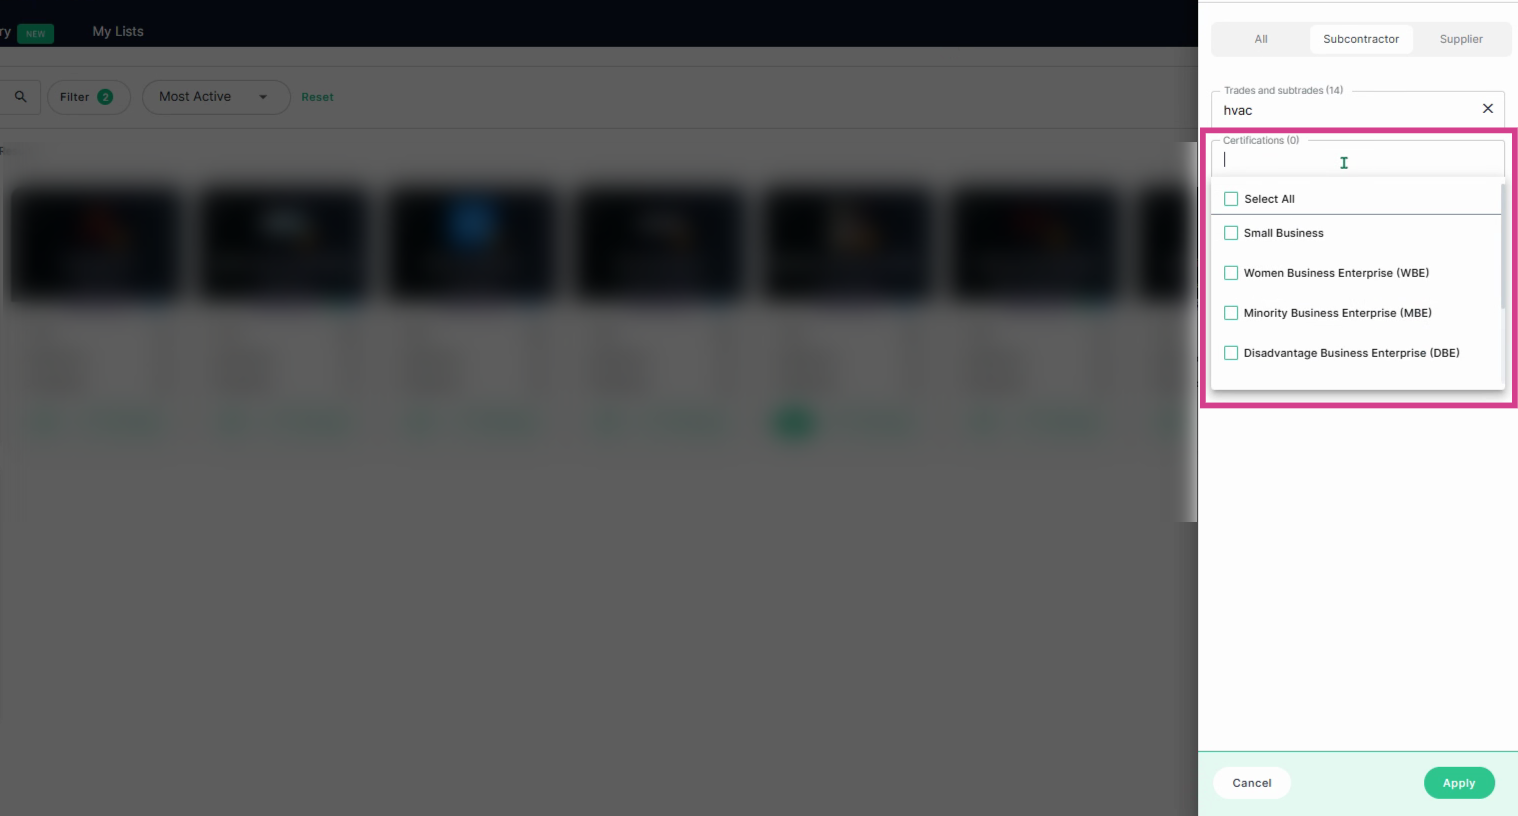
Step 4: In the pop up window on the right side, select the trades then select the Certifications required for your project. Click on the Certifications dropdown menu to review available options.
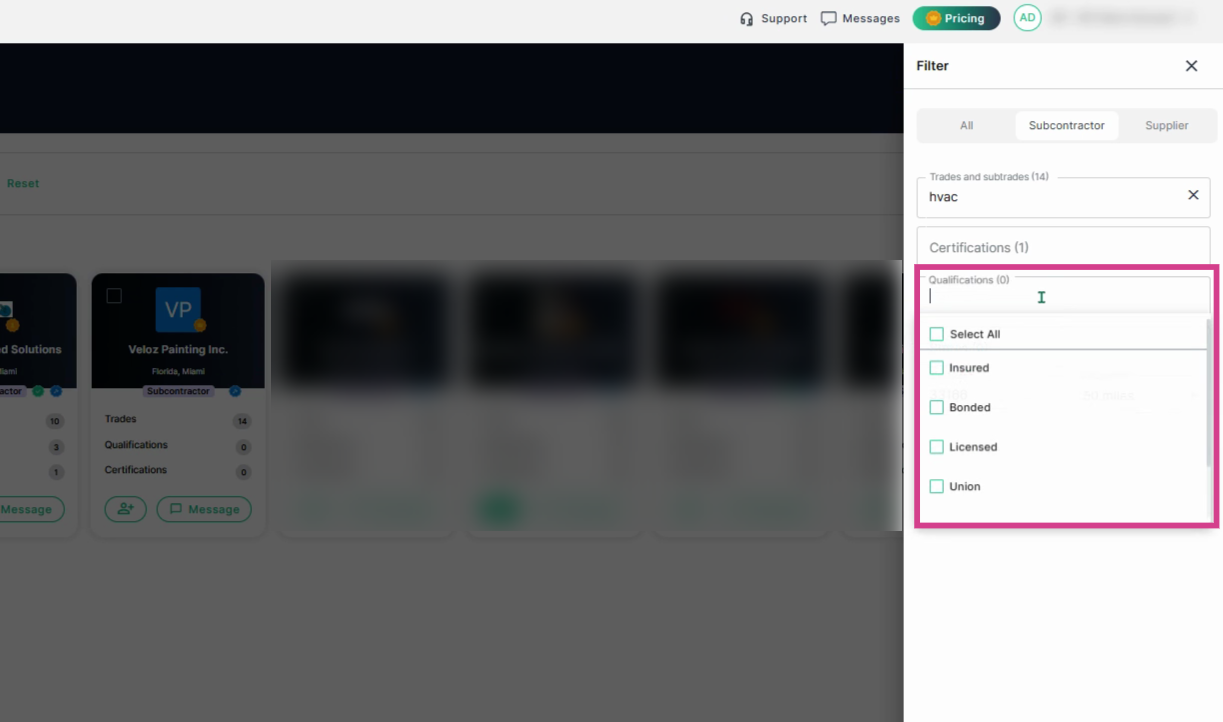
Step 5: Open the Qualifications dropdown menu. Select the qualifications relevant for your subcontractors to be eligible for your project.
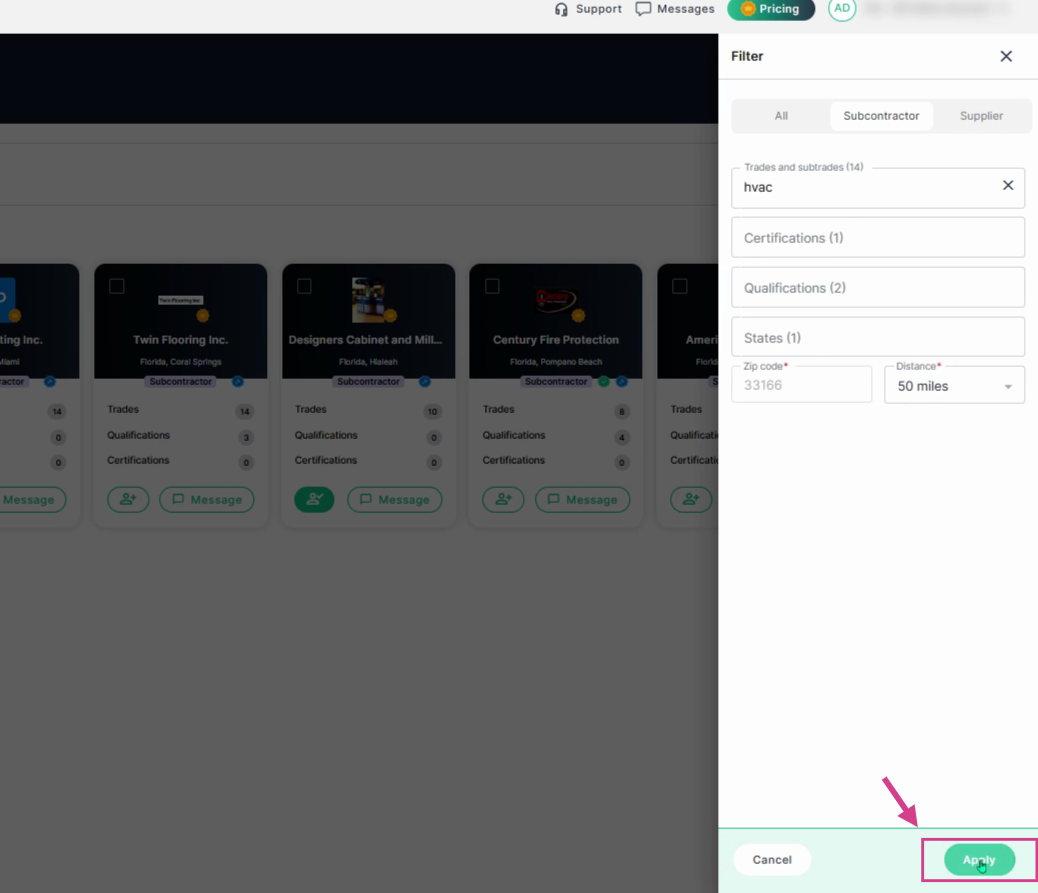
Step 6: After making your selections, navigate to the bottom right corner and click Apply.
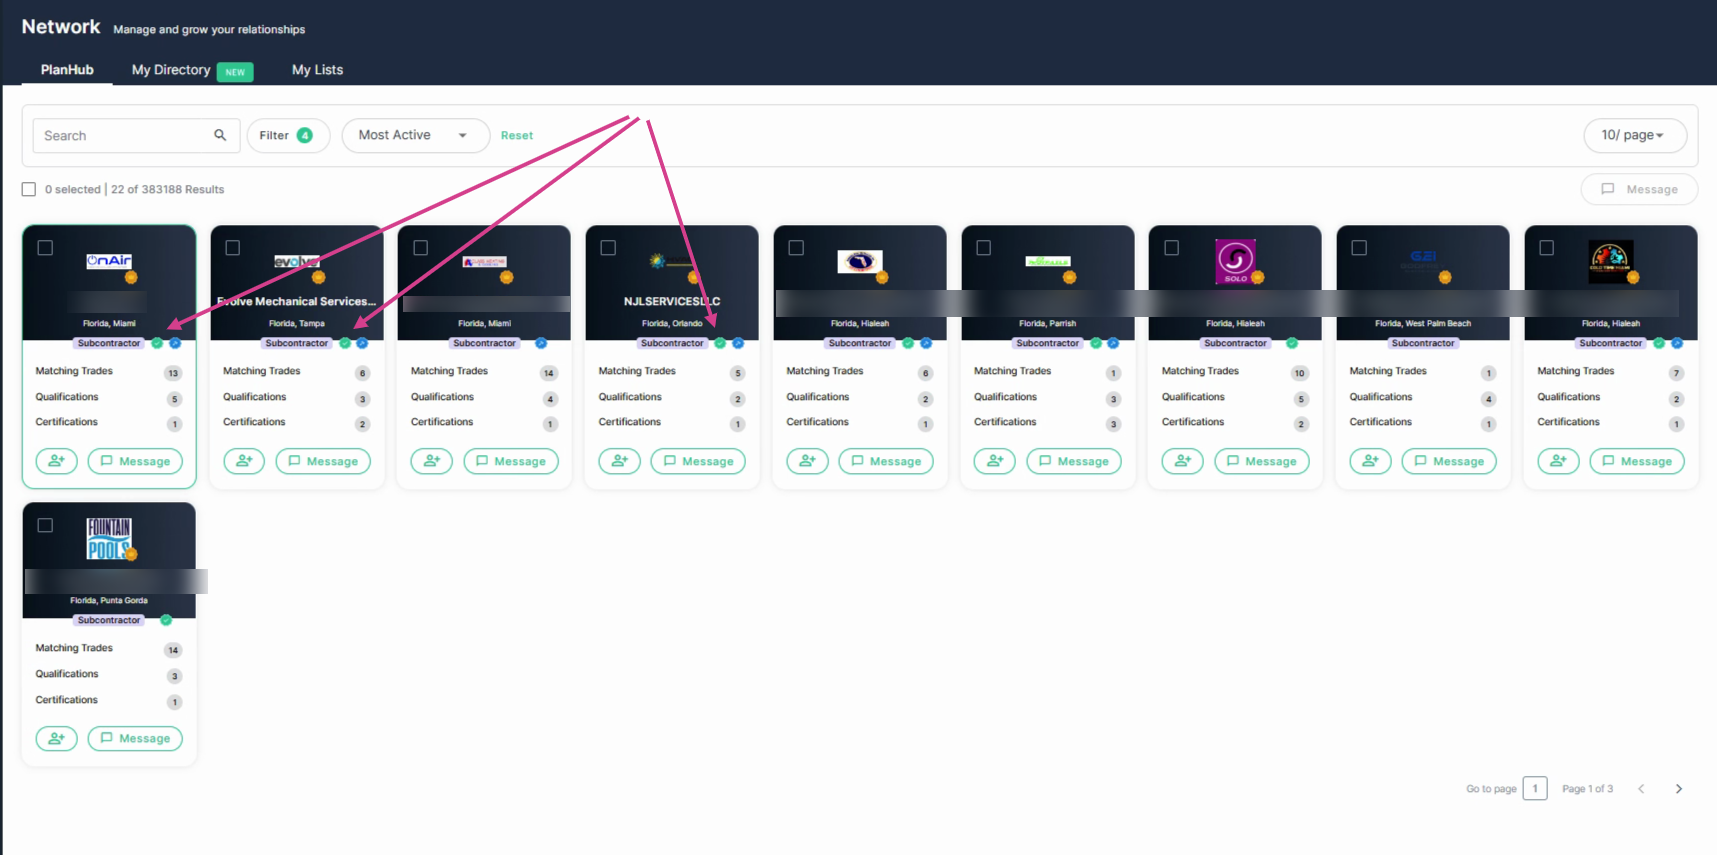
Step 7: Look for the green checkmark badge on the subcontractor company cards. This indicates that they’ve completed their prequalification form. Click the company name to view more details.
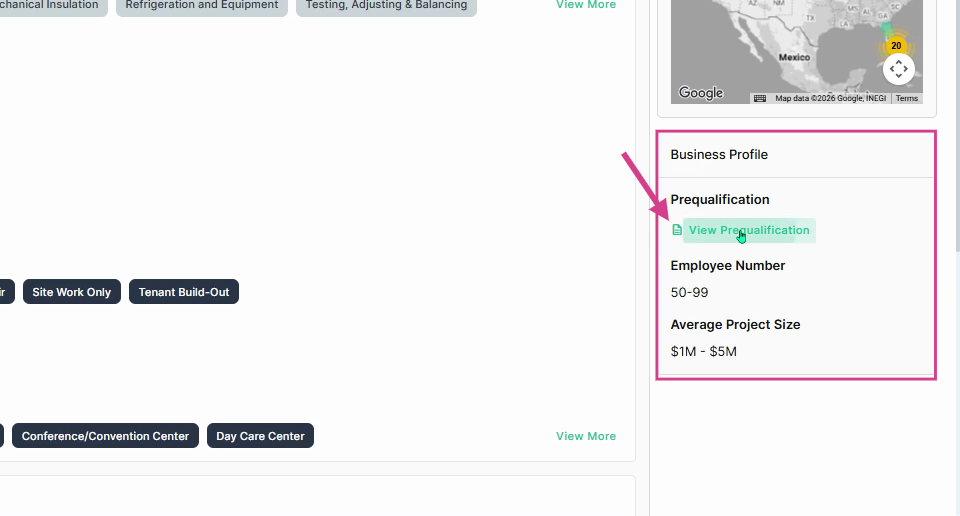
Step 8: On their company profile page, navigate to the right side and view the Business Profile section. Click View Prequalification to review the company’s details, including qualifications, licenses, certifications, project history, safety information, insurance, bonding, and financial or risk-related data.
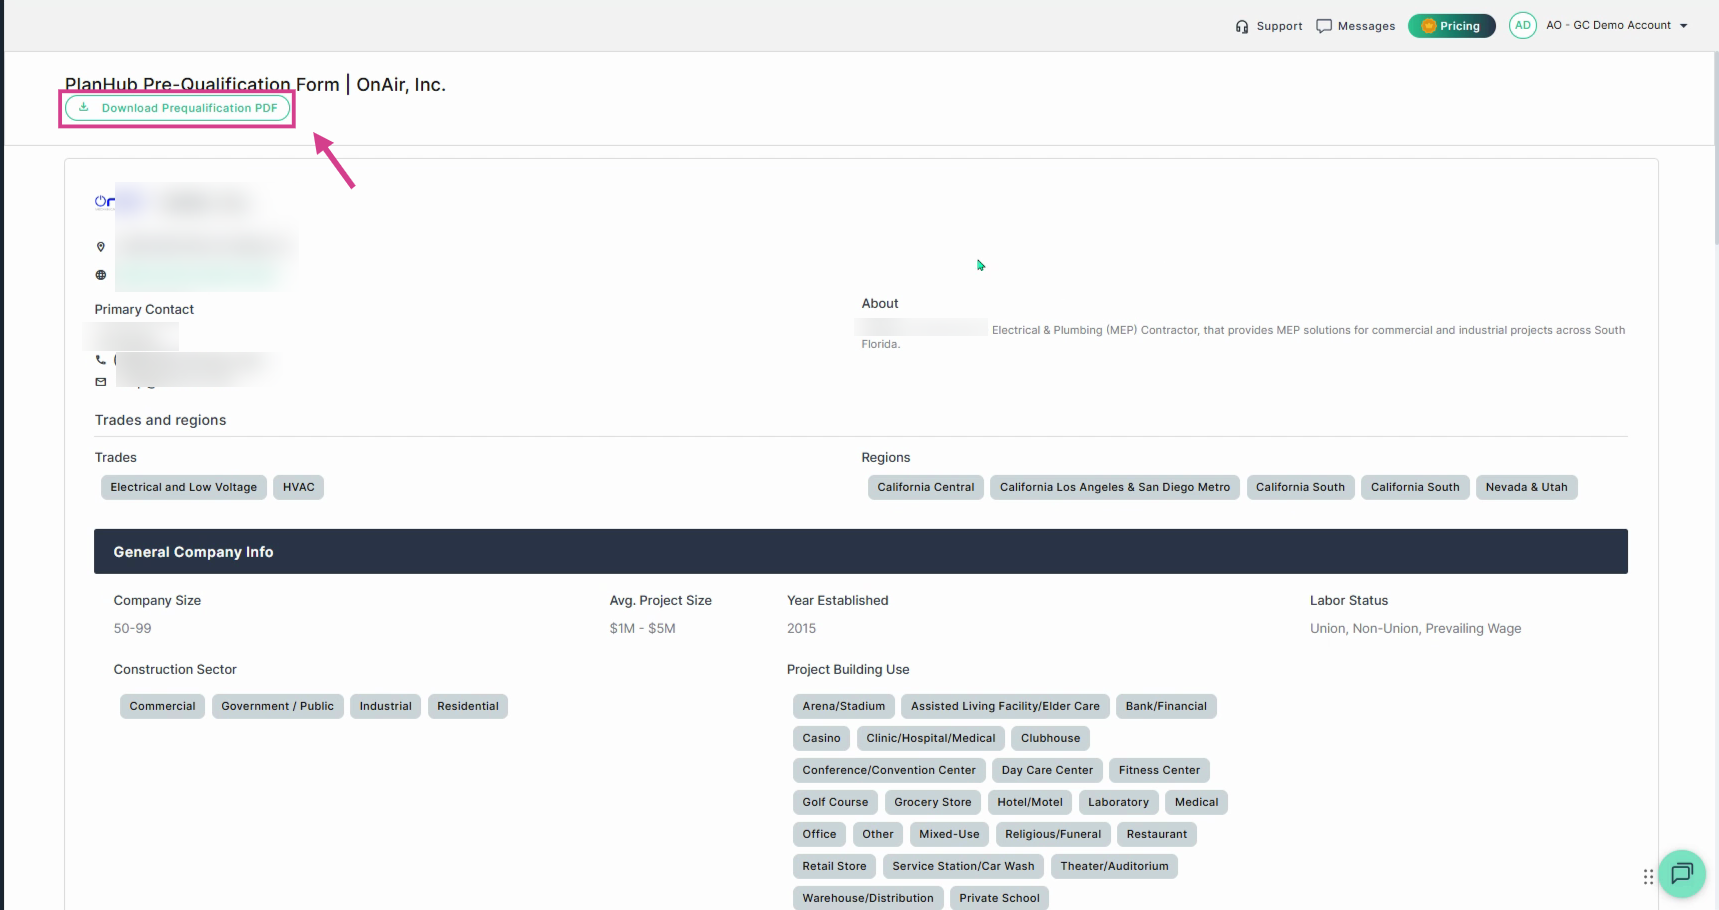
Step 9: To download their prequalification form, click Download Prequalification PDF.
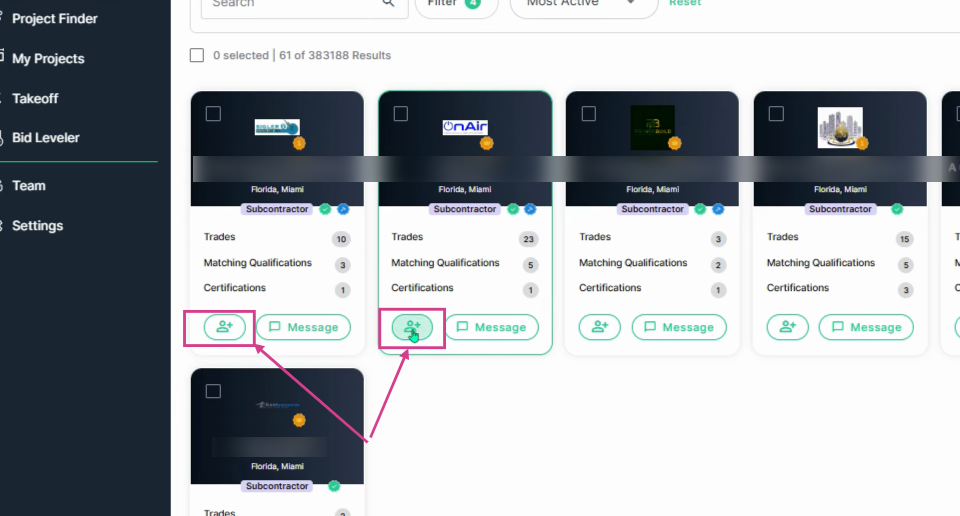
Step 10: To add a qualified subcontractor to your network, click the person-with-plus-sign icon on their company card.
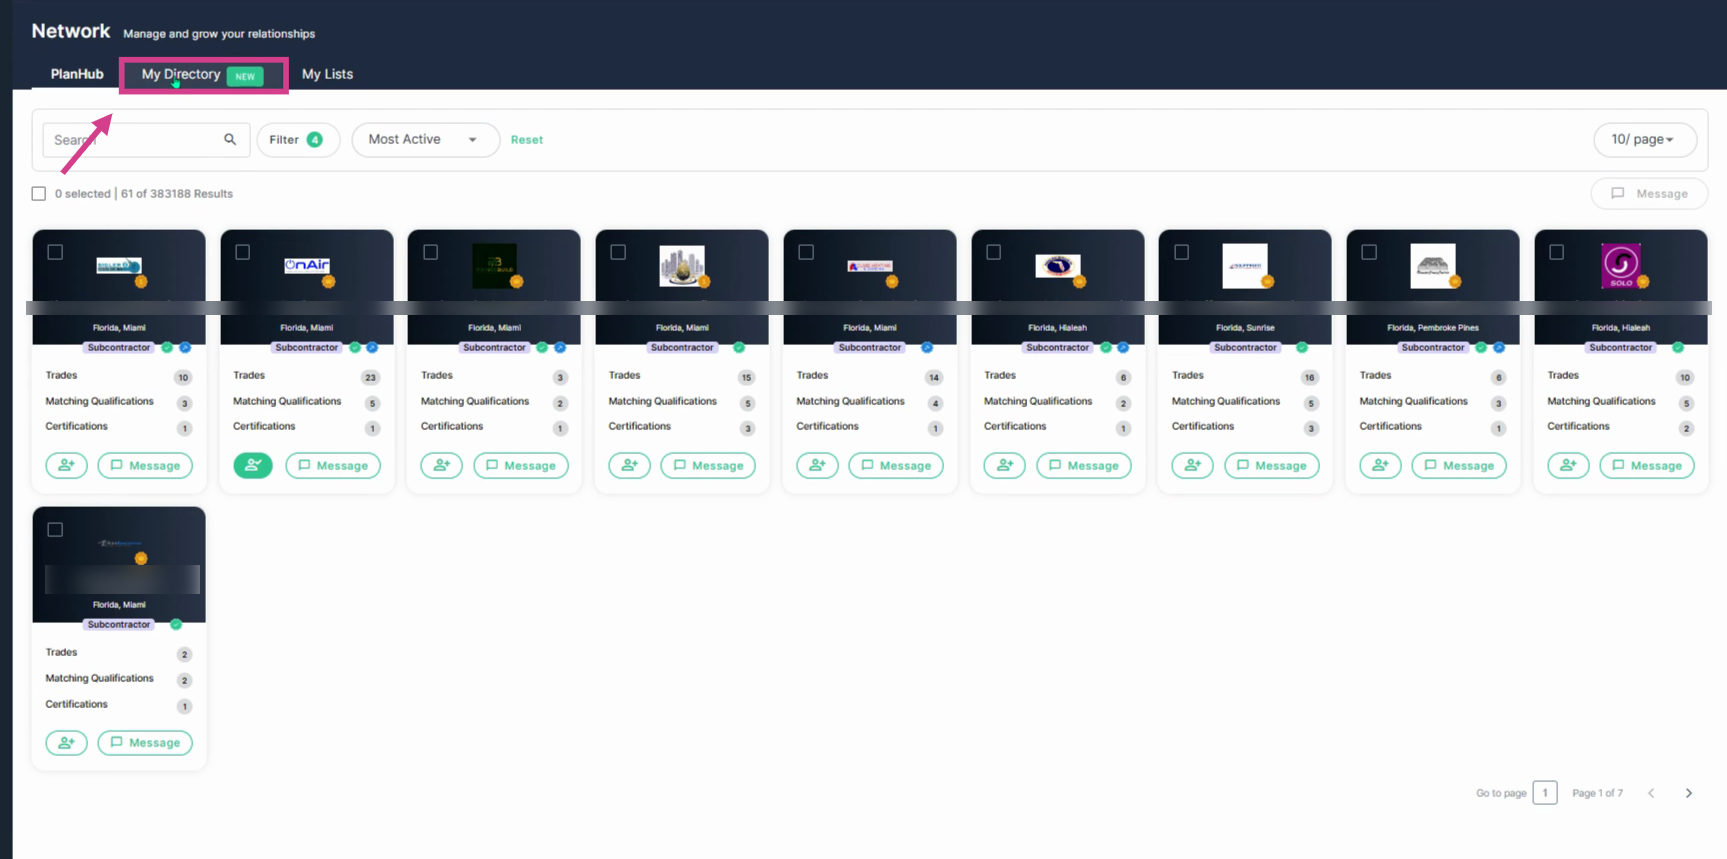
Step 11: Click My Directory at the top of the page to verify the subcontractor has been added.
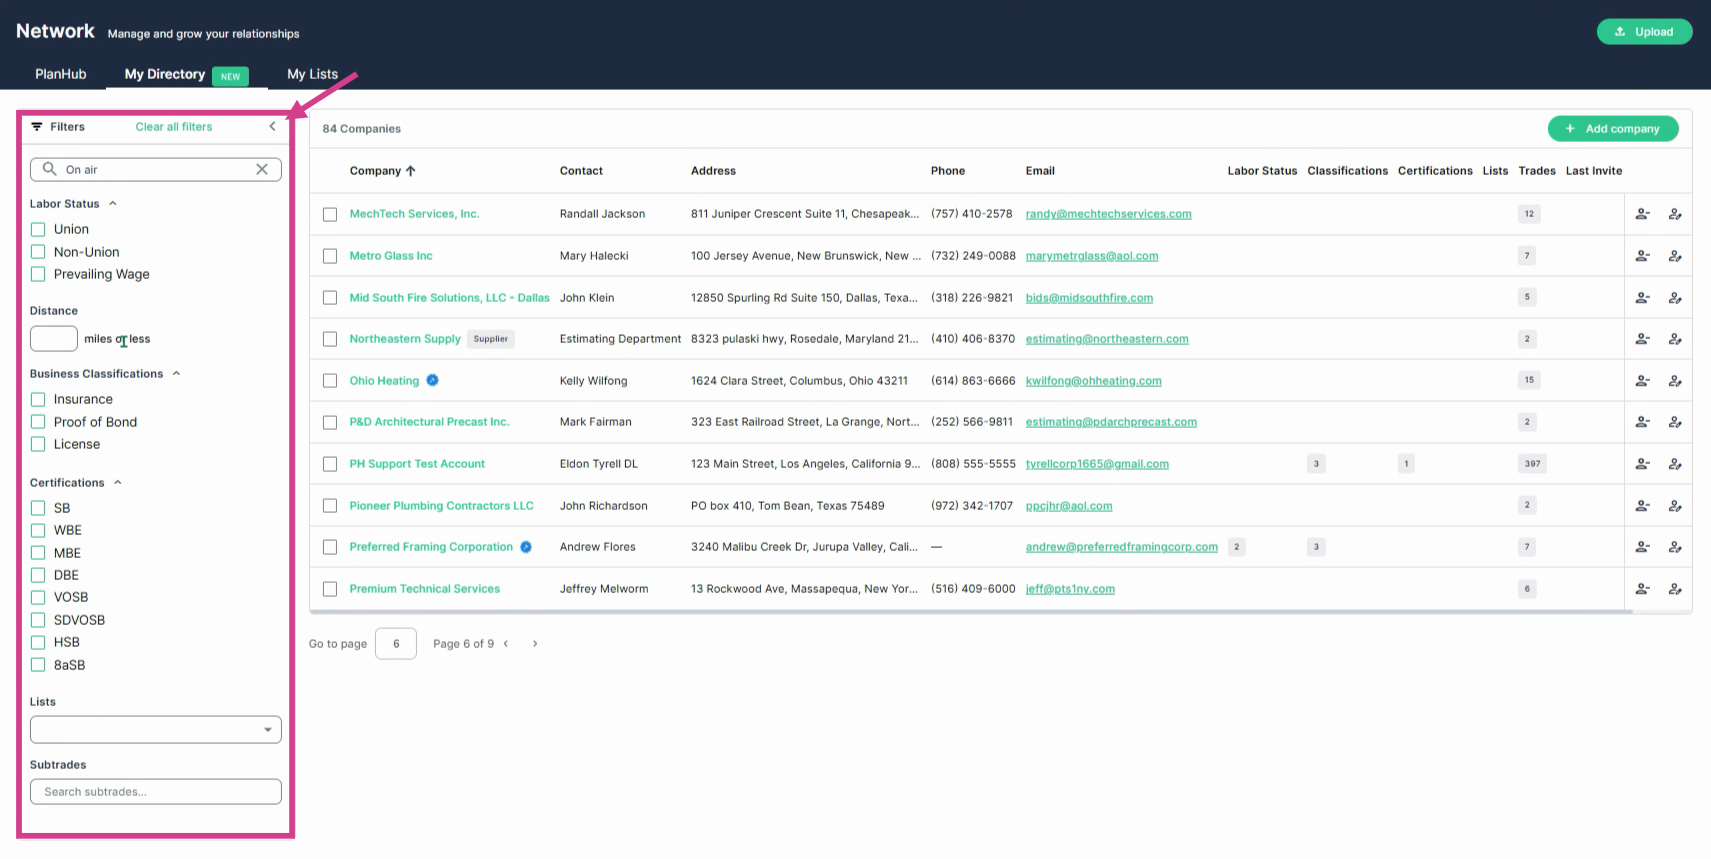
Step 12: Open the filters window, type the company name, or use filter options to review and confirm they've been added.
Step 13: Subcontractors added to your directory gain access to current and future projects. You can add additional contacts as needed.
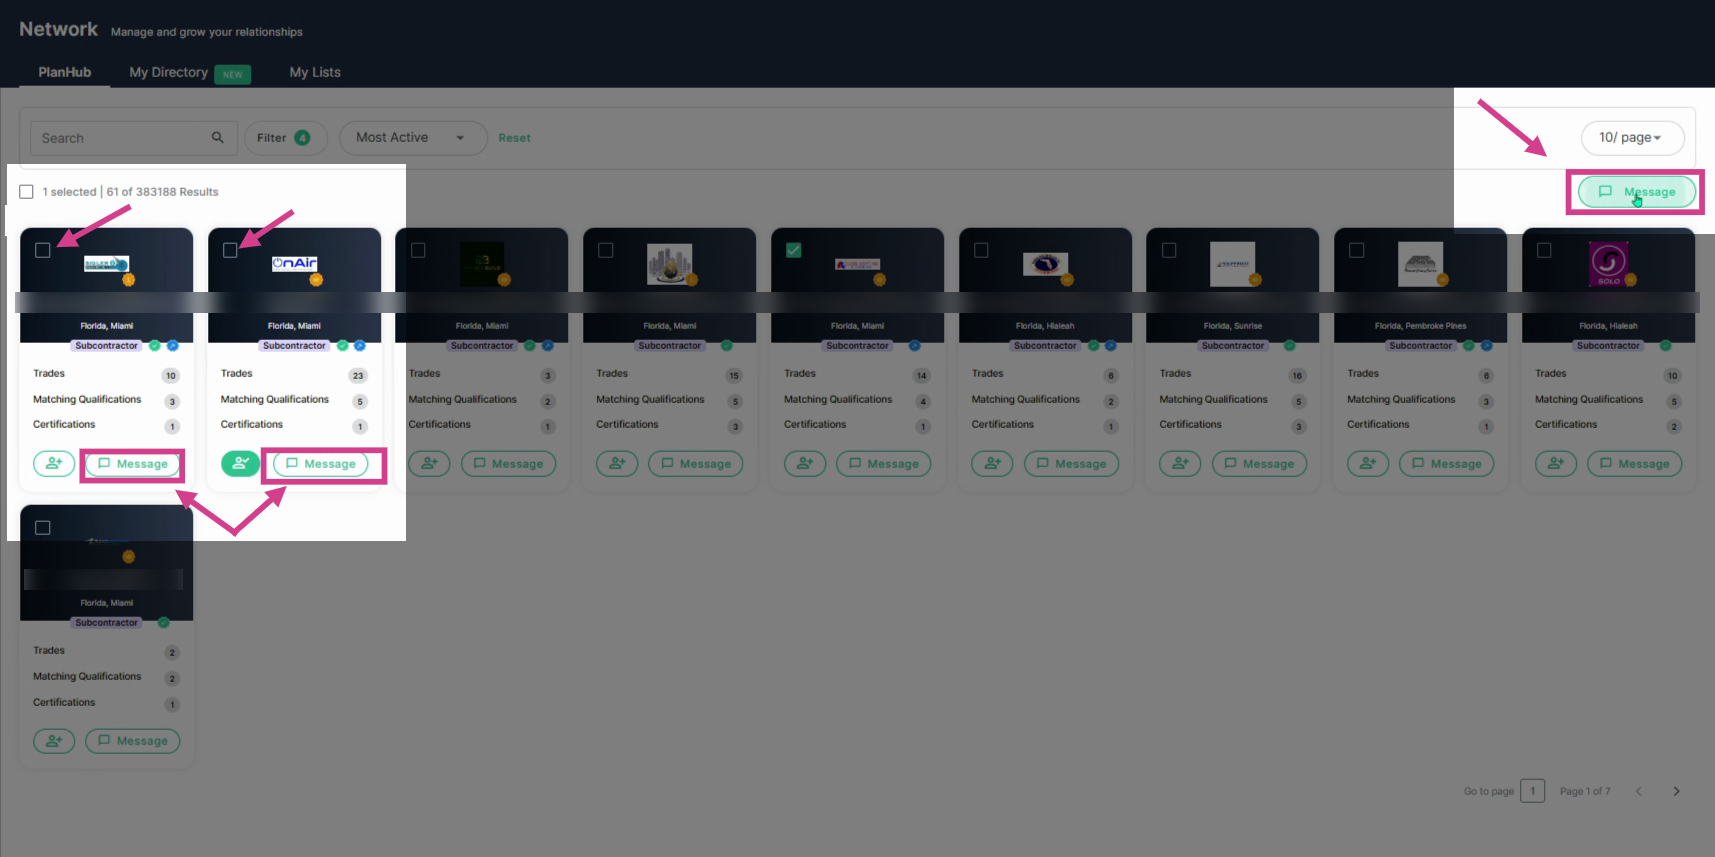
Step 14: To request a prequalification form from a subcontractor who doesn’t have the green badge, click Message on their company card, or select multiple companies by checking boxes and clicking Message in the upper right corner.
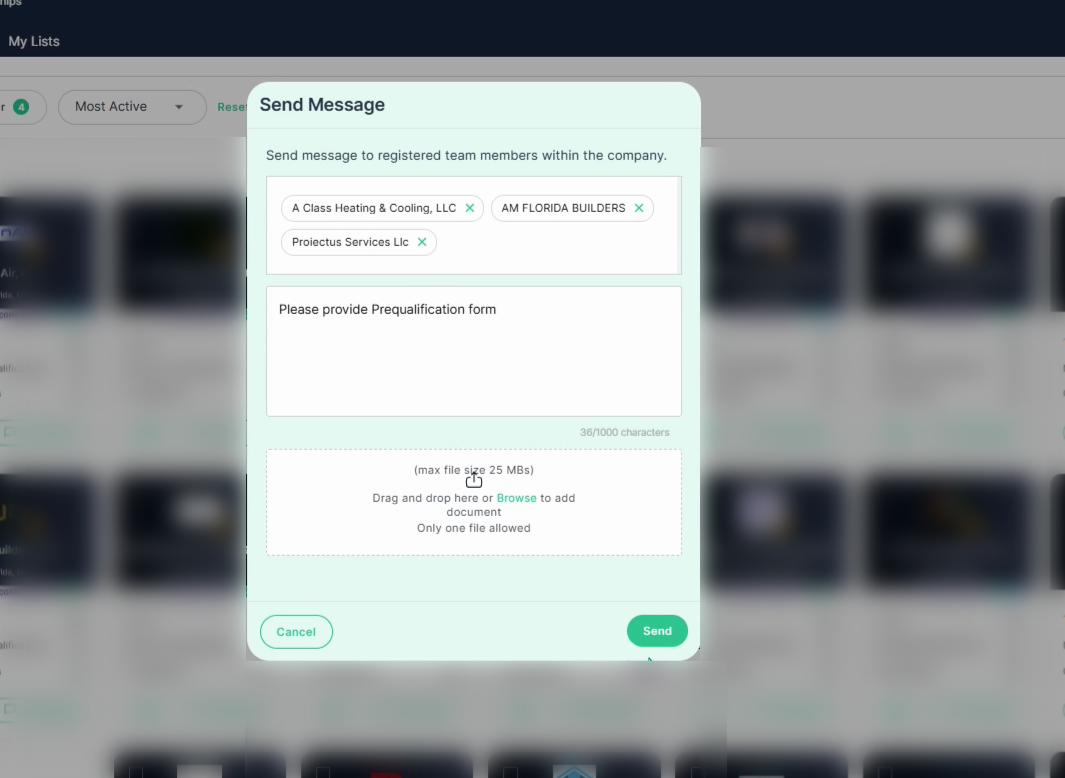
Step 15: Compose your message, upload documents if needed, and click Send to contact one or more subcontractors.
Note: Although you can send a message to multiple subcontractors at once, each recipient will only see their own message and will not have access to the contact information of the other subcontractors.
This process enables you to efficiently identify subcontractors who meet your specific qualification criteria, saving time by narrowing your search to the most relevant candidates. It streamlines subcontractor outreach and relationship management by allowing you to add contacts, send messages, and communicate with multiple subcontractors directly within the platform.
Troubleshooting
Contact us if you need assistance or to report an issue:
- PlanHub Contact Page: https://planhub.com/contact/
- Customer Facing Support Ticket Link: https://knowledgebase.planhub.com/knowledge/kb-tickets/new
- Customer Success Team: CustomerSuccess@planhub.com