Get started with PlanHub Essentials for General Contractors and make managing construction projects and connecting with qualified local subcontractors simple and efficient. This tutorial walks you through setting up your company profile, inviting subs, posting projects, and tracking bids—all in one platform.
Step 1: Set Up Your Company Profile
Go to Settings and select Company.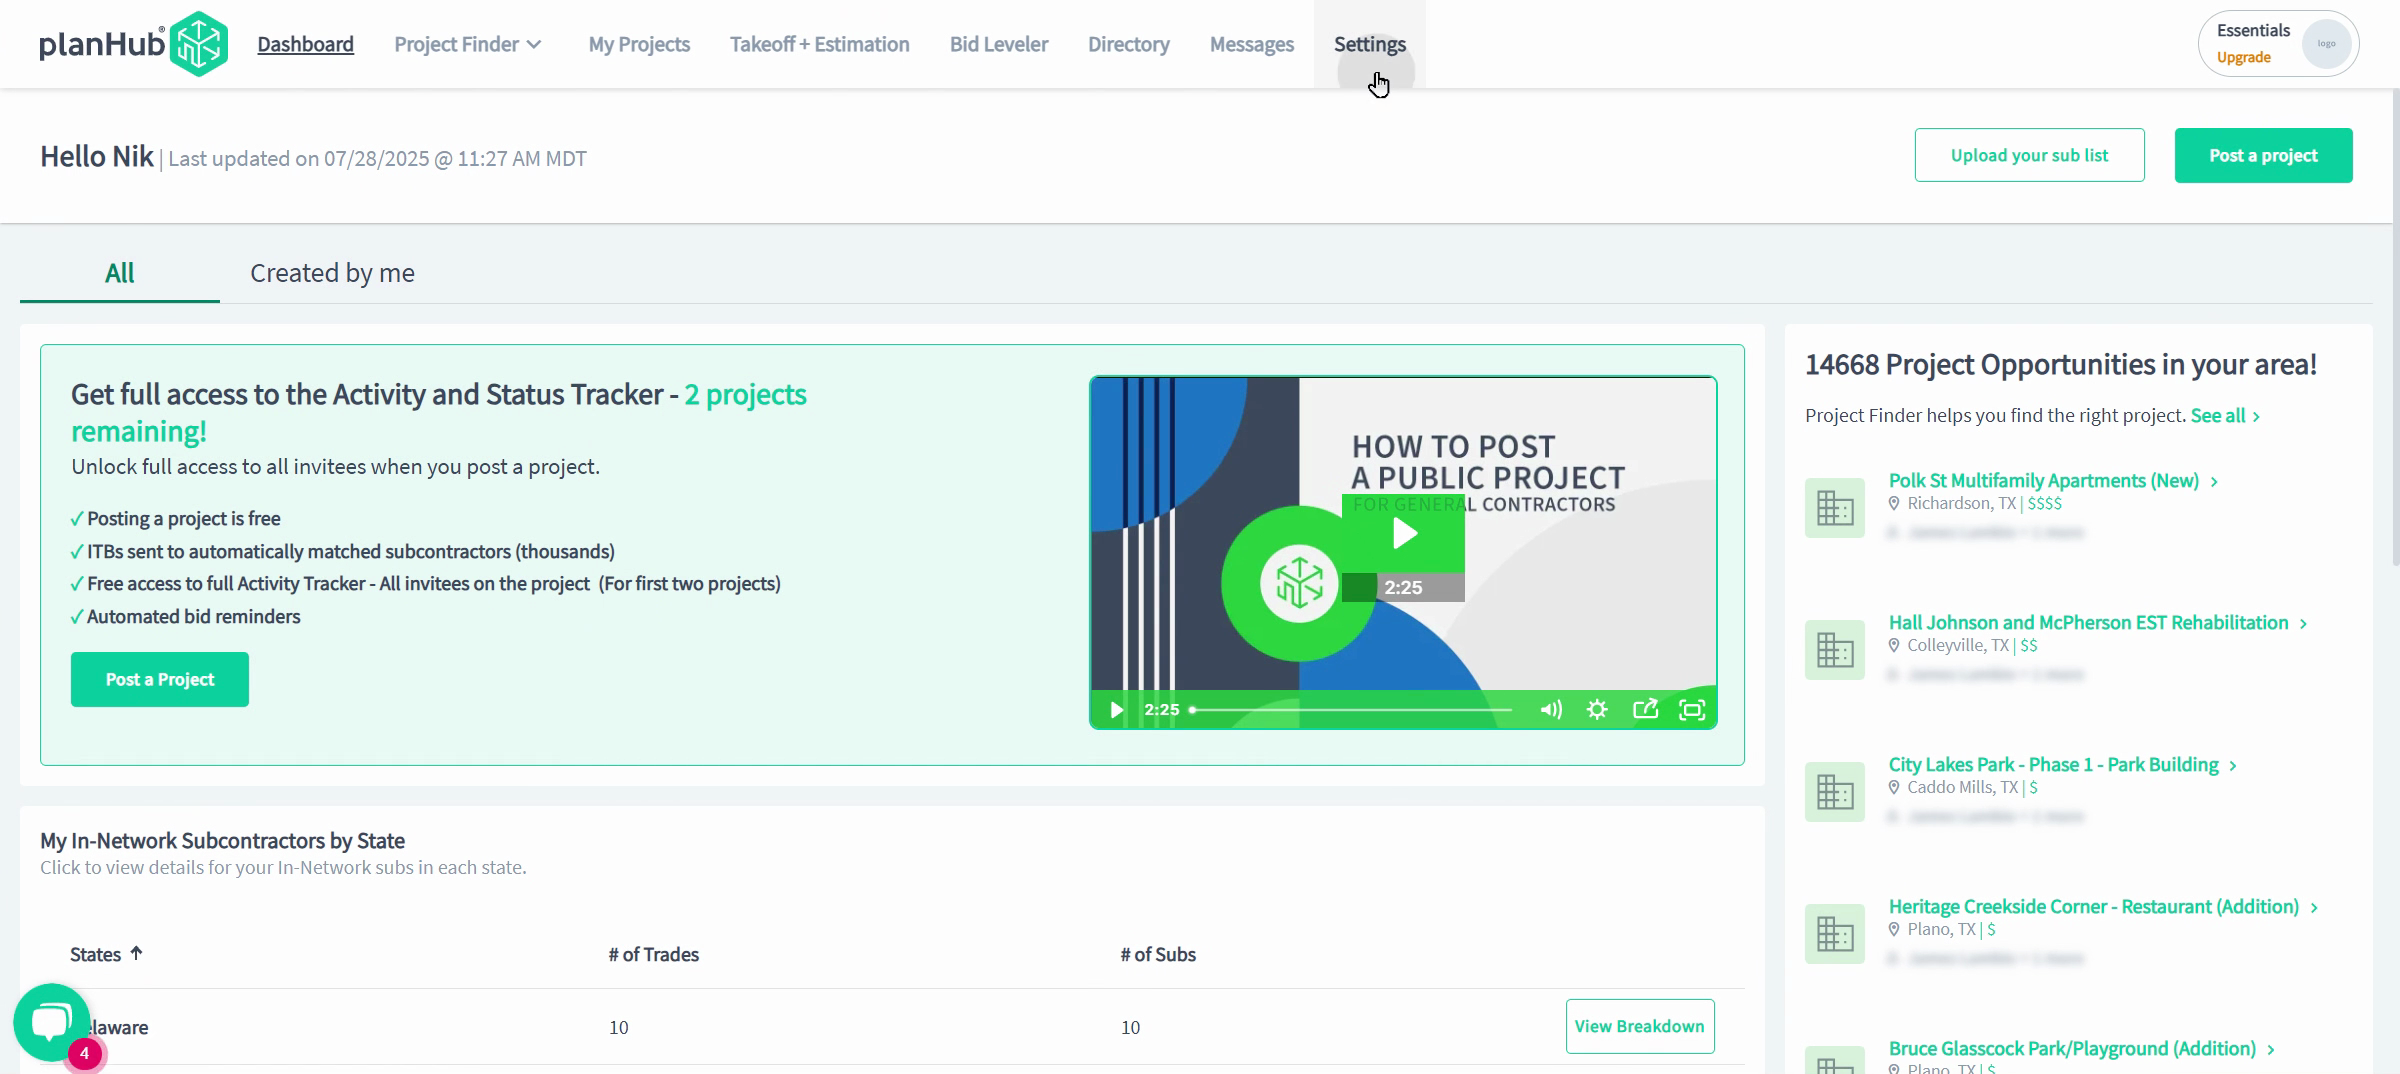 Fill in your company information—this acts as your digital business card and helps subs know who they're working with. Plus, all General Contractor companies get their own shareable projects page for your website or network.
A complete profile increases trust with potential bidders.
Step 2: Upload Your Subcontractor List
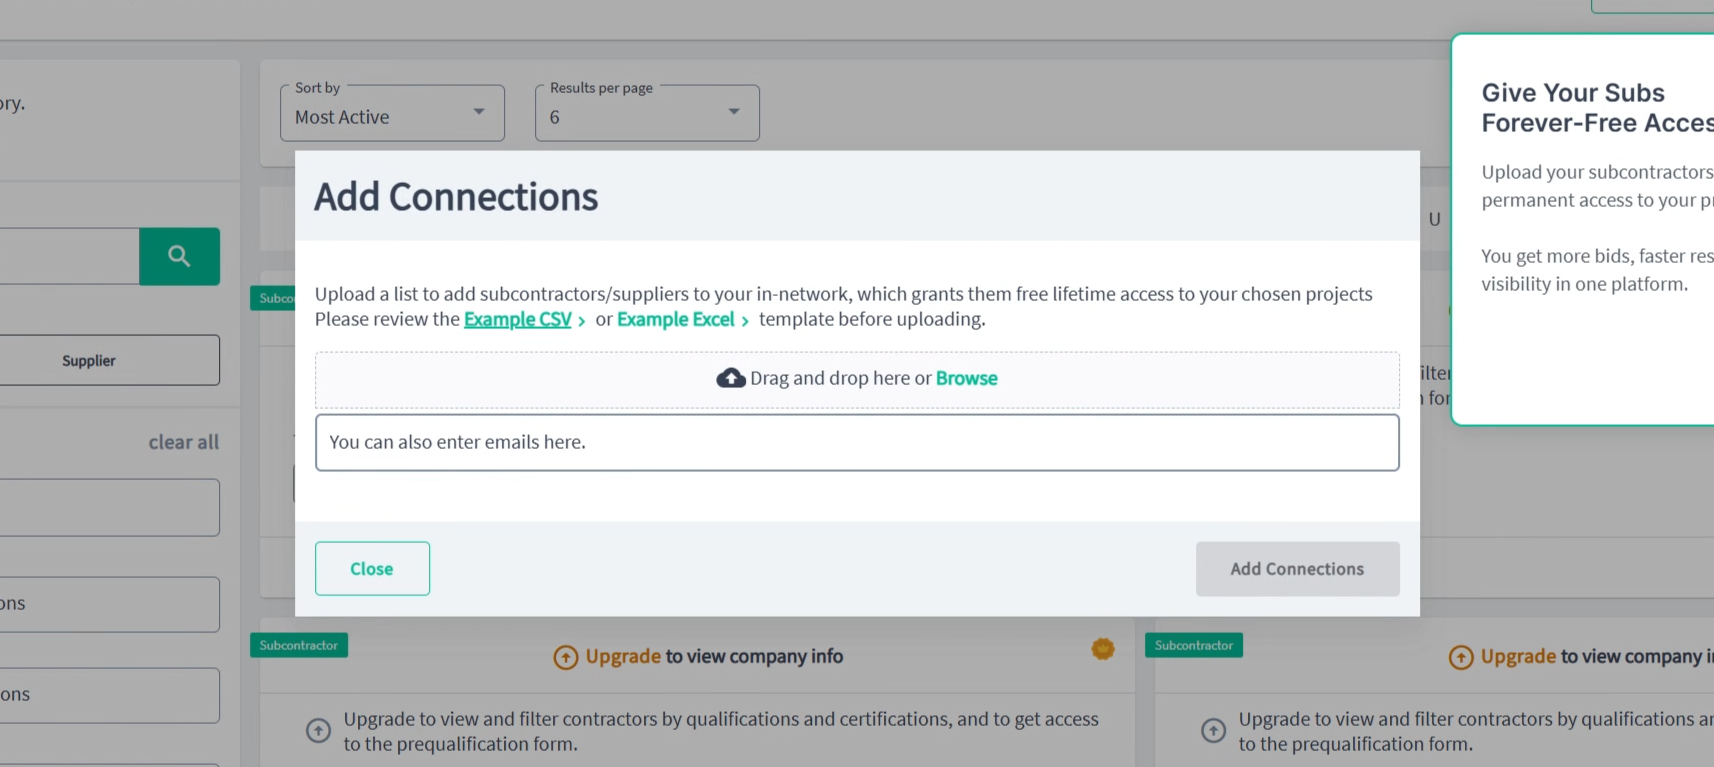
Navigate to the Directory and click "Upload your sub list"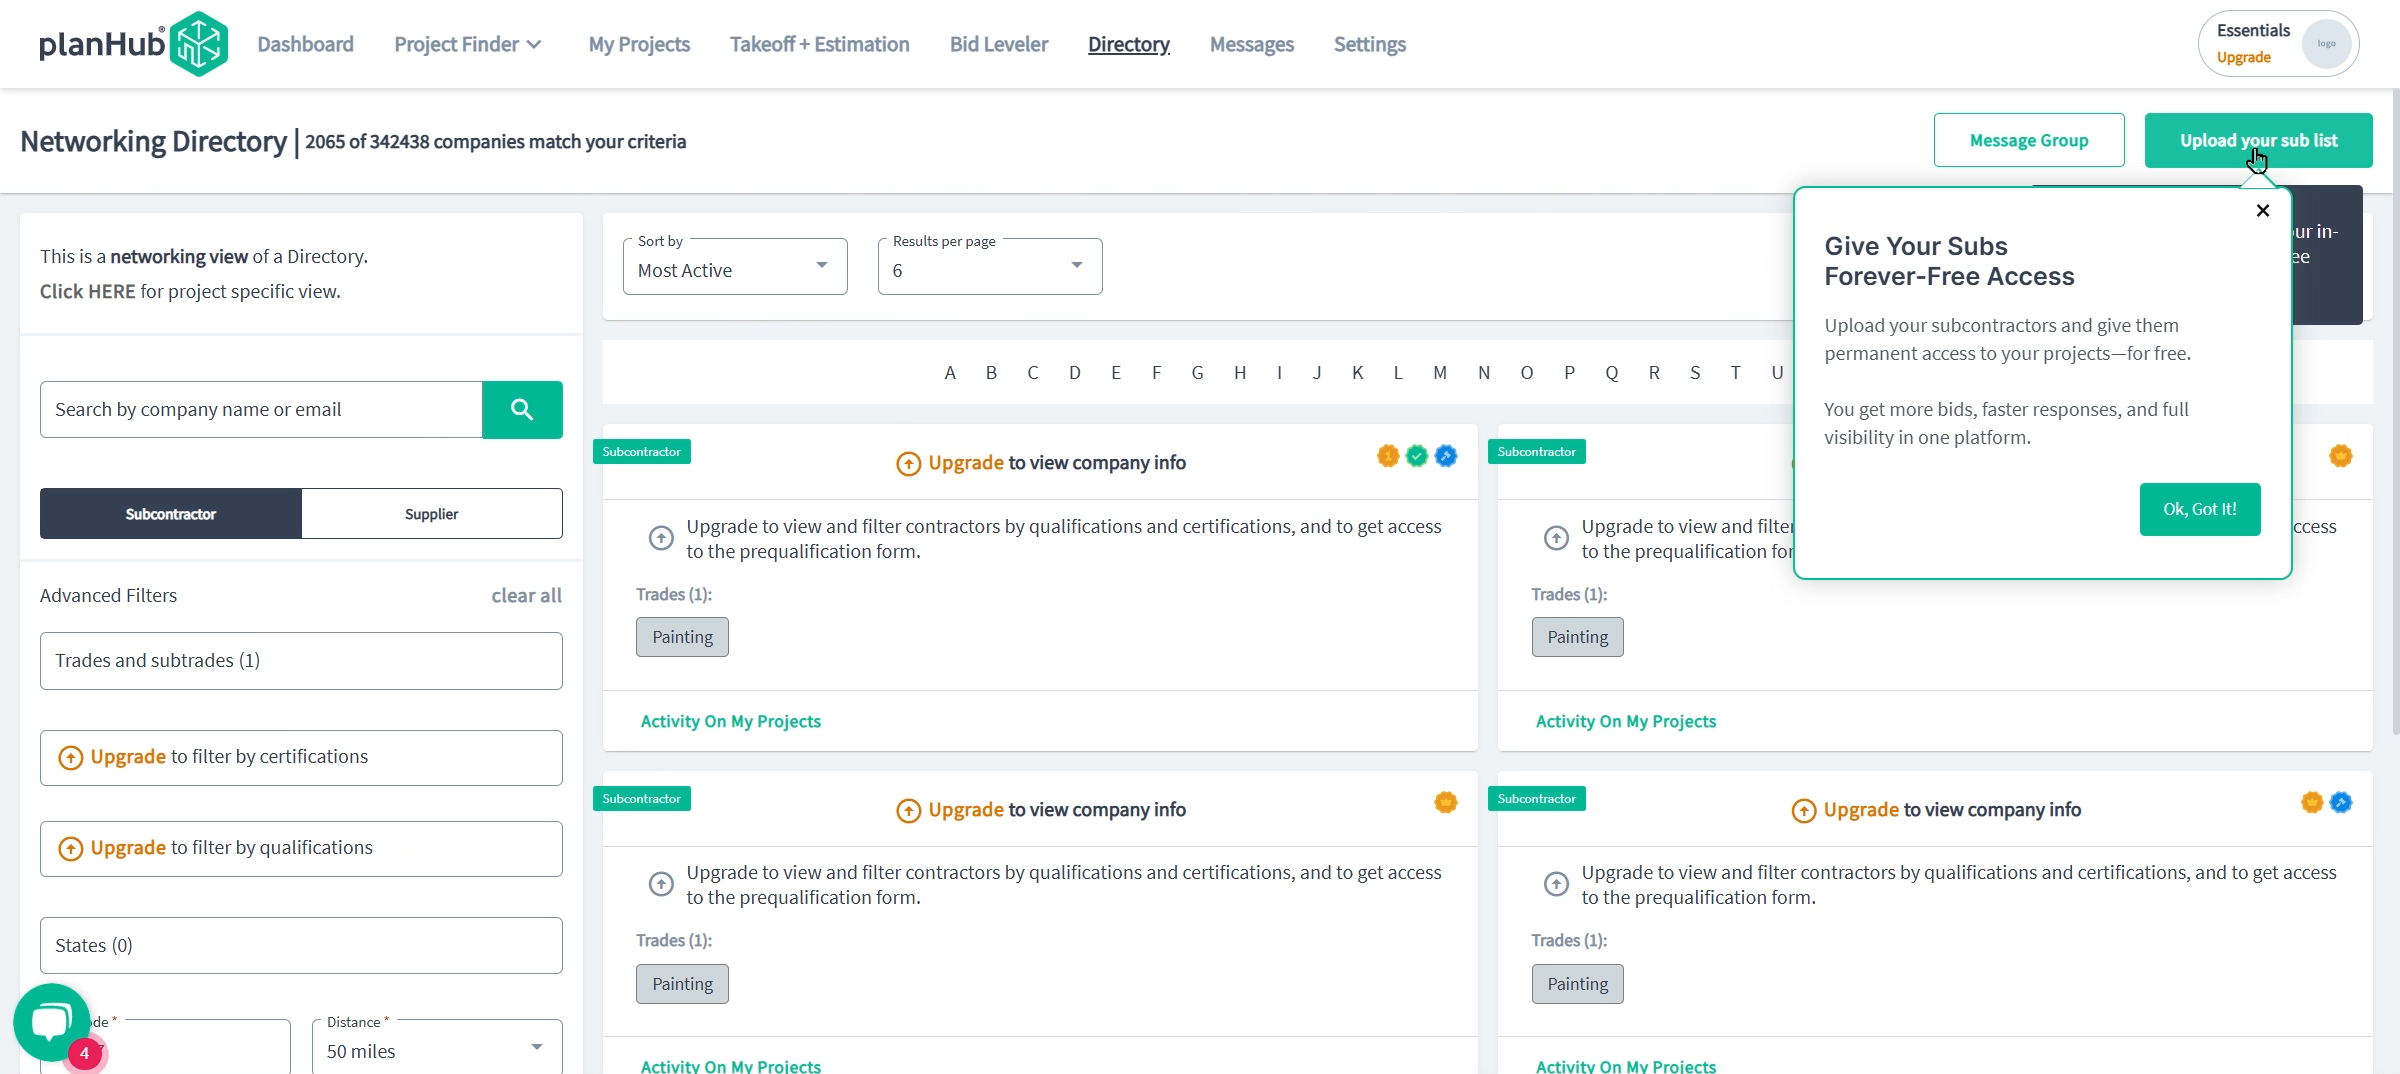 Add emails individually or upload a list. Subs are invited for free and can access your project postings and project files without barriers when you have listed the email they are using on PlanHub as "In-Network".
Step 3: Post a Project
Go to the My Projects page and select Post A Project.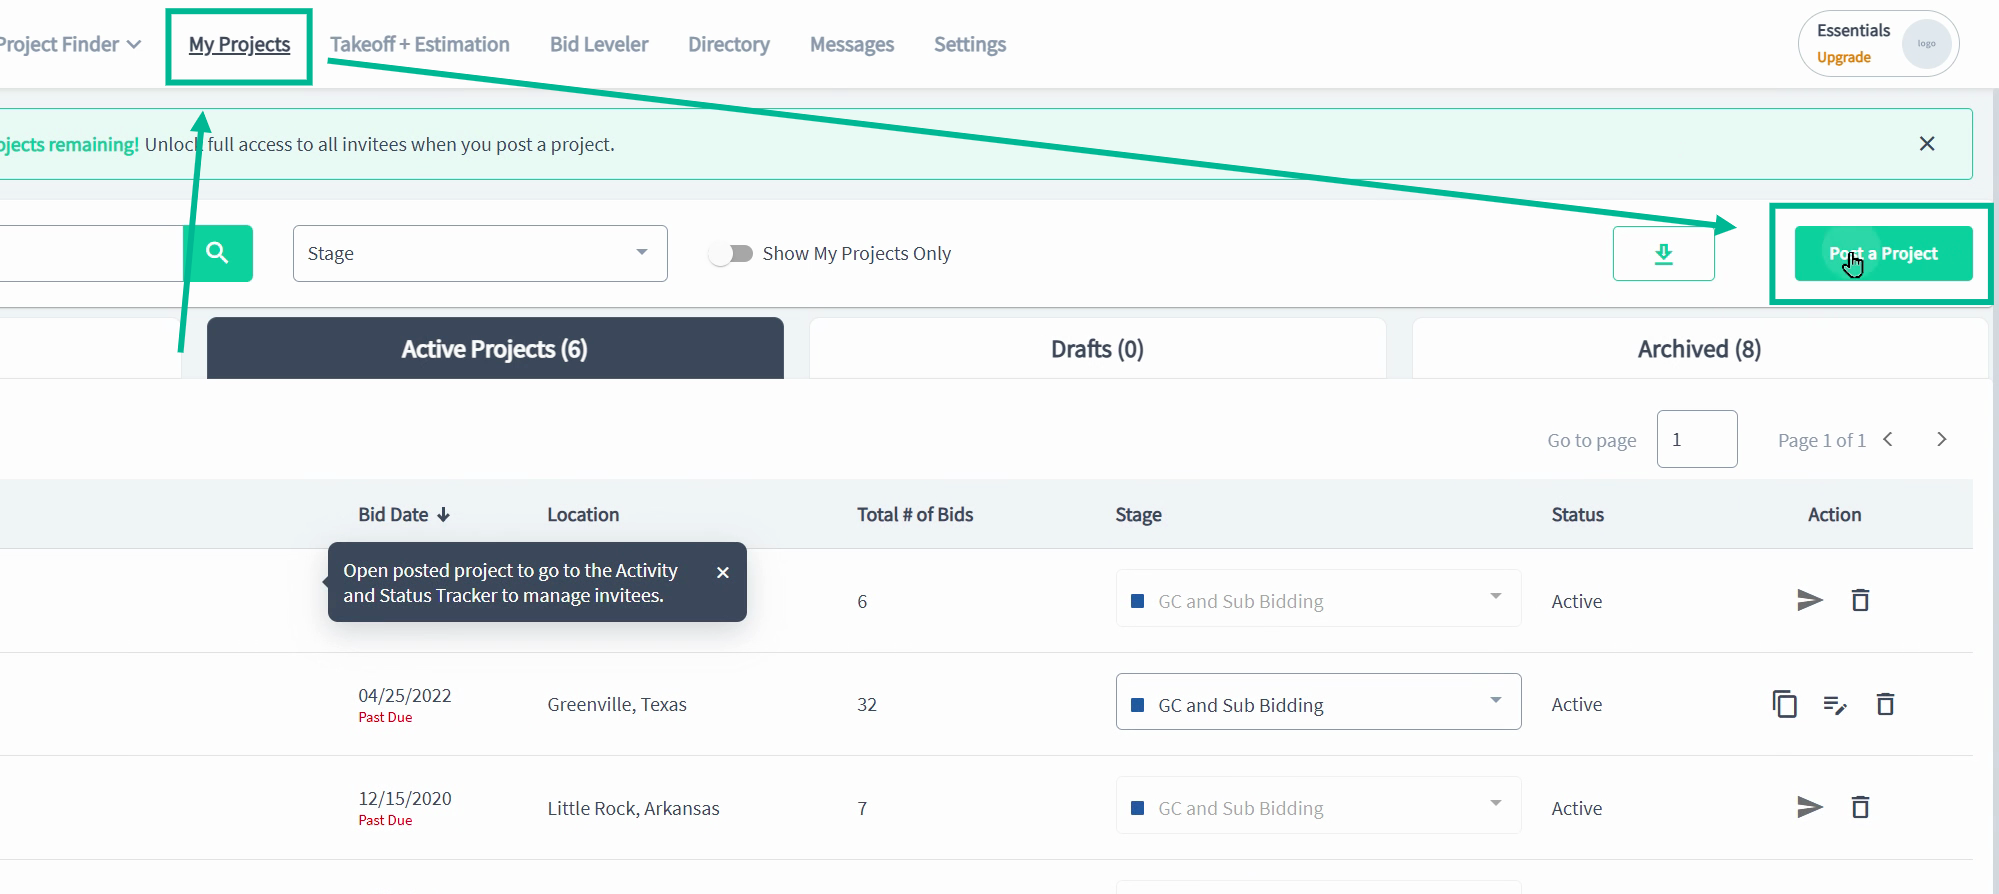 The posting process has four steps, each with required fields marked clearly. Provide detailed and accurate information for the best bidding results.
• Step 1: Project Information
Enter basic project info: project name, location, due date, and construction type. For checkboxes, select all that apply. Move on by clicking Save and Continue. • Step 2: Project Details
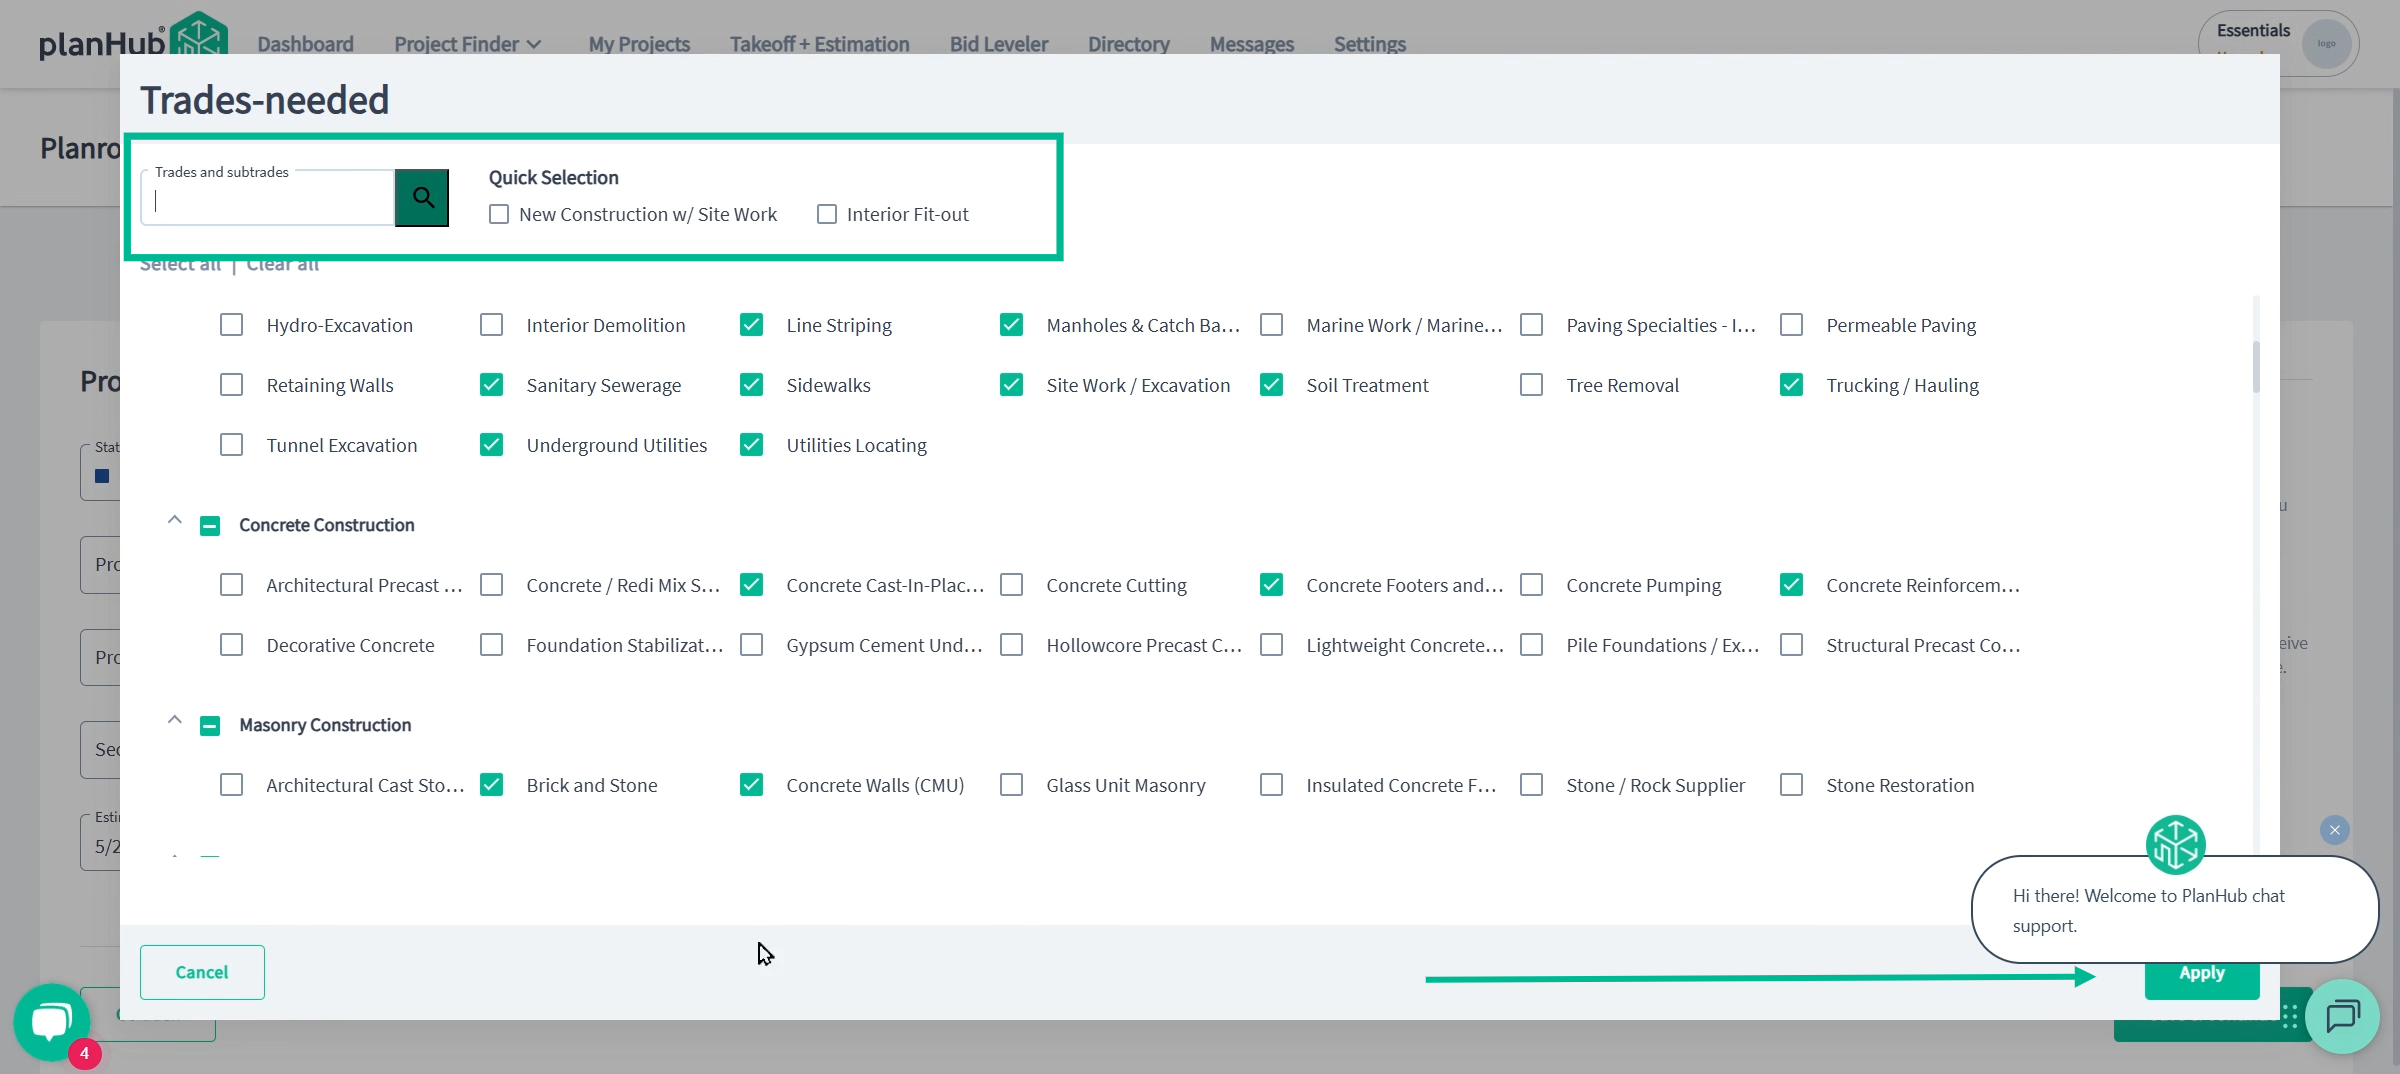
Add project details: bidding status, project type, building use, labor sector, start and completion dates, and project square footage and value. Include a description and select required trades. 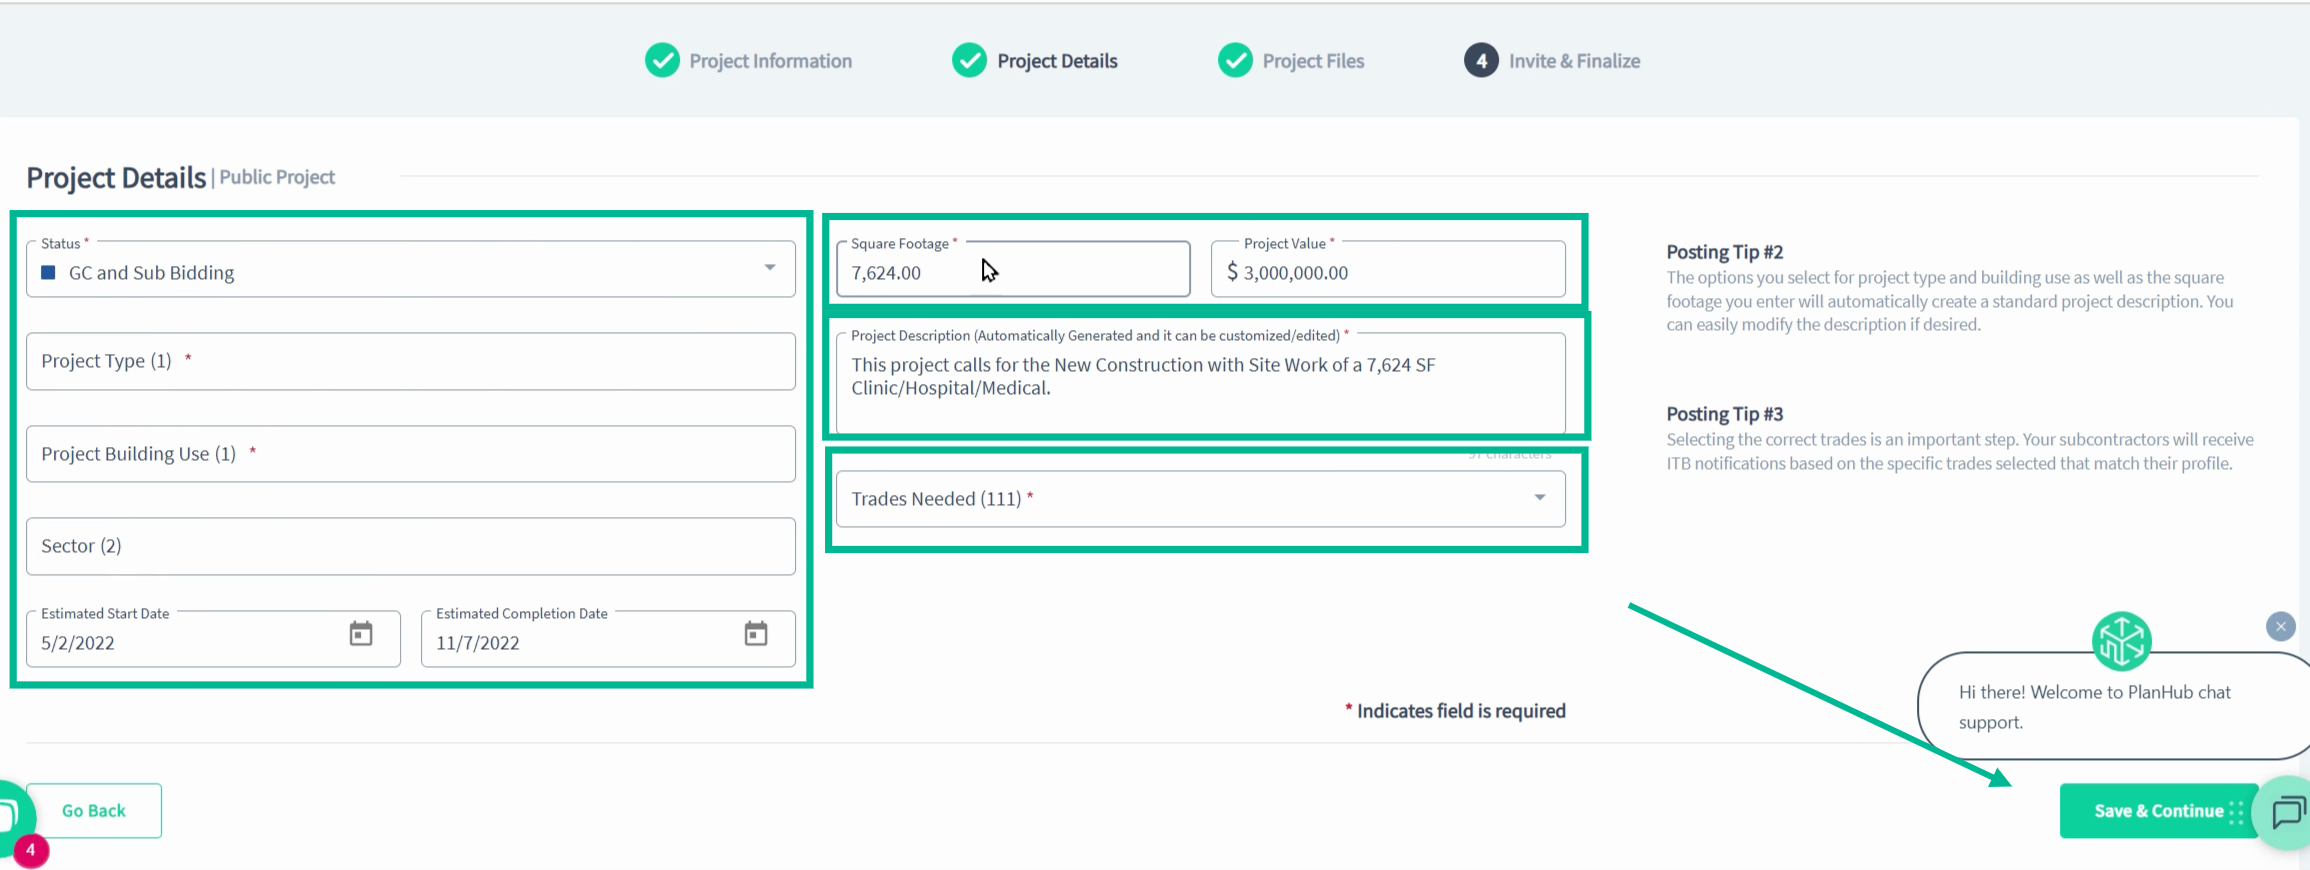 Use the Search box and quick selections to help speed up the trade selection process.
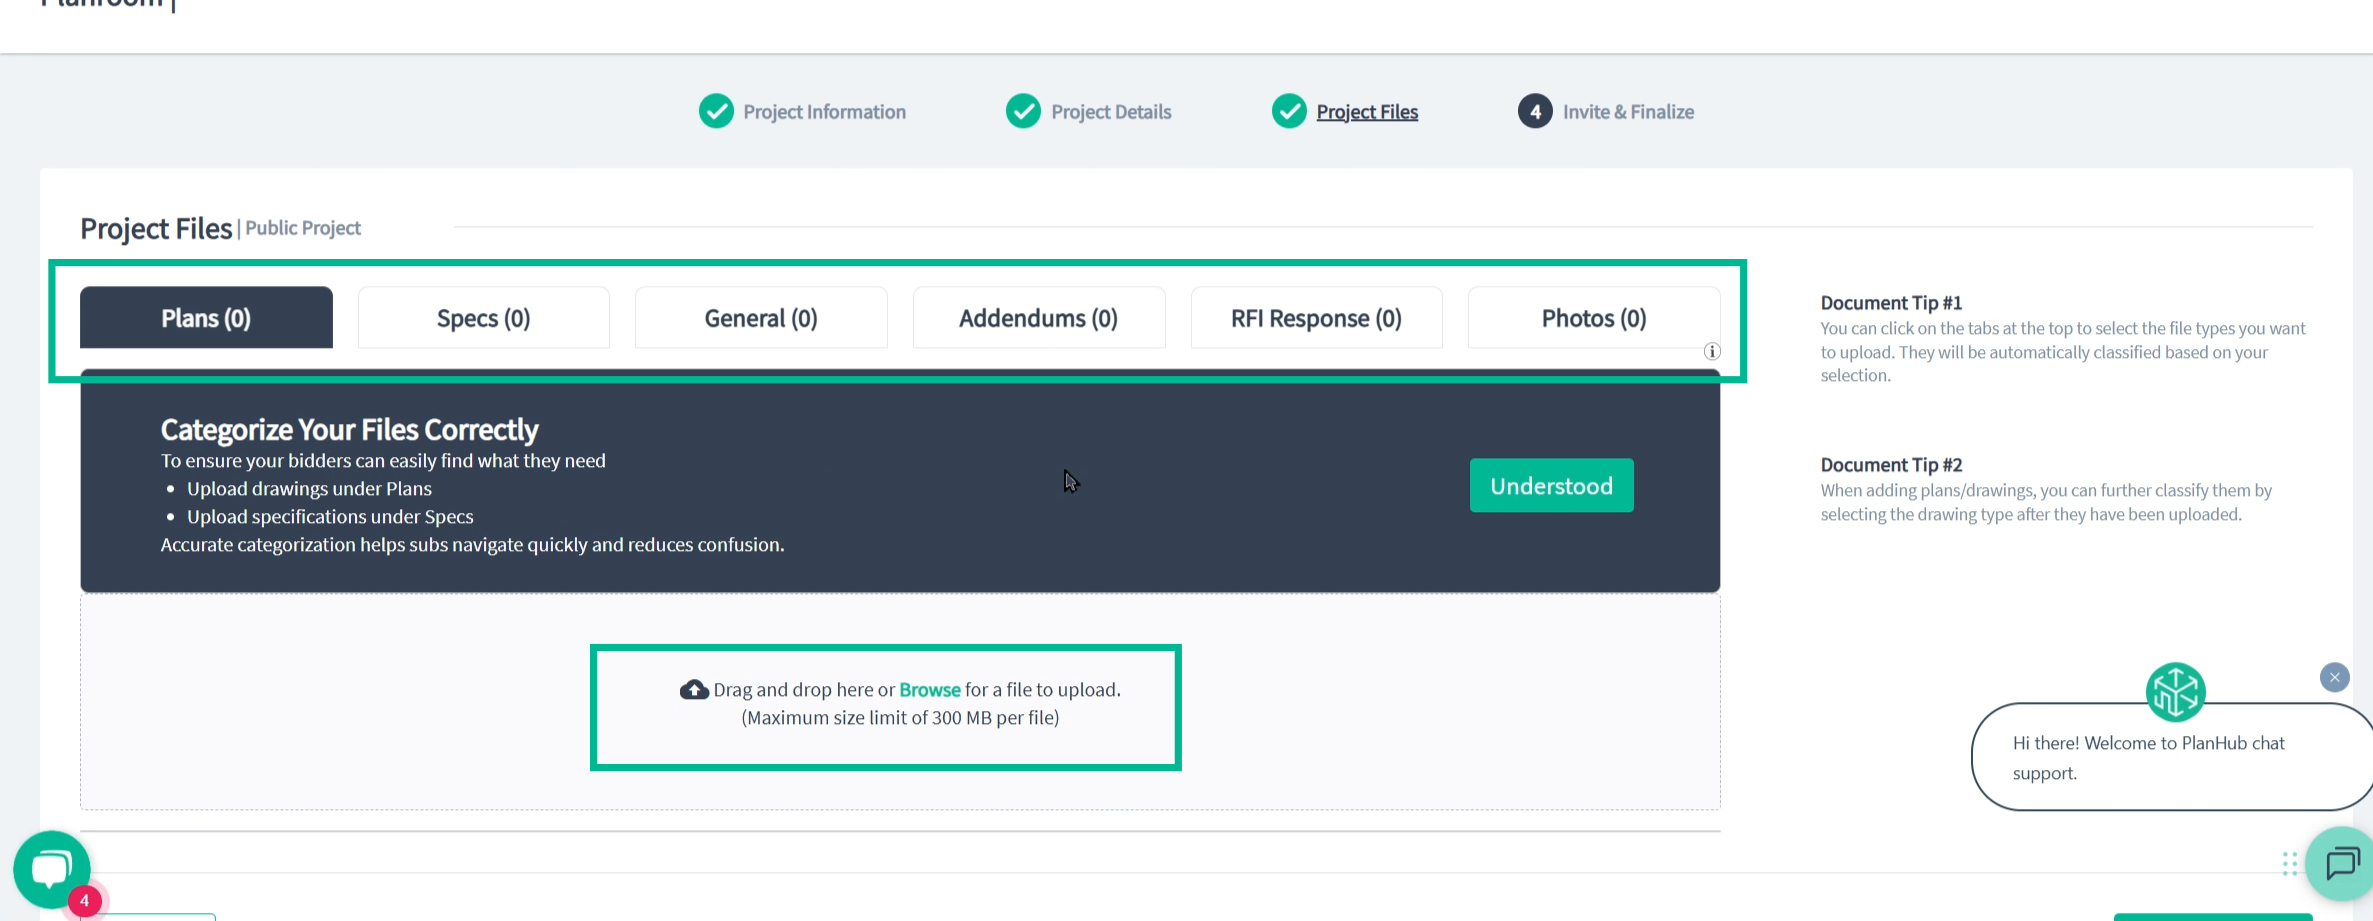
• Step 3: Project Files
Upload documents: Add drawings, specs, and any relevant files. Organize them so subs can find what they need.
• Step 4: Invite & Finish
Set invite preferences: Require prequalification if necessary, add bidding instructions, assign team members, set automated reminders, and finalize invitees. Click "Invite and Finish" once you are ready to post your project and invite bidders. 
Step 4: Review and Manage Your Project
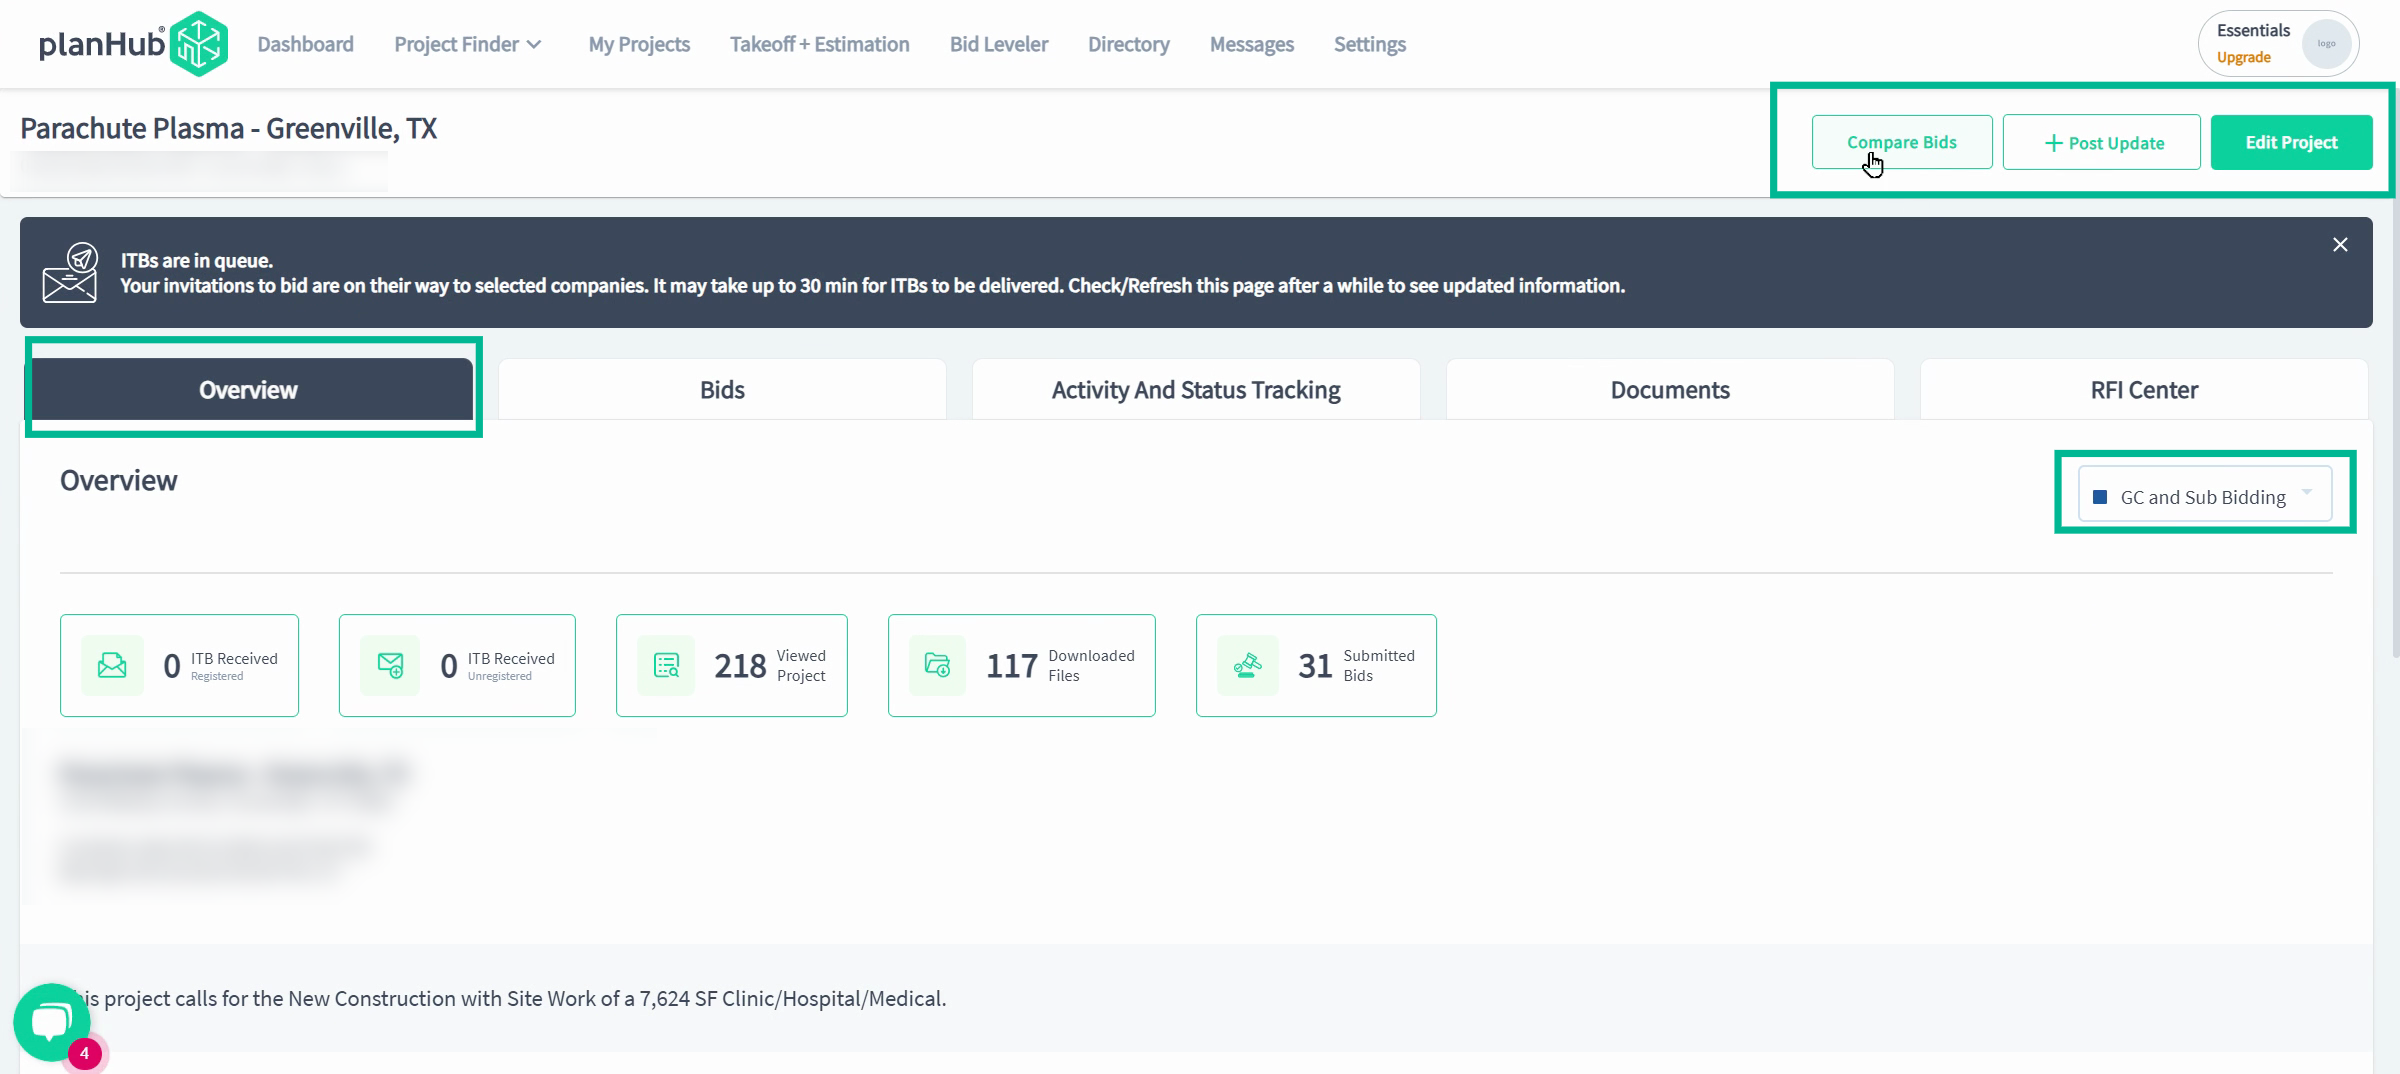
After posting, access the project's overview page to review info and manage the project posting. 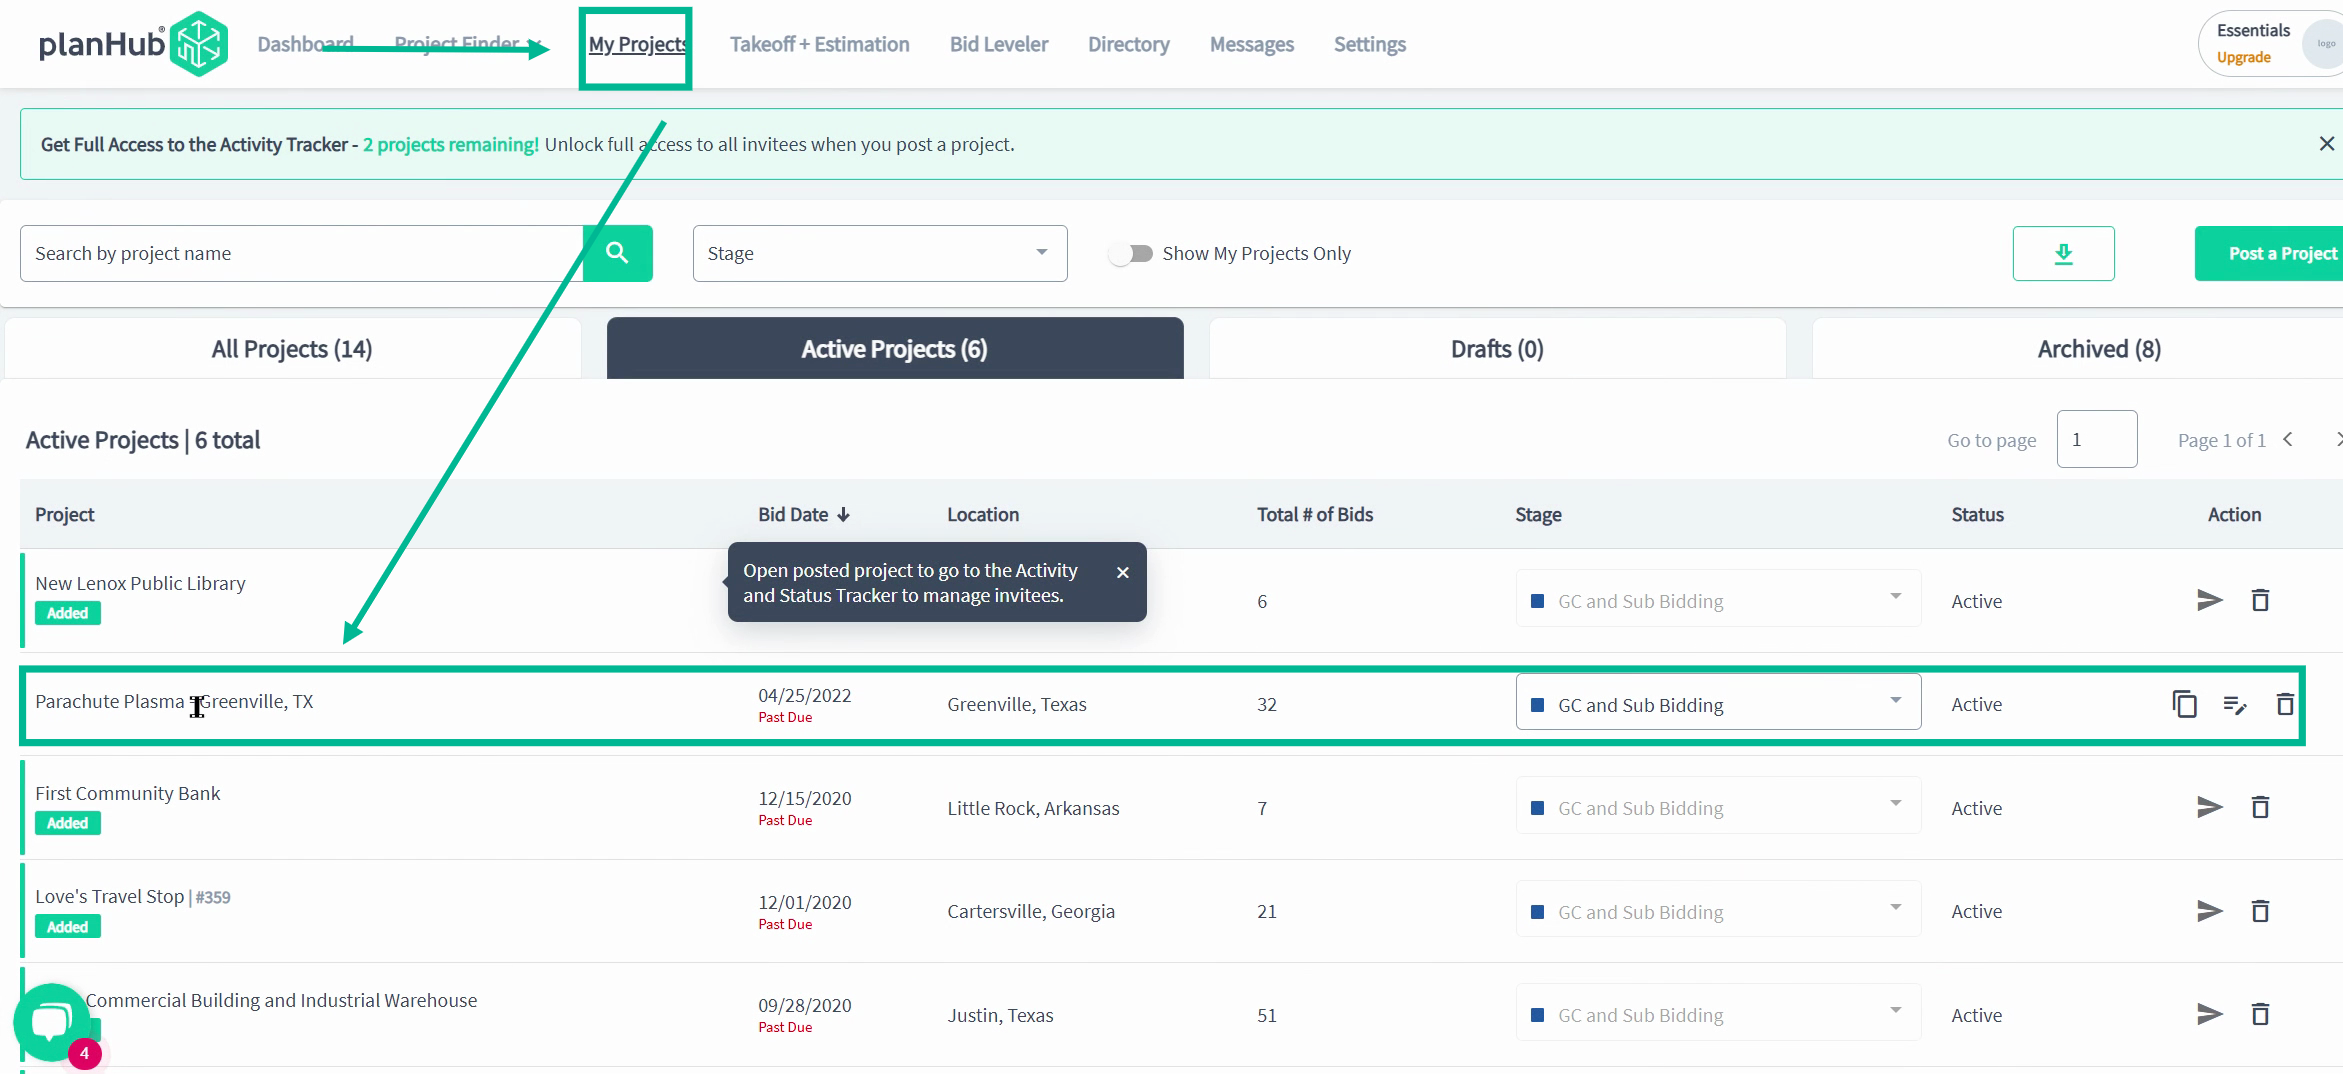 In the Project Overview, the first tab is called "Overview". Here, you can review the posting information, update your posting status, post updates, and edit the project to add trades or files to the posting for addenda.
Track project activity by using the live Activity and Status Tracking tab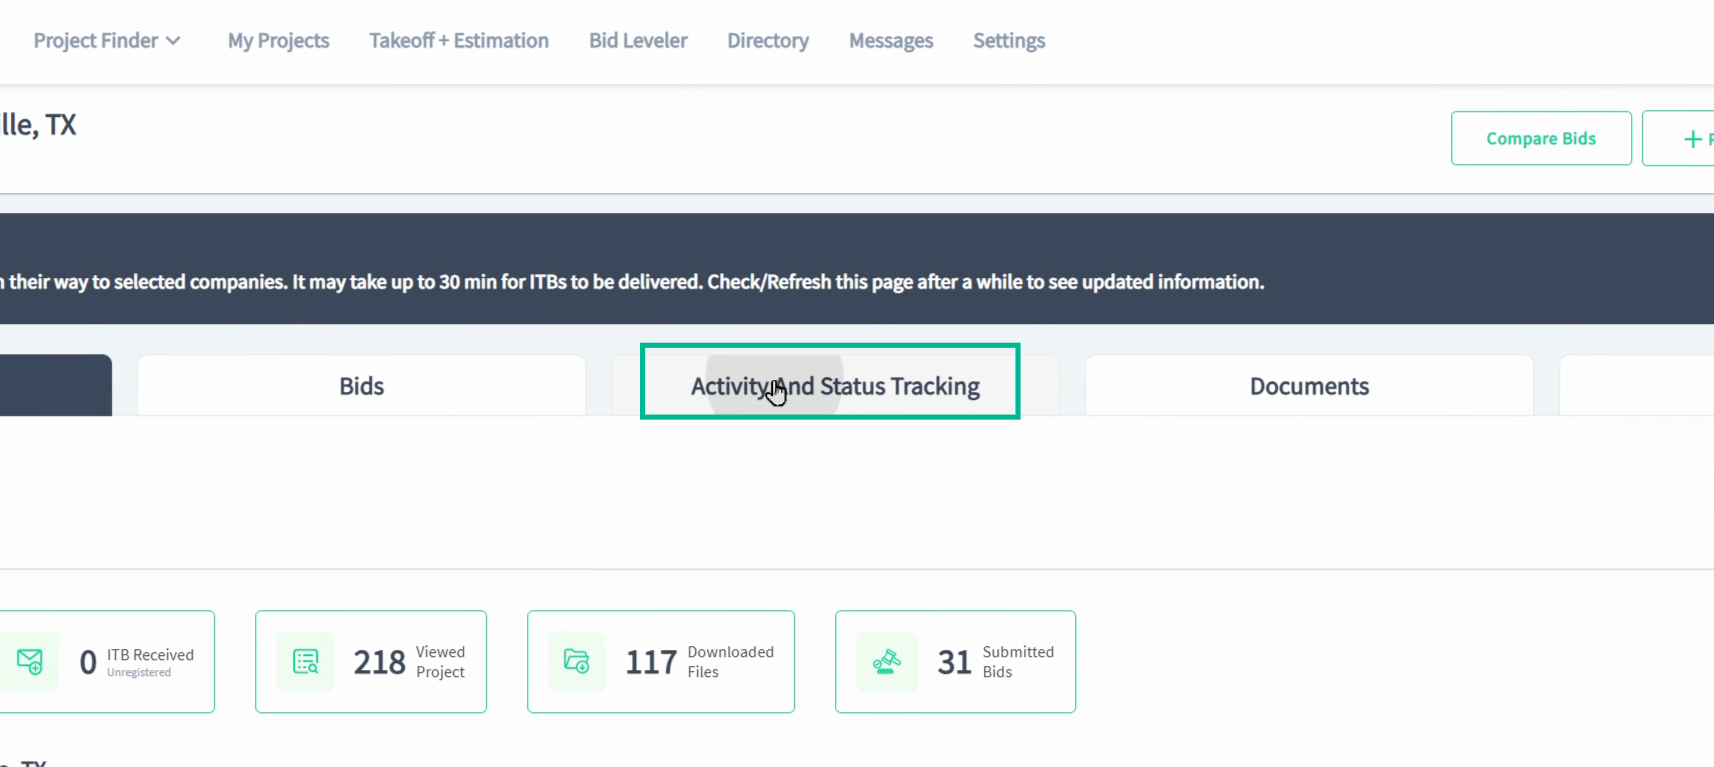 Here, you can filter and connect with interested bidders by trade and company type.
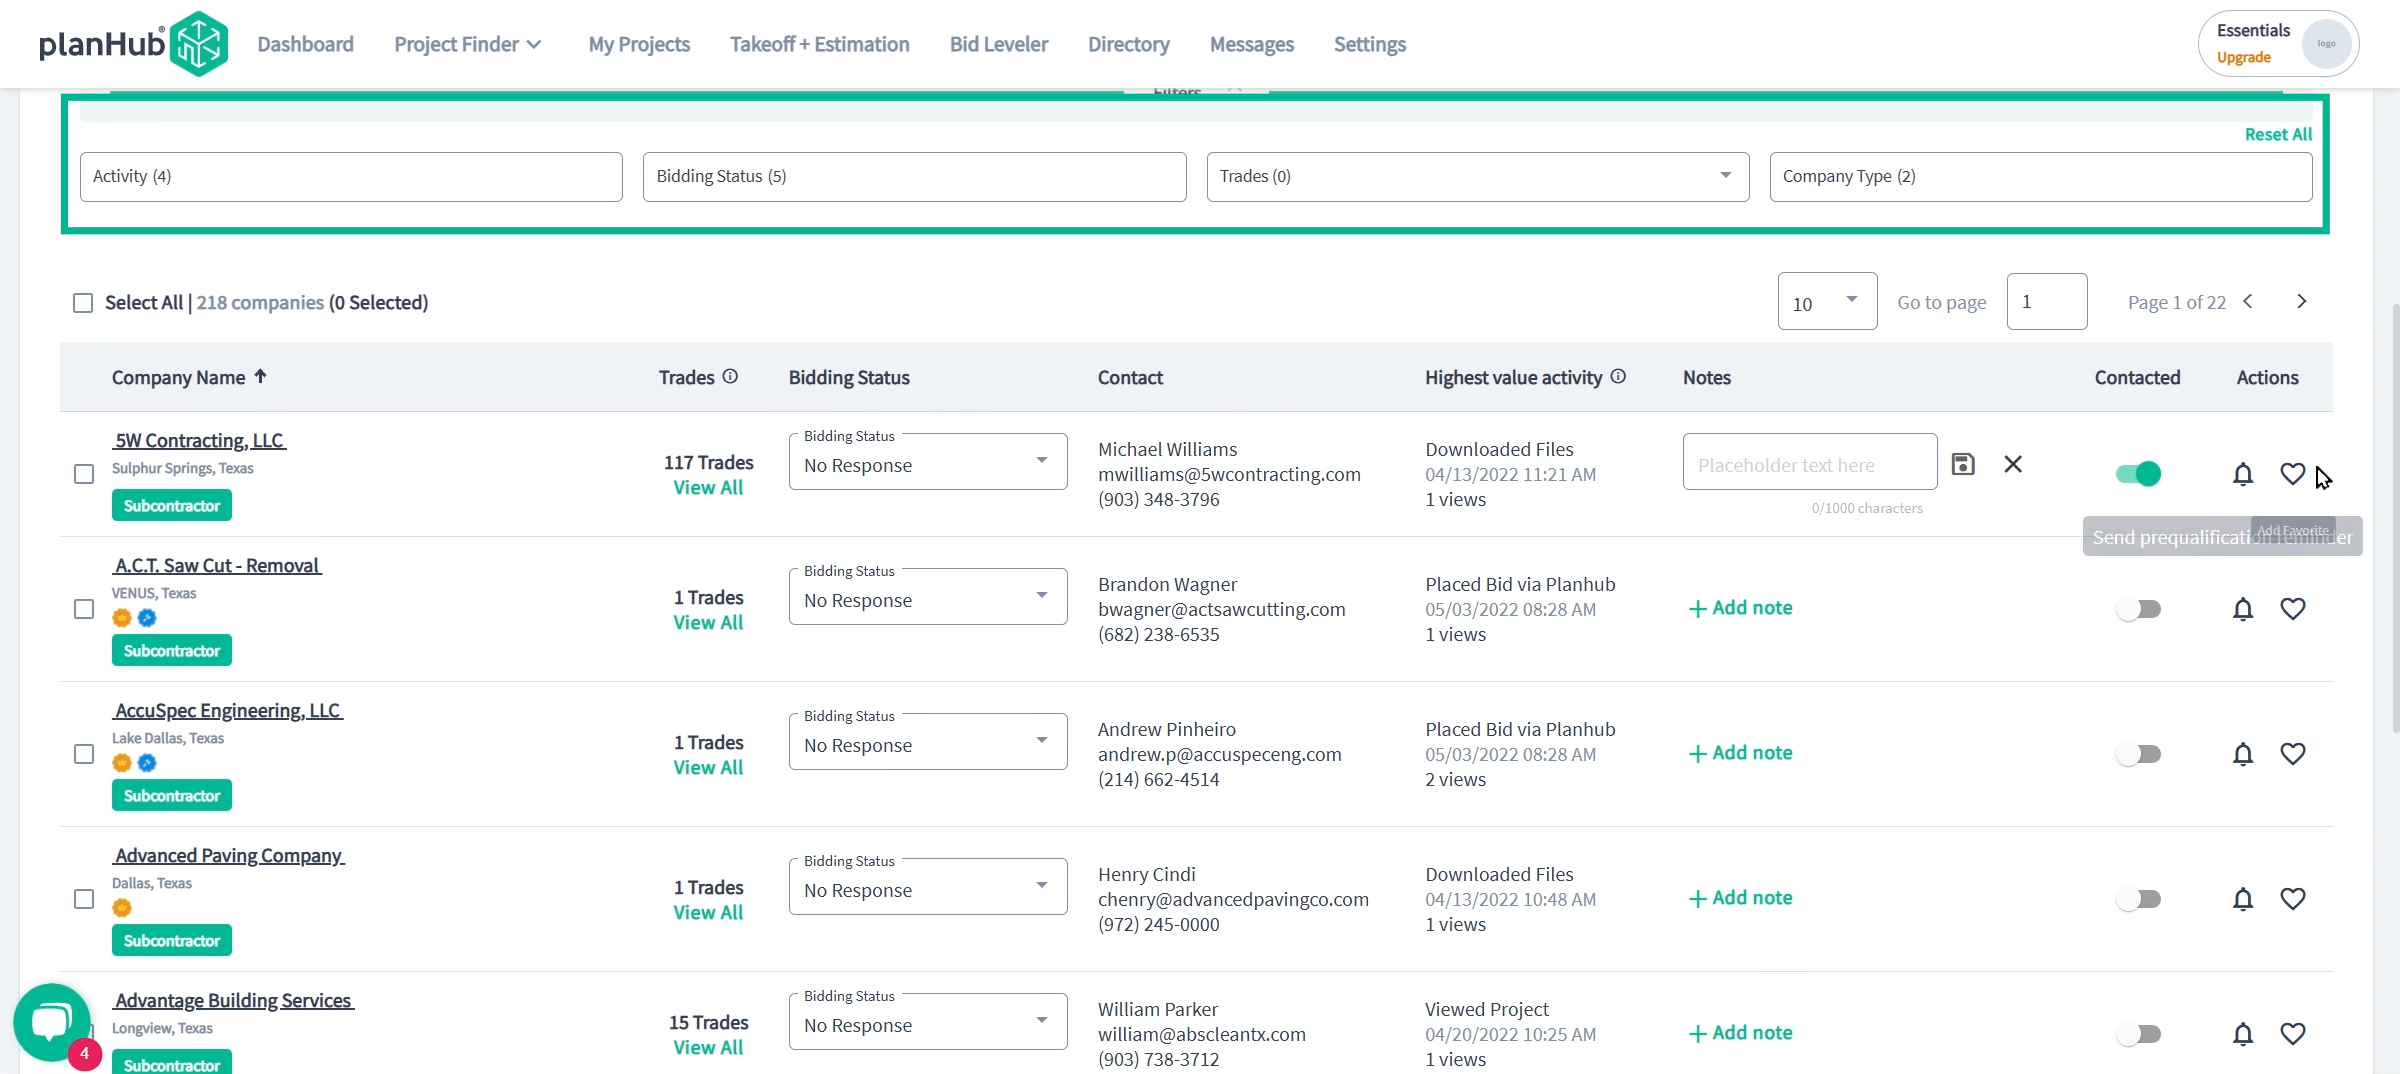
Manage ITB responses, track contacts, and build your favorites list
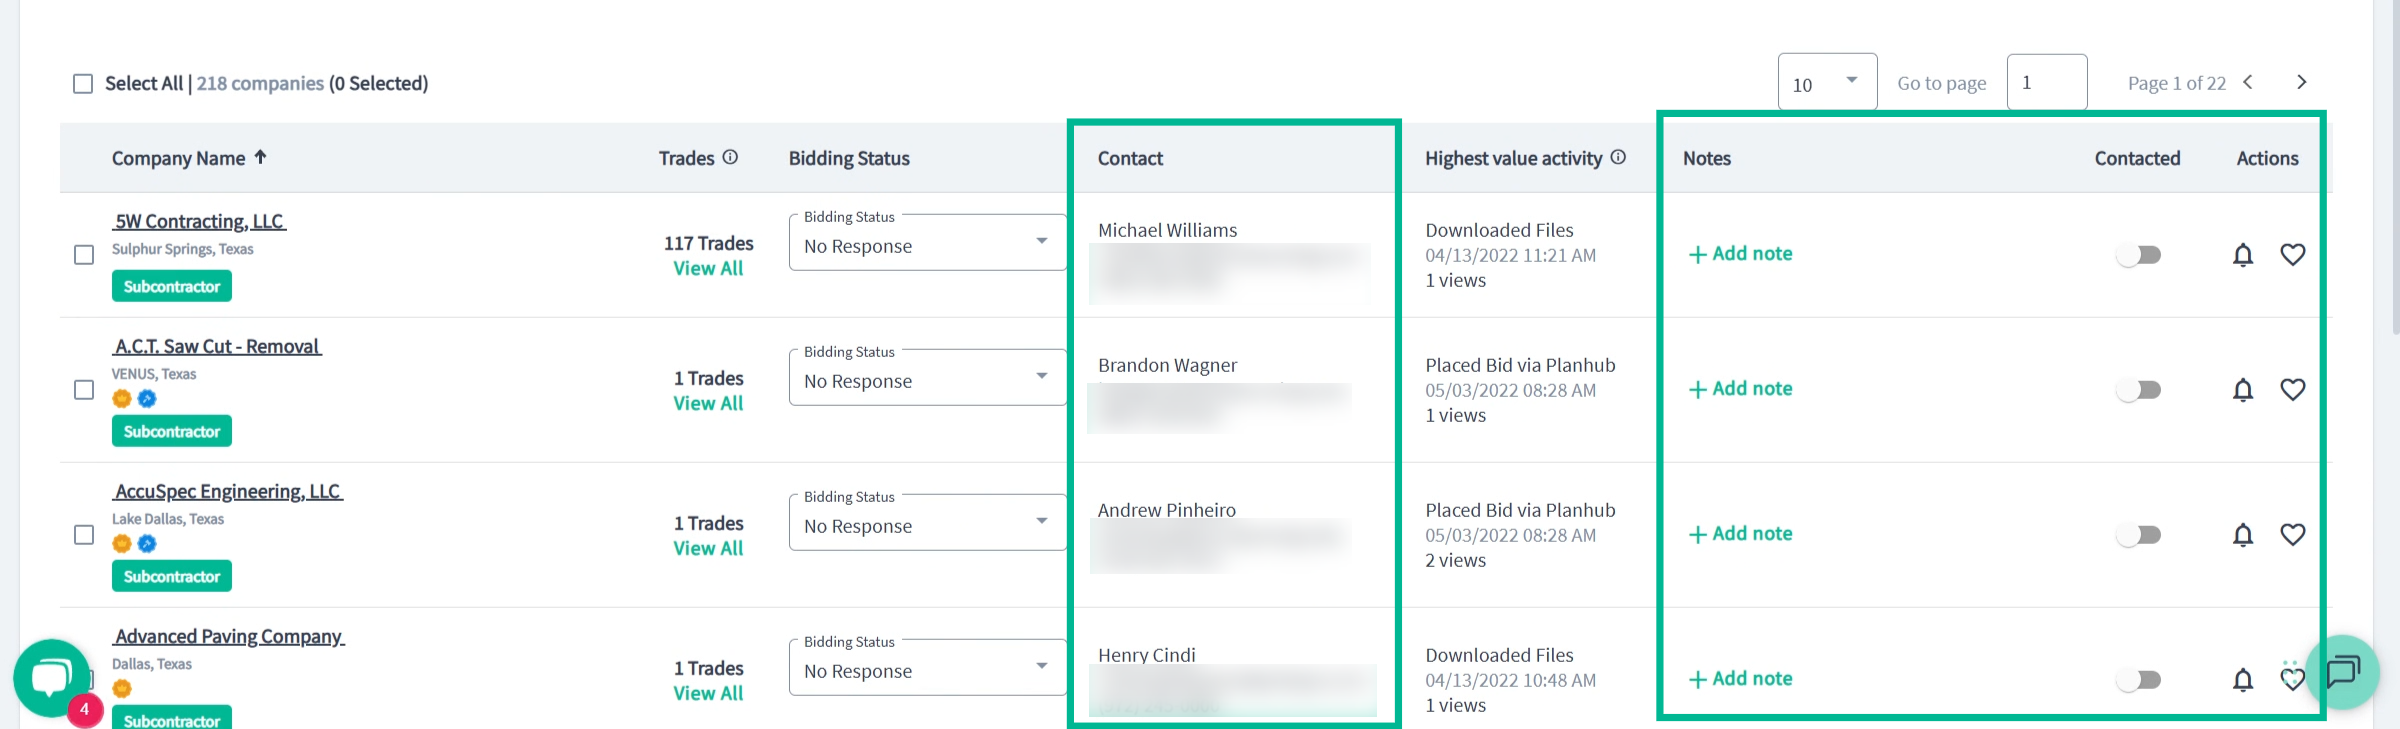
And send bulk messages so you can work to build new relationships rapidly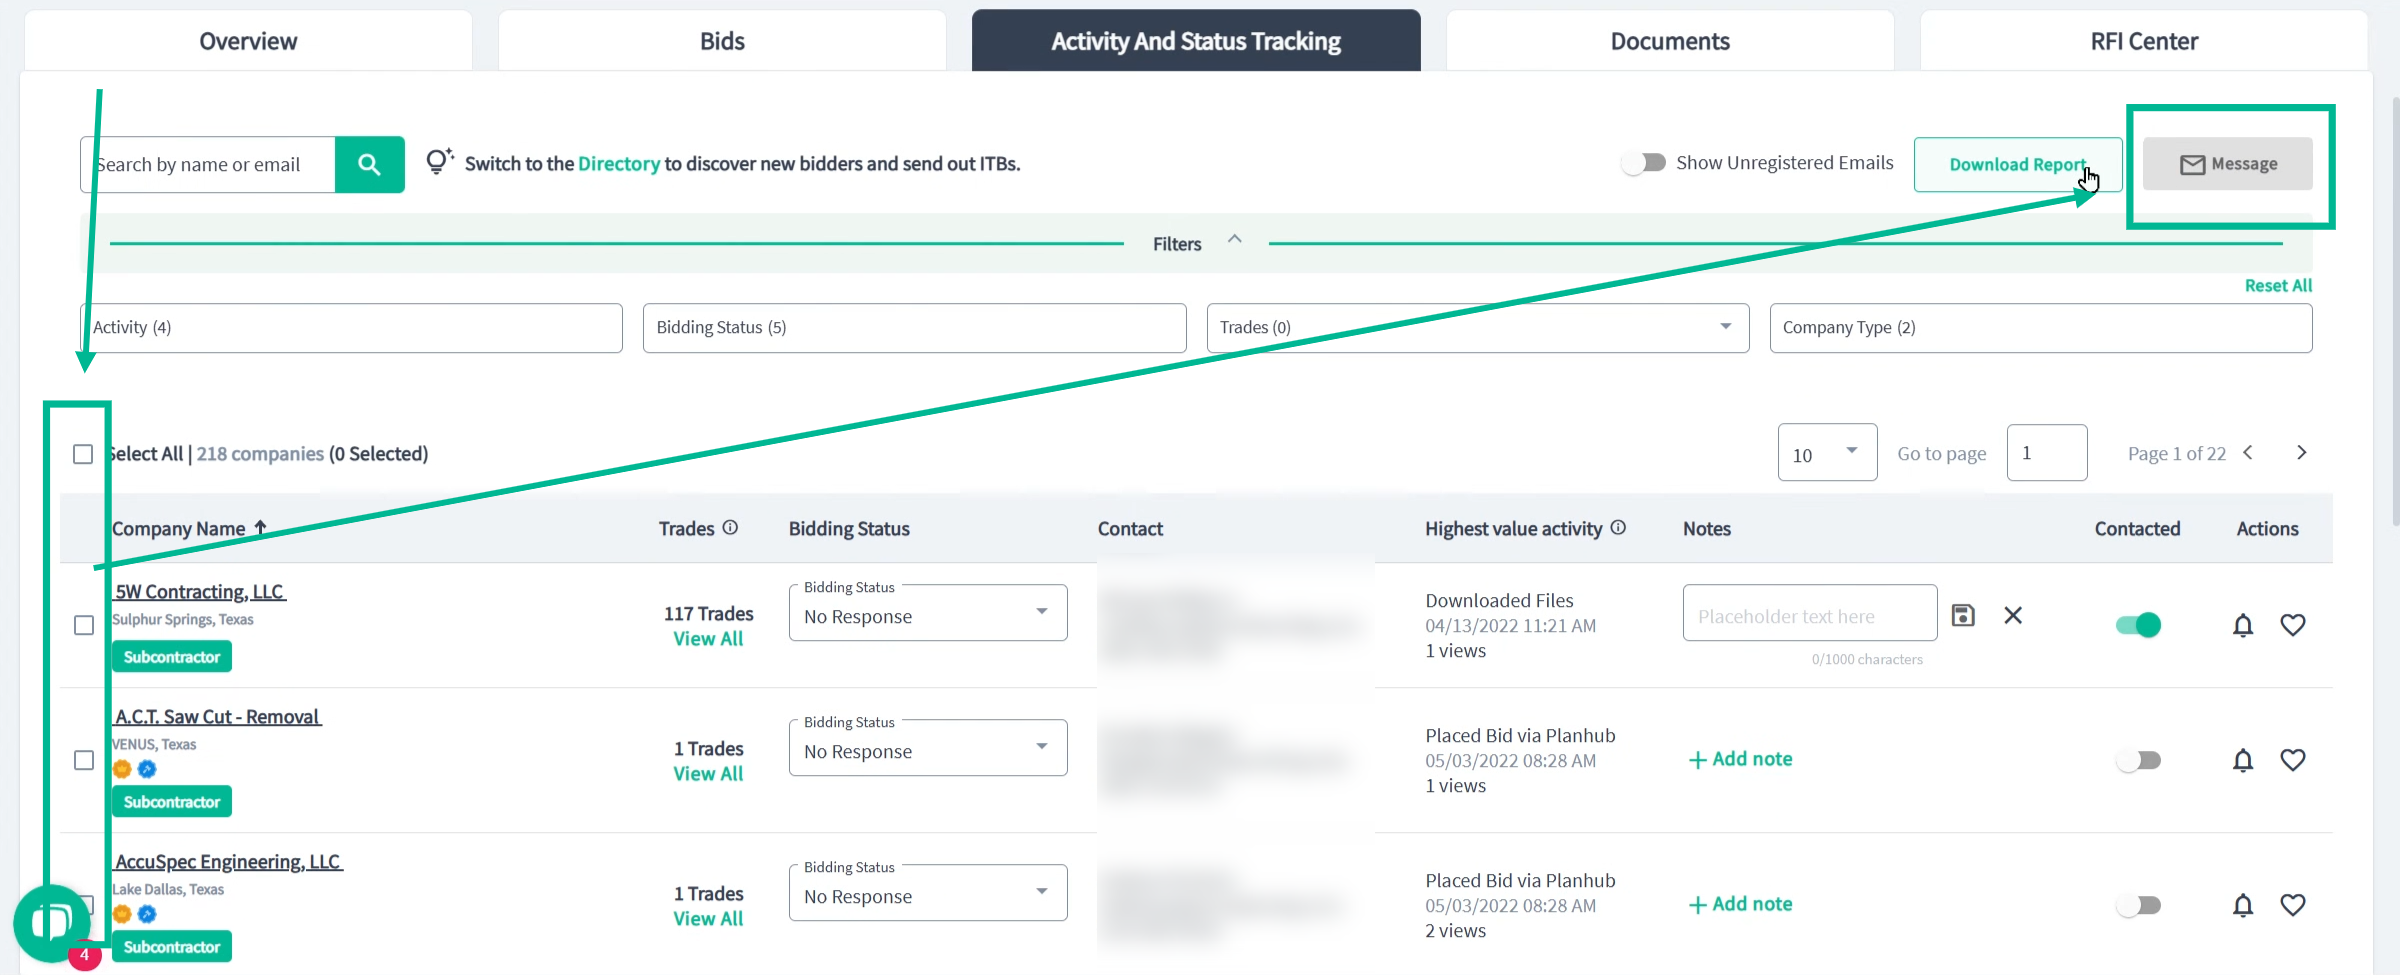
Step 5: Manage Bids and Provide Feedback
Go to the Bids tab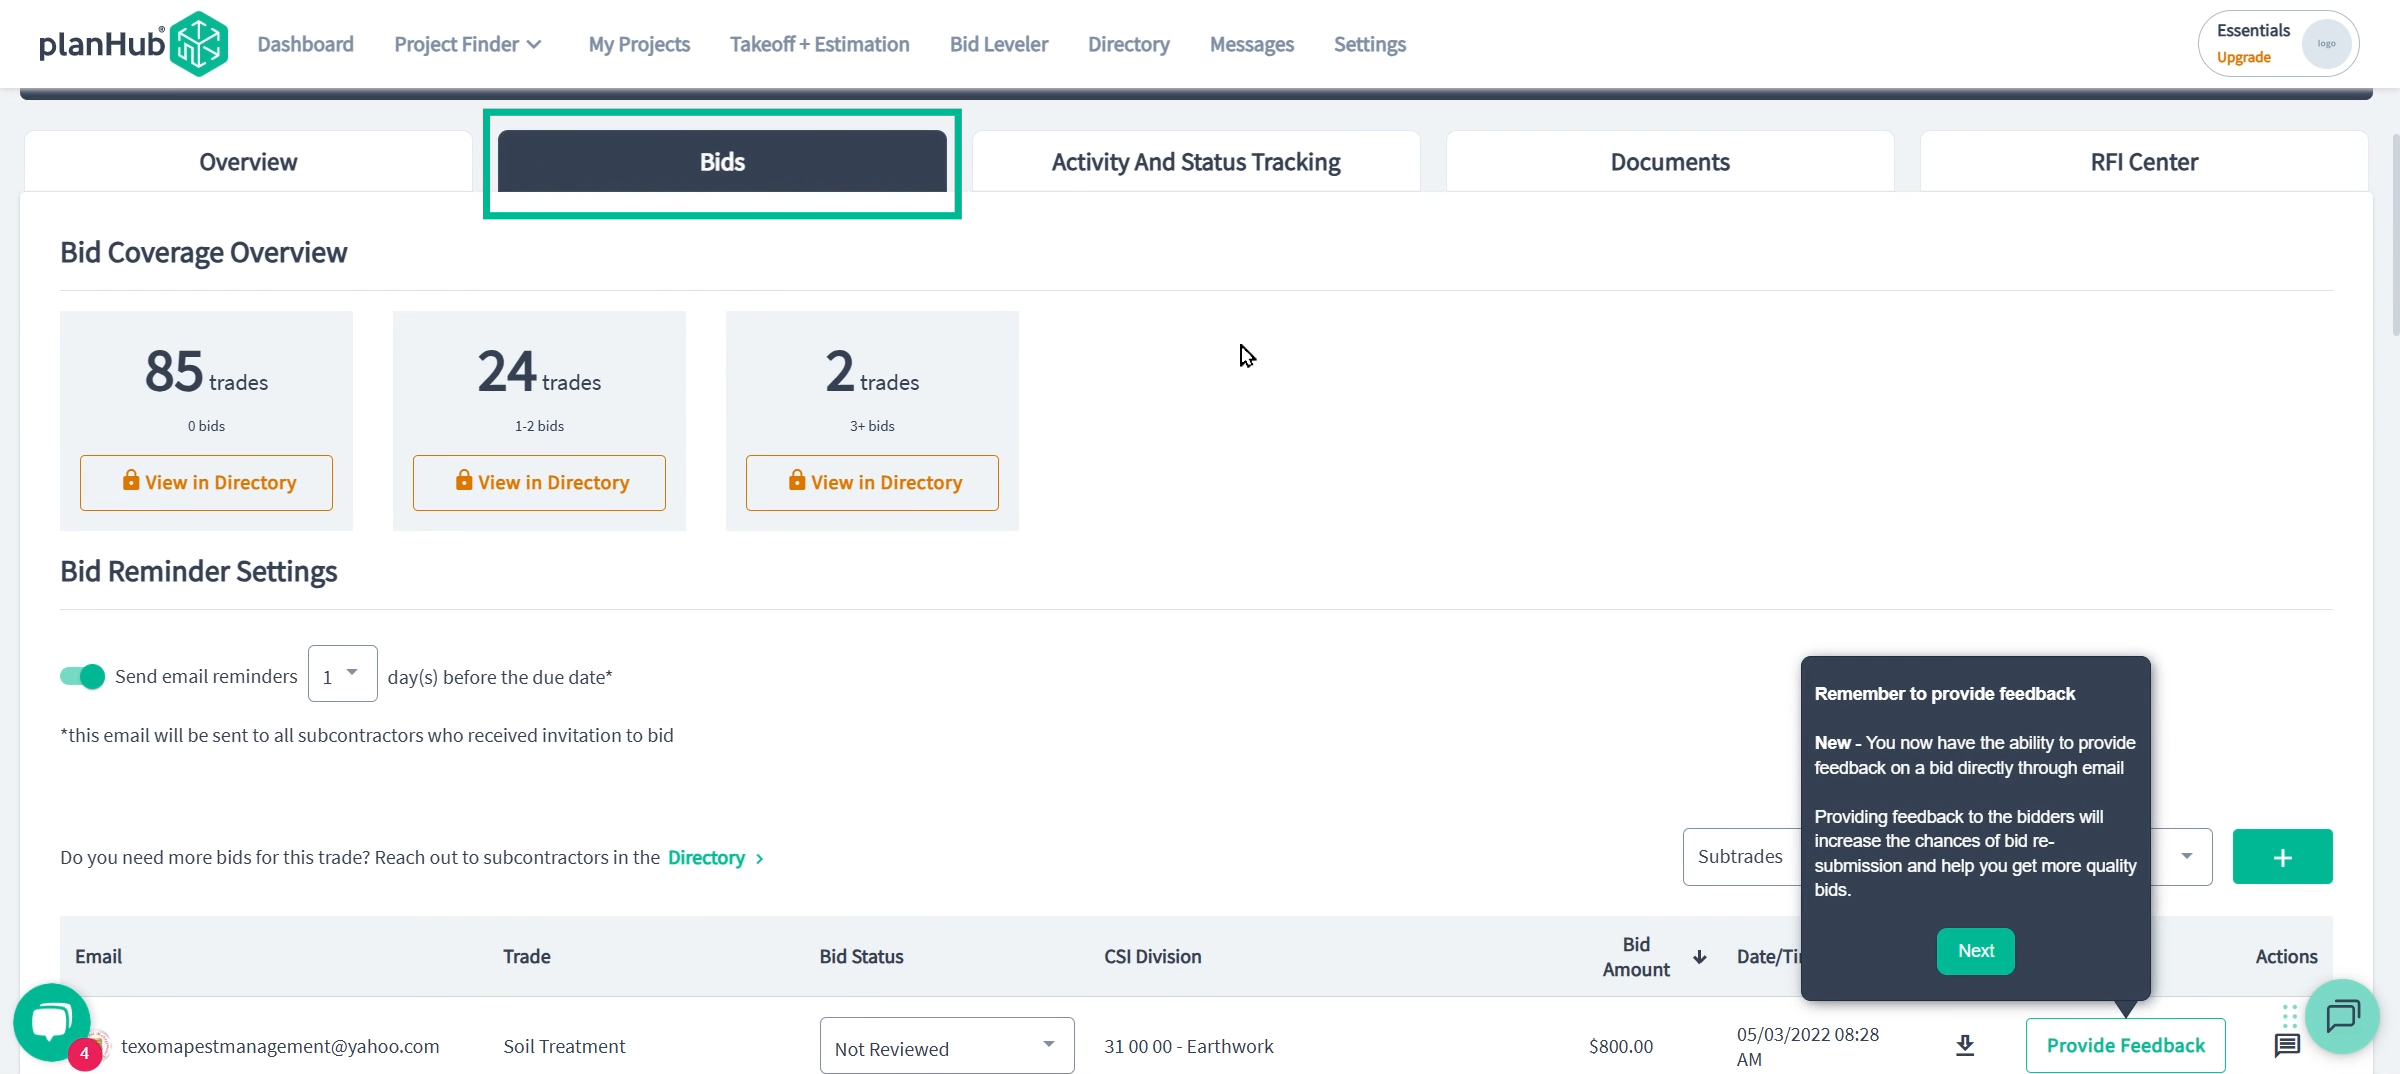
Quickly import bids so your team can keep track of all the bids you have received from all your bidding platforms:
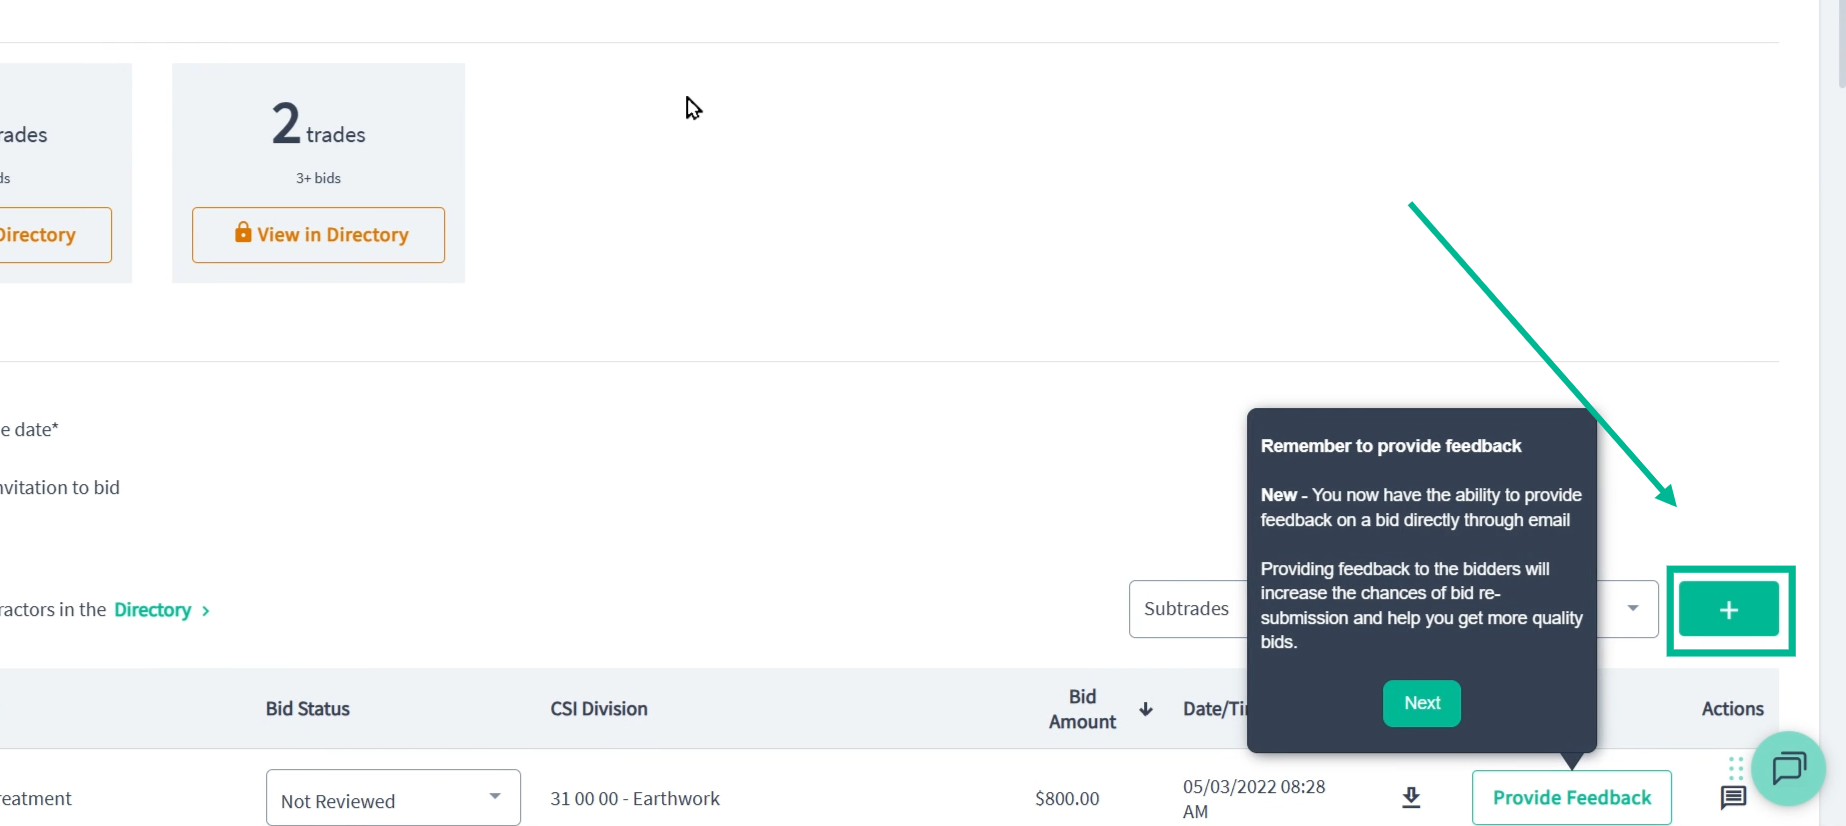 Build trust and encourage bidders to continue bidding your jobs by giving feedback and notifying them if they were awarded or non-awarded bids.
If you were not awarded the job, it is still important to notify the bidders of your change in your bidding status to keep the process honest and efficient.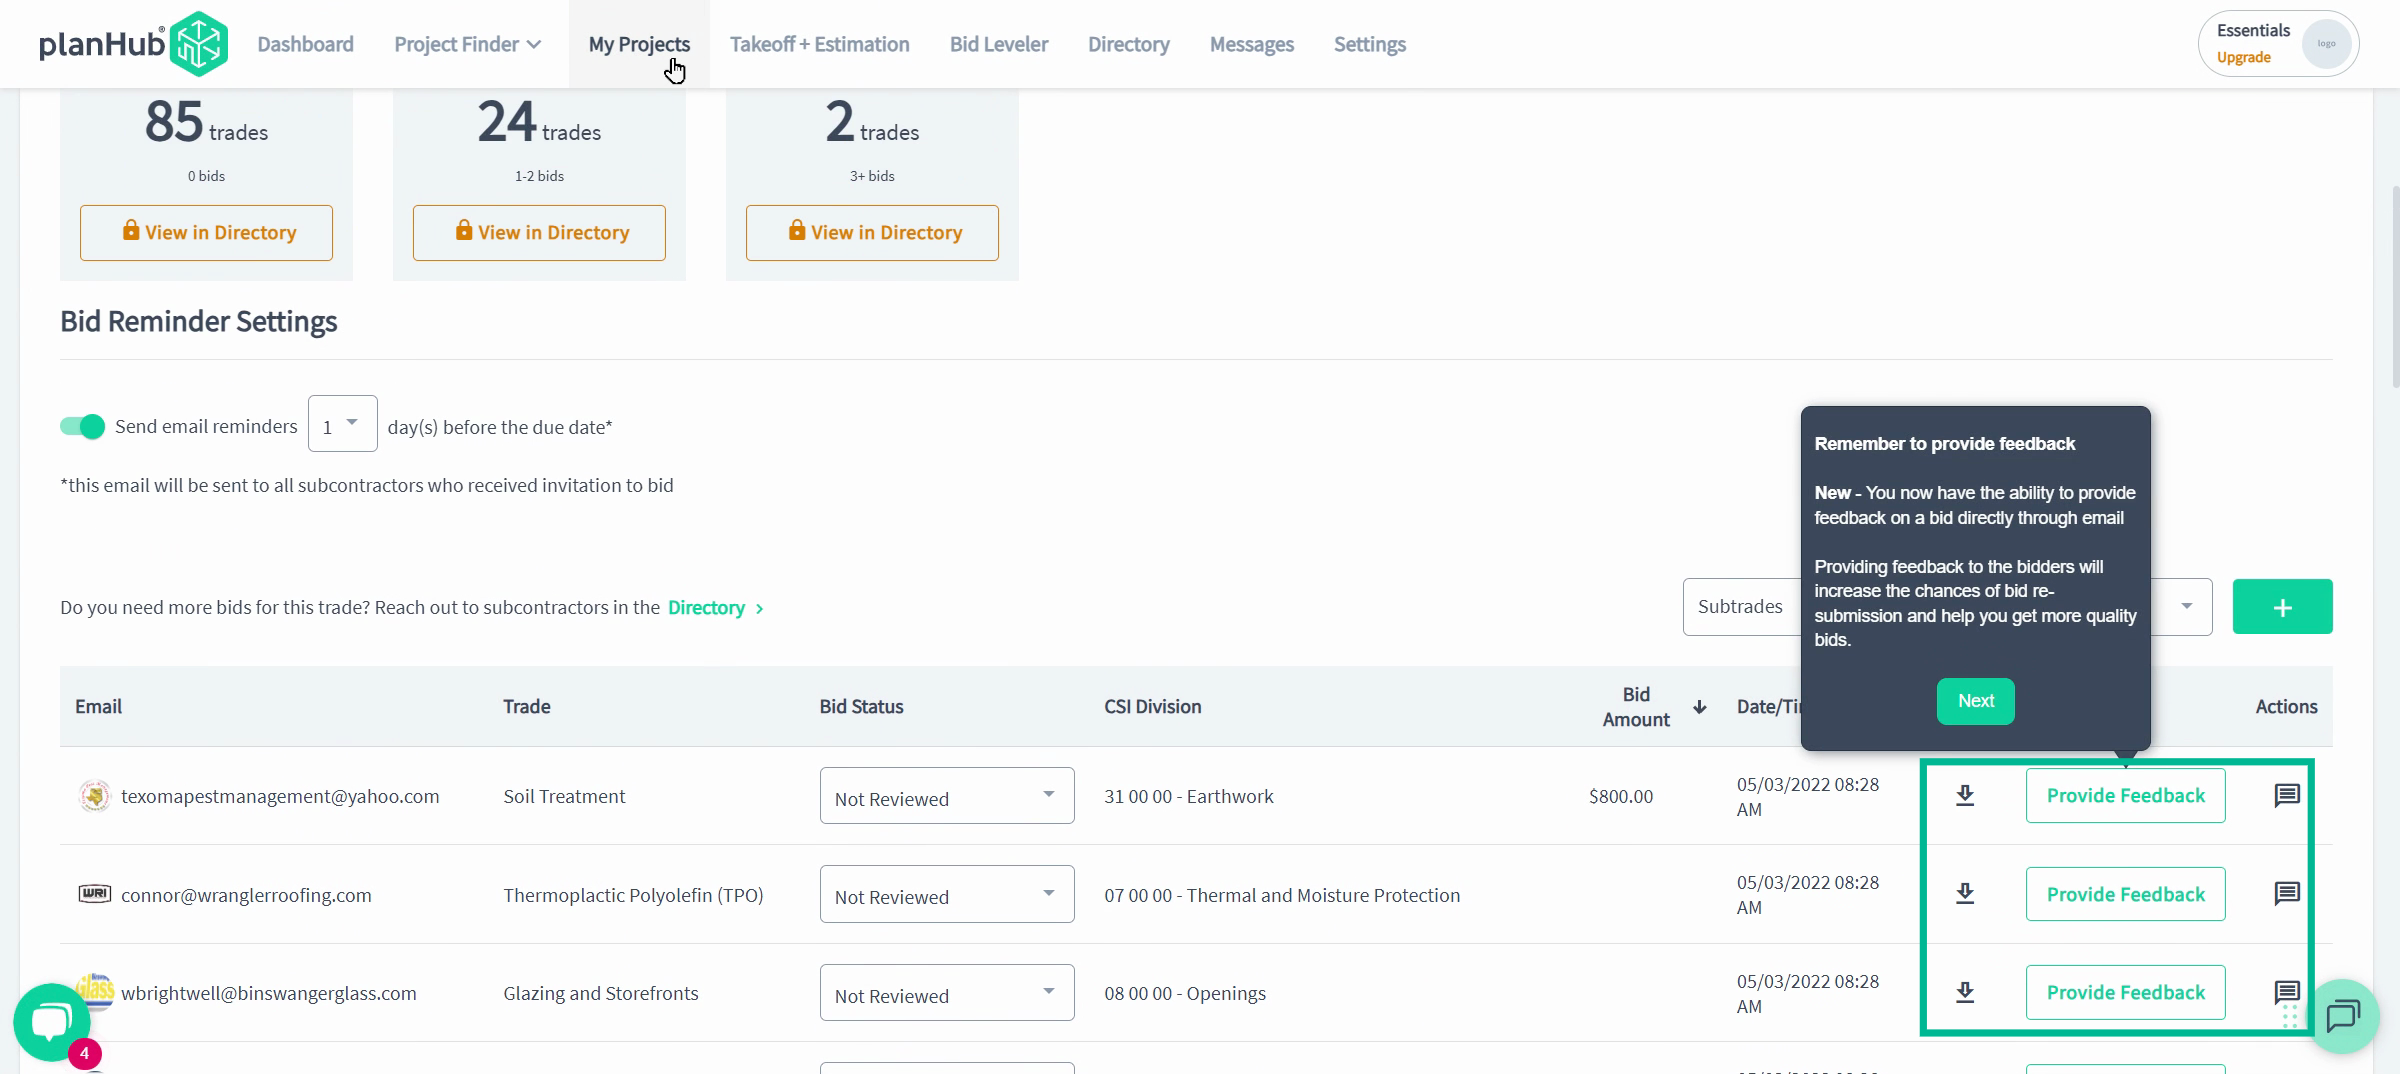
Stay organized on the My Projects page, updating statuses as projects move through bidding, awarding, or completion stages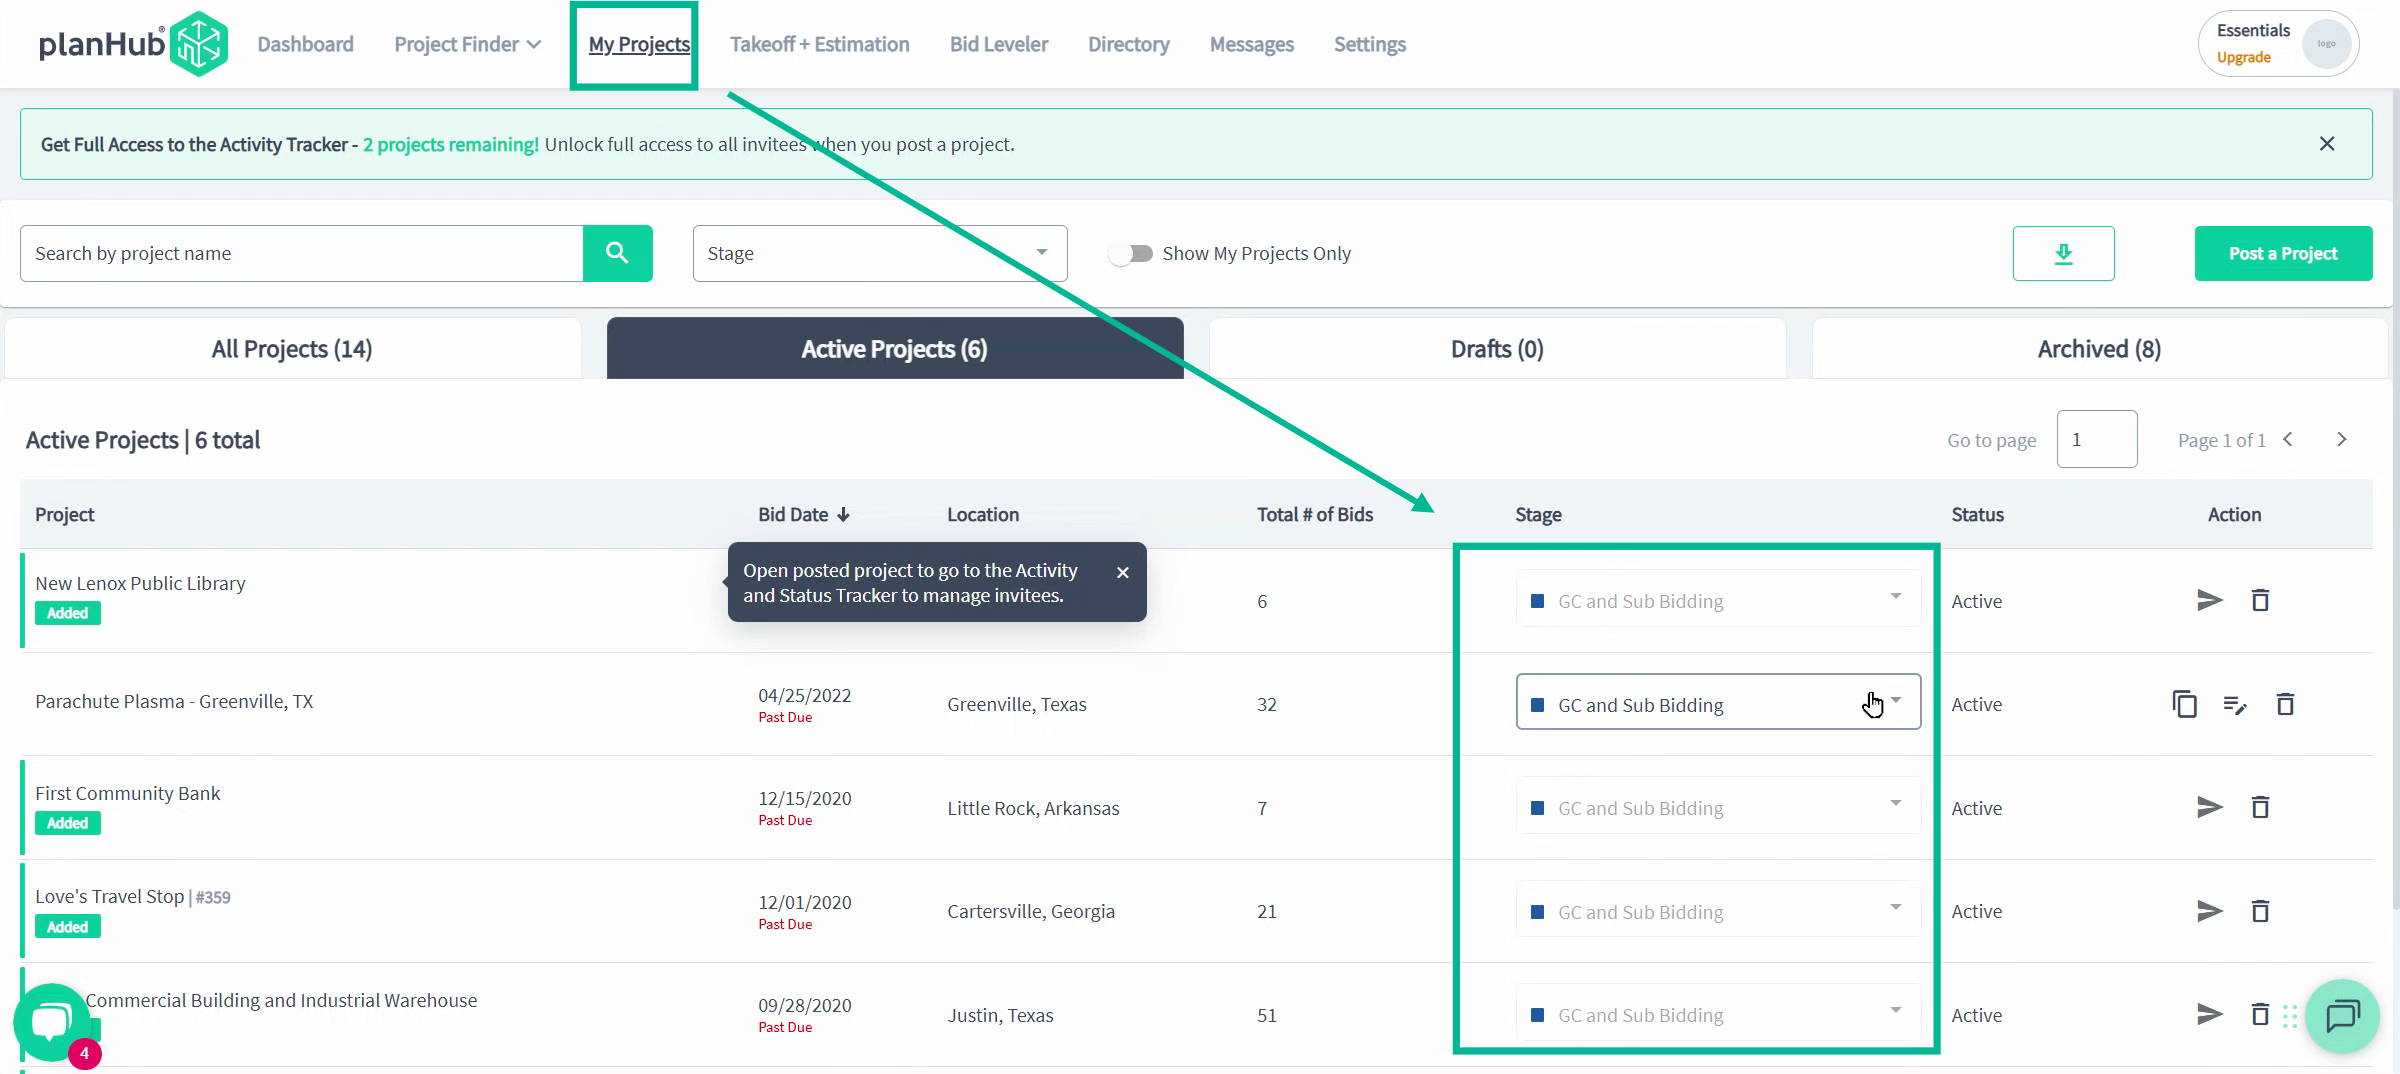
General contractors who complete their profile, invite preferred bidders, post detailed projects, keep statuses updated, and provide bid feedback see more bids and better engagement, and it's all free!
If you have questions, connect with your General Contractor team via email at GCHelp@planhub.com
Troubleshooting
Contact us if you need assistance or to report an issue:
- PlanHub Contact Page: https://planhub.com/contact/
- Customer Facing Support Ticket Link: https://knowledgebase.planhub.com/knowledge/kb-tickets/new
- Customer Success Team: CustomerSuccess@planhub.com