Prerequisites: You need a subscription or trial that includes Takeoff to measure plans, export a plan into TakeOff, and set the scale. Then you can begin measuring.
How to Begin a Takeoff In PlanHub
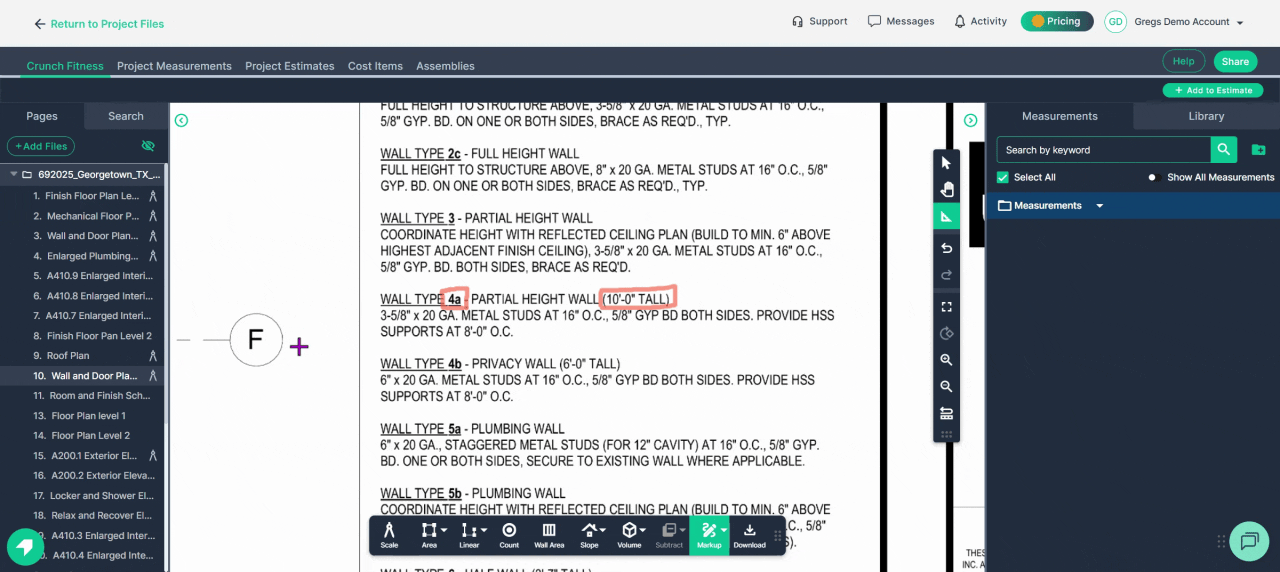
- Locate the target walls. This example measures wall type 4A—with gypsum board on both sides and a height of 10 feet.
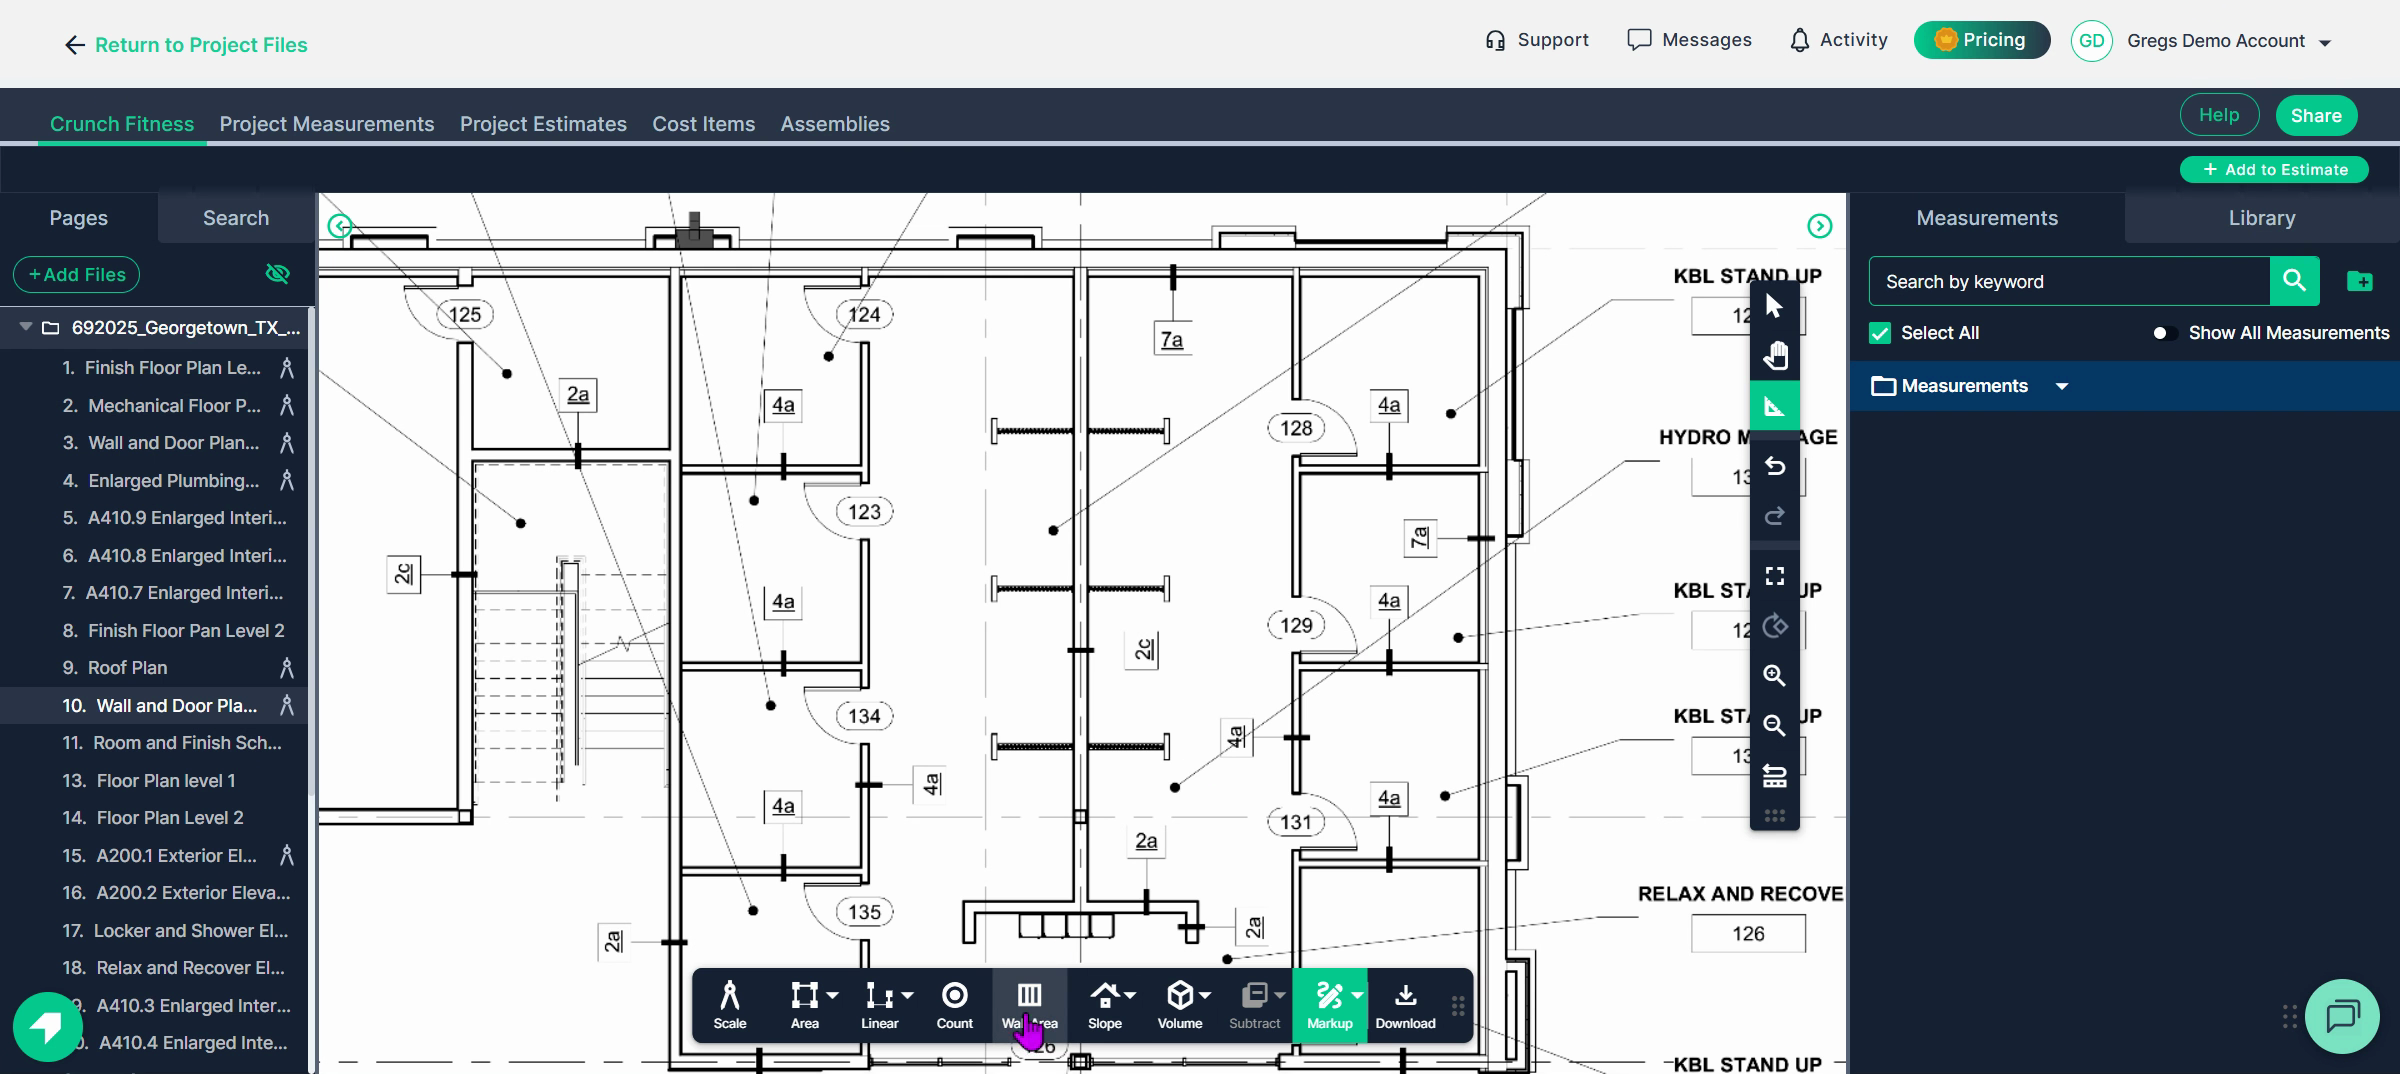
Step 2: On the toolbar, select the Wall Area Tool. This tool quickly calculates wall length, the number of studs needed at based on on-center spacing, and drywall sheet quantities.
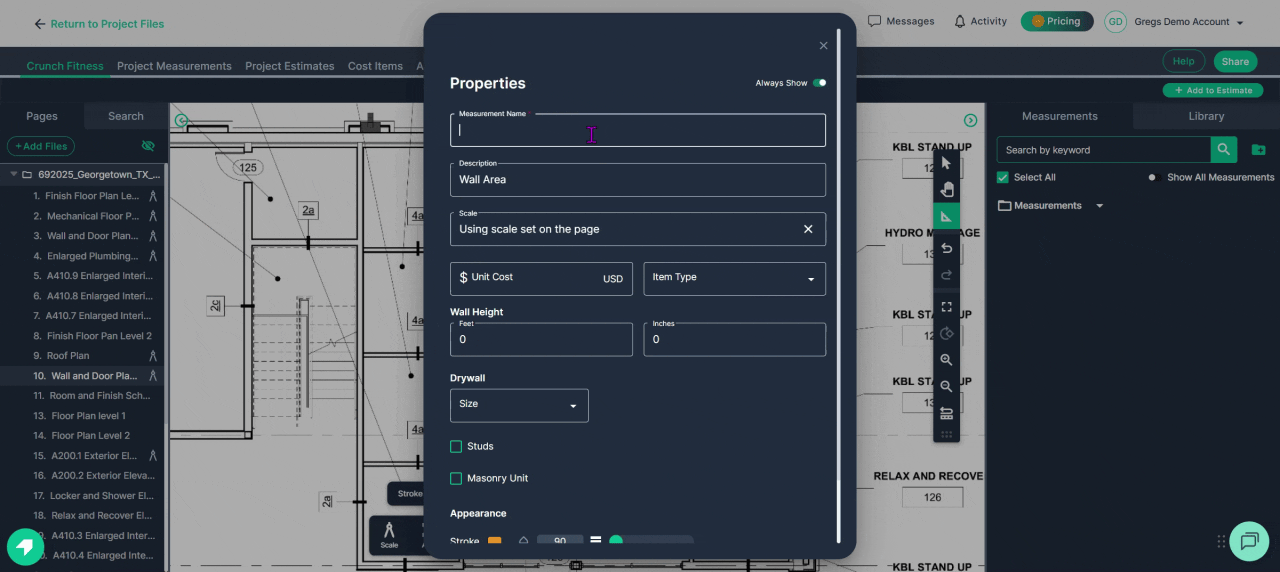
Step 3: Set the properties
-
Name the measurement after the wall type, as shown in the plan. Set the wall height, 10' for this example.
-
For drywall, enter the size as 4x10. Since this is a two-sided wall, set it for two layers.
-
Check the box in the Studs section, choose Metal, and set the spacing at 16 inches on center.
Step 4: Select a highly visible color for the line, then click Set.

Step 5: Align the cursor with the beginning of the first 4A wall and left-click to start. Move along the wall’s direction, then double-click at the end to finish the segment.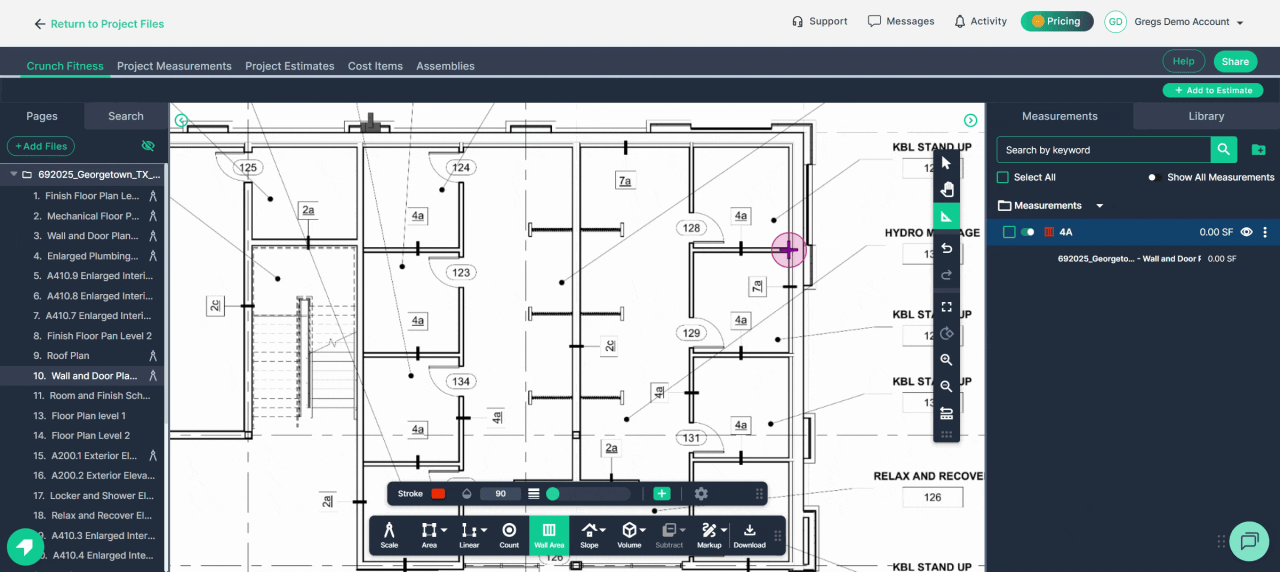
Step 6: Continue measuring additional 4A wall lengths using the Continue switch on the right side of the page.
-
Left-click to start each segment
-
Double left-click to finish, repeating until all desired 4A wall segments are measured.
-
Repeat for the segment of wall connecting the divider walls.

Step 11: When finished, observe your total takeoff results on the right side.
The results show just over 1,392 square feet—the face area for one side of the 4A wall.
Expand the results using the plus symbol for more details.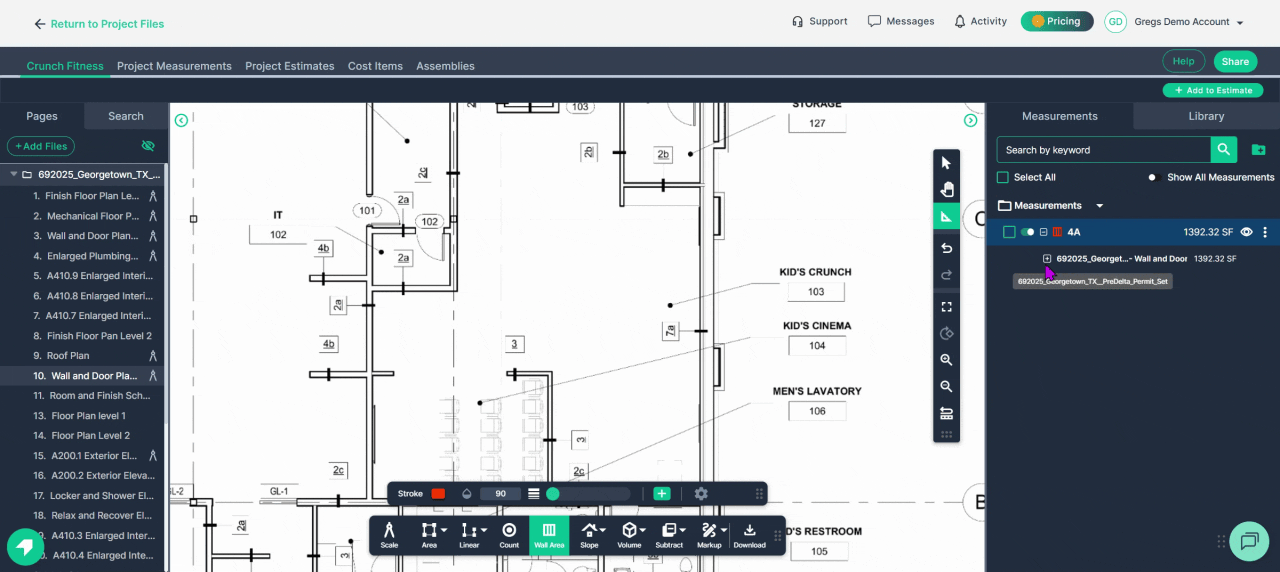
The wall area tool can save you time by calculating basic wall components directly from your takeoff measurement.
Next Steps
Once you have completed taking all your measurements, you can:
-
Download the measurements in a table from the Project Measurements page
-
Add a legend and download the PNG of your takeoff page
-
If you have purchased the Estimation add-on tool, send measurements into the Project Estimate page or push them into an Assembly you have built.
-
Share your Takeoff with anyone using the Share button in the upper right-hand corner.
Troubleshooting
Contact us if you need assistance or to report an issue:
-
PlanHub Contact Page: https://planhub.com/contact/
-
Customer Facing Support Ticket Link: https://knowledgebase.planhub.com/knowledge/kb-tickets/new
-
Schedule a Free 1-on-1 Takeoff Training: https://meetings.hubspot.com/zac-low/takeoff-and-estimation