In this article, you'll learn how to set and verify a scale in PlanHub's takeoff tool.
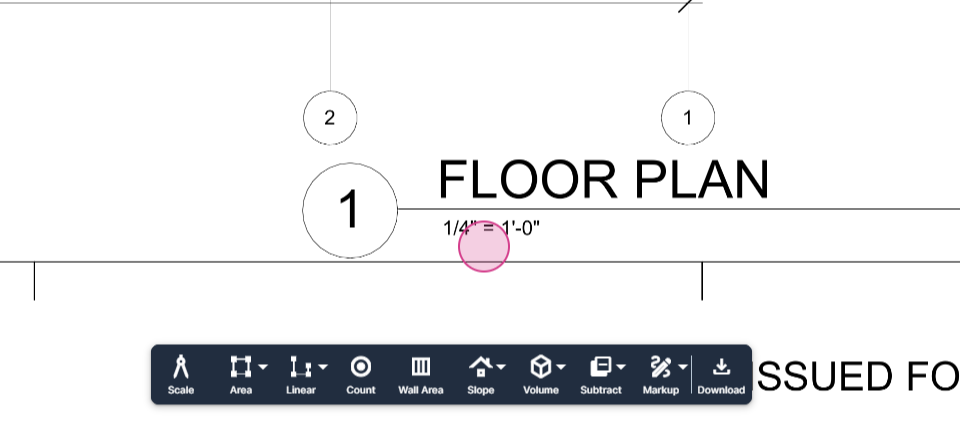
Step 1: Identify the scale printed on the page. In this example, the plan calls for a 1/4 inch equals 1 foot scale.
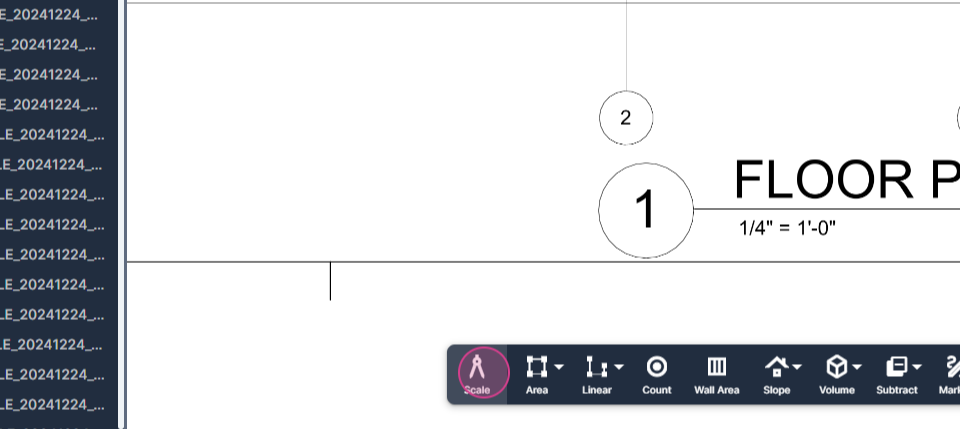
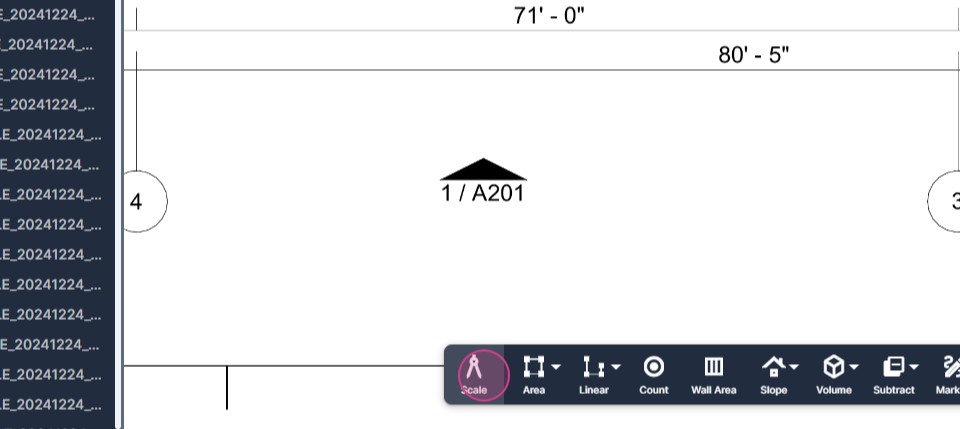
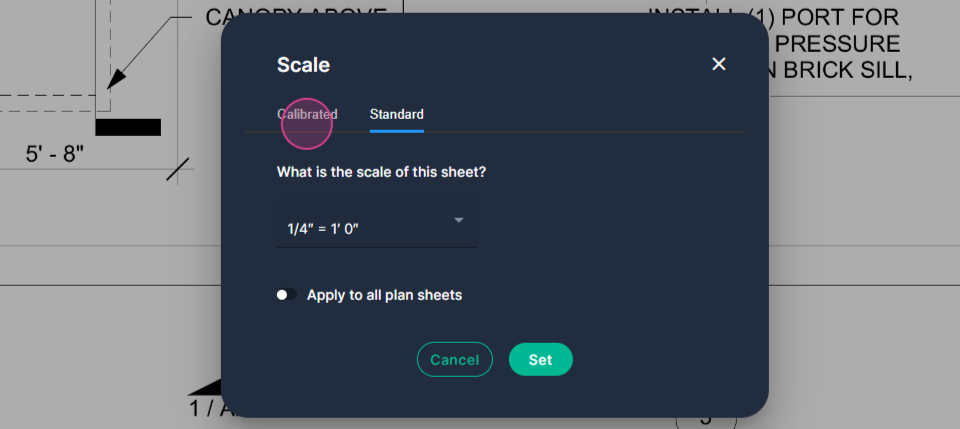
Step 2: Navigate to the toolbar and click the scale button.
Step 3: The selection menu will always open to standard mode with 1/8 of an inch equals 1 foot. This is the most common commercial scale.
If you need a different scale, click the menu to scroll up or down to find the scale you need.
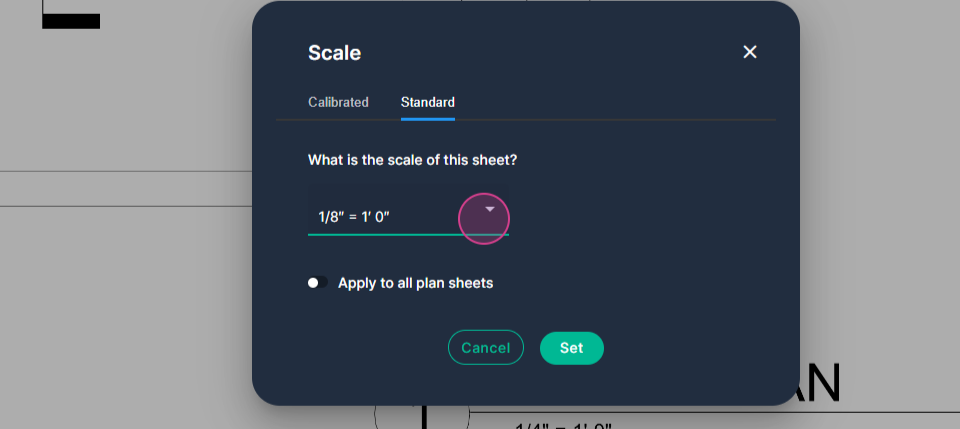
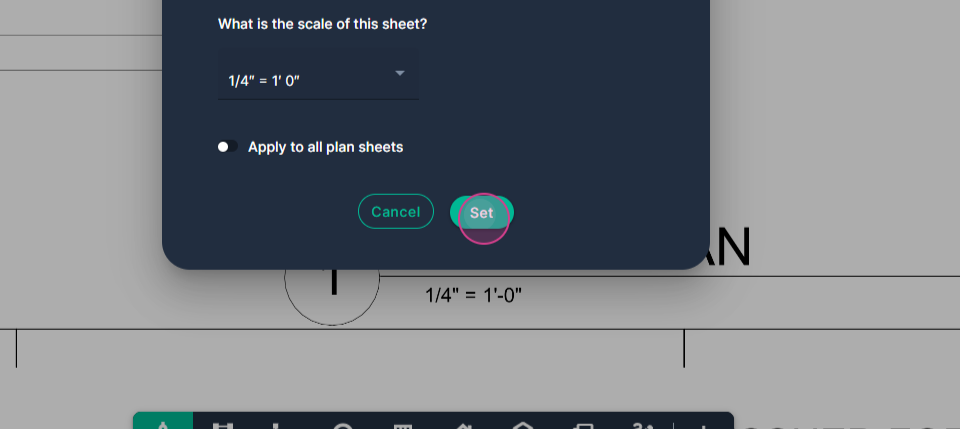
Step 4: Select the scale with a left click.

Step 5: Click Set on the box. Your scale is now set for the page.
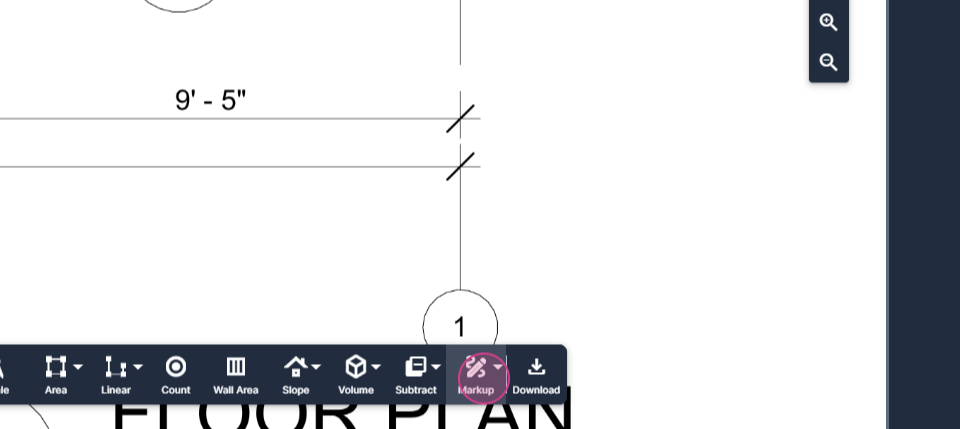
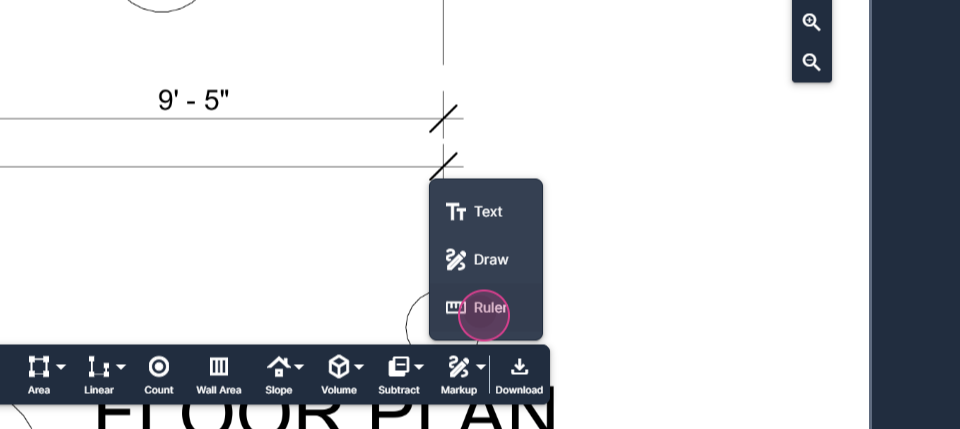
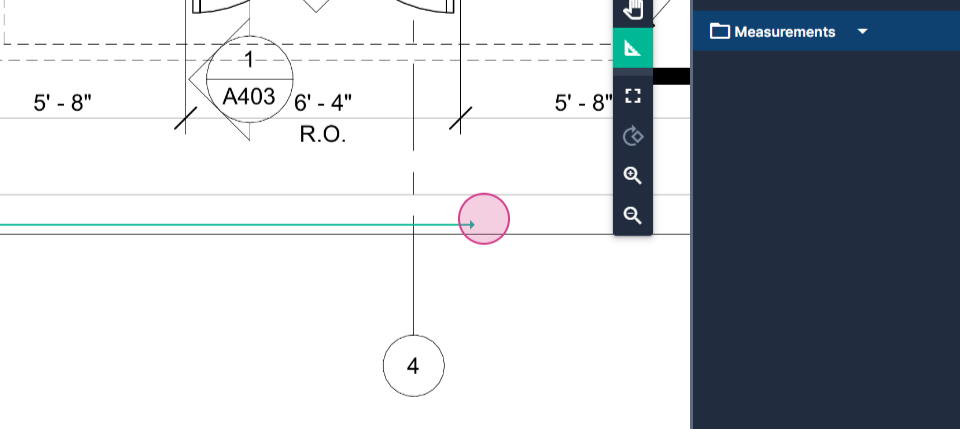
Step 6: Verify the accuracy of the scale. Click markup tool then click Ruler.
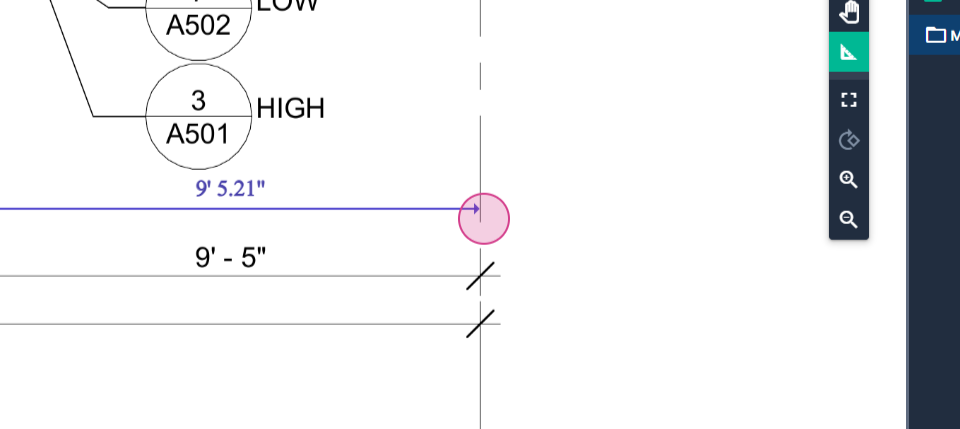
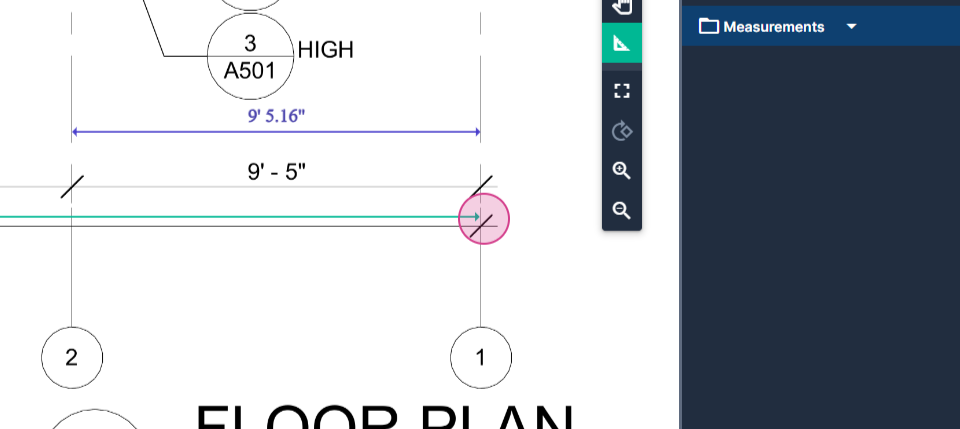
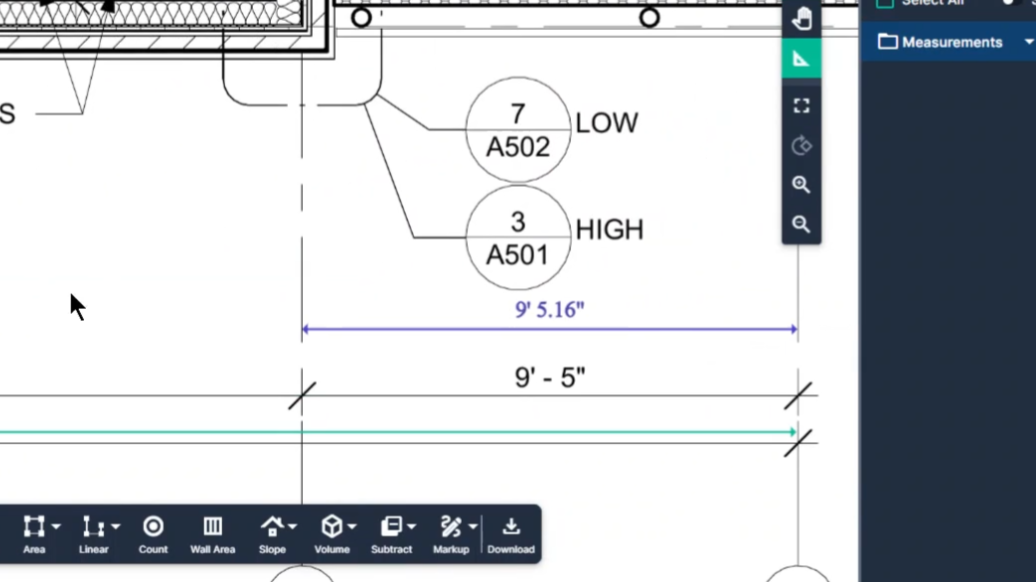
Step 7: Measure a known measurement to see if it agrees with your scale. Click at the beginning point, drag the ruler measurement across the page to the endpoint, and click again.
Step 8: If the page doesn't have a printed scale, or the scale doesn't match your measurement, you can calibrate your scale. Locate the longest known measurement on the page.

Step 9: Navigate to the scale button and click it.
Step 10: Select the calibrated tab.
Step 11: Enter the length of the line you're going to draw.
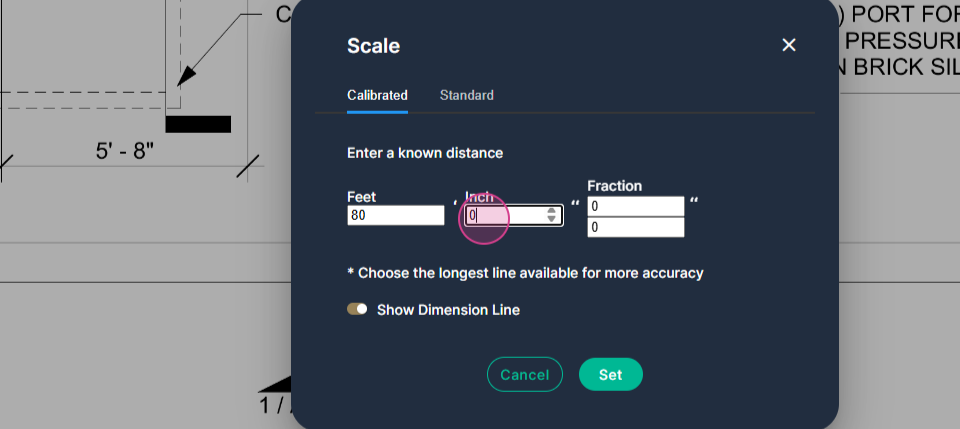
Step 12: Click Set in the box.
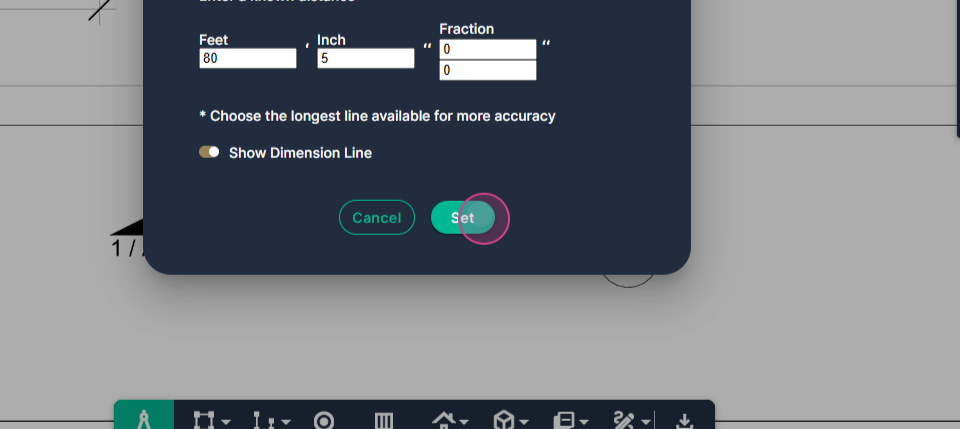
Step 13: Draw a line to define that length to the system. Click at the beginning point of the measurement.
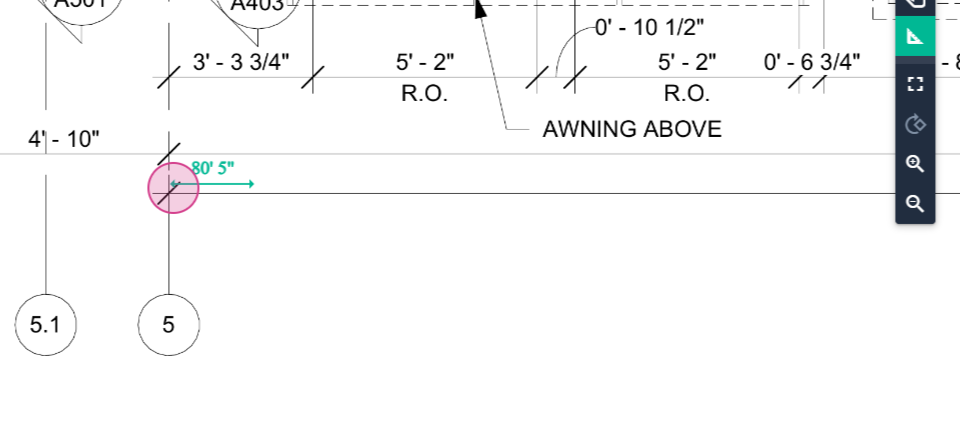
Note: The calibration line will follow you as you pan across with your right button, clicking and dragging.
Step 14: Click again at the opposite end where the measurement ends.
Your page now has a calibrated scale using the known measurement.
Step 15: Check your verification ruler measurement to verify your calibrated scale's accuracy.
You've now successfully set and verified a scale in PlanHub's takeoff tool.