This article will guide you through the process of placing a bid on PlanHub projects. By the end, you'll know how to use both the Quick Bid and Cost Item Breakdown.
Step 1: Start by navigating to the project you wish to bid on.
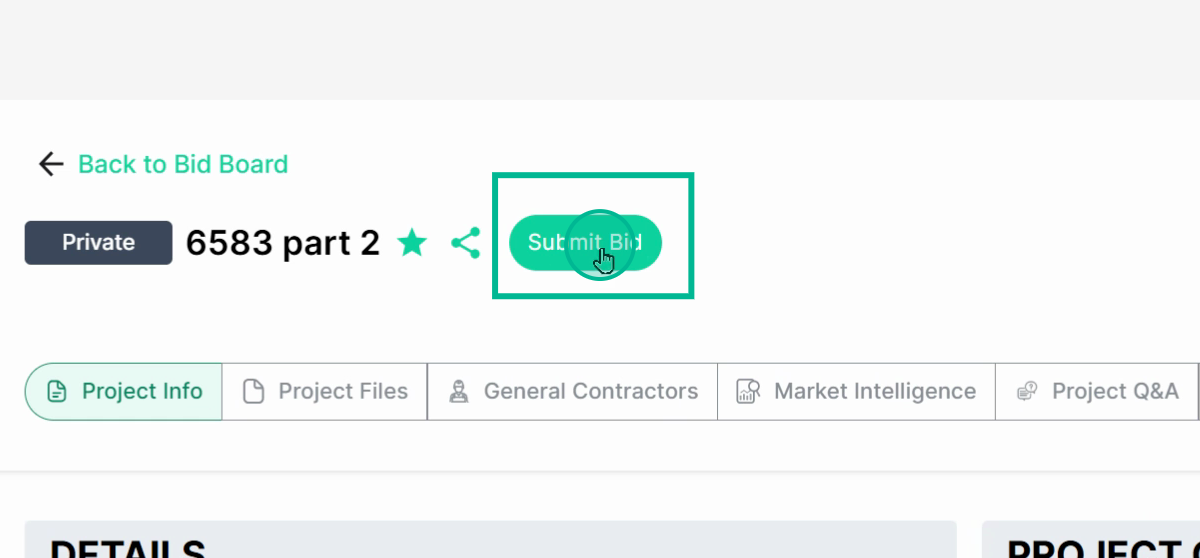
Step 2: In the project's details, find three places to start the bid submission process. The first one is in your navigation bar. Click on Submit Bid.
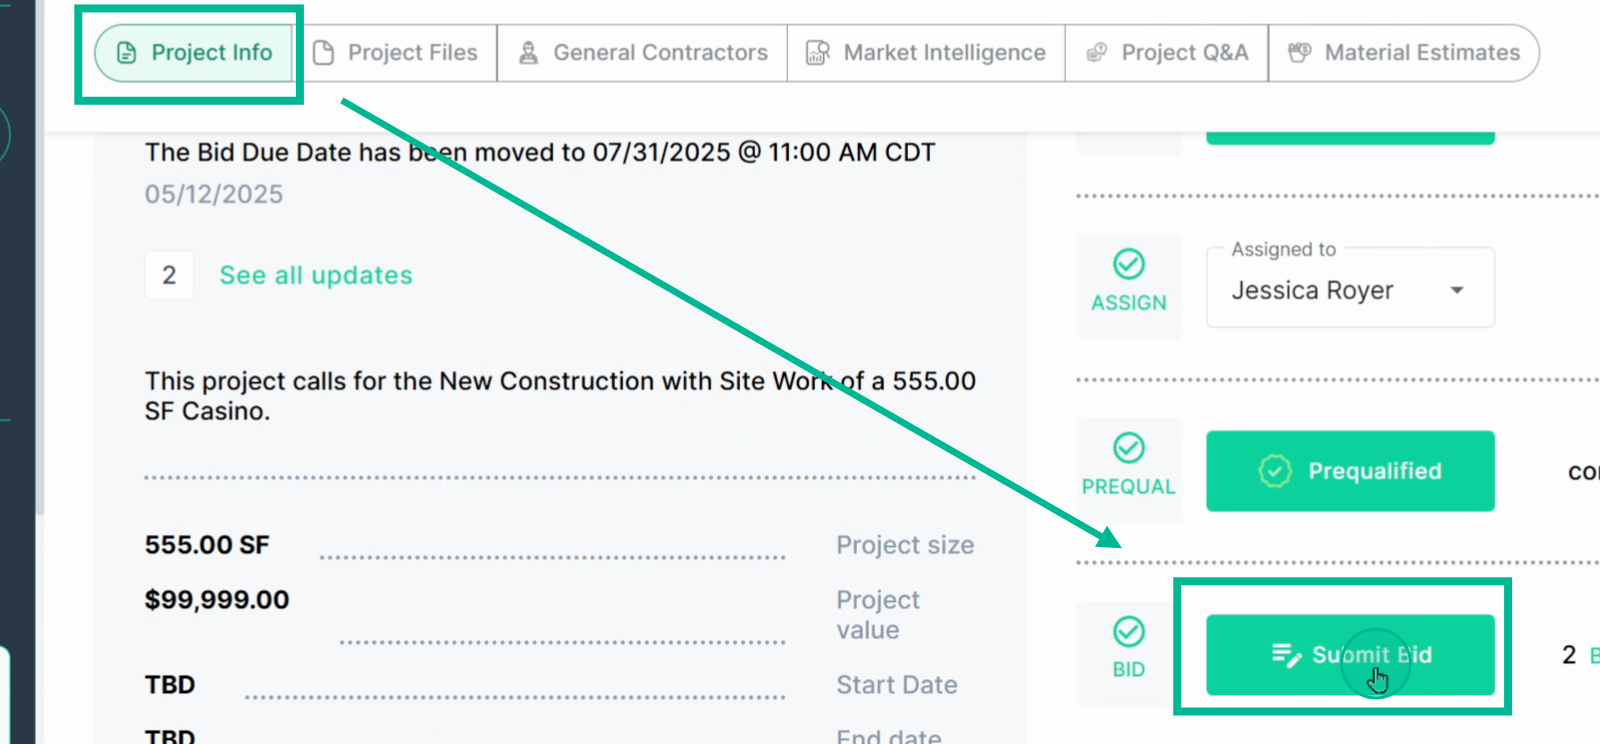
Step 3: The second place is under your Project Info tab, in the Project Checklist. Click on Submit Bid.
Step 4: The third place is under the General Contractor tab. Click on Place Bid.
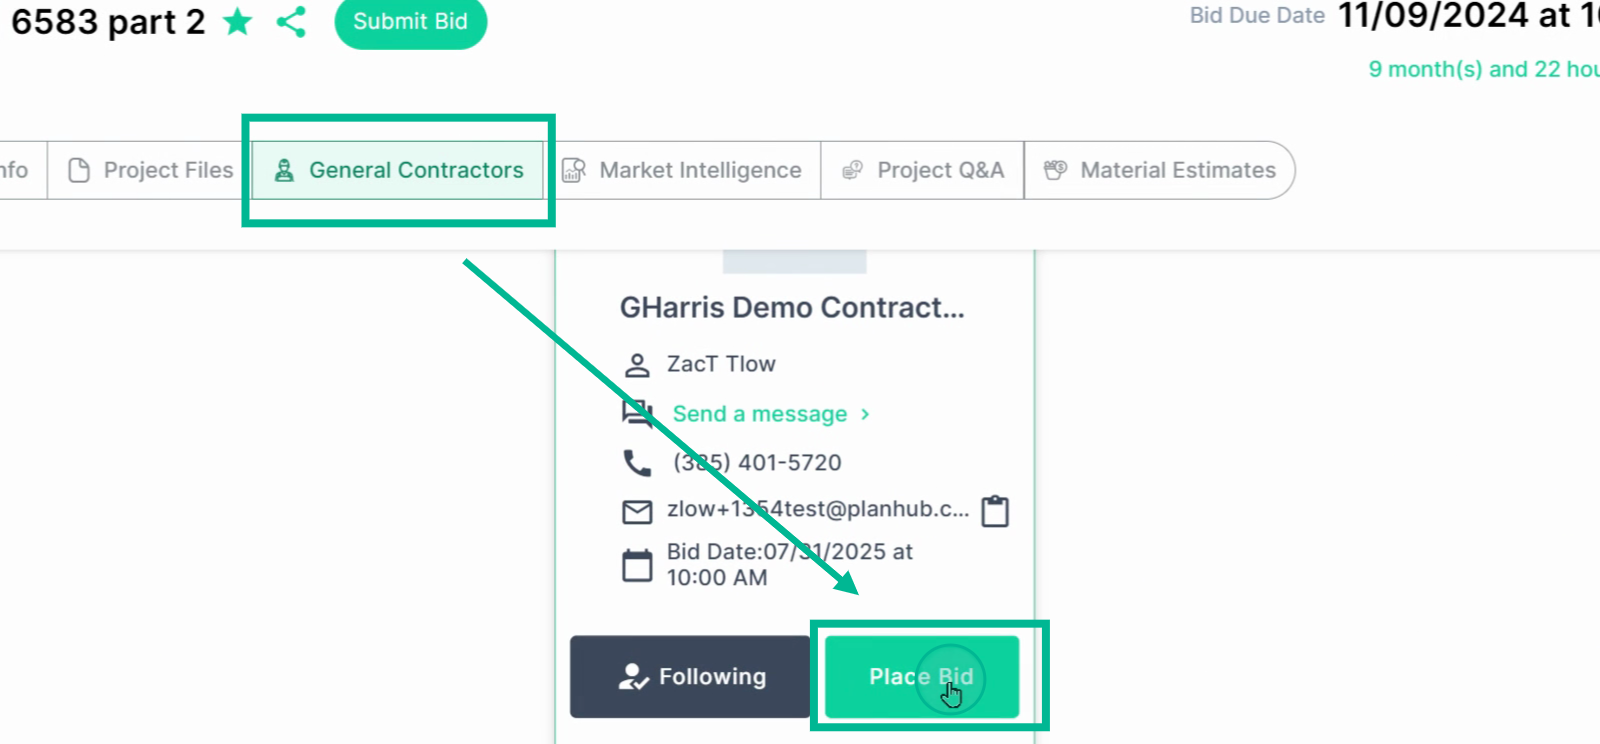
Note: All three options lead to the same process.
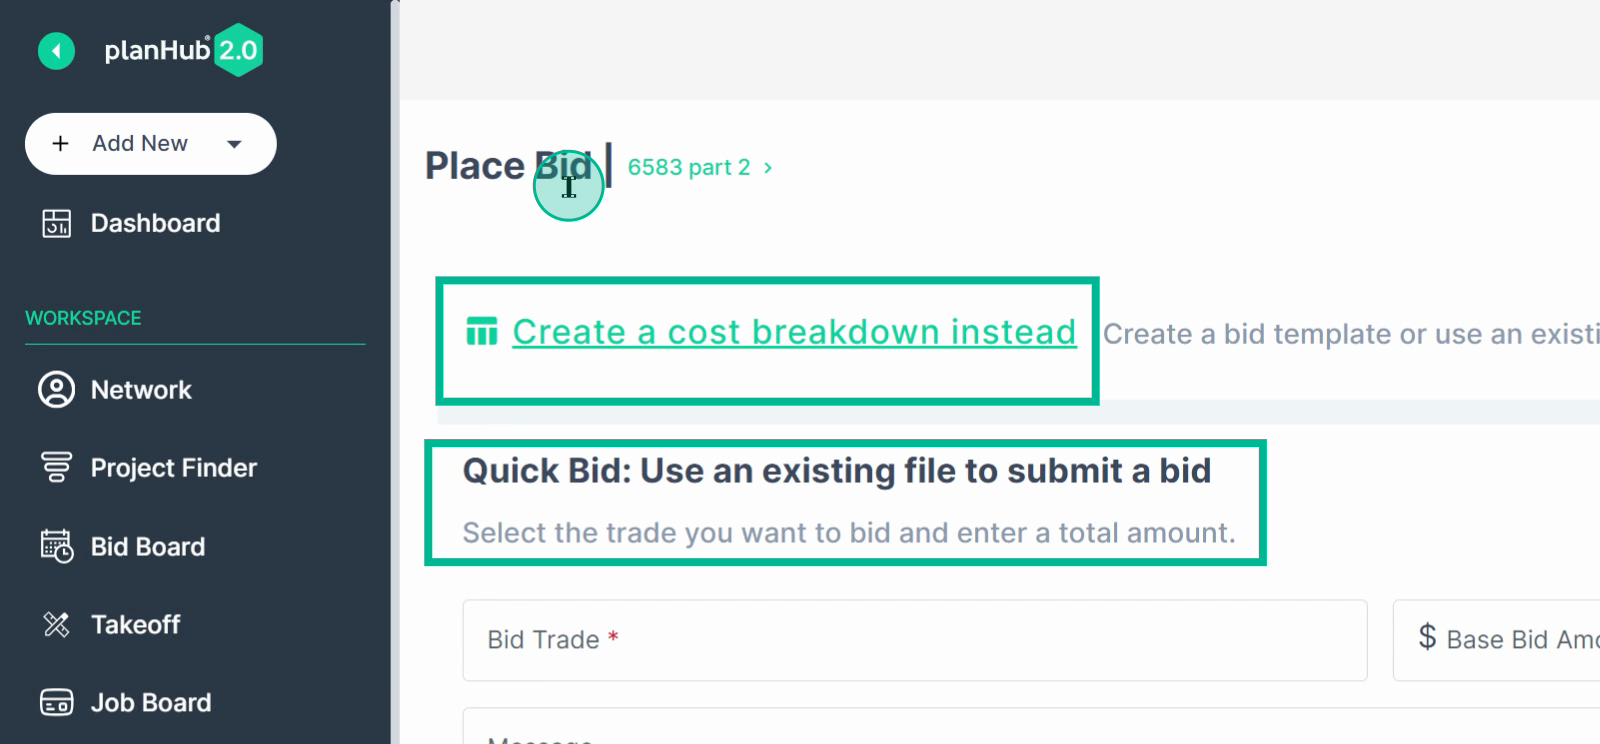
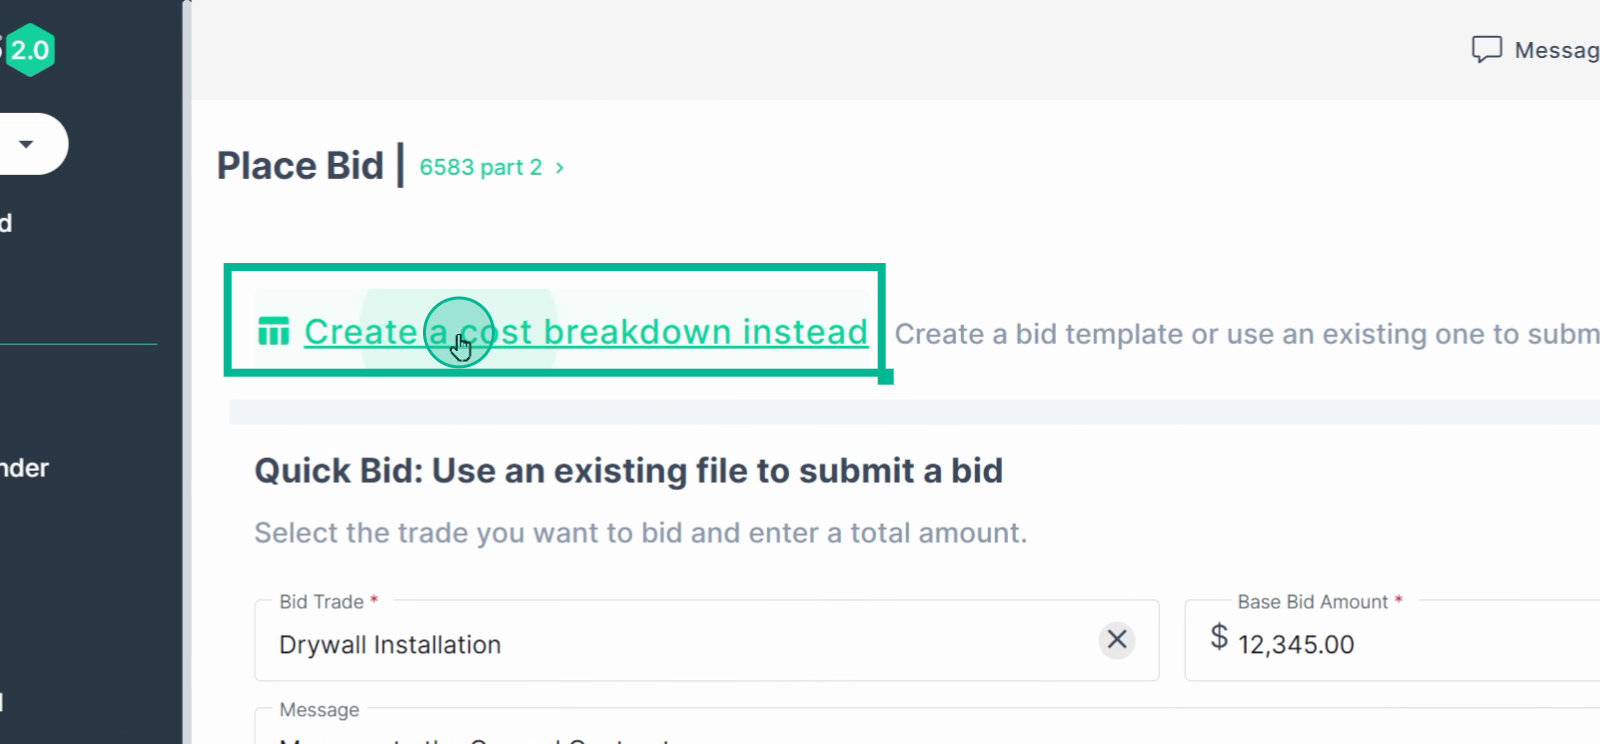
Step 5: Once you're on the Place Bid page, choose between the Quick Bid and the Cost Breakdown option.
Quick Bid requires uploading your own bid documents, while the Cost Breakdown uses PlanHub's bid builder tool.
Step 6: Quick Bid: Fill in all fields marked with a red star or asterisk, select your trade, enter your base bid amount, add any additional messaging, and attach your bid documents.
Click Next to proceed to the next step for QuickBid.
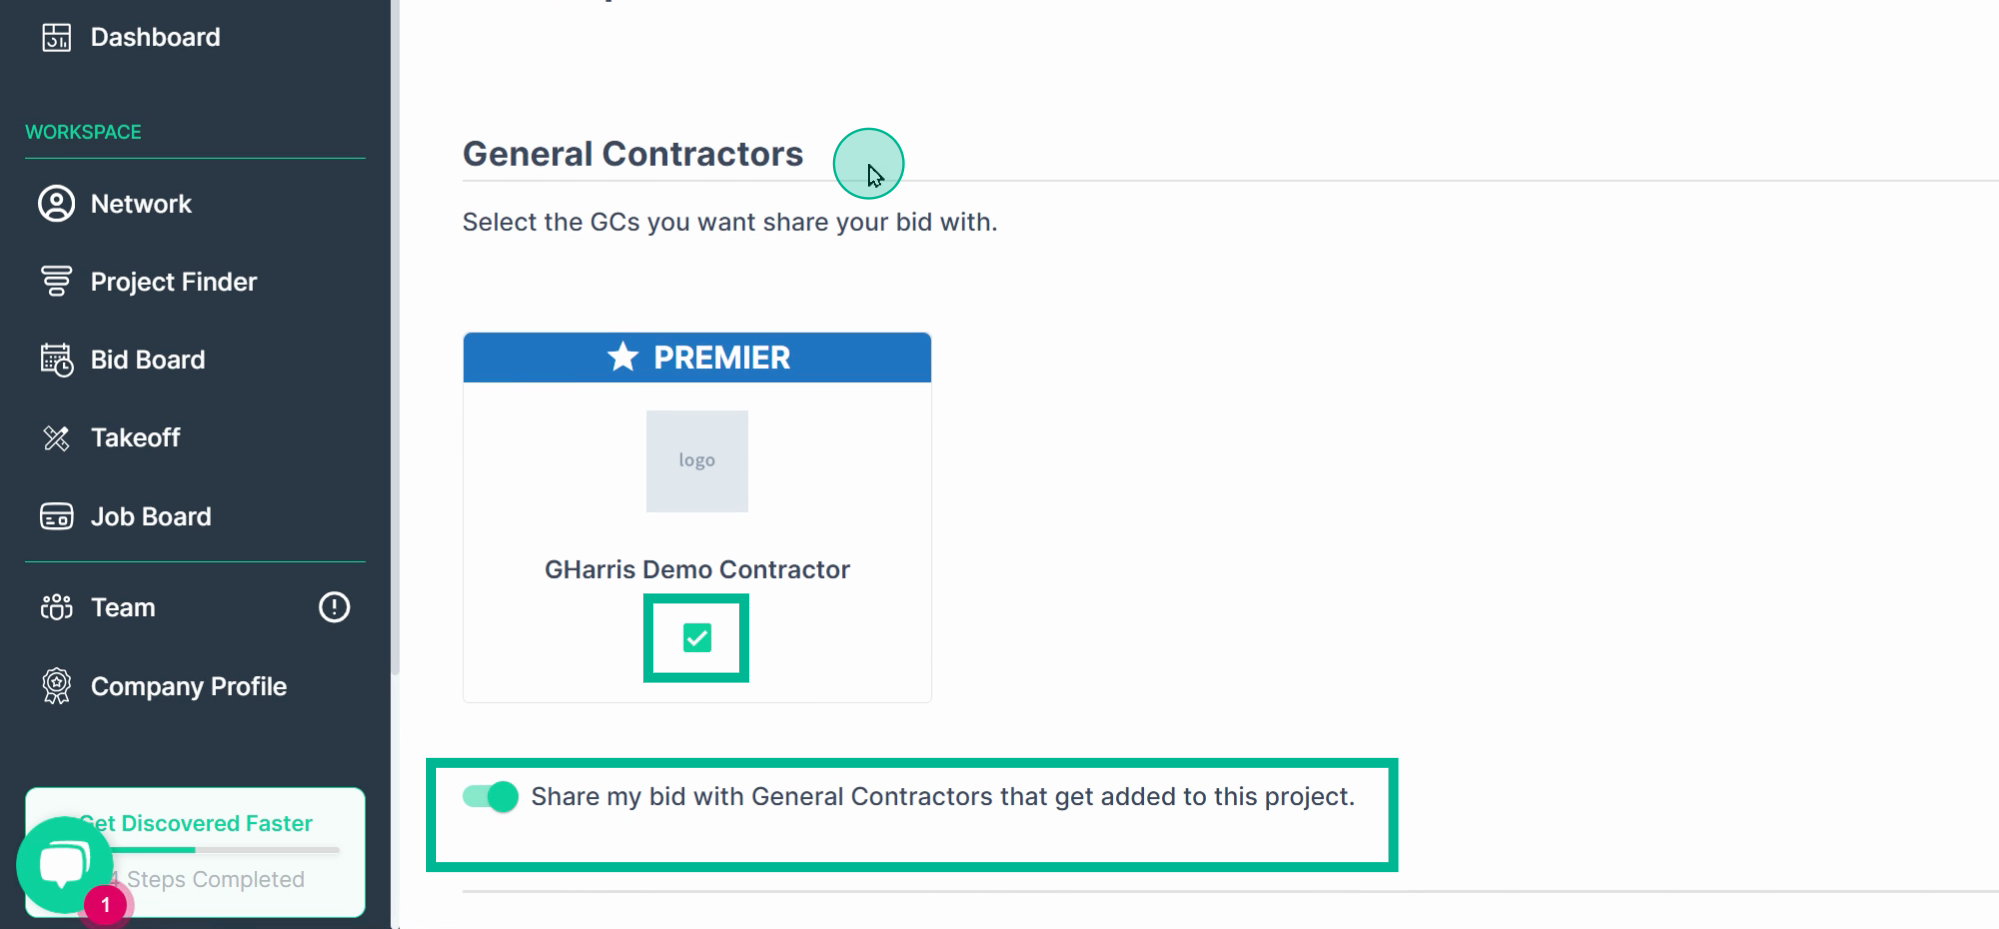
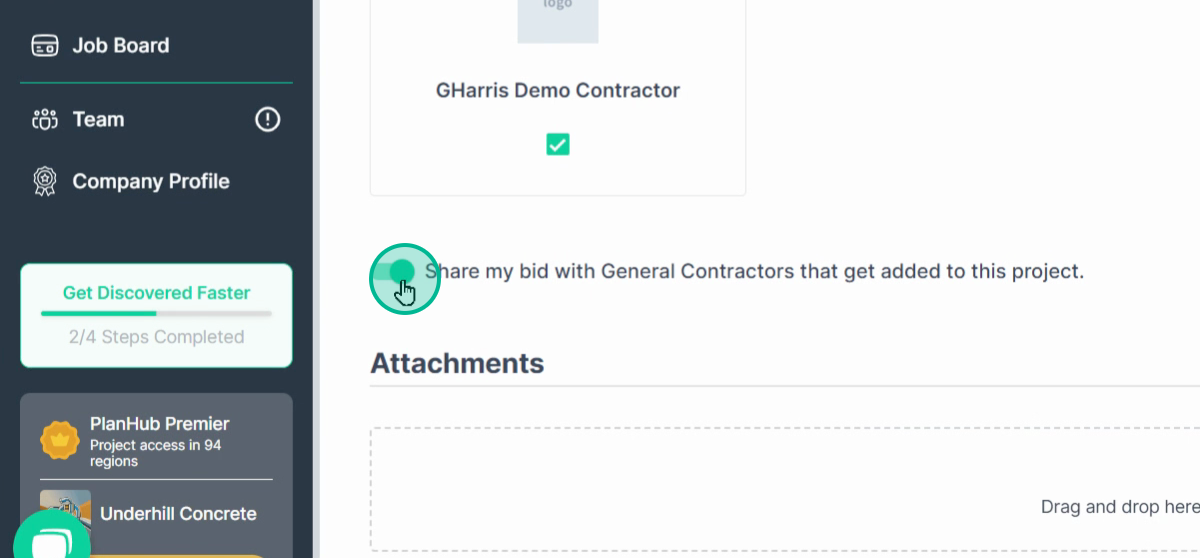
Step 7: Select the General Contractors to whom you wish to send this bid document, and choose whether to share your bid with general contractors added to this project or to send this document and the bid only to the selected General Contractors.
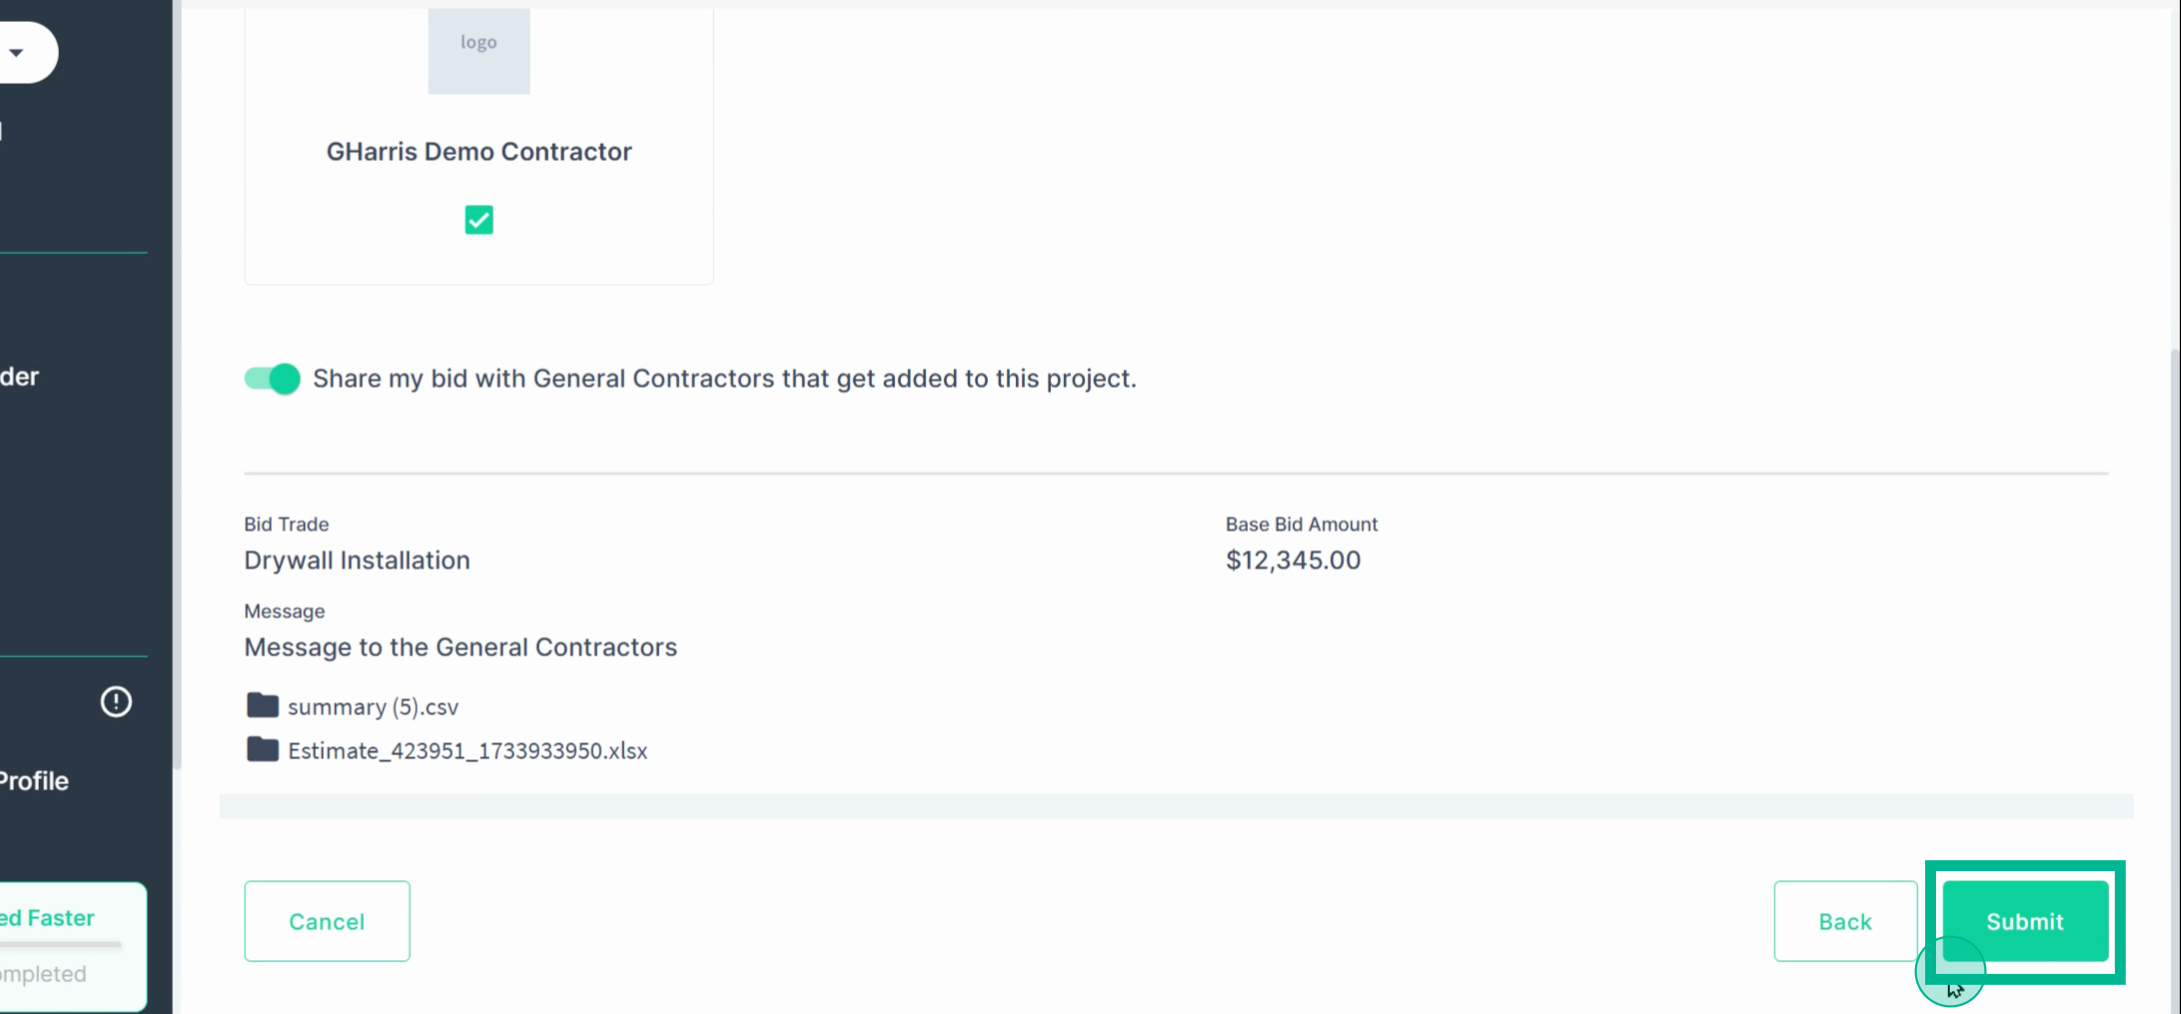
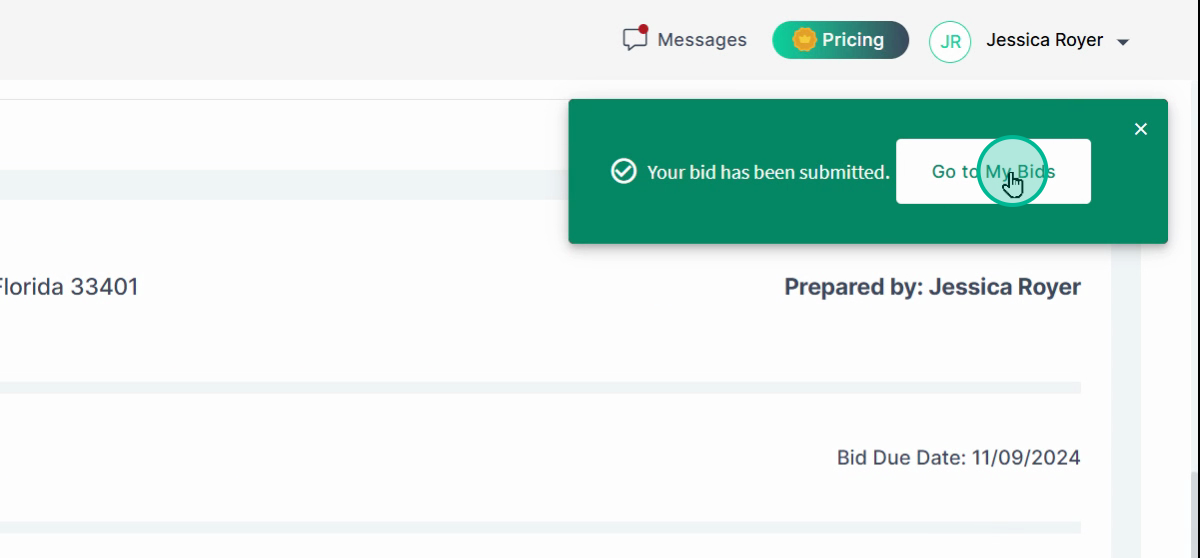
Step 8: Click Submit once you're ready.
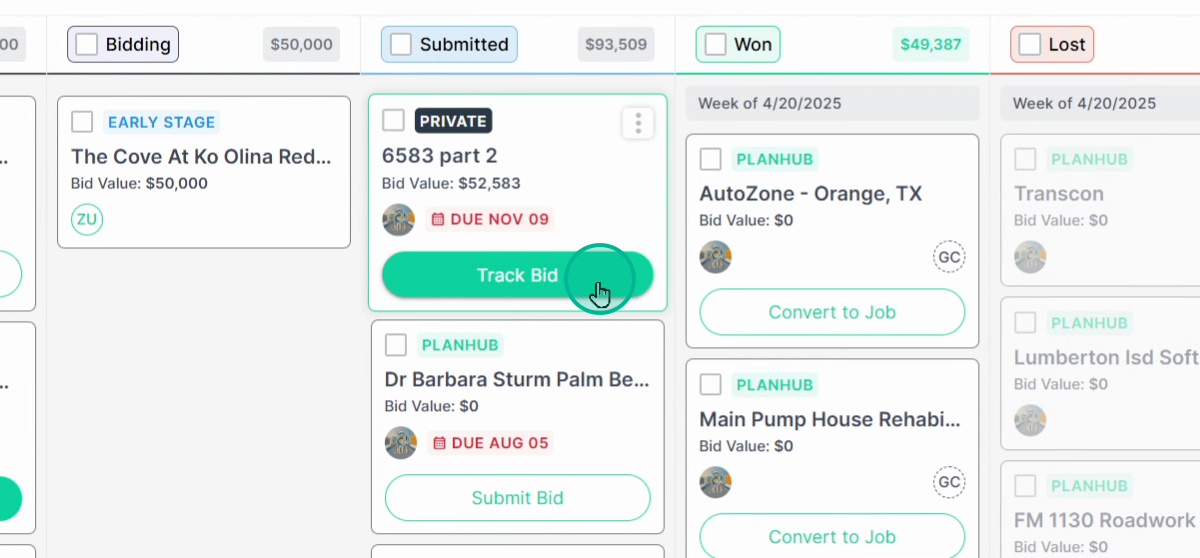
Your Bid will be submitted, you will be able to track it on the bidboard, it will be emailed to the GC, and you will be copied on the email.
Step 9: Now, let's go over the Cost Breakdown. To use the Cost Breakdown and Bid Builder Submission, click on Create Cost Breakdown.
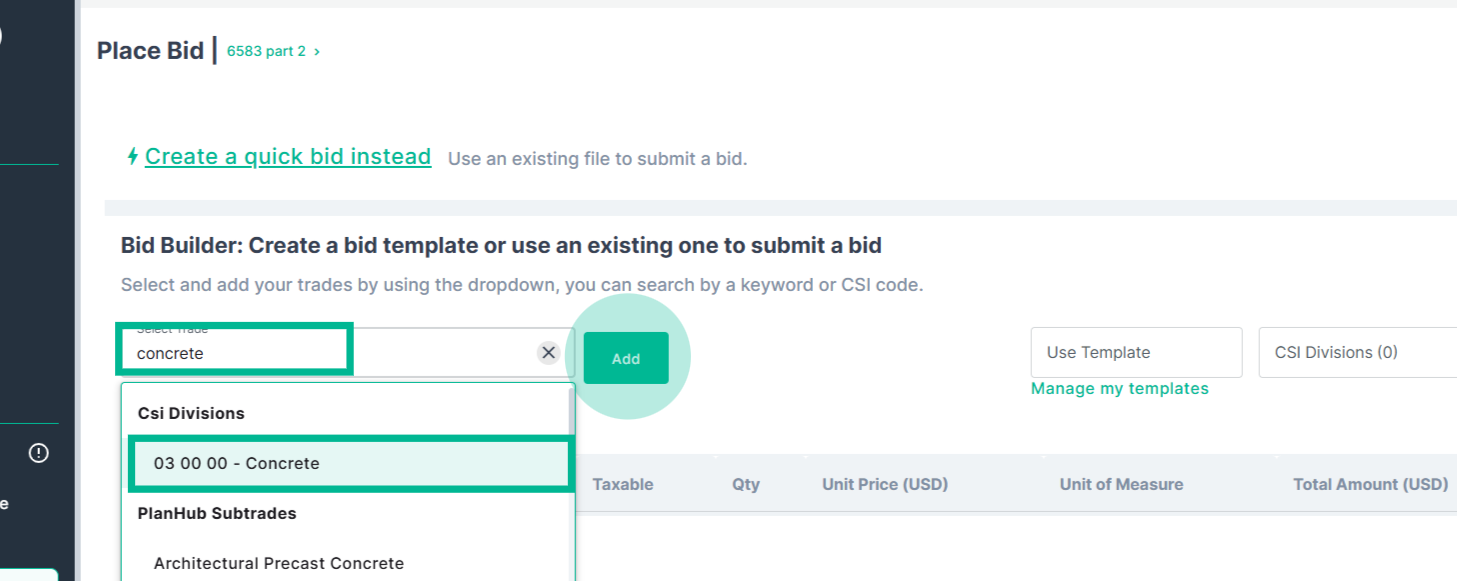
Step 10: Click on the Select Trade field, type in the trade you're bidding, select the trade, and click Add.
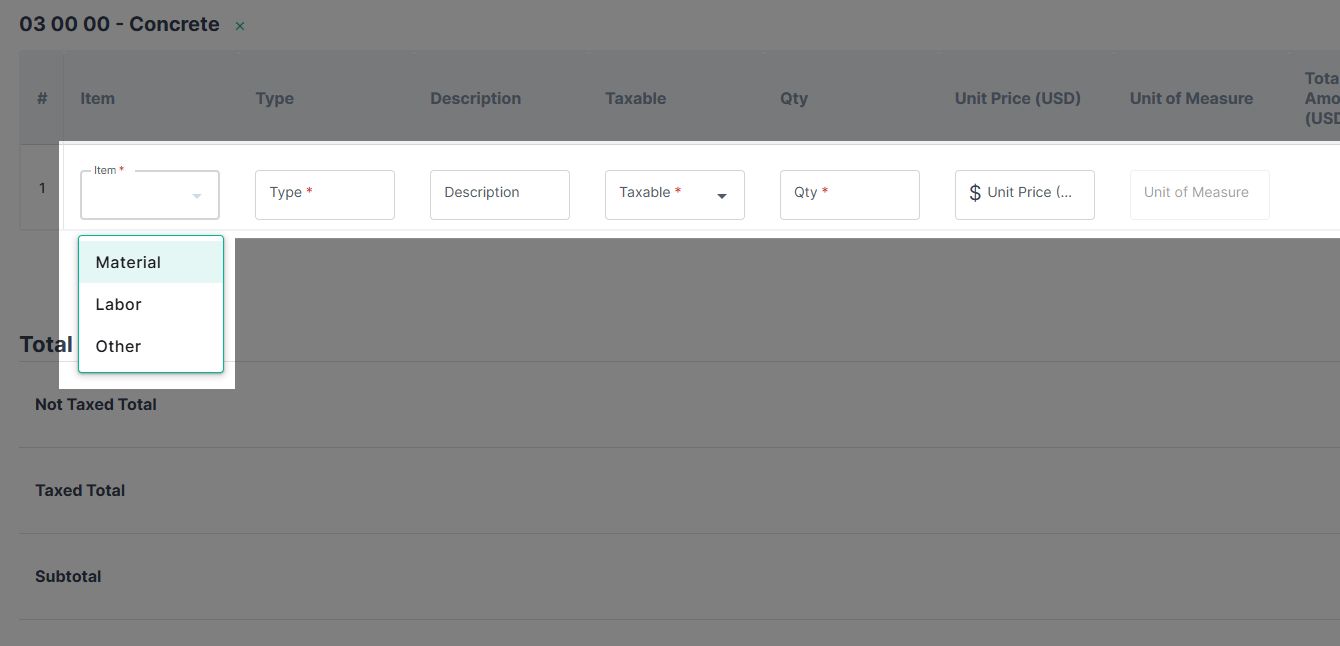
Step 11: Fill in all required fields.
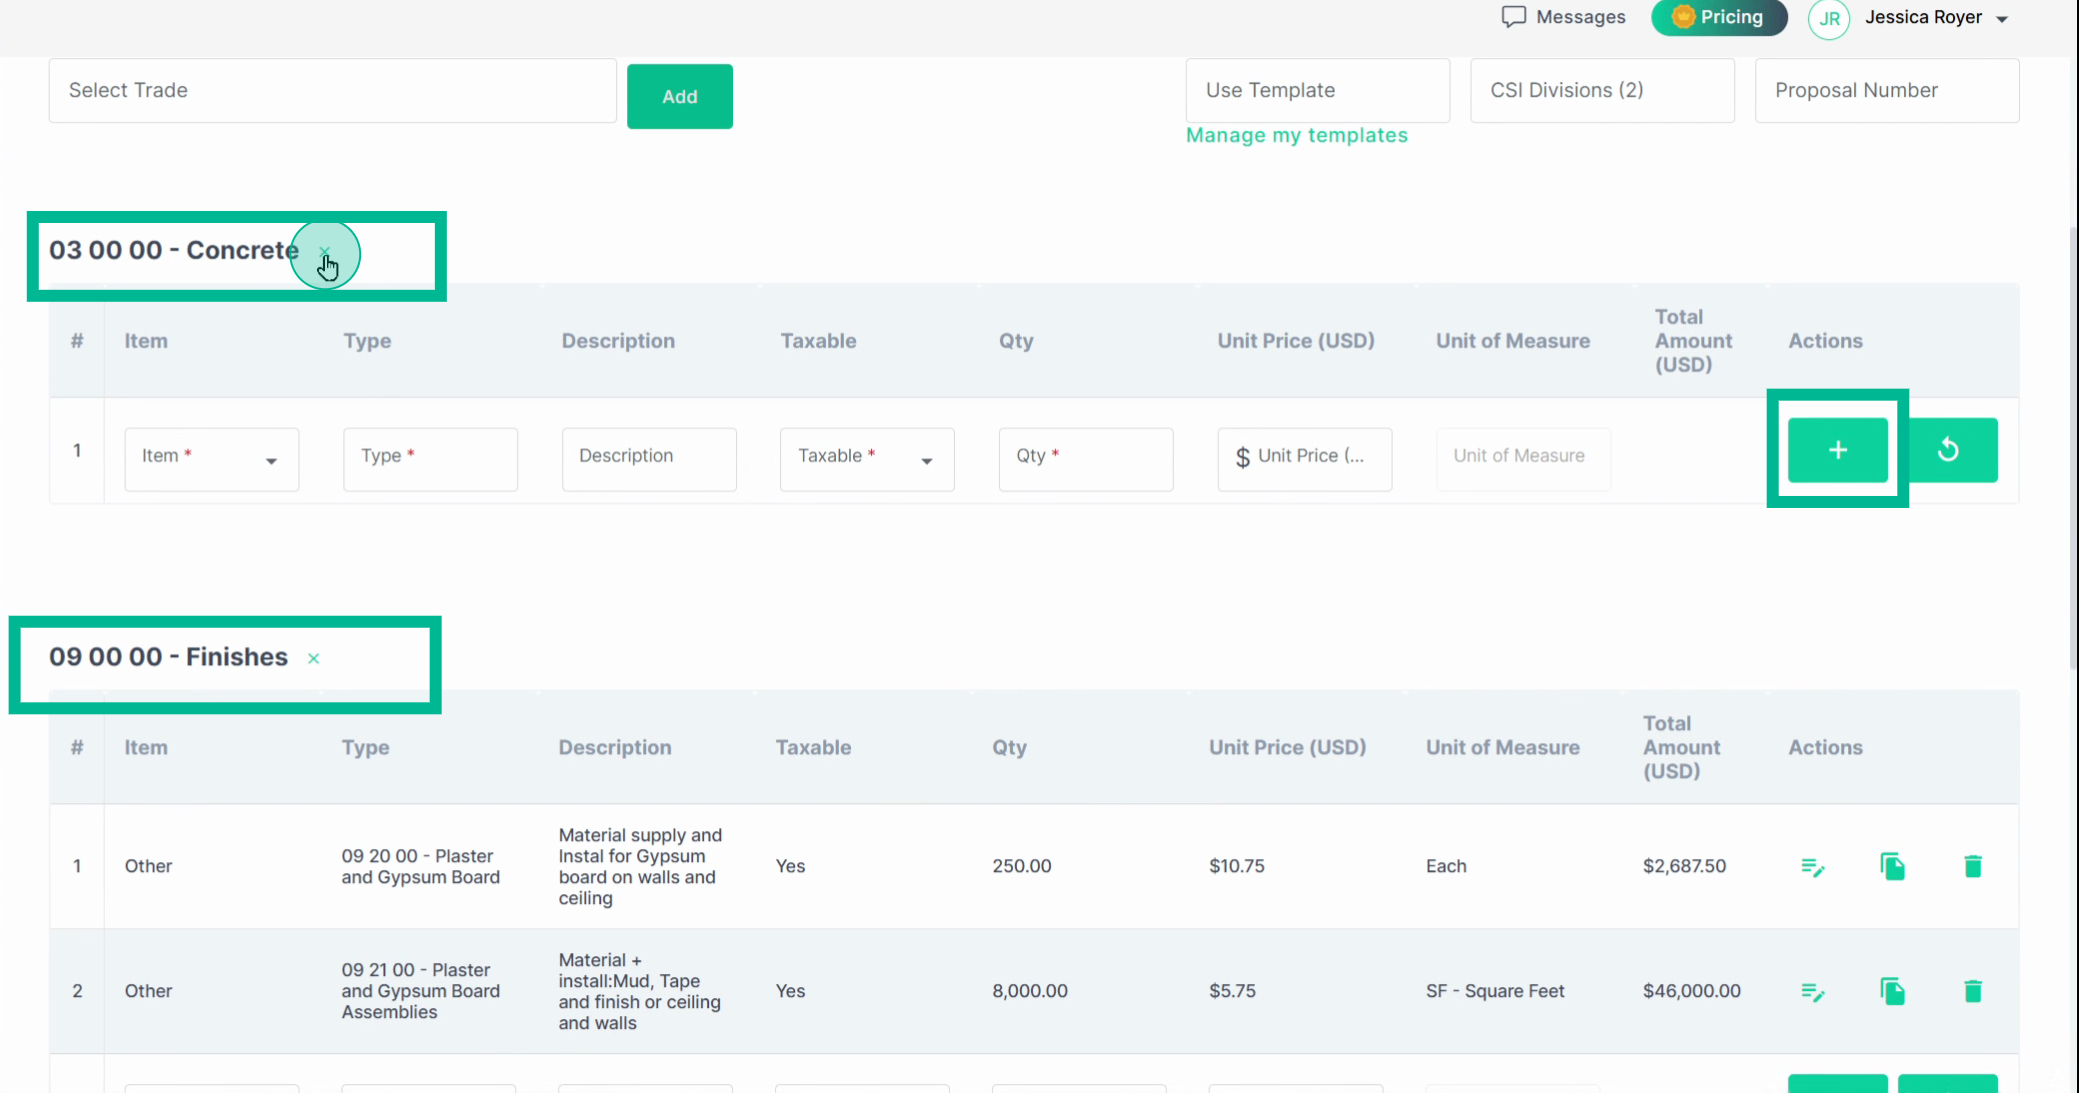
Step 12: Bid Builder bids are segmented by section. This allows you to bid multiple divisions at once in one submission.
When you add a section, you can add additional trades underneath that section. To remove a section, hit the X on that section.
To add a new line item, click the plus sign.
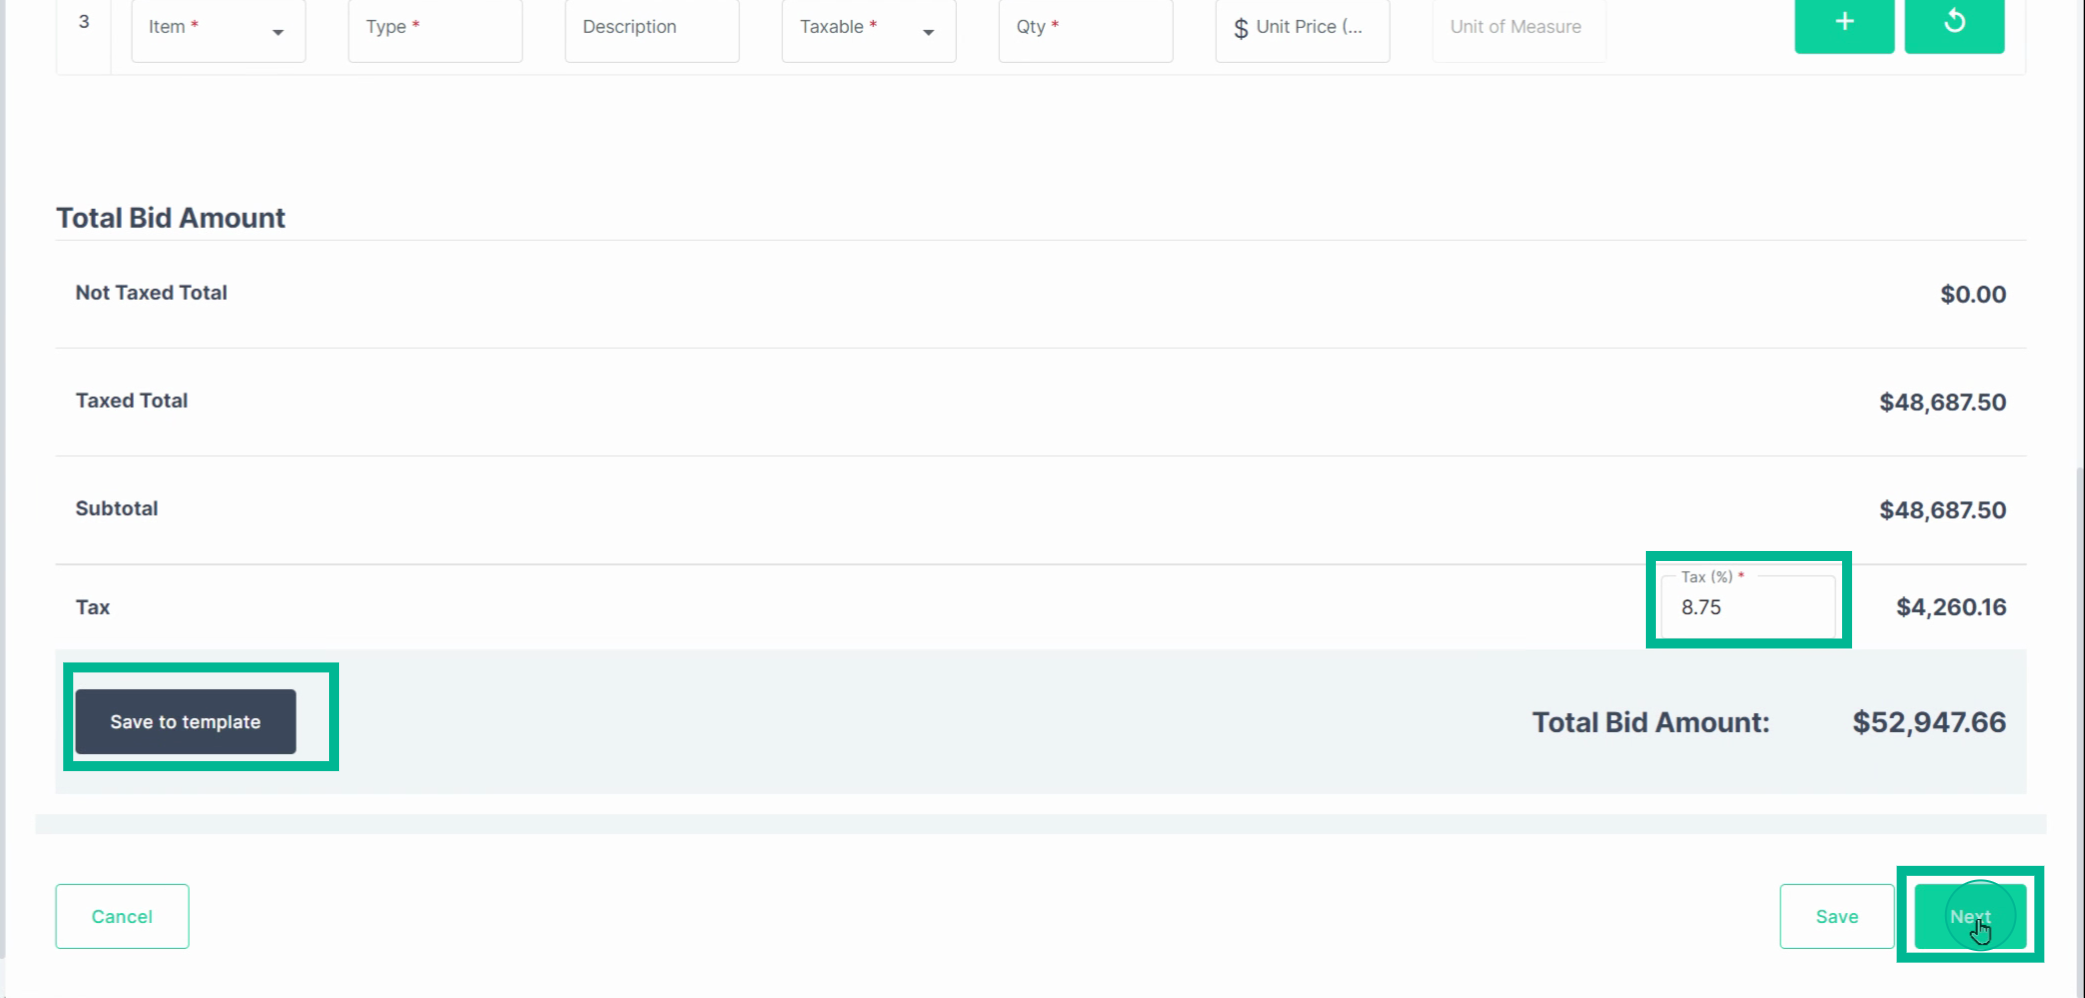
Step 13: Apply any tax as needed.
If you wish to save this bid as a template, use the Save to Template option.
Click Next when you're ready to submit.
Step 14: Just like with the Quick Bid, select the General Contractors you want to share your bid with, and choose if you want this bid shared with any other added General contractors for this project. Toggle this off when you do not wish your bid to be shared with other GCs, and keep it toggled on if you wish general contractors to receive this bid should they be added to this project.
Step 15: In the Bid builder, you have the opportunity to add additional documentation in the attachment section. Finally, you're provided with a preview of your bid builder bid as it will be visible and downloadable in a PDF format for both the general contractor and yourself. Once you've completed your bid creation, click Submit.
Step 16: After submission, you'll receive a confirmation email, and you'll be copied in the email sent to the general contractor with your bid attachment. If the general contractor is asking for a prequalification form and you have not completed yours, you will be reminded to get that filled out.
You can follow the prompt to go to your bids on your bid board. Here you'll see a list of all the bids that you've submitted.
Step 17: Next, move to your bid board and start tracking your bid.
Troubleshooting
Contact us if you need assistance or to report an issue:
- PlanHub Contact Page: https://planhub.com/contact/
- Customer Facing Support Ticket Link: https://knowledgebase.planhub.com/knowledge/kb-tickets/new
- Customer Success Team: CustomerSuccess@planhub.com