Setting Up Your PlanHub Company Account as a General Contractor
Getting started with PlanHub is quick and straightforward. Here’s how to create your company account and make sure you're ready to connect with relevant subcontractors and suppliers.
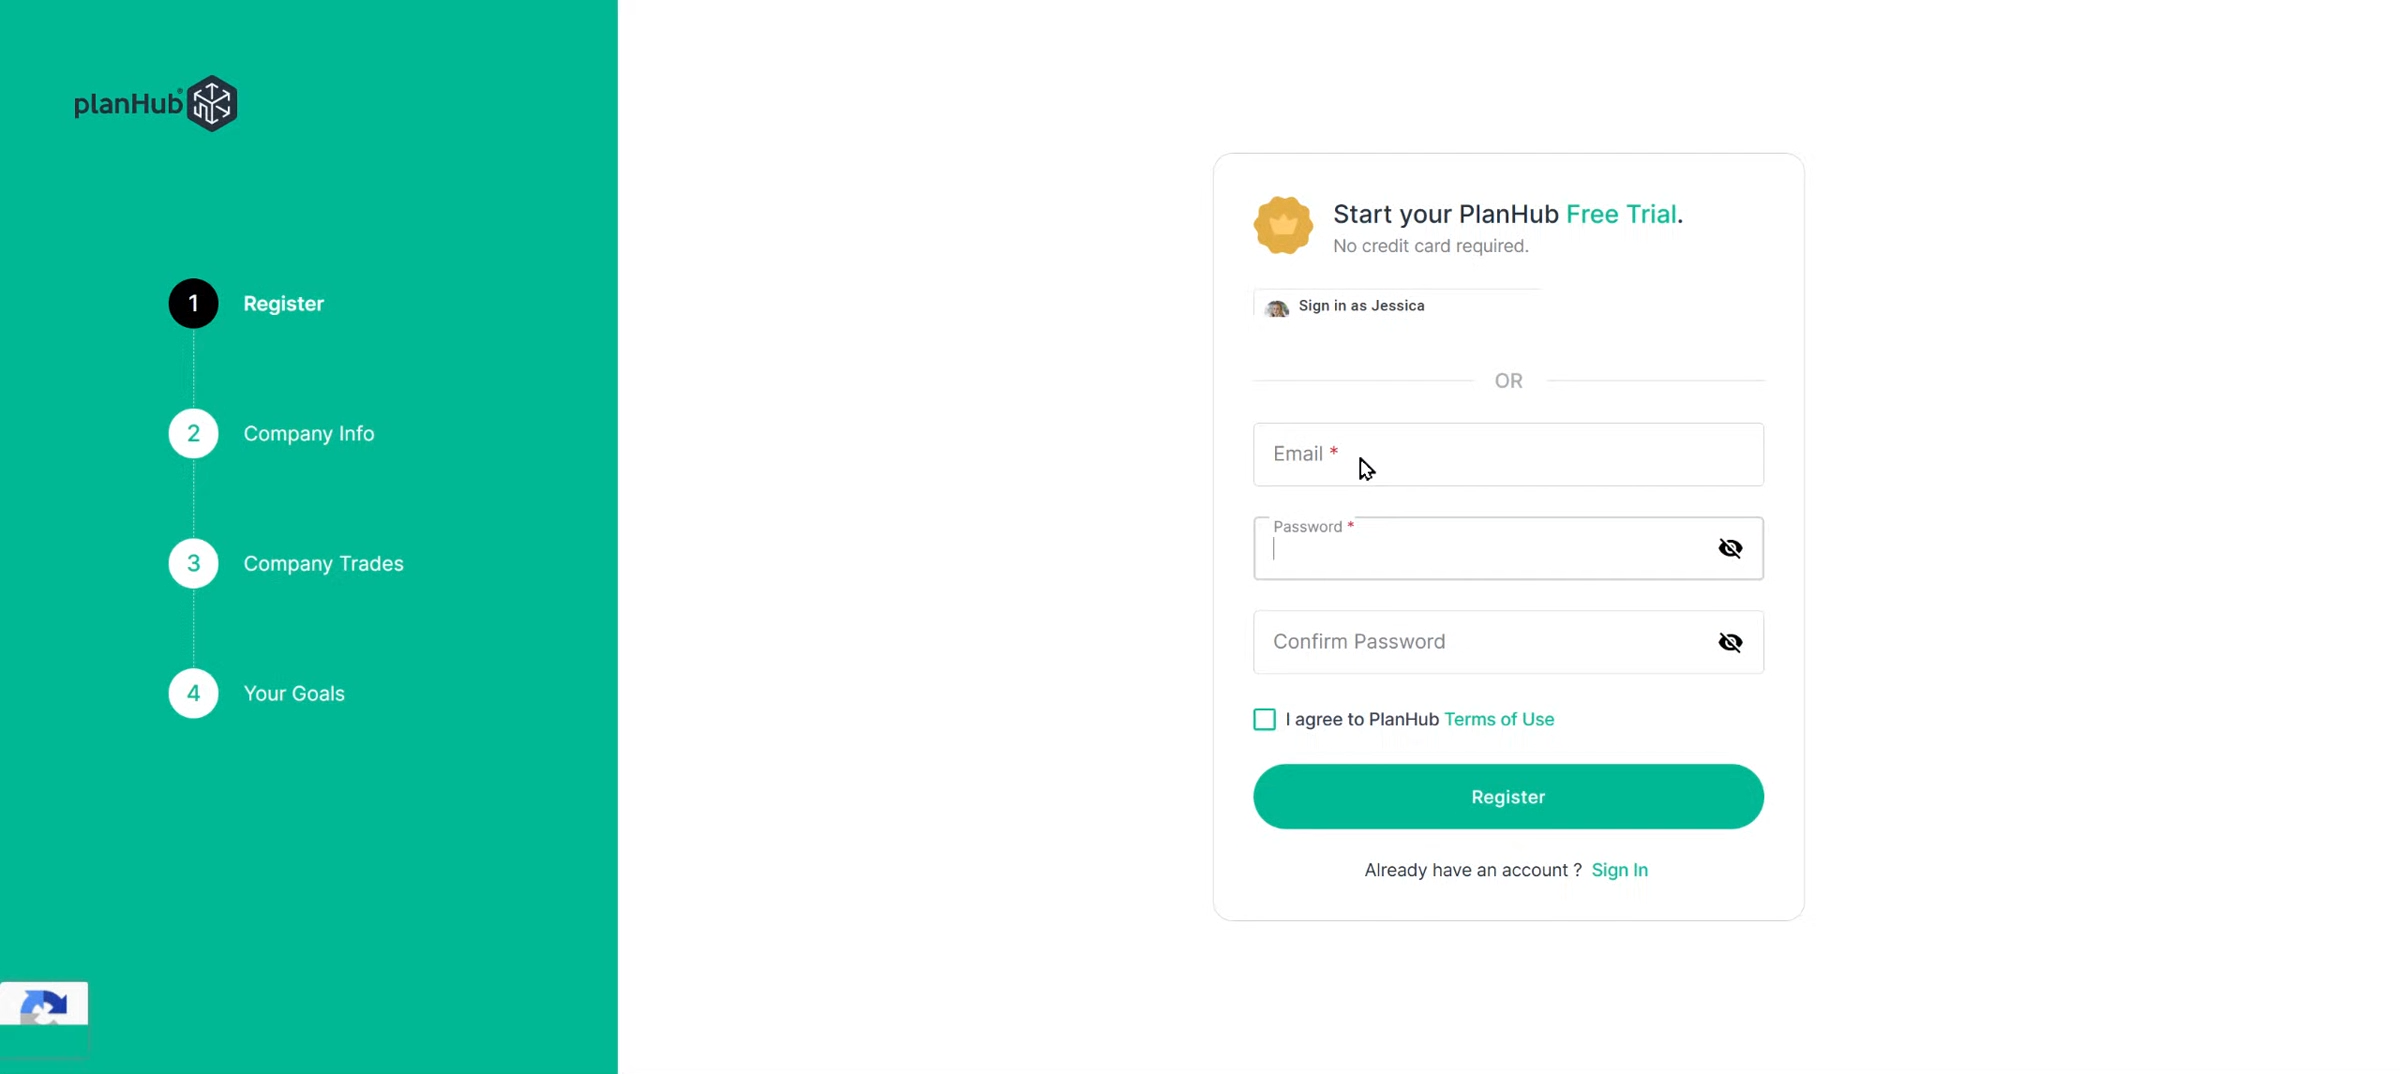
Register Your Account
Step 1: Go to plahub.com and click "Try For Free"
Step 2: Set up your Username/Email and Password, and review and agree to PlanHub's Terms of Use to register.
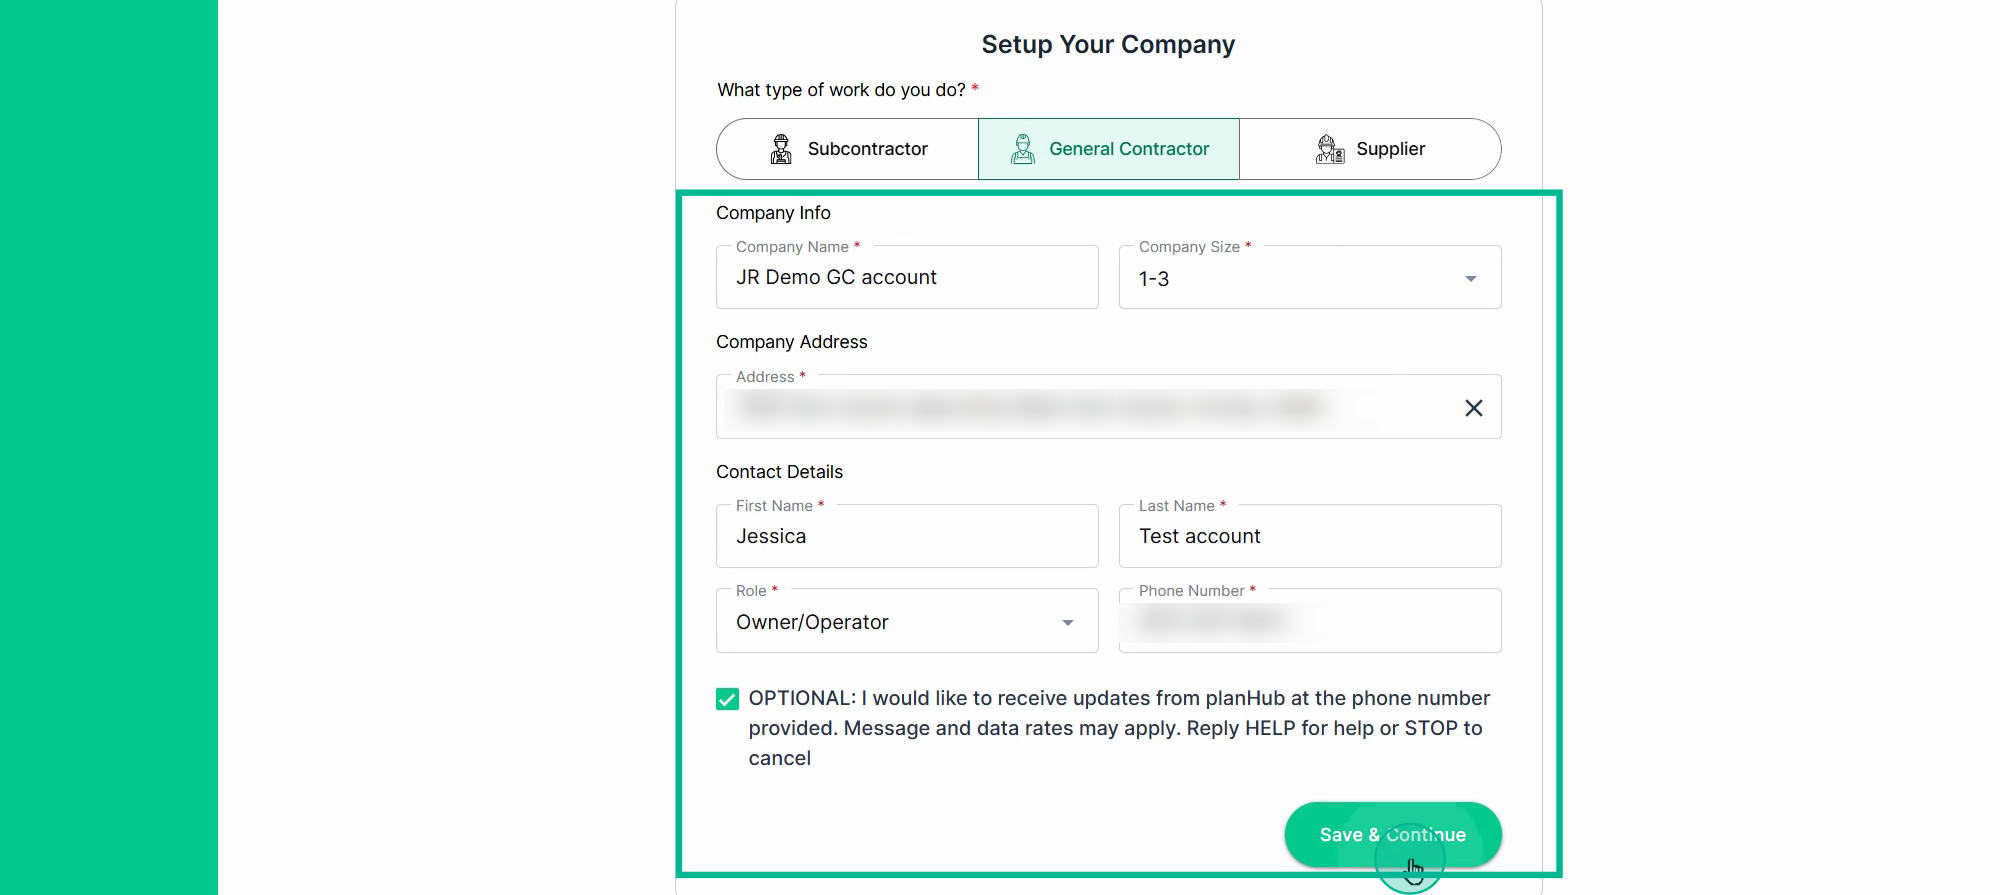
Setup Your Company
Step 1: Select your company type.

Step 2:
-
Fill in your company's basic information.
-
Add all relevant additional details for your company.
-
If you want updates from PlanHub at the provided phone number, check the optional box.
Step 3:
If PlanHub identifies a potential match for your company, you’ll see existing company options. Select your company and click Yes, Add to Team. If none match, click No, this is not my team.

Step 4: Choose the goal that matches why you’re joining PlanHub.

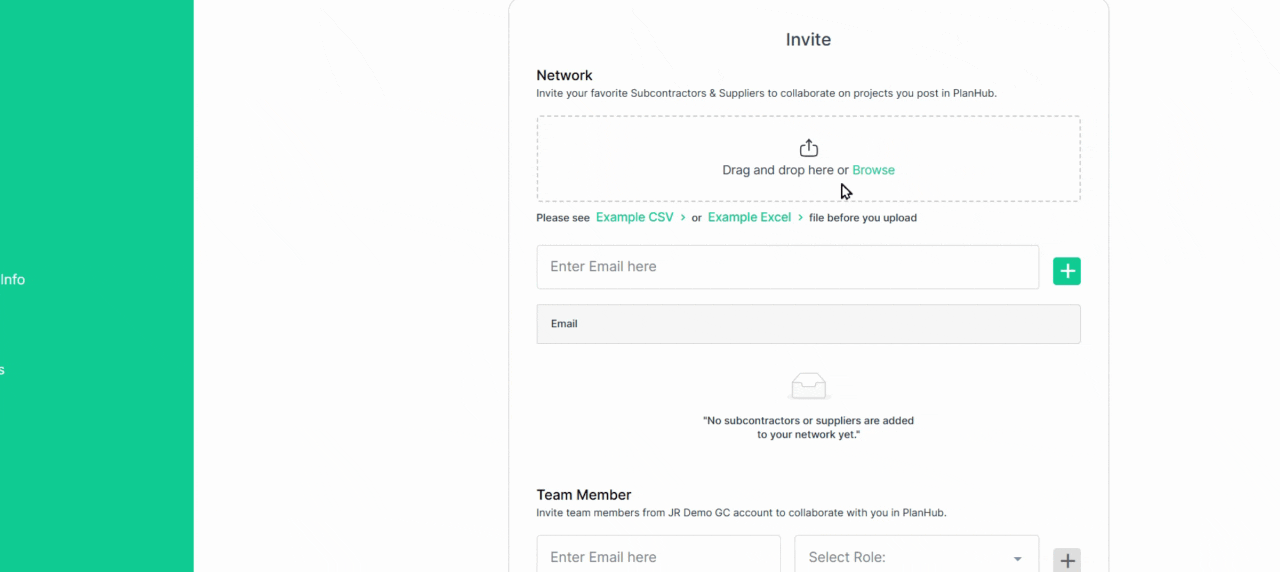
Step 5: Invite your network.
Upload a list of your subcontractors by clicking Browse, or add their emails individually.
Download the sample Excel, Google Sheet, or CSV templates if you need guidance on formatting.
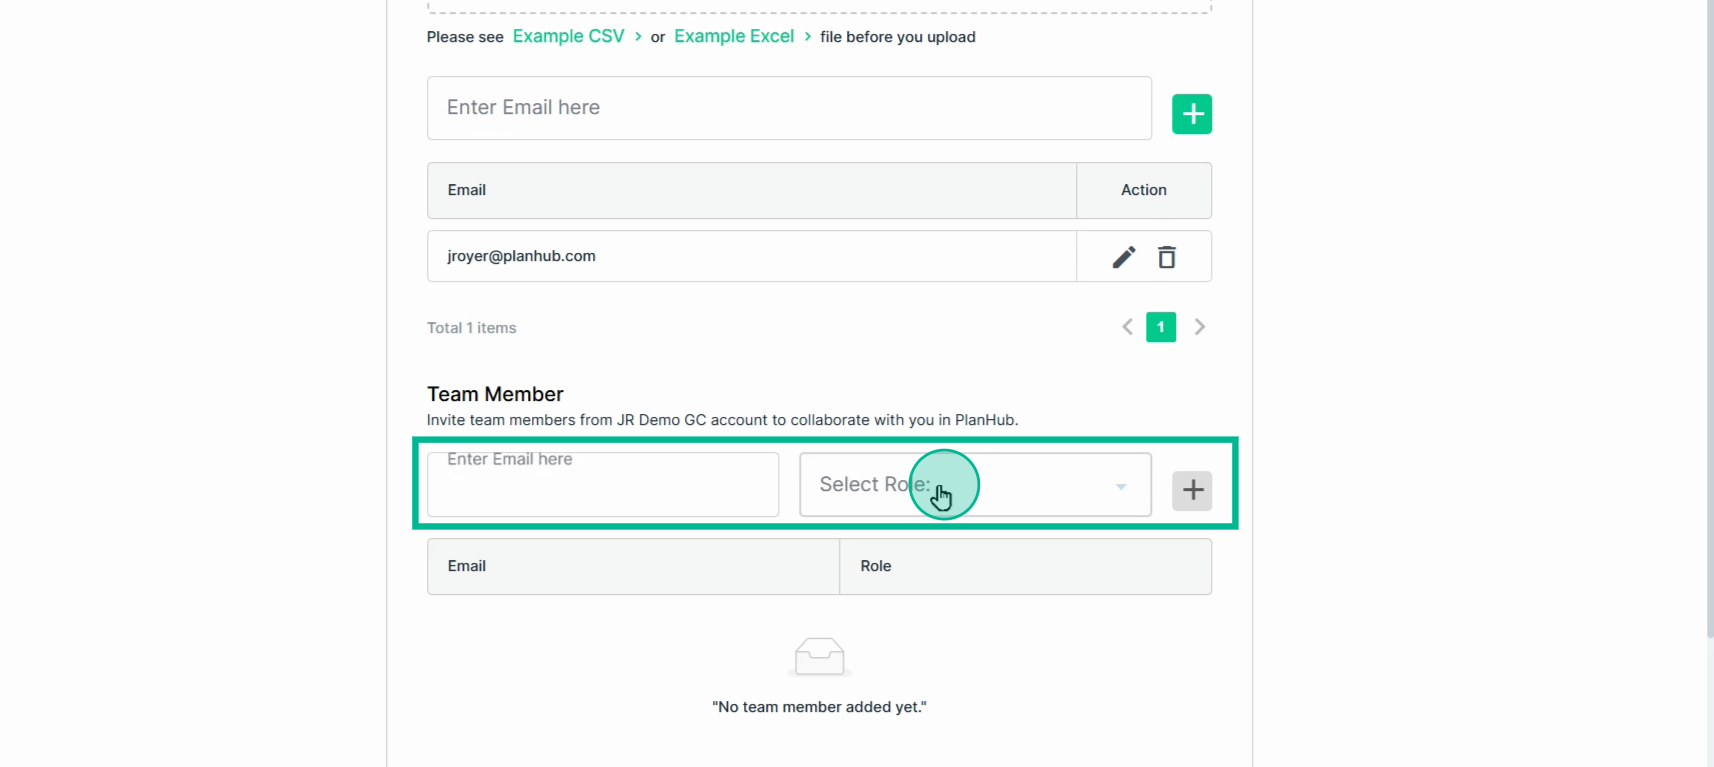
Step 6: Invite team members.
Enter each person’s email, select their role, and see them listed below.
They’ll receive an invitation to set up their PlanHub login.
You can Skip this process or Submit your results to continue.
Congratulations! Your PlanHub company account is now ready as a general contractor.
Start posting your projects for free to reach PlanHub’s network of subcontractors and suppliers. You’ll quickly increase your project visibility and attract more bids from local professionals.