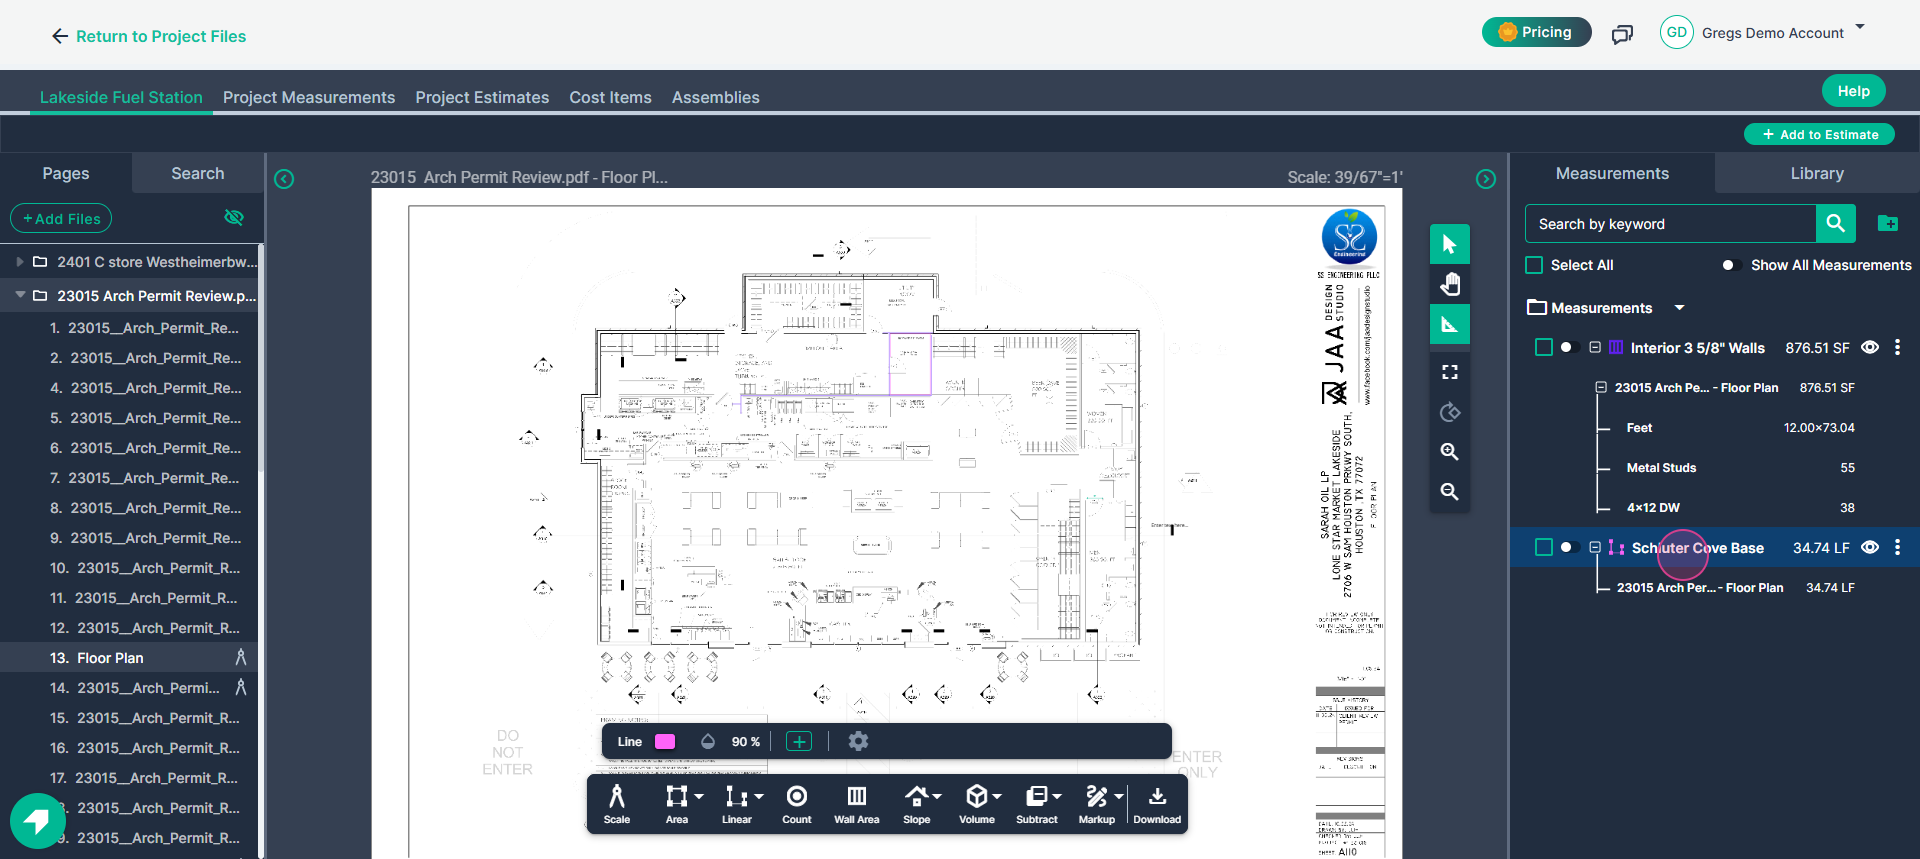
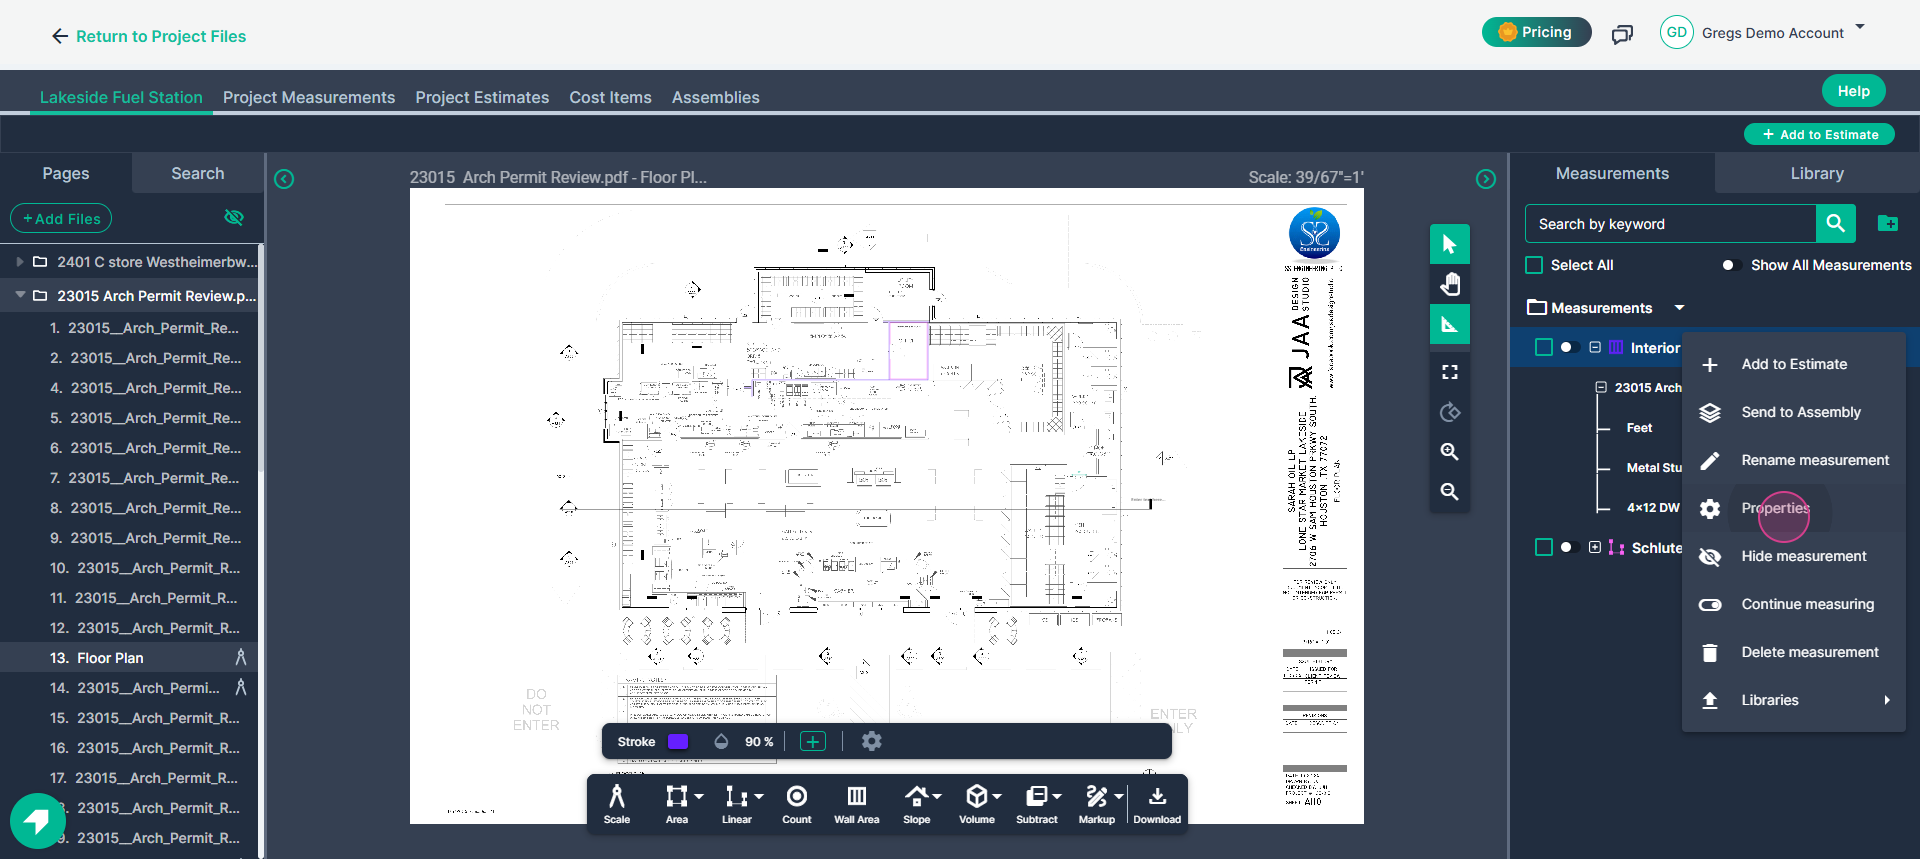
Step 1: Right-click the measurement item you want to add a cost. Open the Properties box for the item—for example, the Schluter cove base—by selecting Properties.

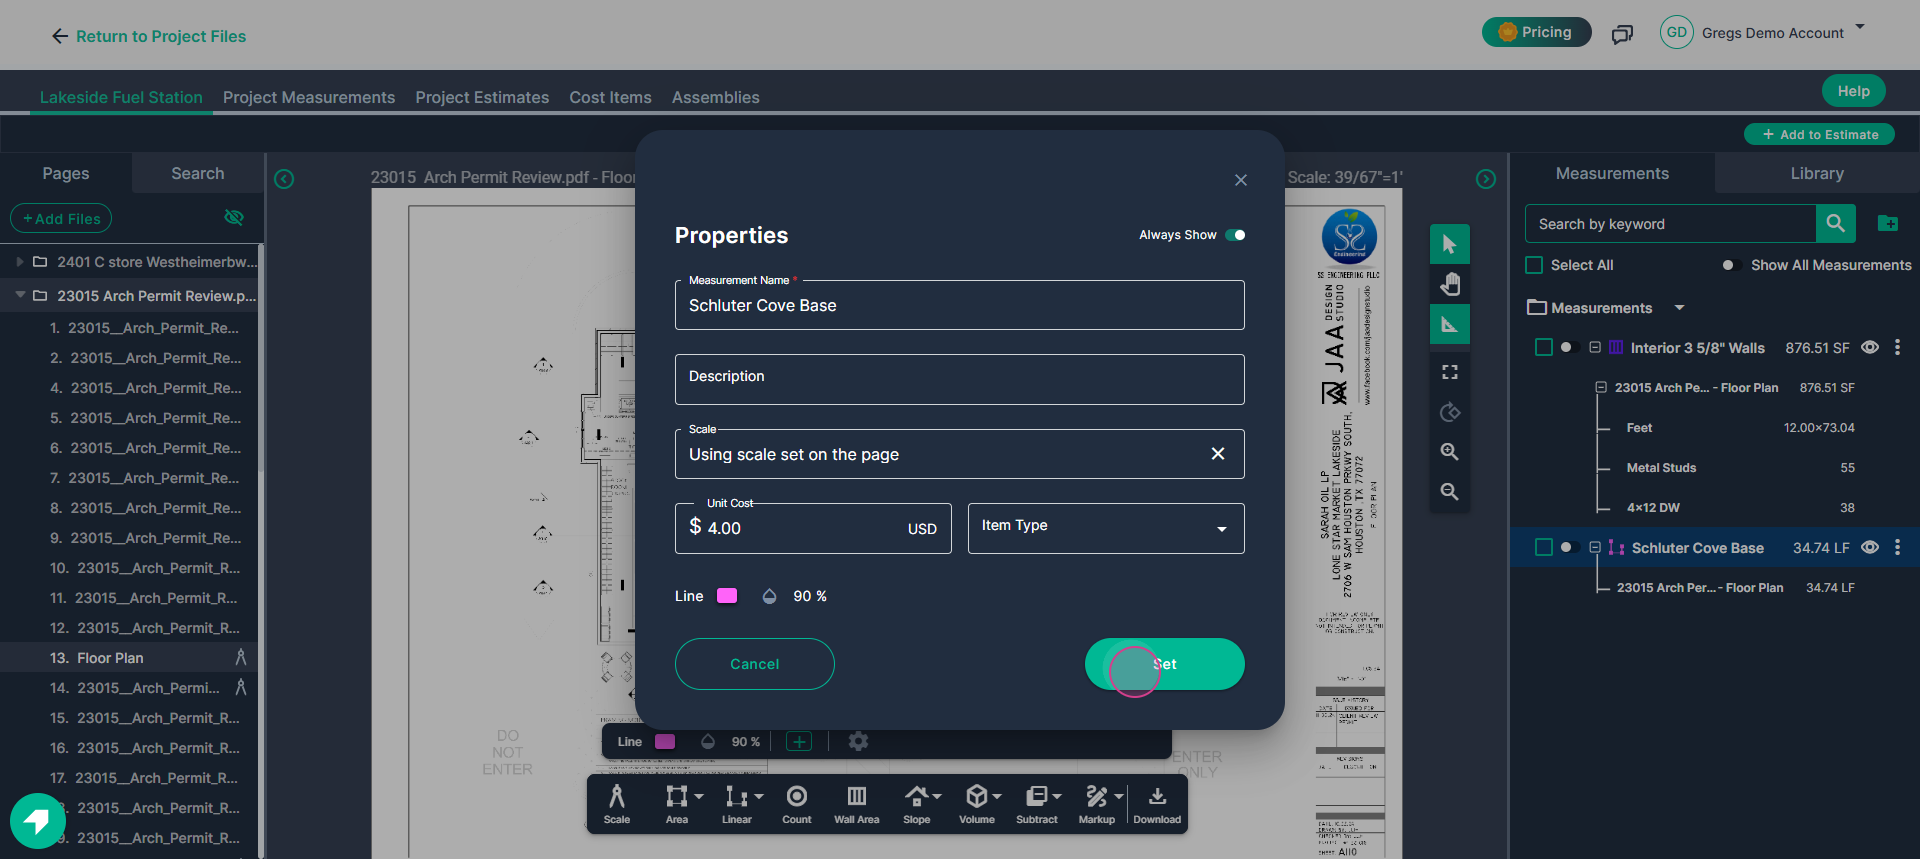
Step 2: Find the Unit Cost field in the Properties box. Enter the cost per unit, such as 4 for $4 per linear foot.
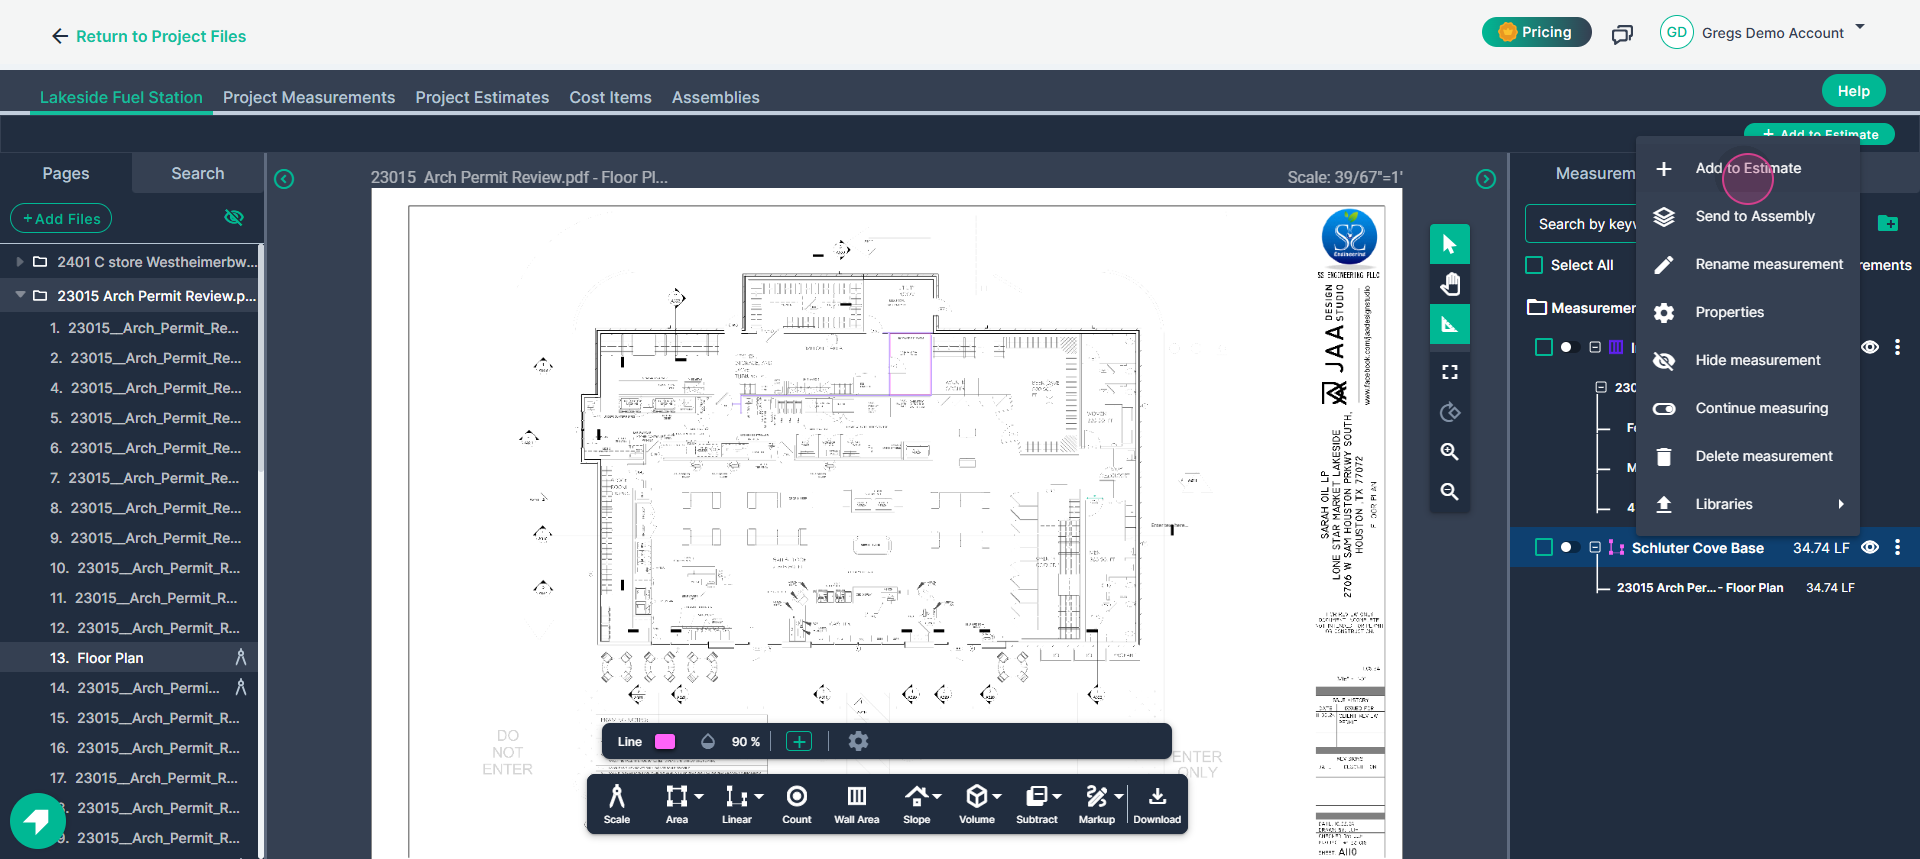
Step 3: Send the measurement to your estimate. Right-click the measurement and select Send to Estimate.

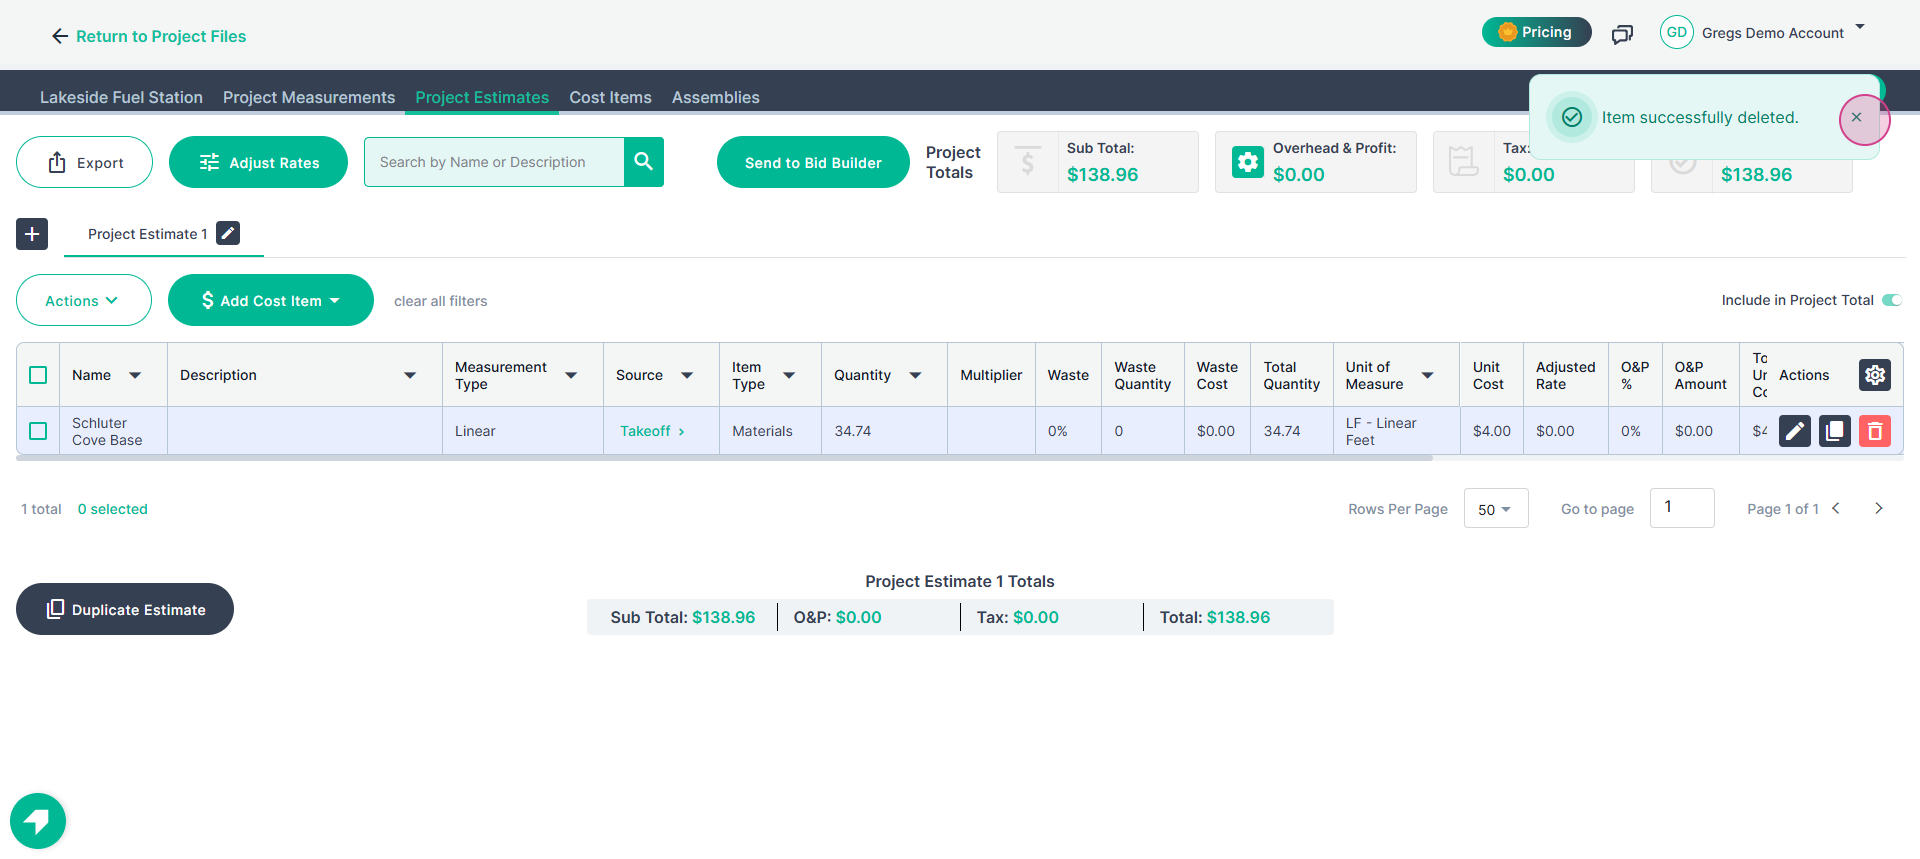
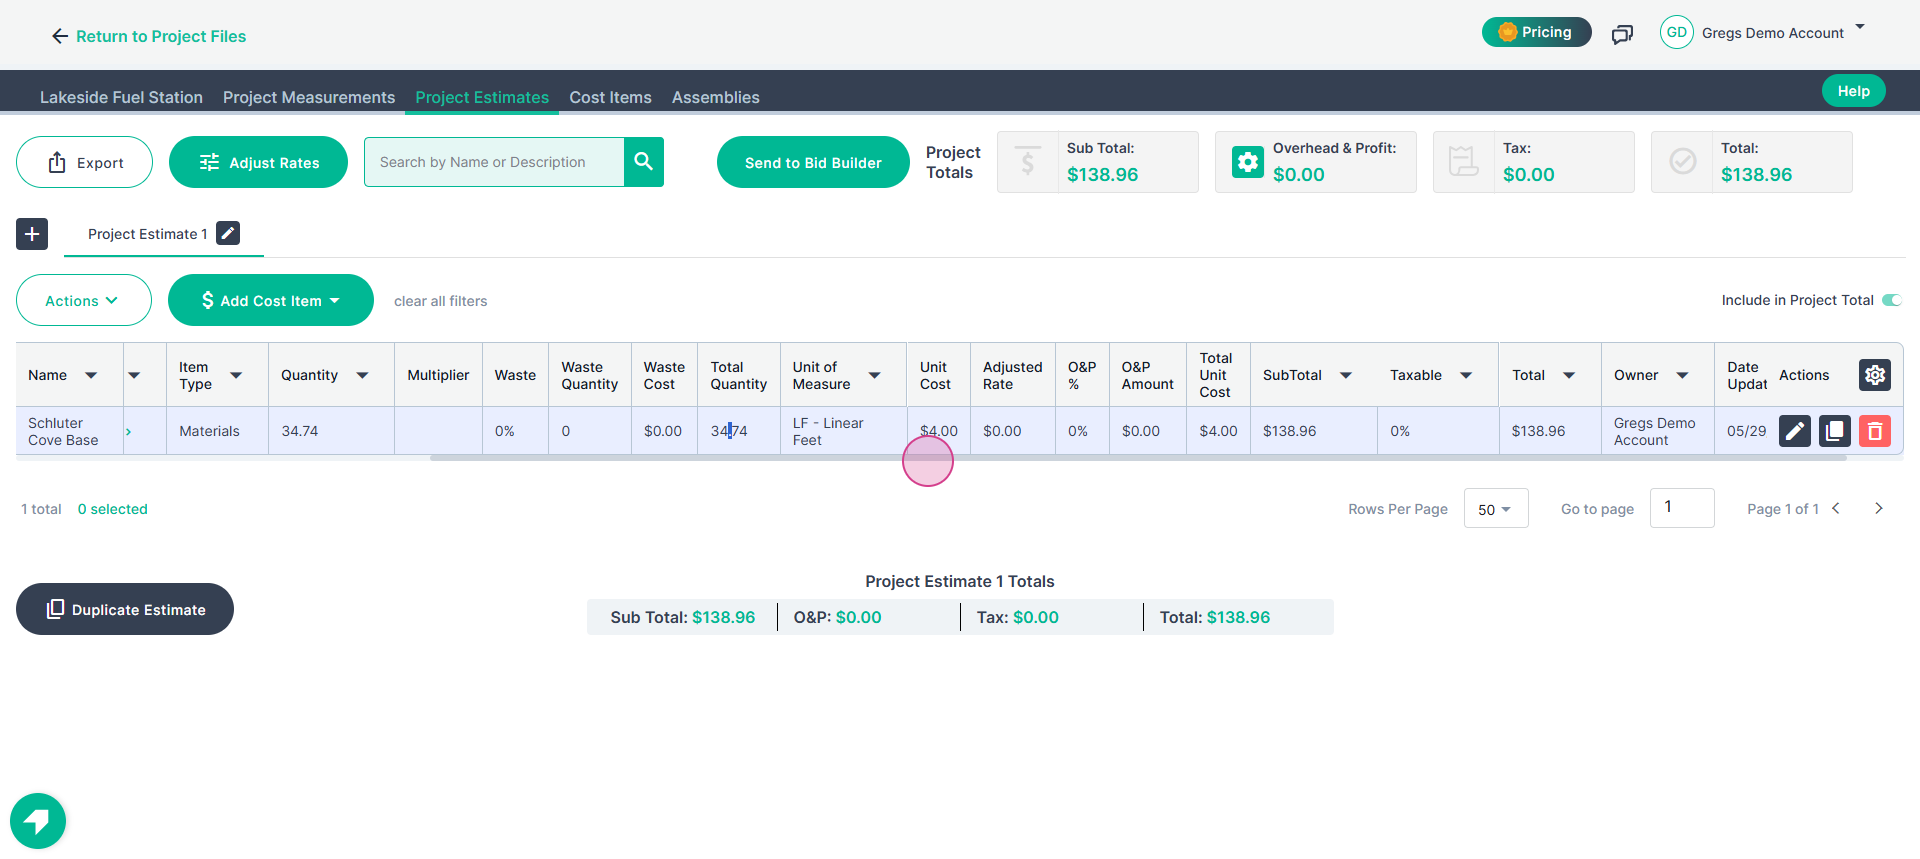
Step 4: View the new cost item in your estimate.
The estimate now includes a cost item for the Schluter cove base, with a unit cost of $4 multiplied by the total measured quantity (e.g., 34.74 linear feet), for a total of $138.96.

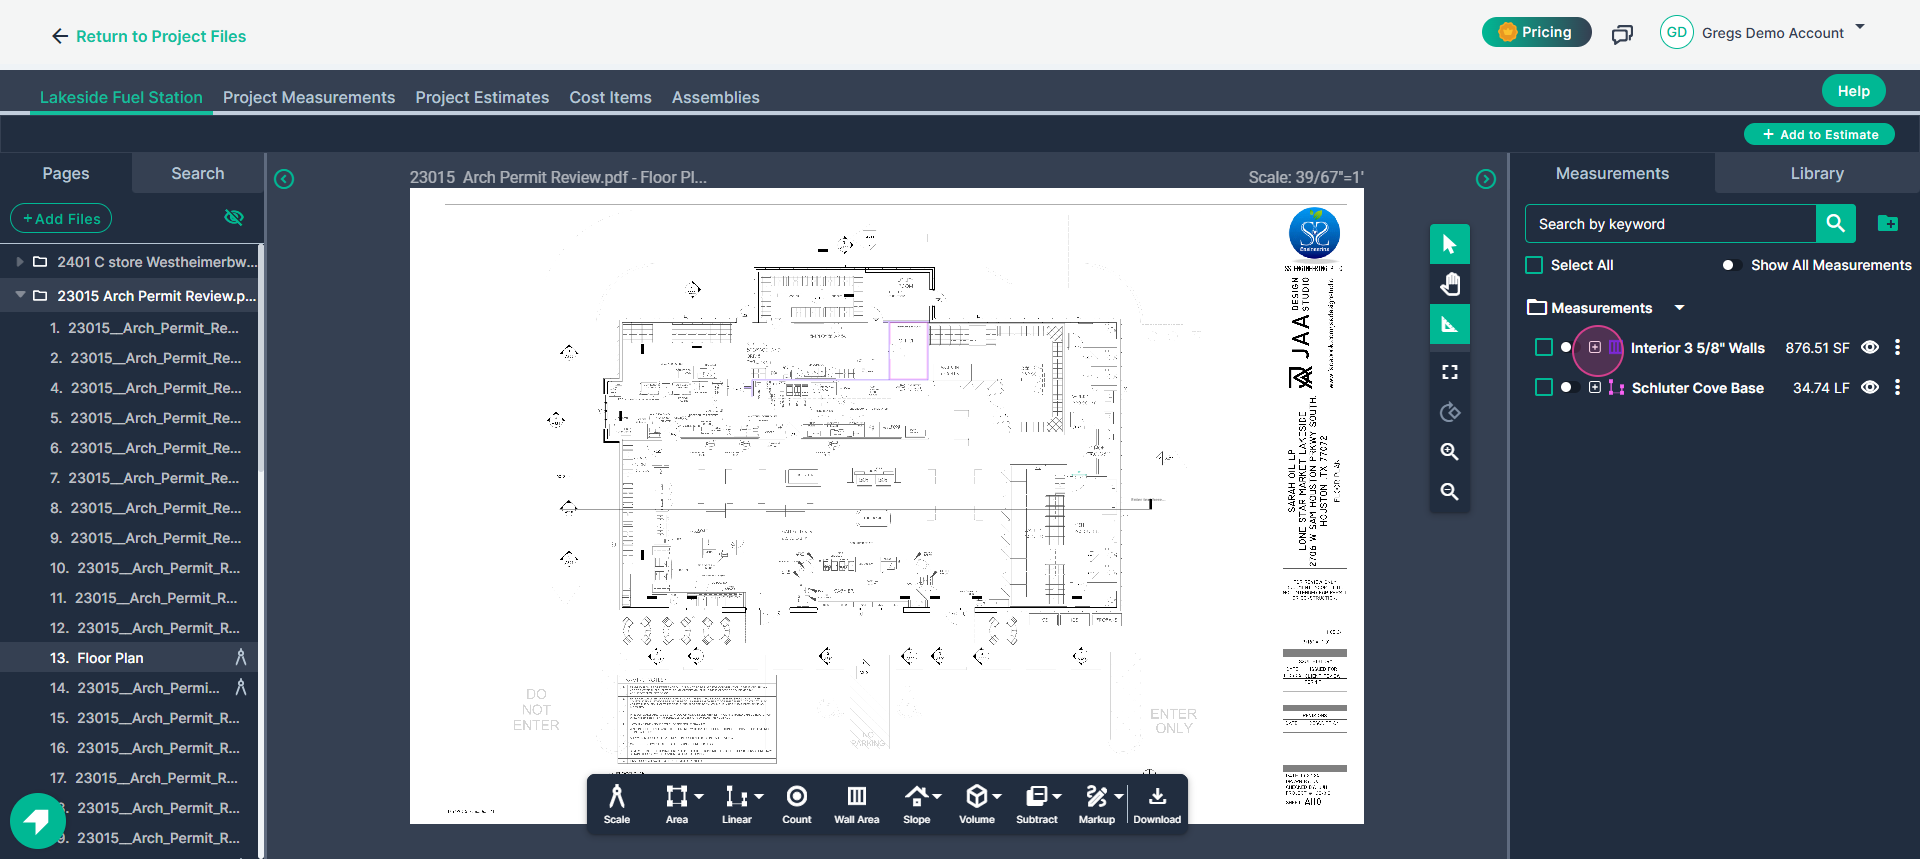
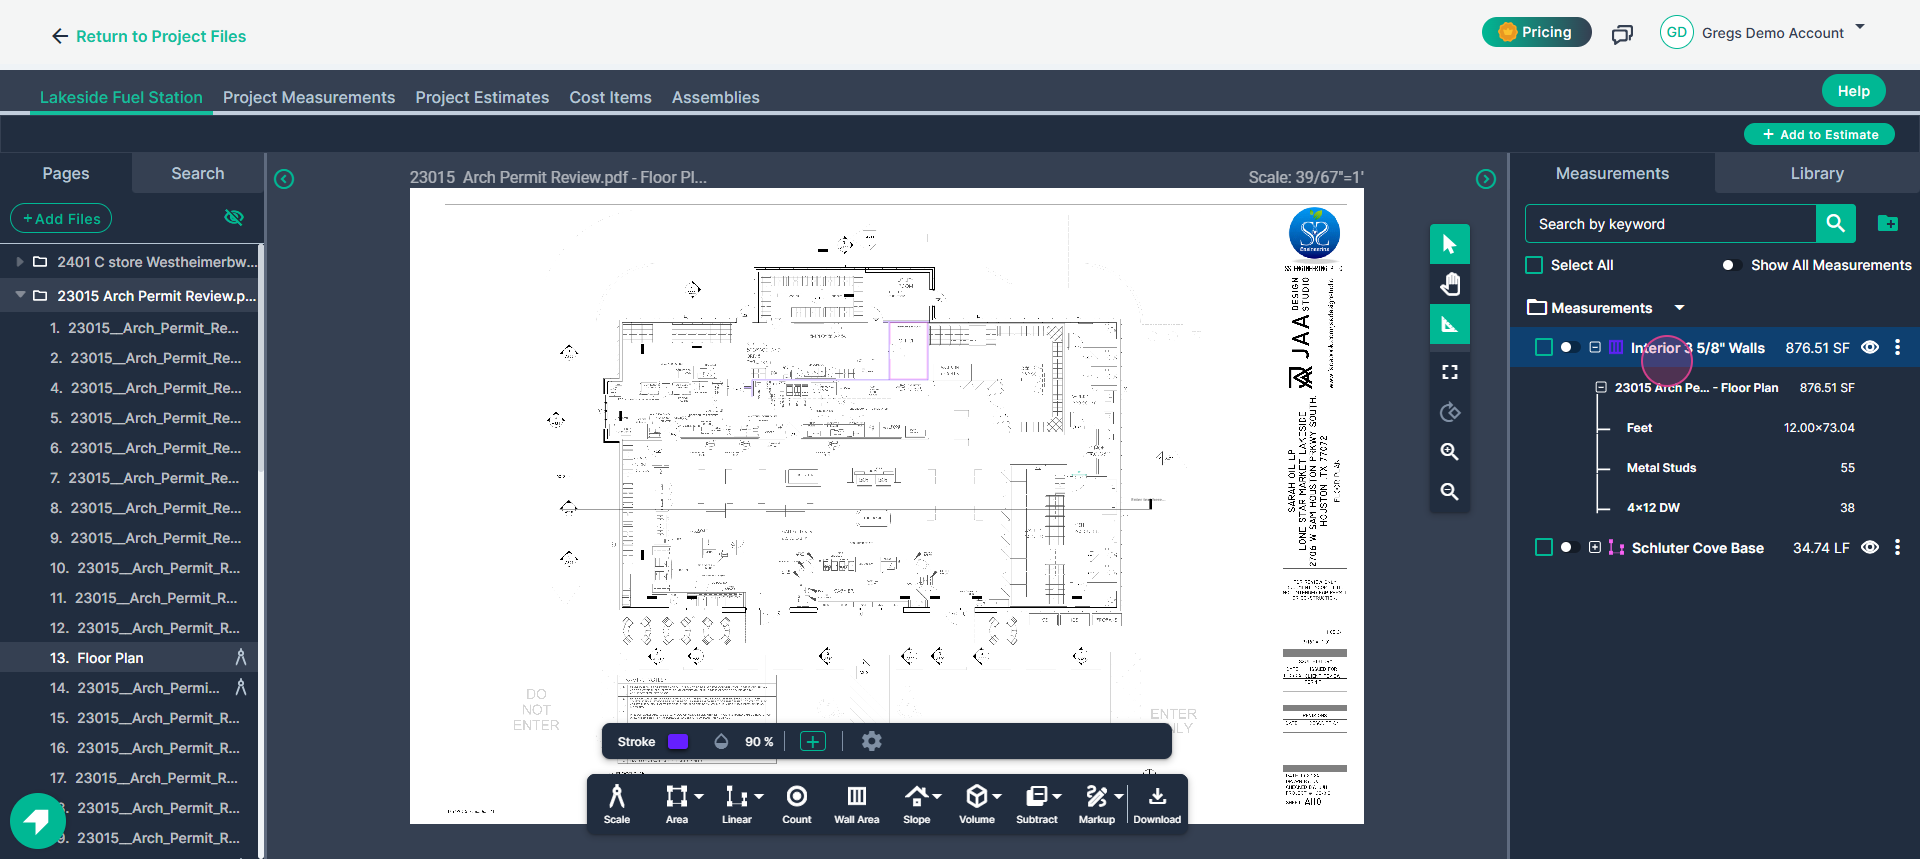
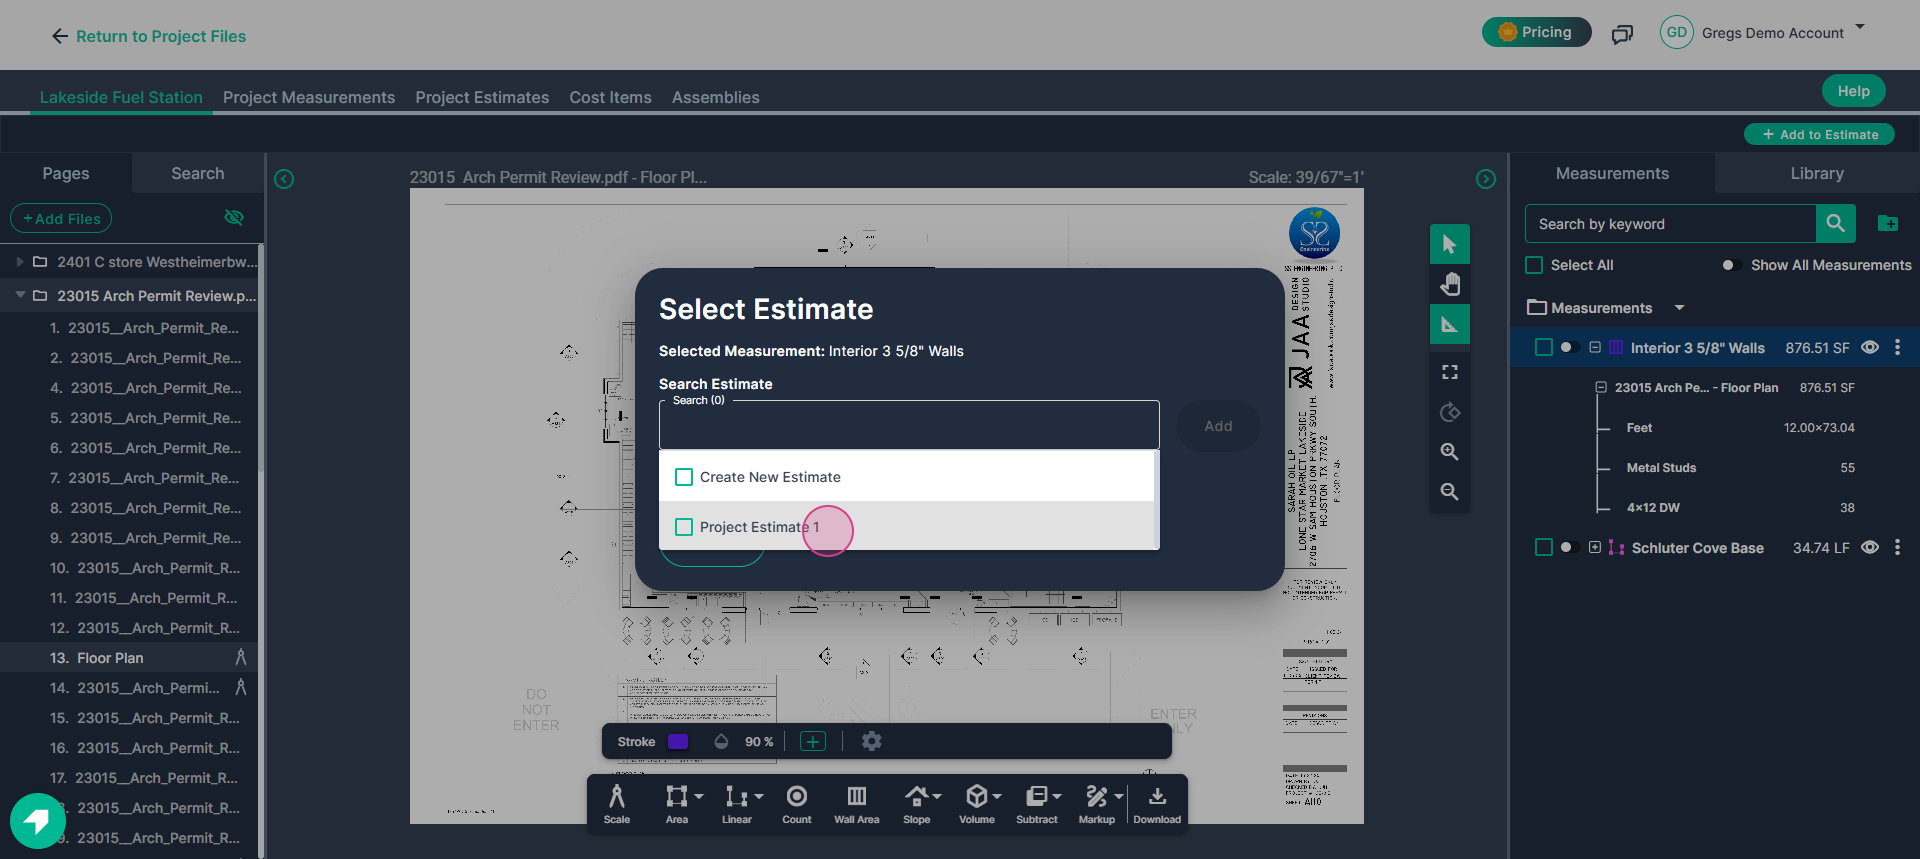
Step 5: Remember that some measurements include multiple result types. For example, a wall measurement might calculate square footage, linear feet, stud count, and drywall sheet count. Setting a unit cost at the measurement level applies that same cost to every result.

Step 6: For multiple results, you may leave the unit cost at zero. Send the measurement to your estimate without entering a cost at the measurement stage.
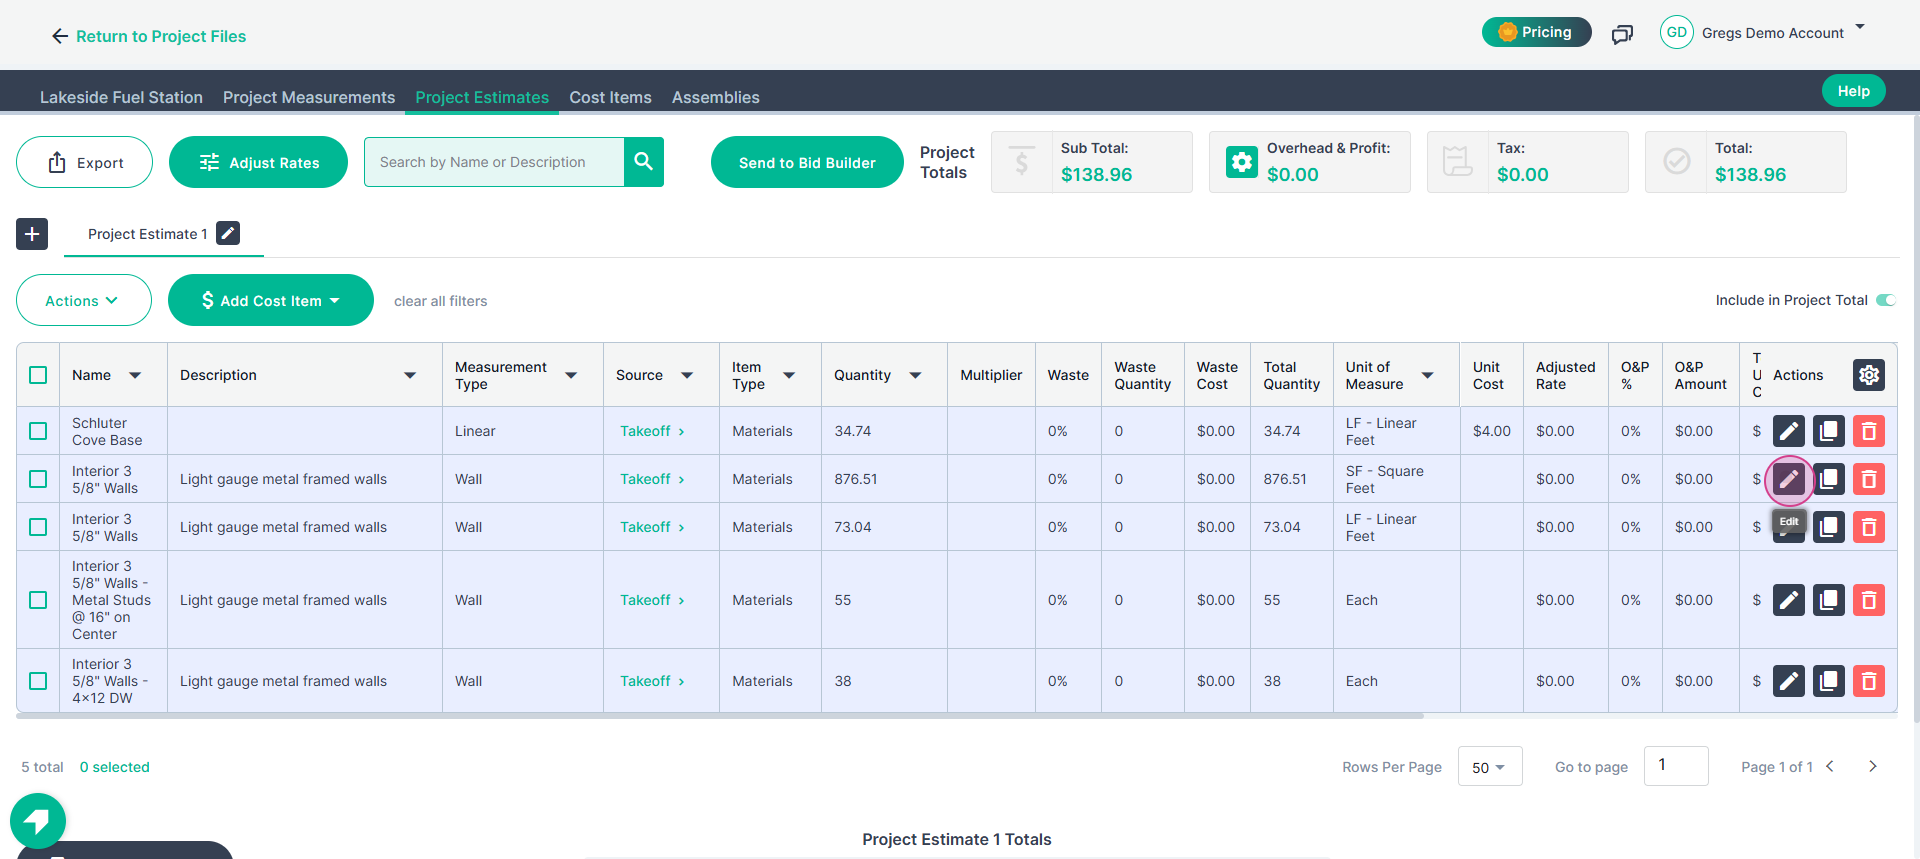
Step 7: Add a unit cost for each item in your estimate. Click the pencil icon next to any estimate line where you want to specify a unique unit cost.
For instance, for an item measured in square feet, enter $2 per square foot. Save your changes.
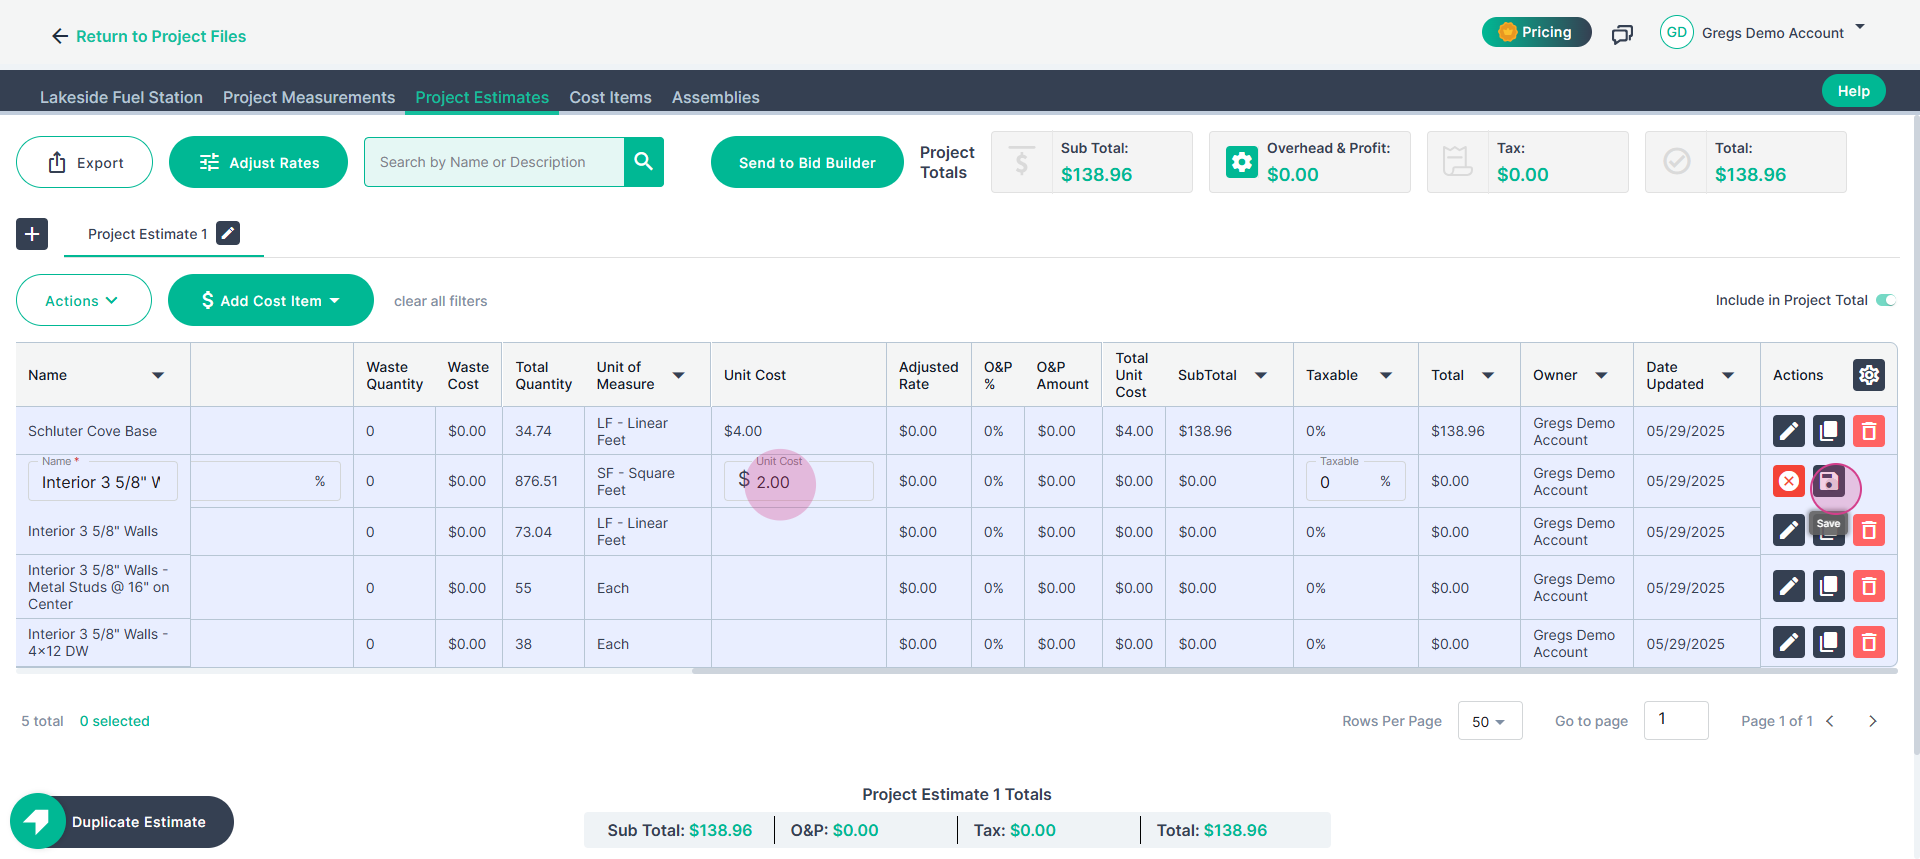
Repeat this process for each line item where the unit cost differs.
By following these steps, you’ll always apply the right costs to the right units, just as shown in your workflow.