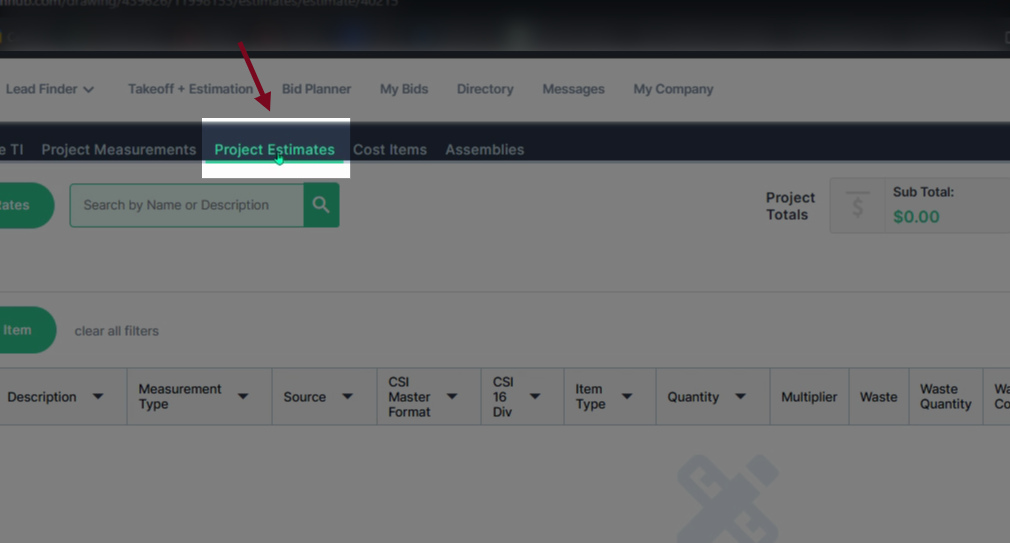
Step 1: Navigate to the Project Estimates tab.
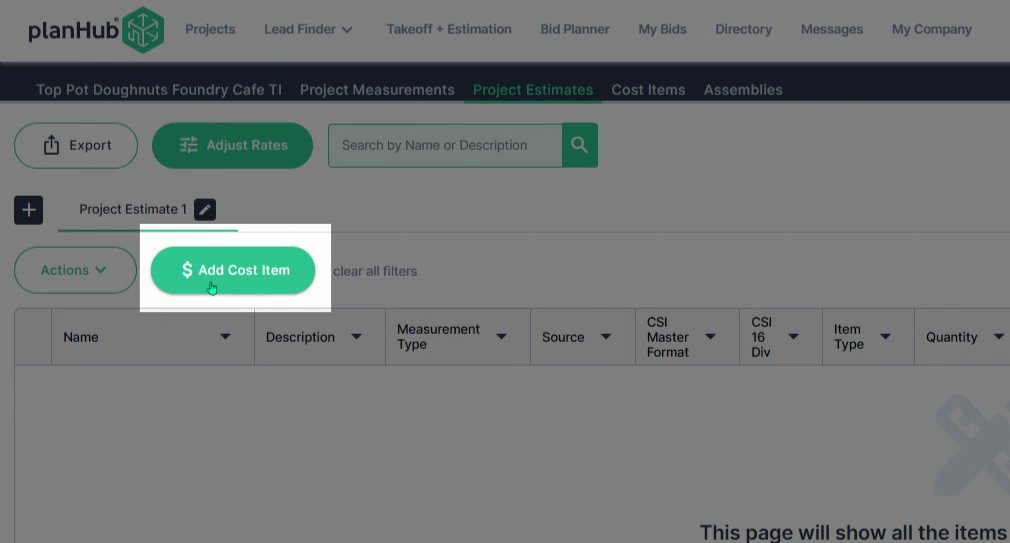
Step 2: Click Add Cost Item.
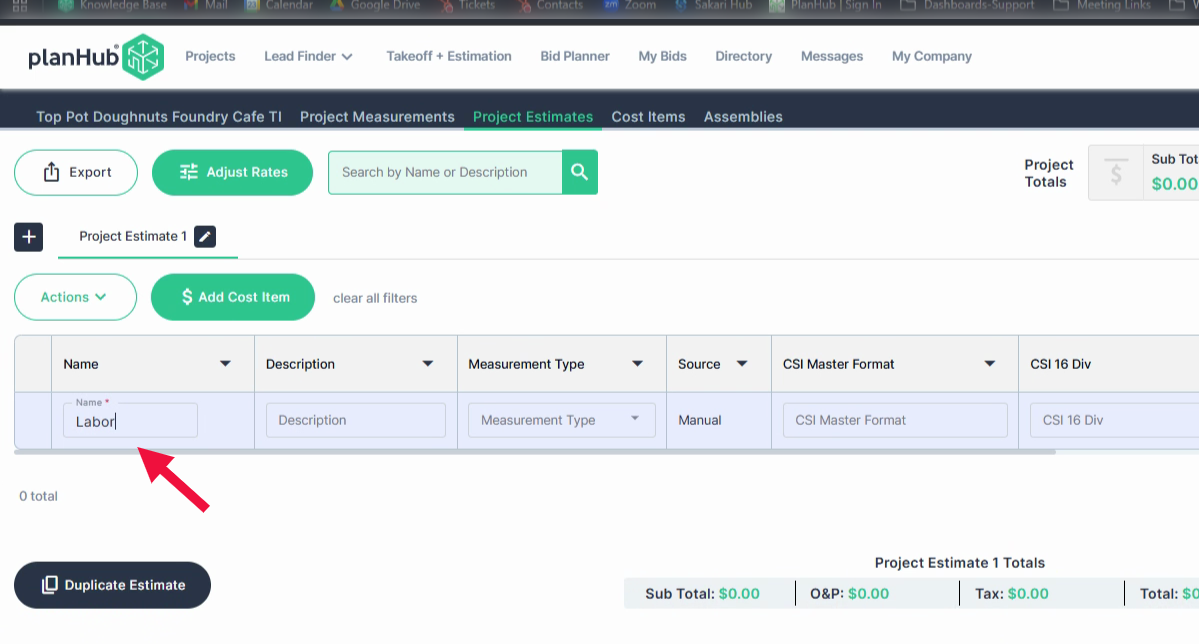
Step 3: Click in the Name box and enter the cost item name.
Step 4: (Optional) Fill in a description for the cost item in the next box.
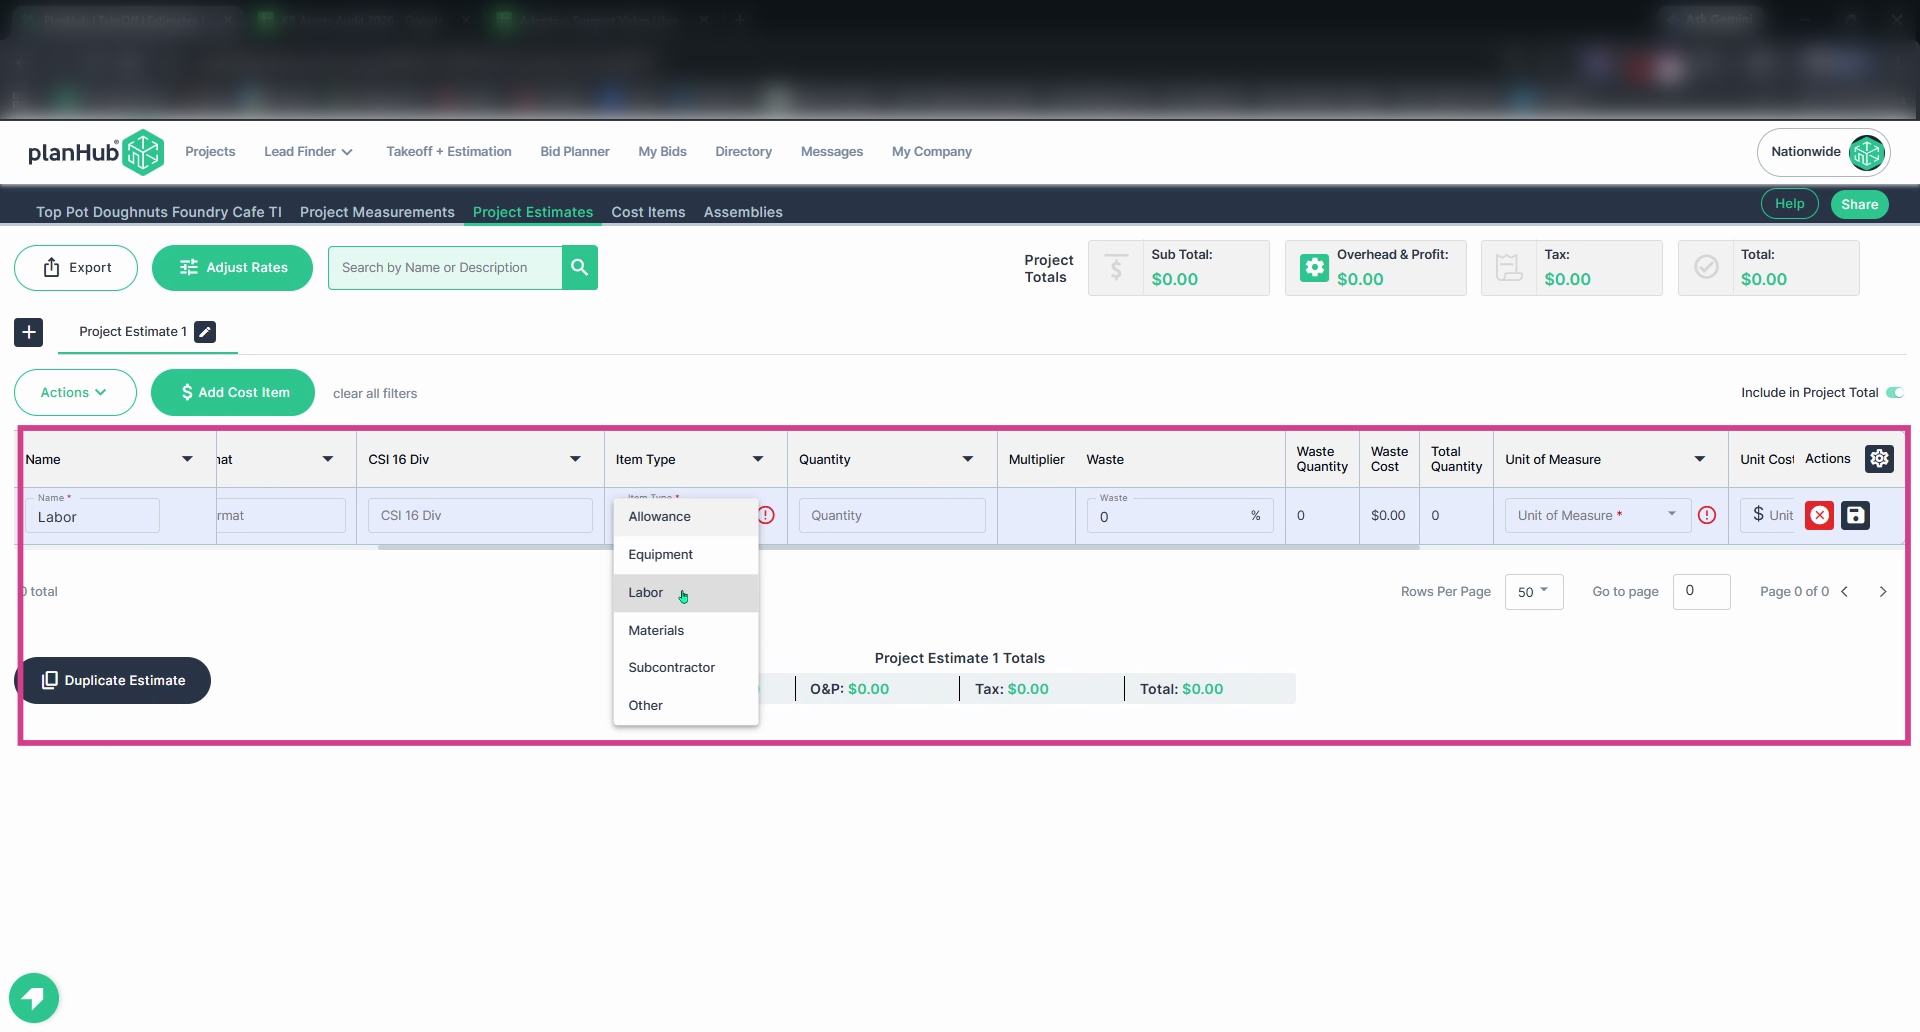
Step 5: Complete all required fields marked with an asterisk. Begin with Item Type.
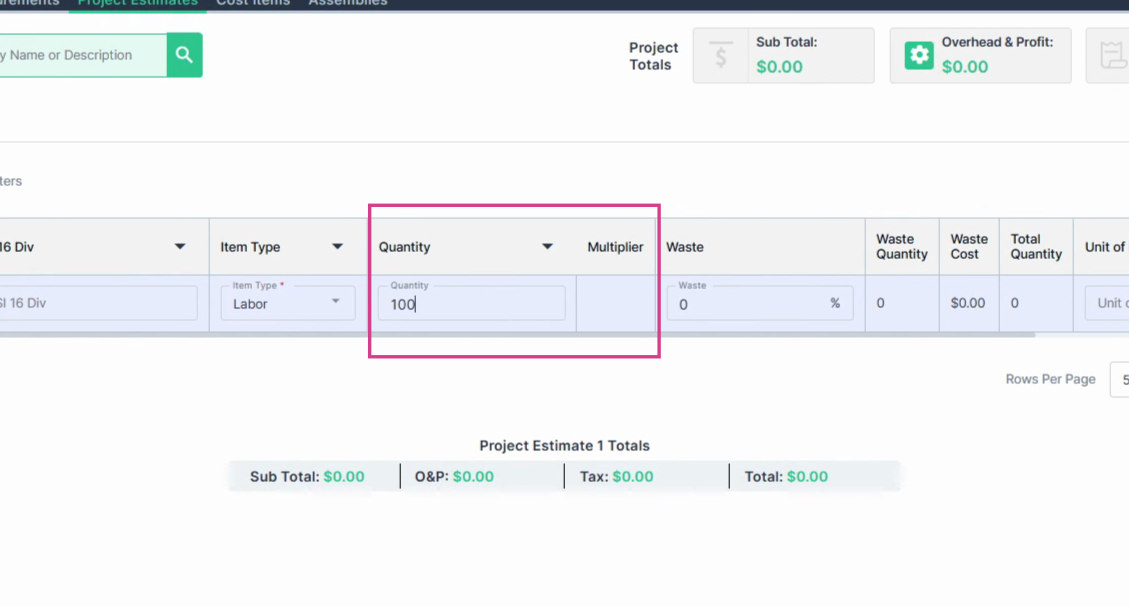
Step 6: Enter the quantity.
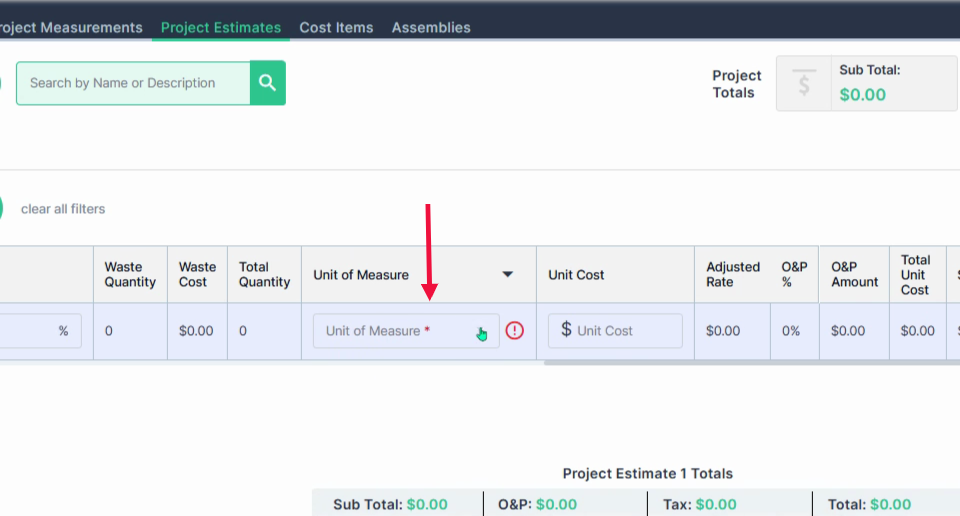
Step 7: Set the Unit of Measure.
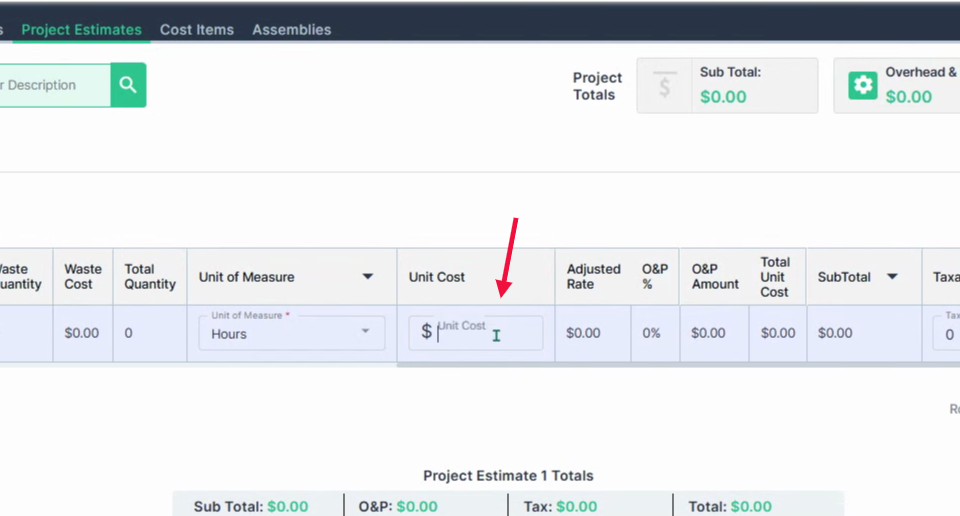
Step 8: Enter the Unit Cost.
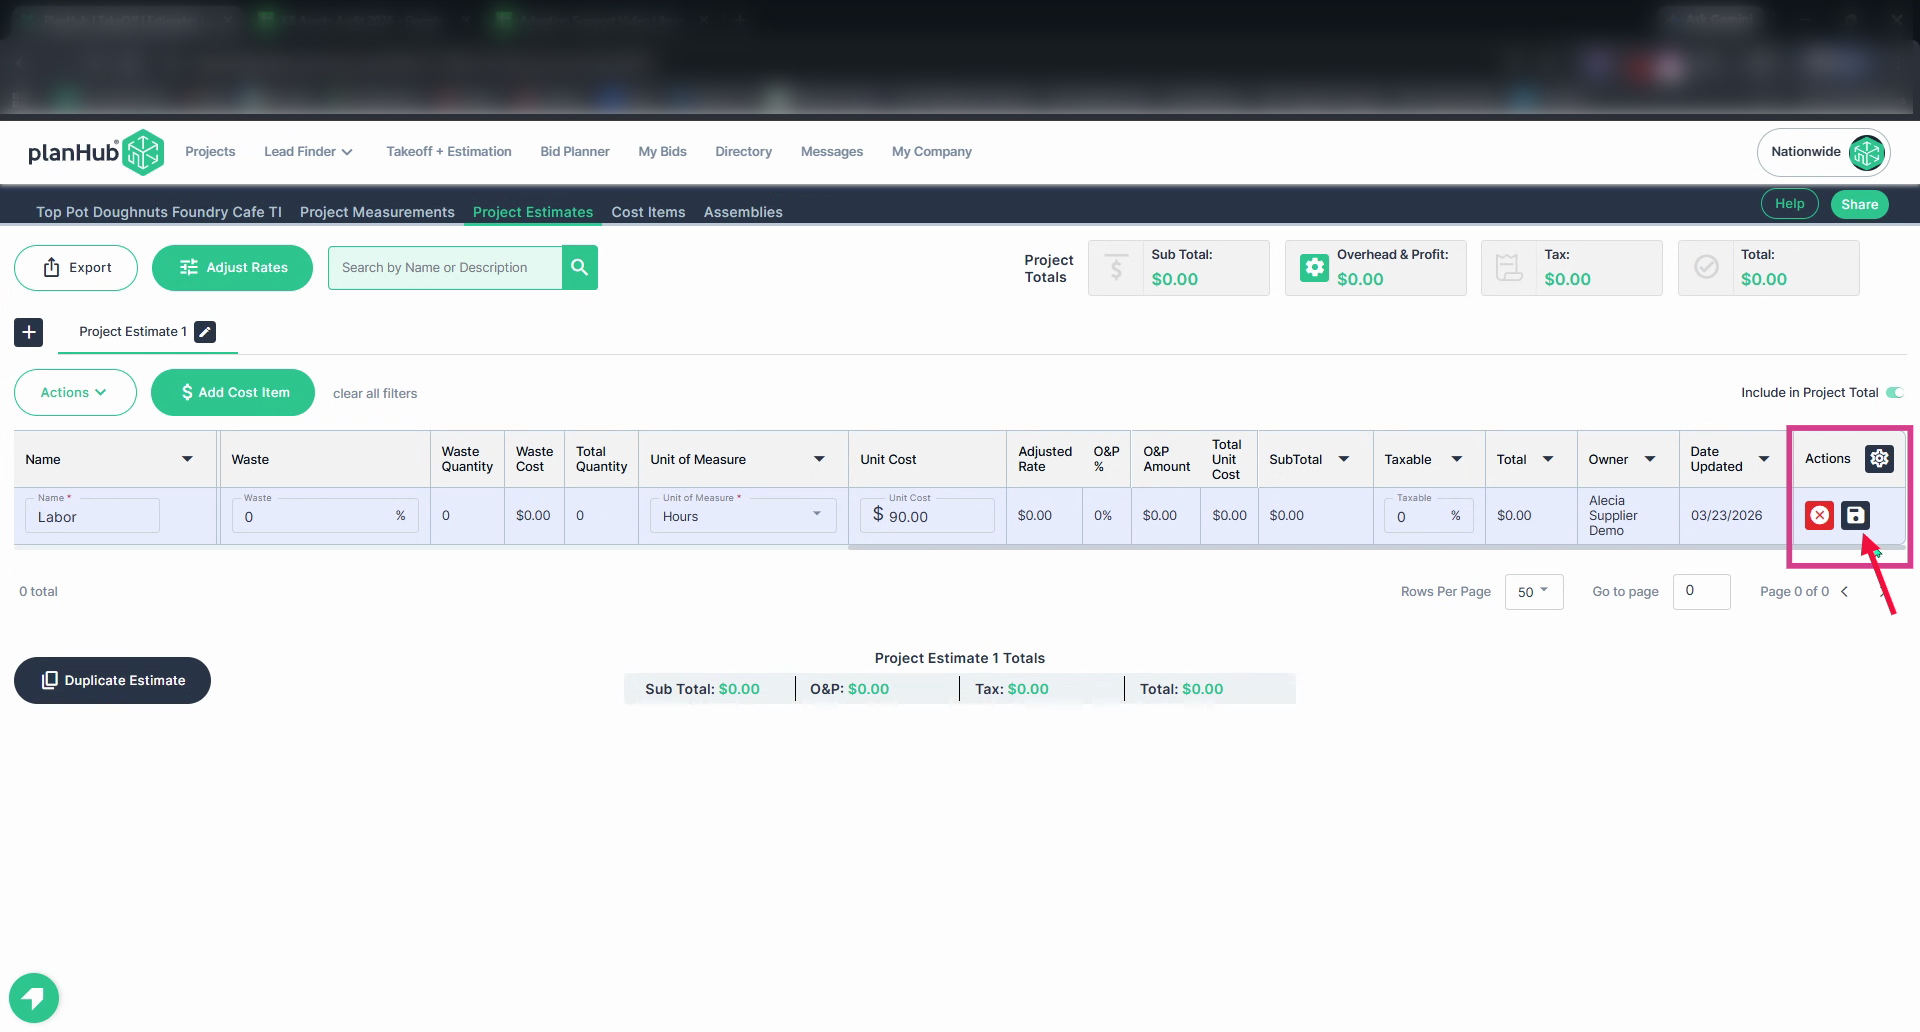
Step 9: Click Save in the Actions column to add the cost item.
Adding Cost Items to the Cost Items Library
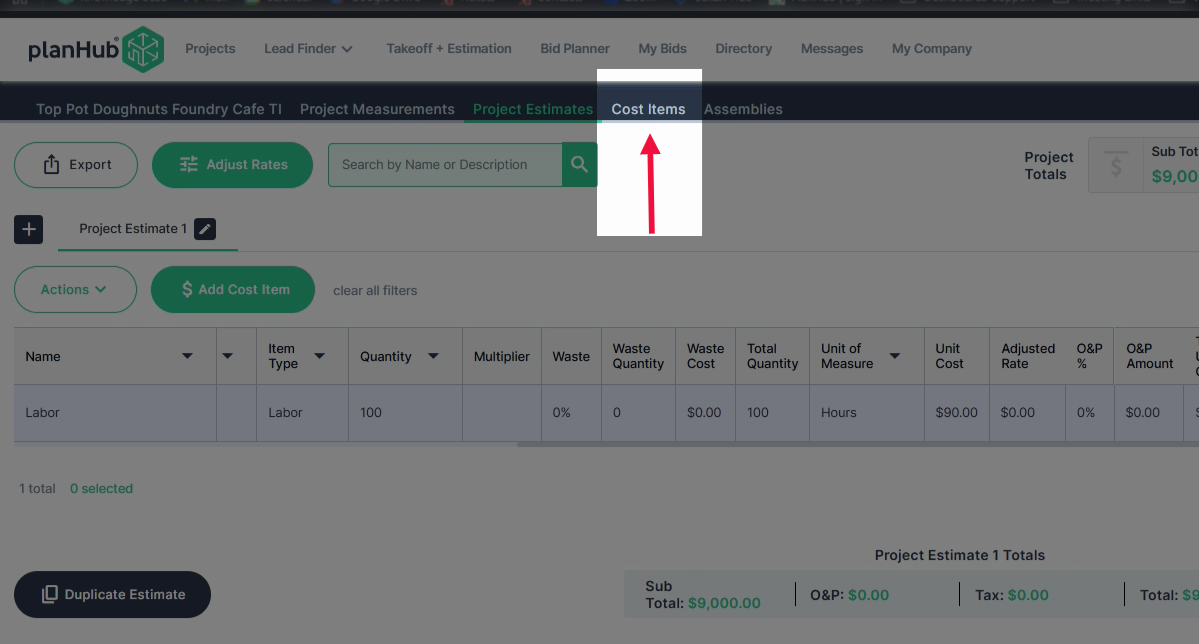
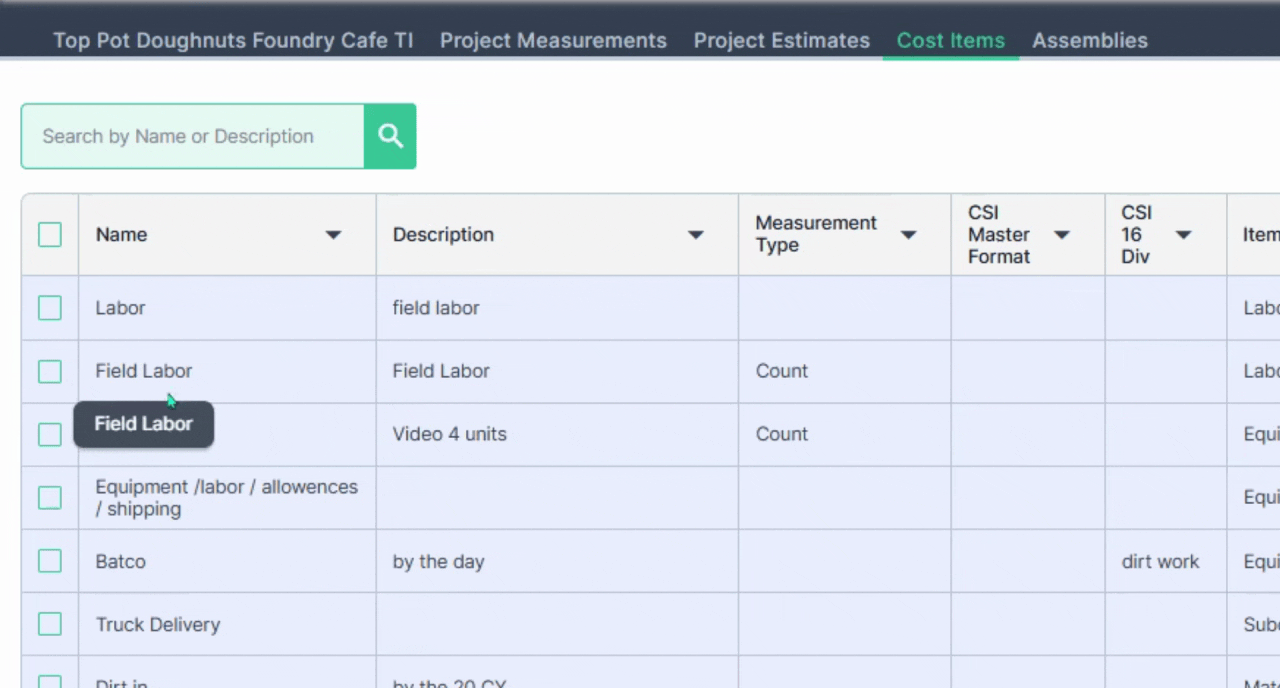
Step 1: Click Cost Items at the top of the page.
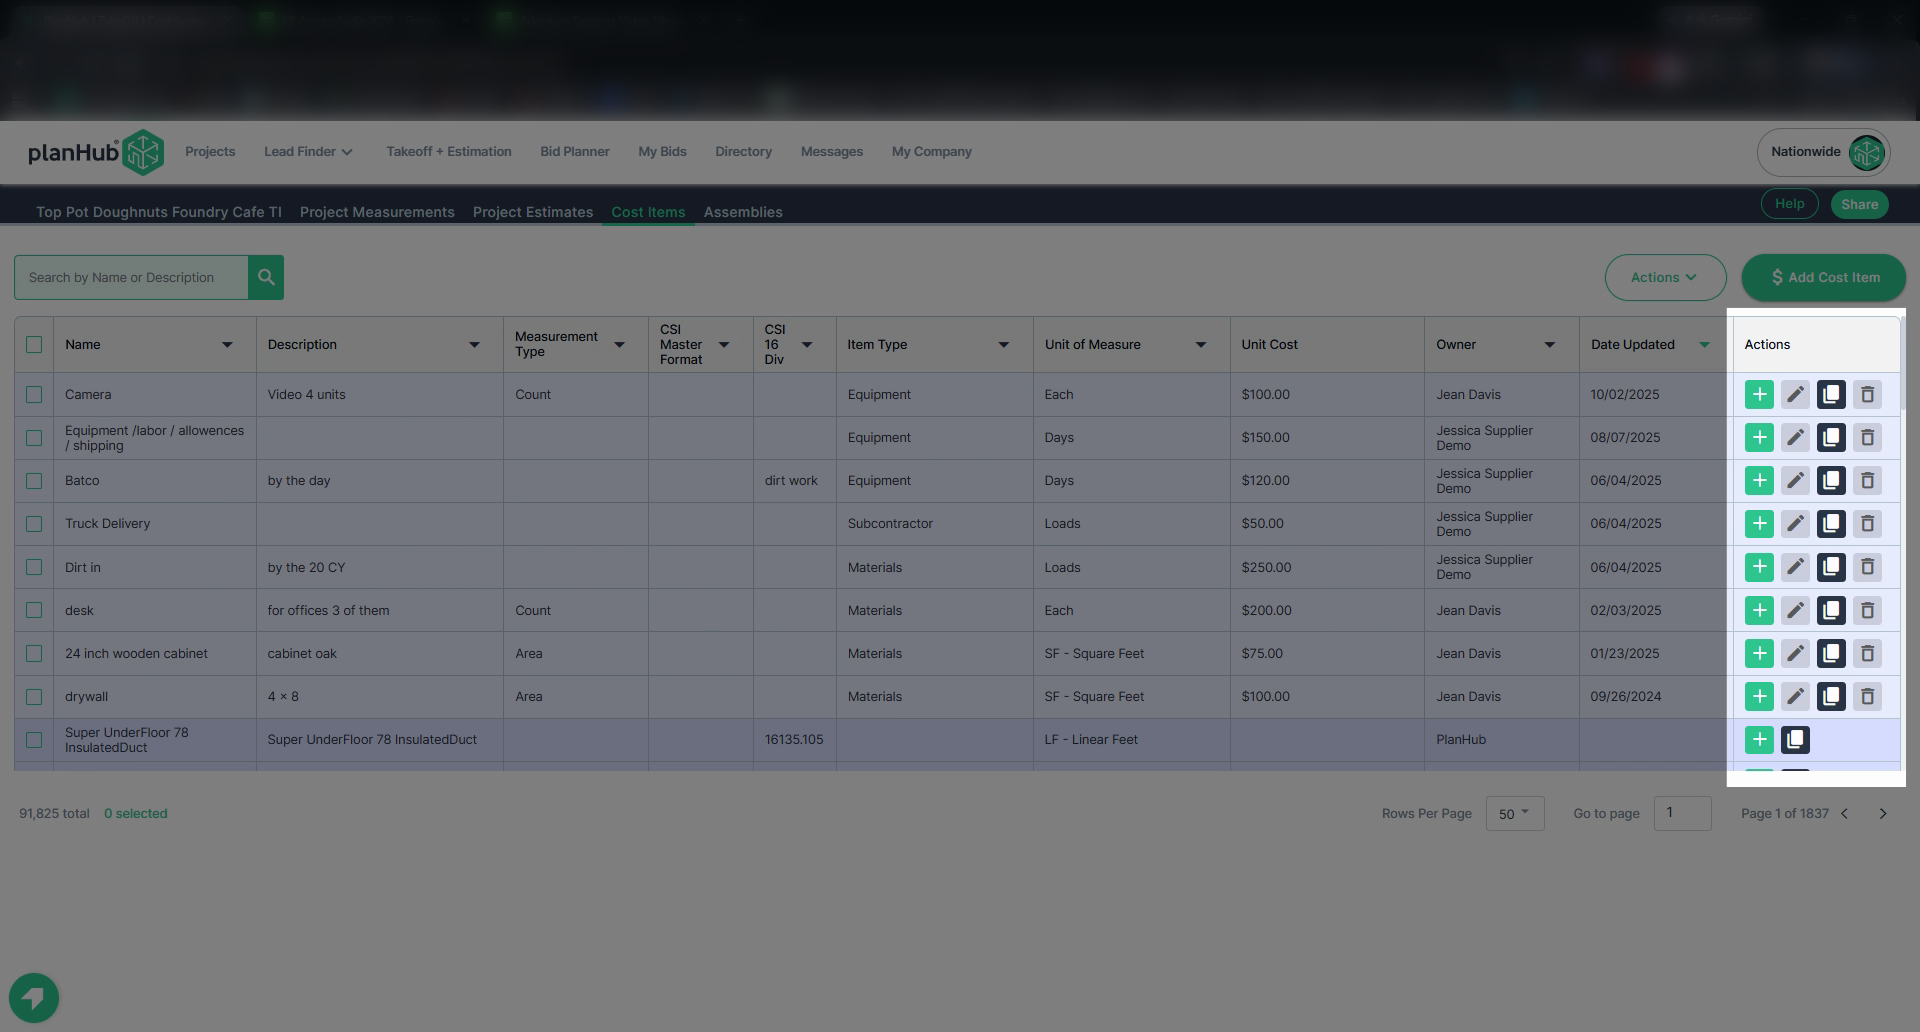
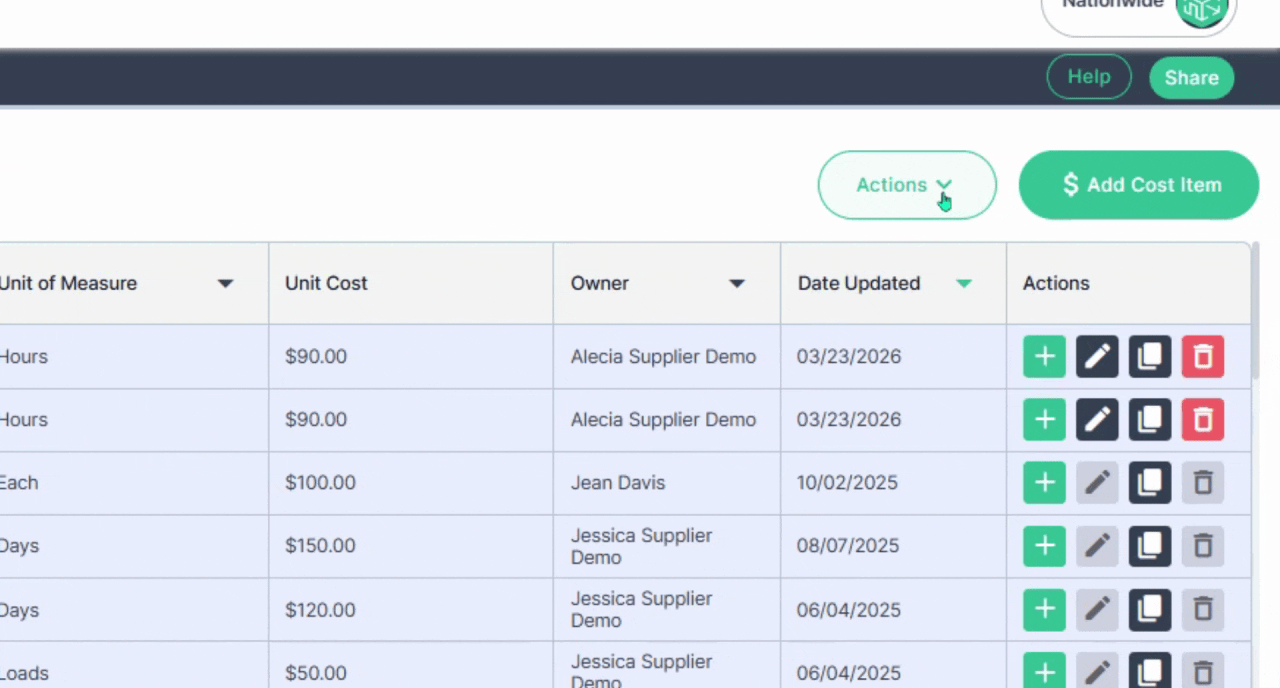
Step 2: On the right side, in the Actions column, you can click on the plus sign to Add Cost Item to your estimate from each row.
Step 3: Enter the information in the blank boxes in the row as needed. All boxes with an Asterisk are required.
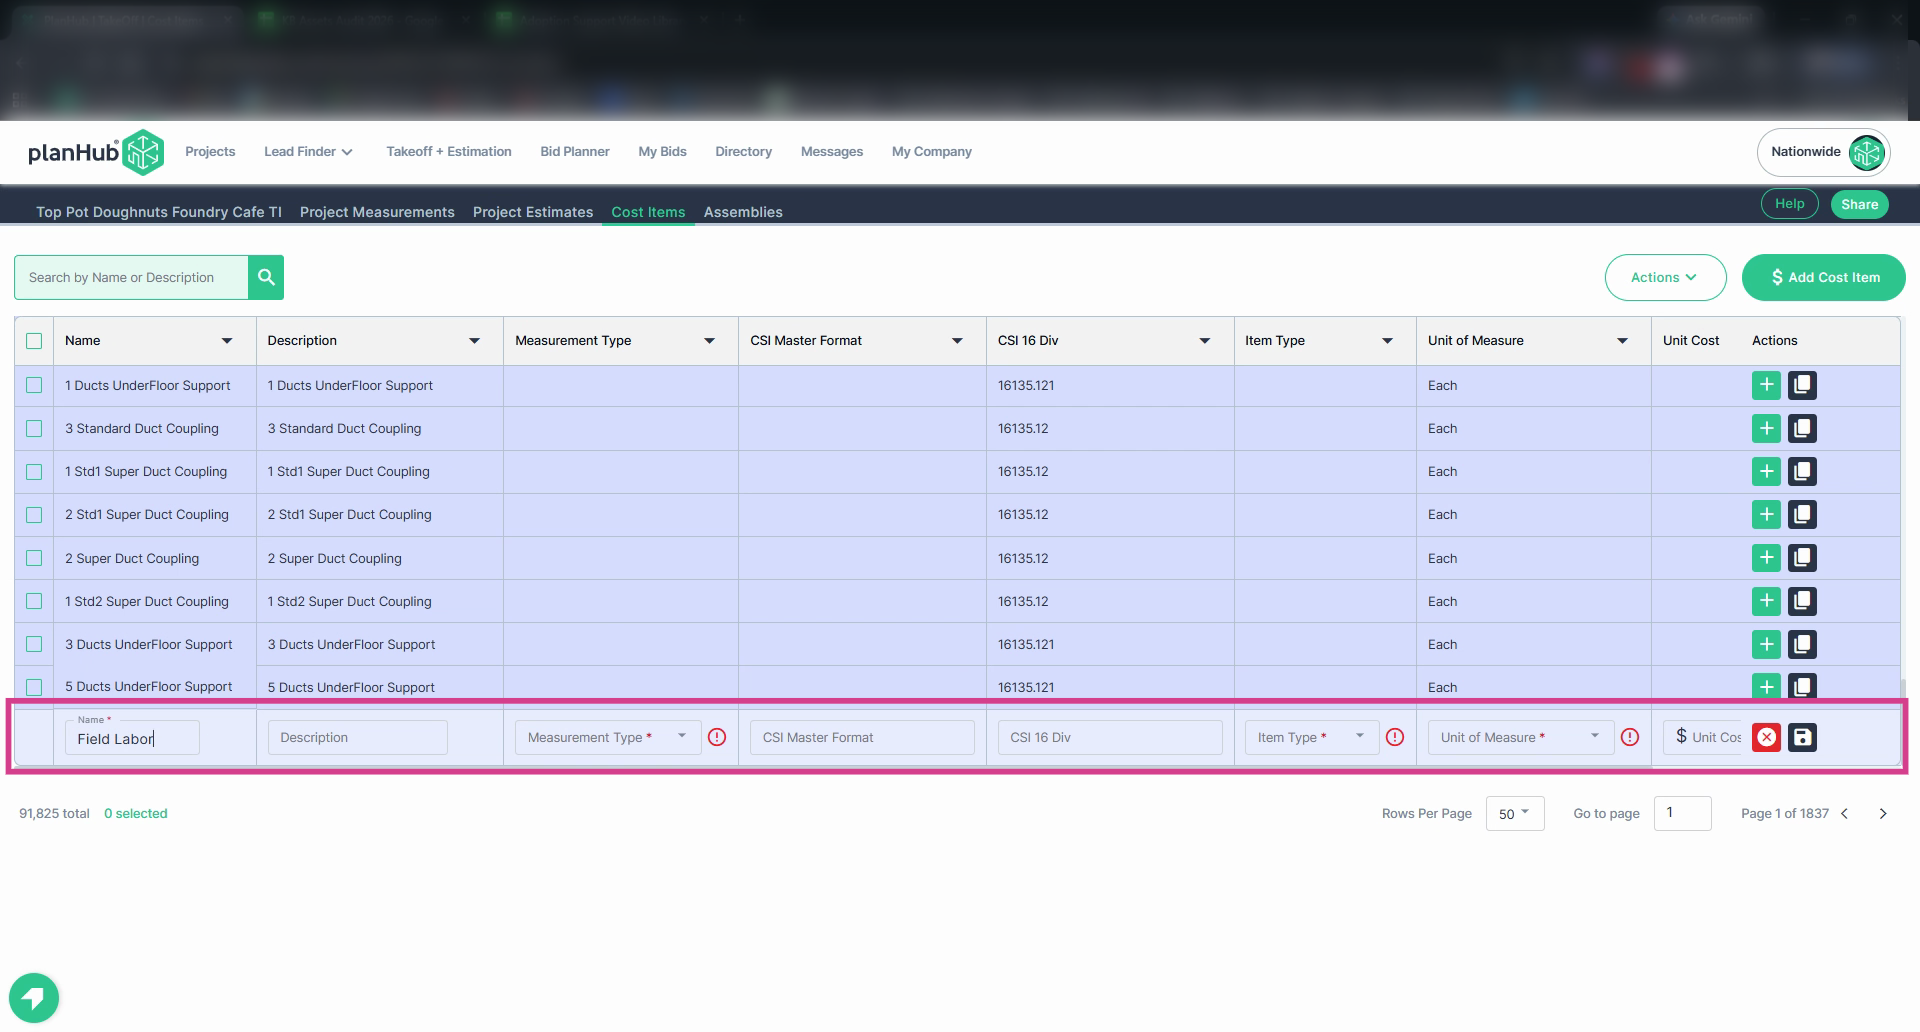
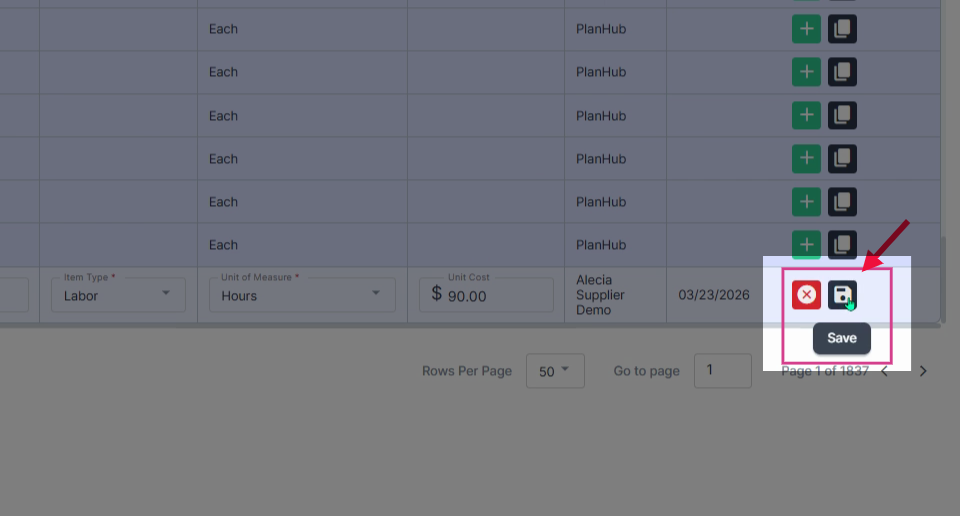
Step 4: Click on the Save option at the end of the row once all boxes have been updated.
Saving Existing Cost Items to the Library
Step 1: Select the item you want to add. Check the box in the first column and row n the left side of the page.
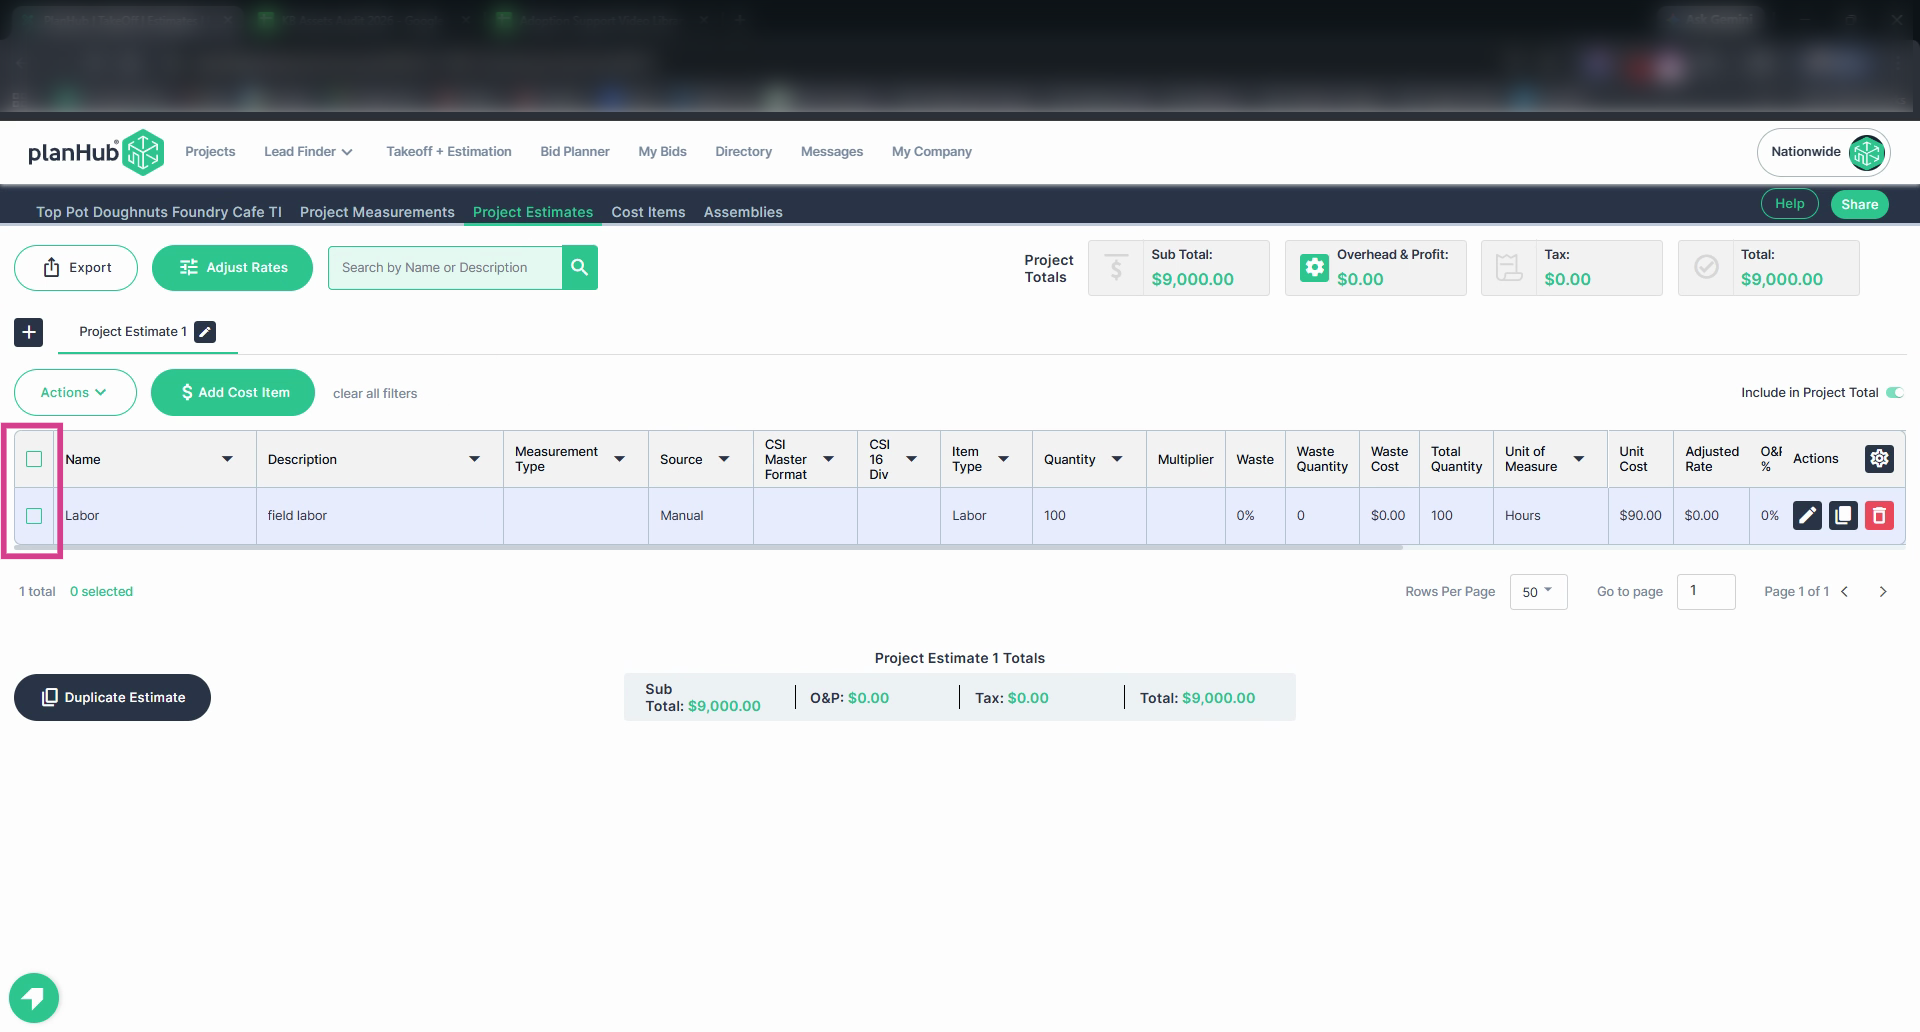
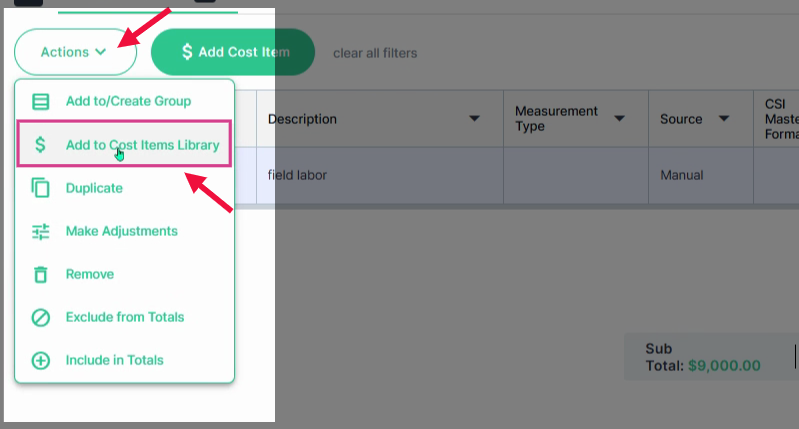
Step 2: Above the list, click the Actions menu and choose Add to Cost Items Library.
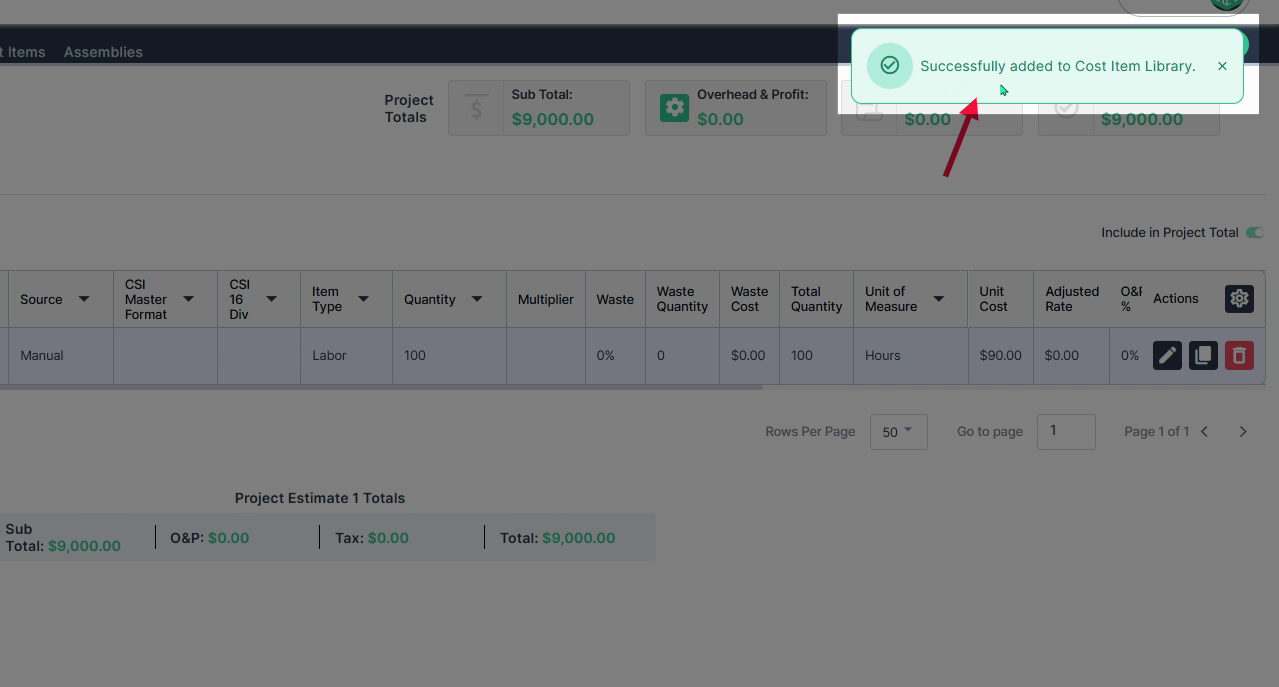
Step 3: Look for confirmation in the top right corner.
Adding Cost Items to Assemblies
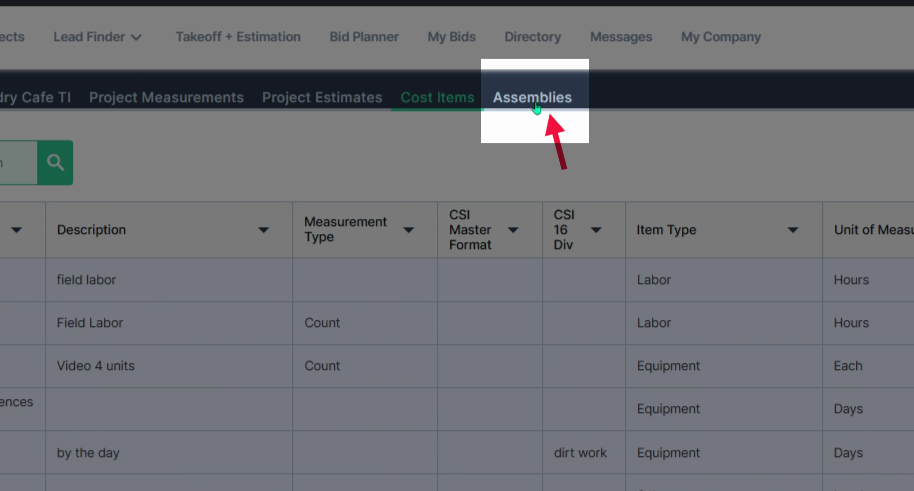
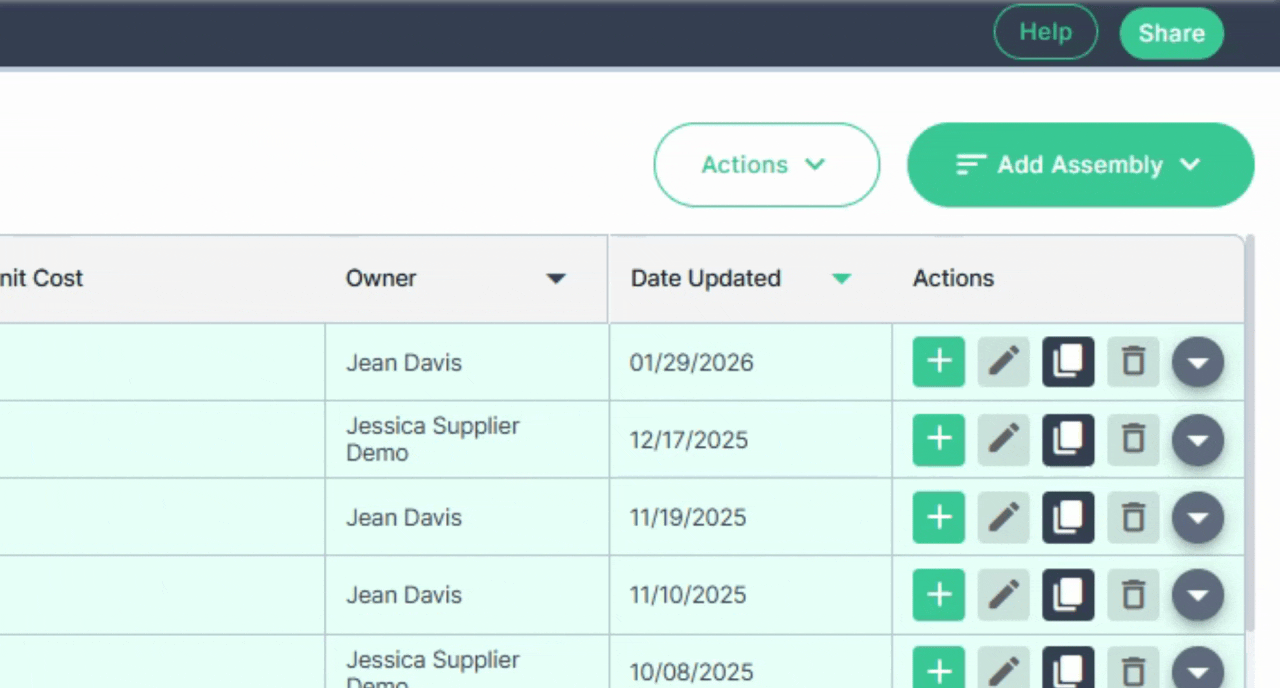
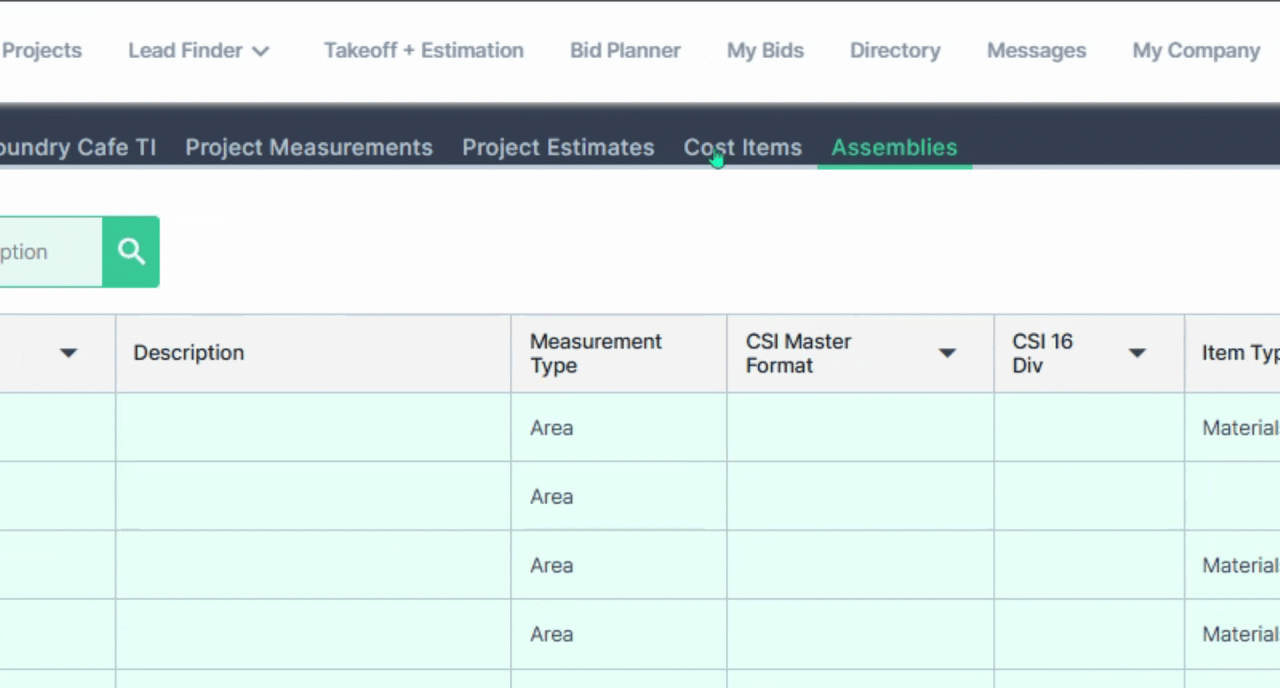
Step 1: Click on the Assemblies tab at the top of the page.
Step 2: Navigate to the Add Assembly tab and select Create Assembly in the drop down menu.
Step 3: To add a cost item saved by your company team members, click on the Owner dropdown menu, then select My Company, and click OK.
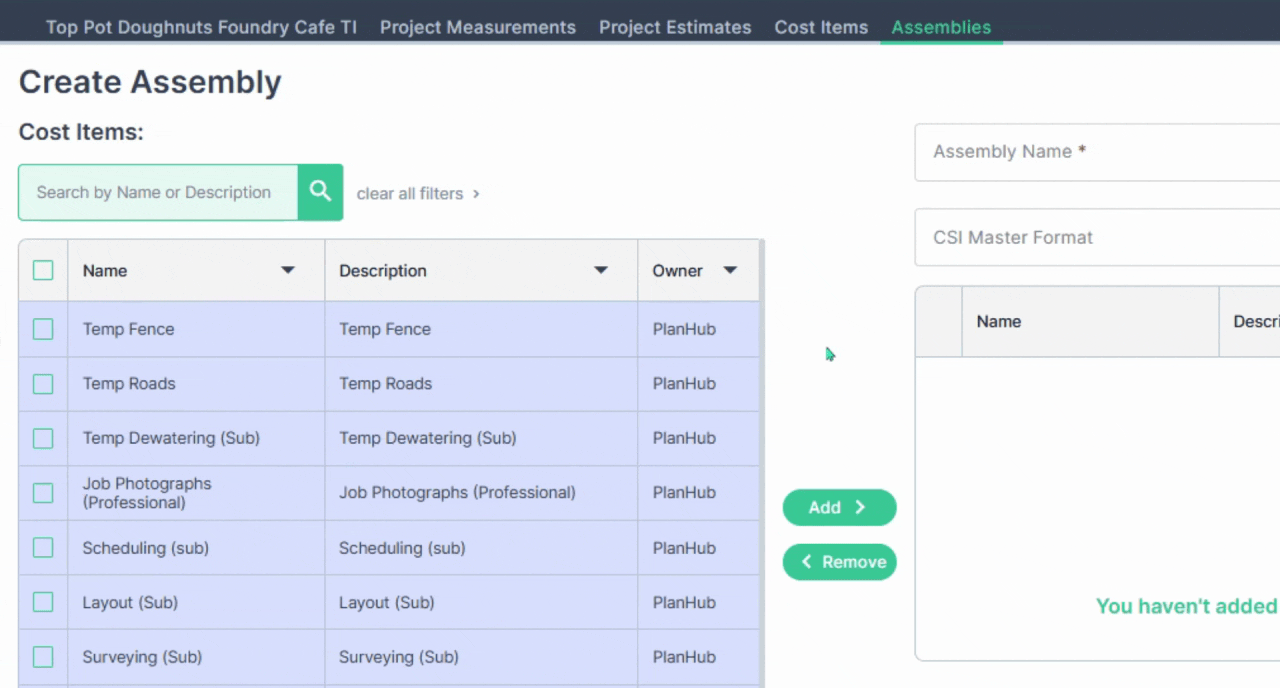
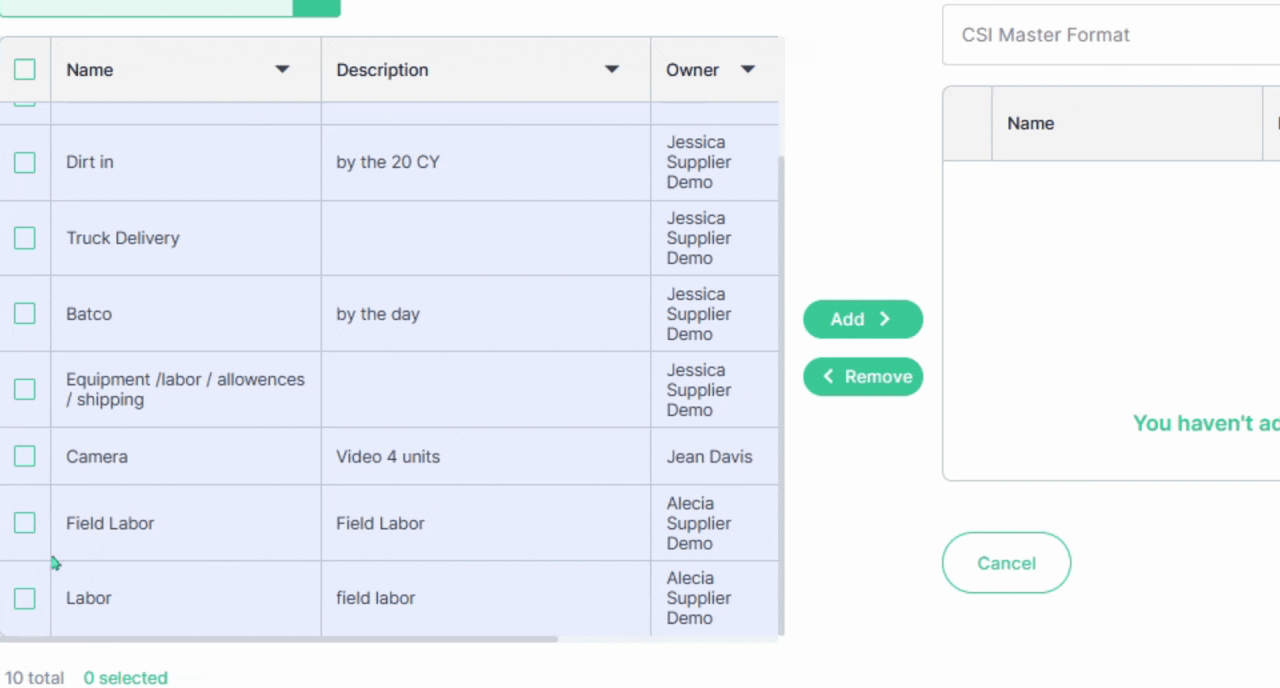
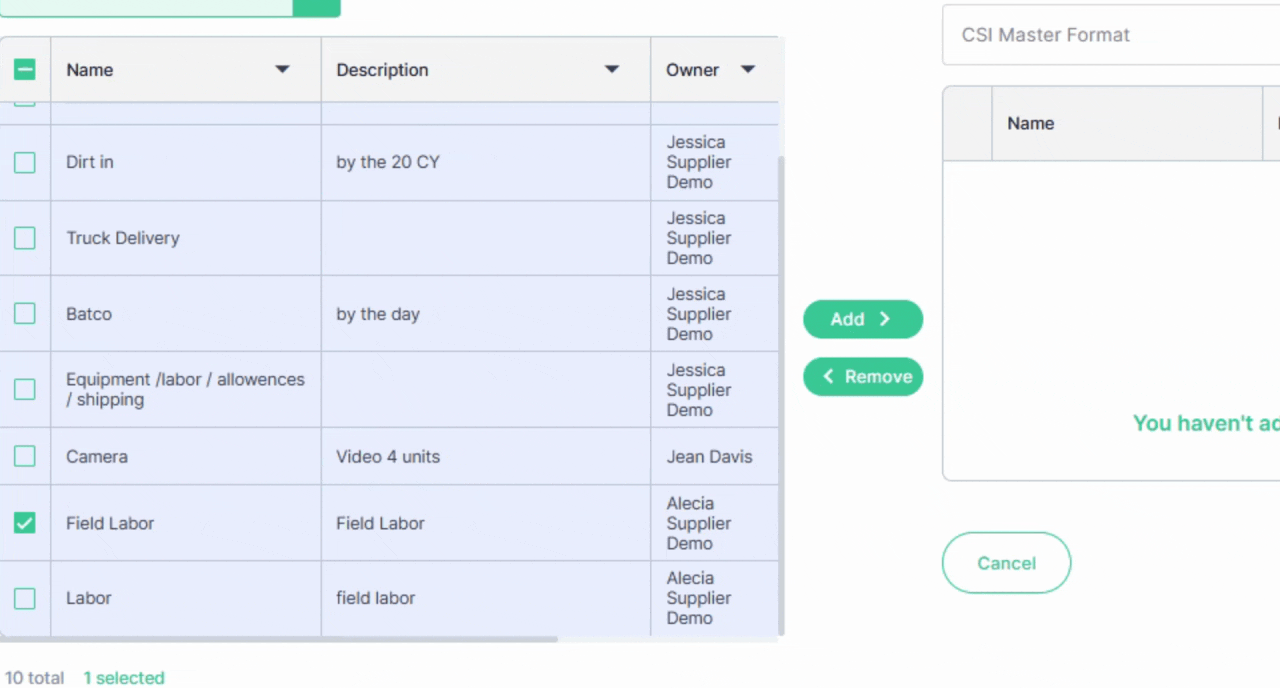
Step 4: Check the box for each cost item you want to include. Click Add to add the cost item to your assembly.
To learn more about assemblies, view the How to Create an Assembly article.
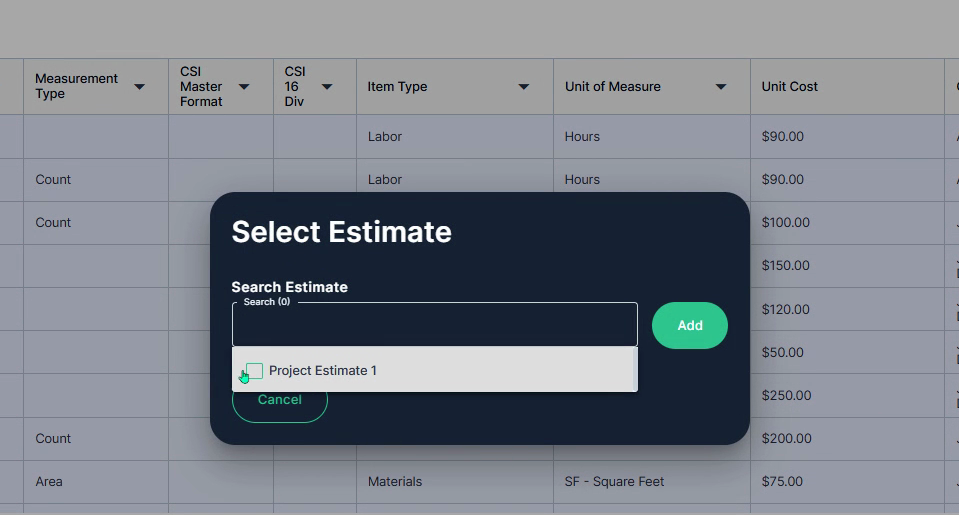
Adding Cost Items from the Cost Items Library to an Estimate
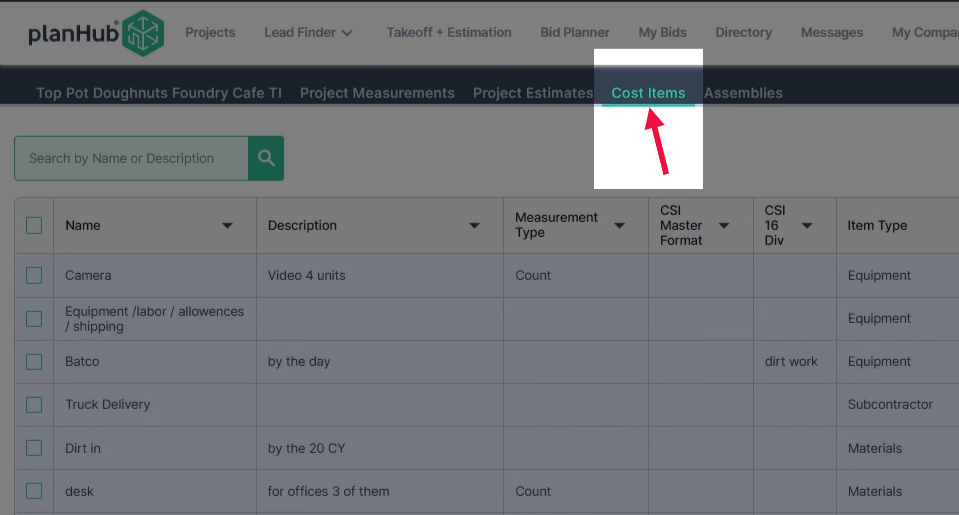
Step 1: Click the Cost Items tab at the top of the page.
Step 2: Check the boxes for the cost items you want to add to your Estimate.
Step 3: Next, navigate to the Actions menu in the upper right corner and click Add to Estimate.
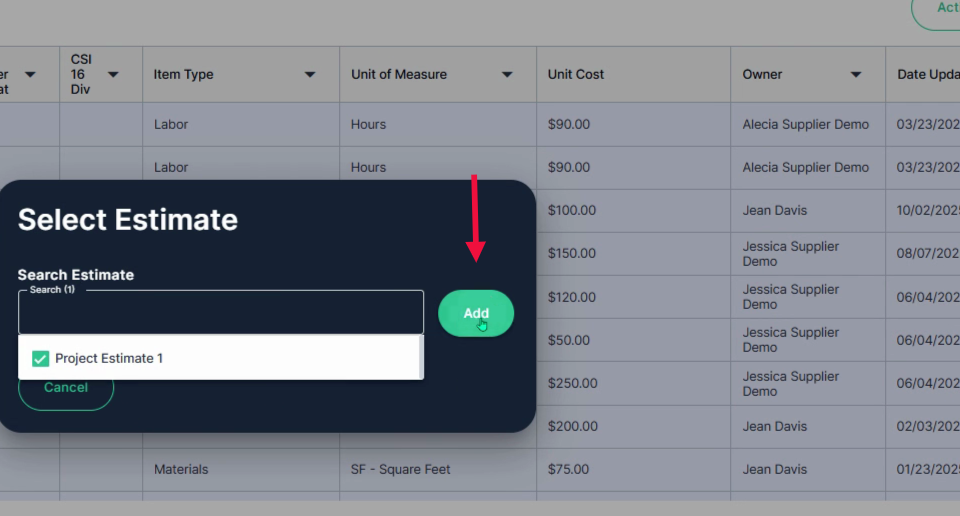
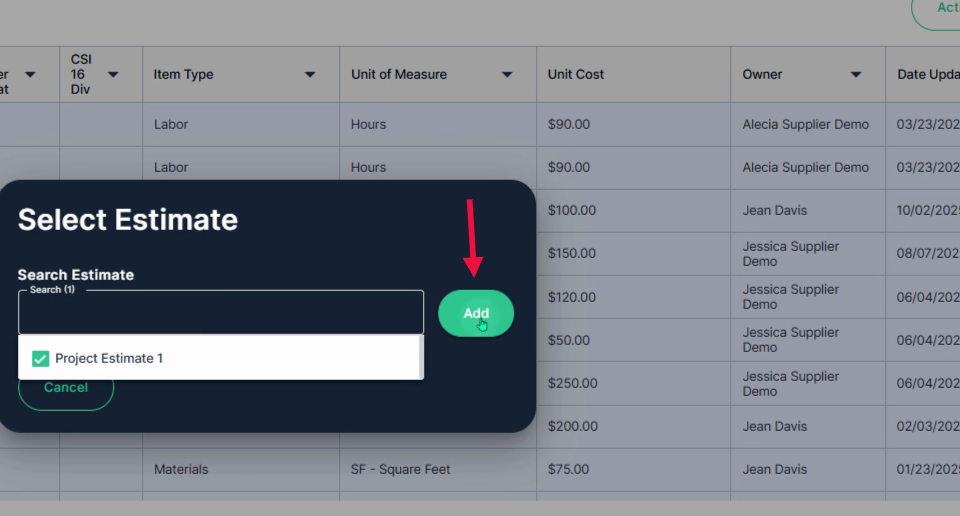
Step 4: In the pop-up window, add a checkmark to the box for the Estimate you want to use.
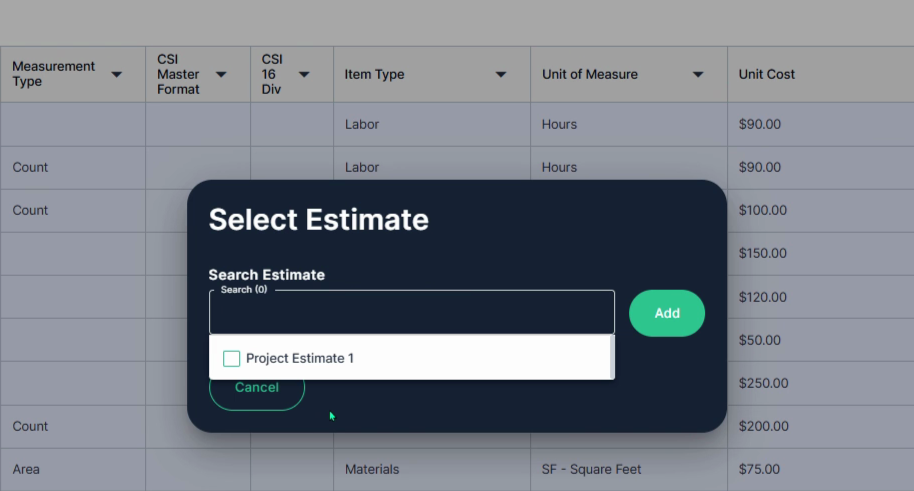
Step 5: Next, click the Add button.
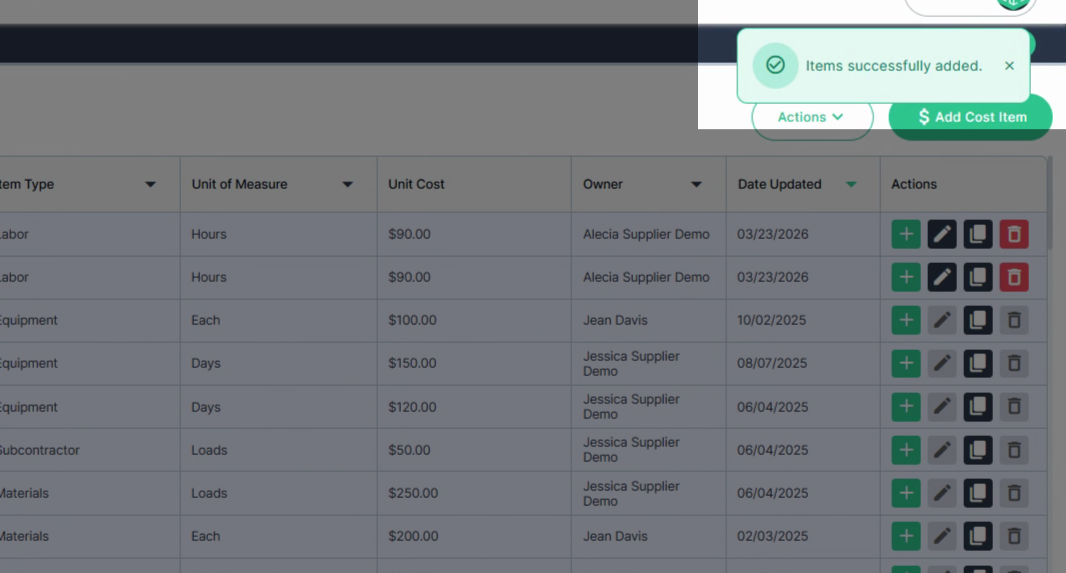
Step 6: View the pop up window confirming the Items successfully added to your estimate.
Quick Add from Actions Column
Step 1: Navigate to the Cost Items tab at the top of the page.
Step 2: In the Actions column, at the end of the row, click the plus sign to add the cost item to your estimate.
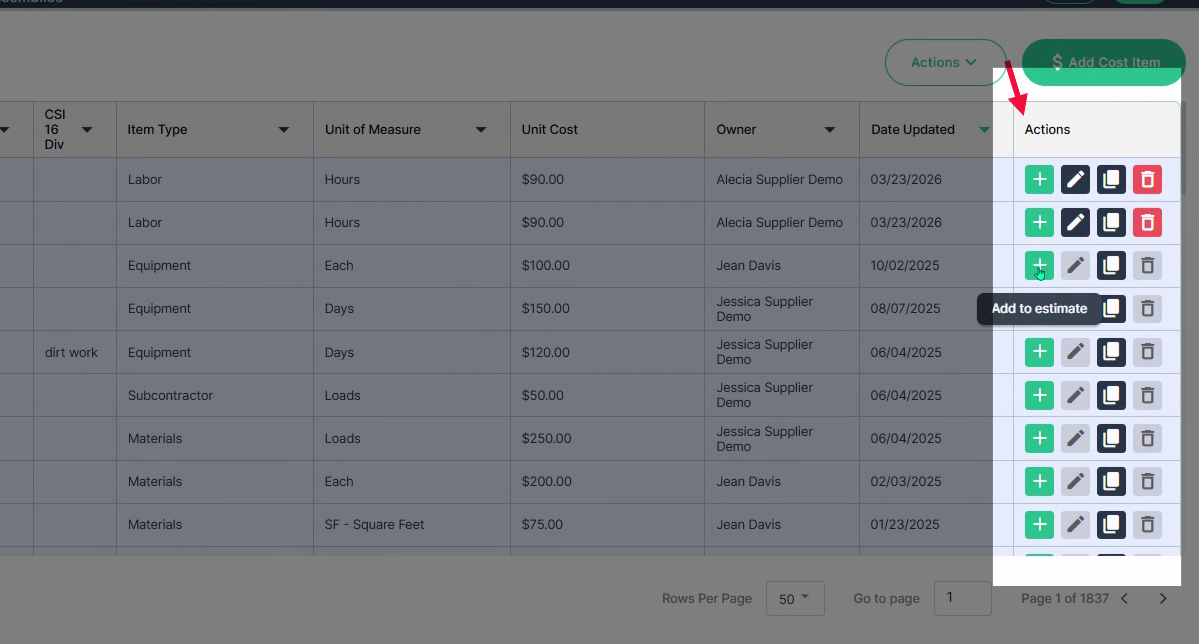
Step 3: In the pop-up window, select the project estimate to which you would like to add the cost item.
Step 4: Add the check mark, click Add, and finish.
You can now confidently add and manage cost items within your estimates and cost items library to build more accurate and efficient project workflows.