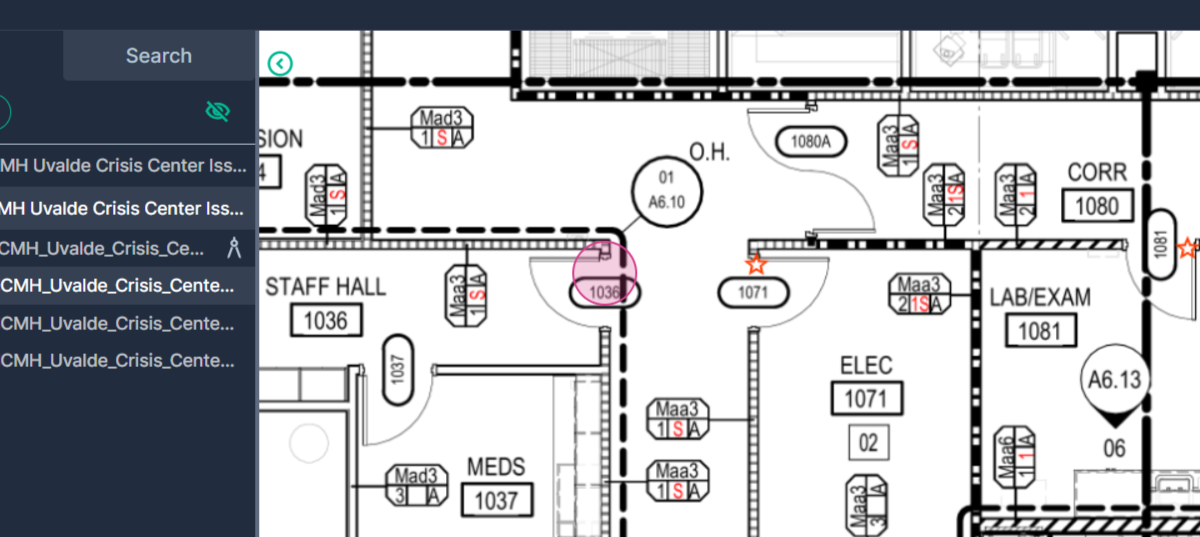
Prerequisites: A subscription or trial that includes Takeoff is required to measure plans, export a plan into TakeOff, and set the scale. Then you can begin measuring.
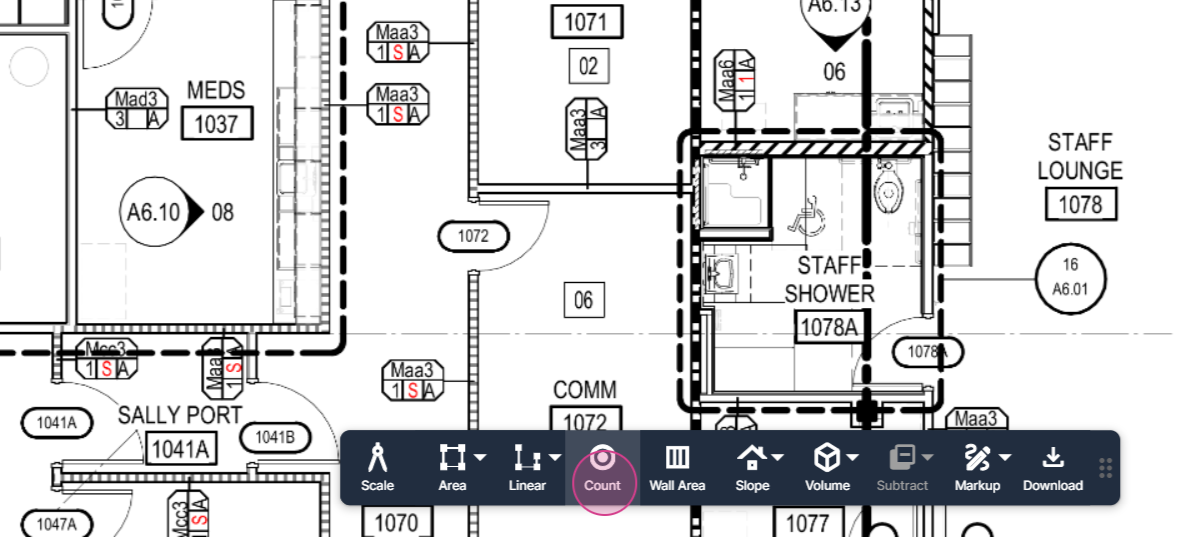
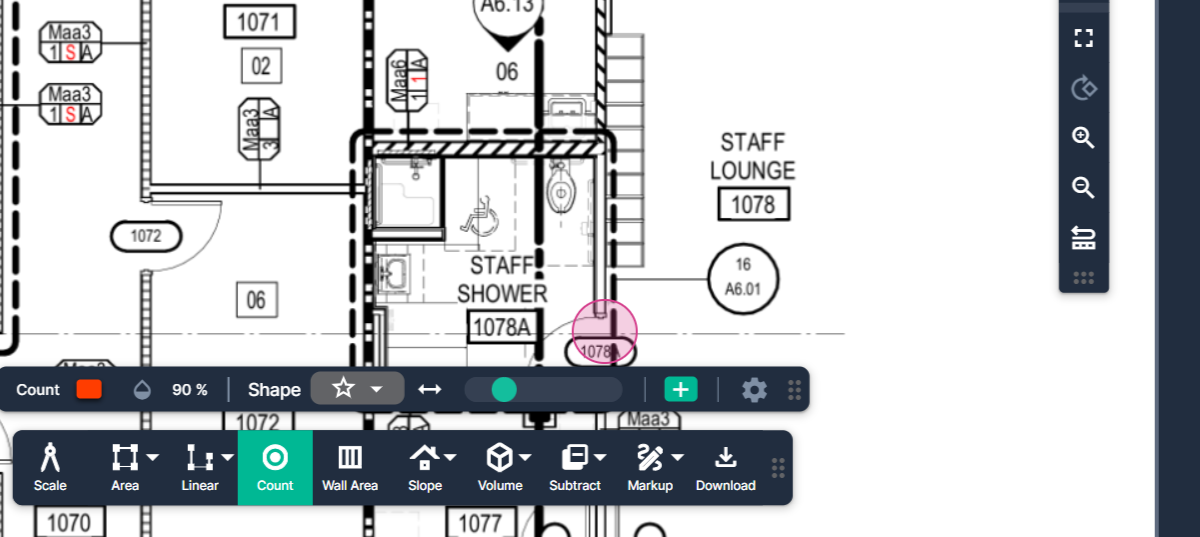
Step 1: Start by clicking Count on the toolbar.
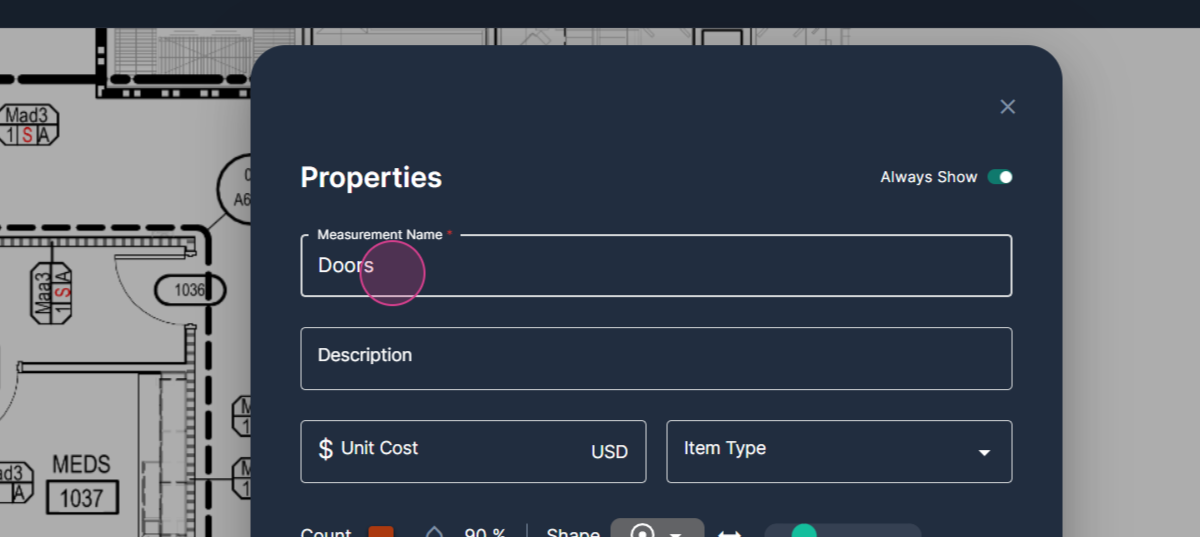
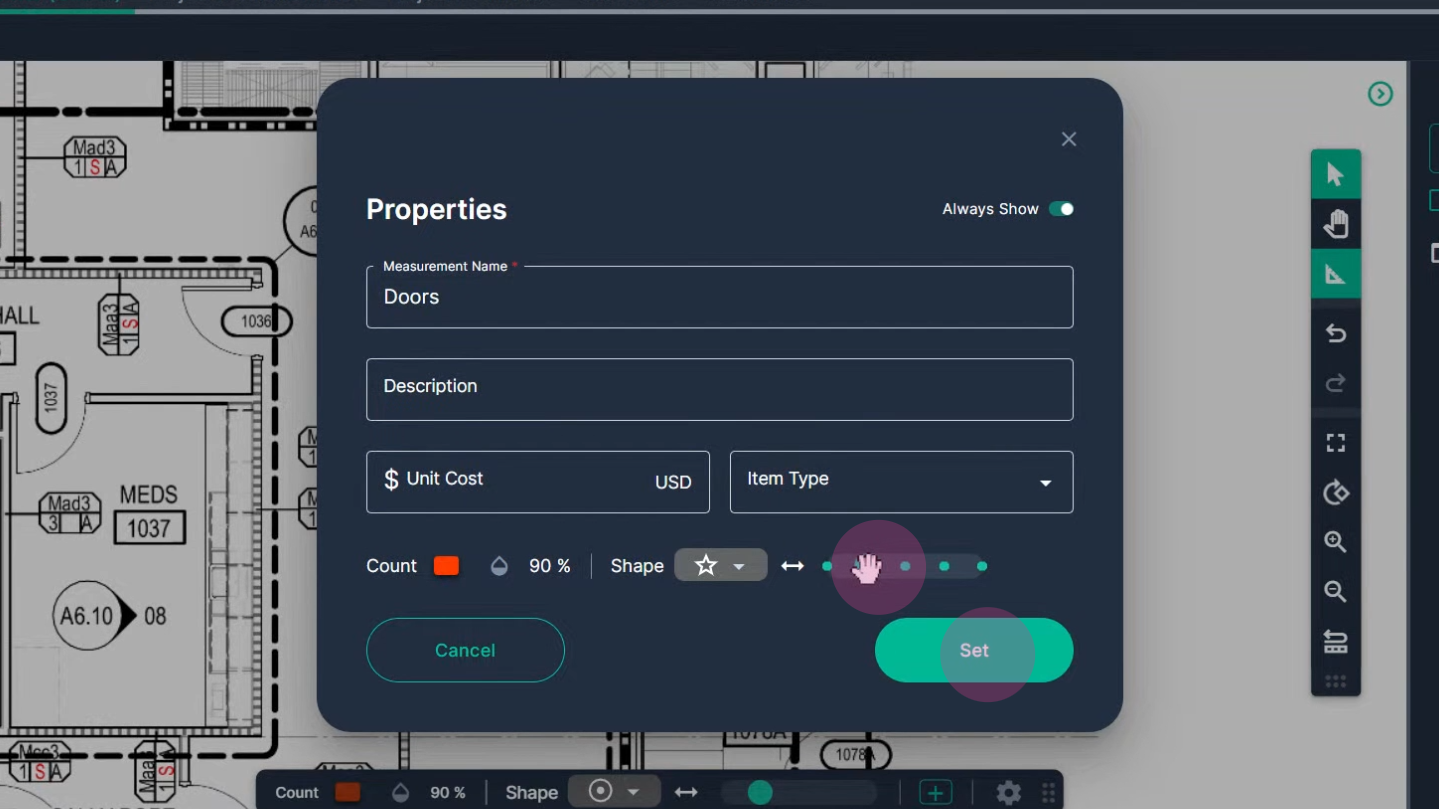
Step 2: Give the tool a name that represents the objects you're tallying. In this case, we're naming it "Doors".
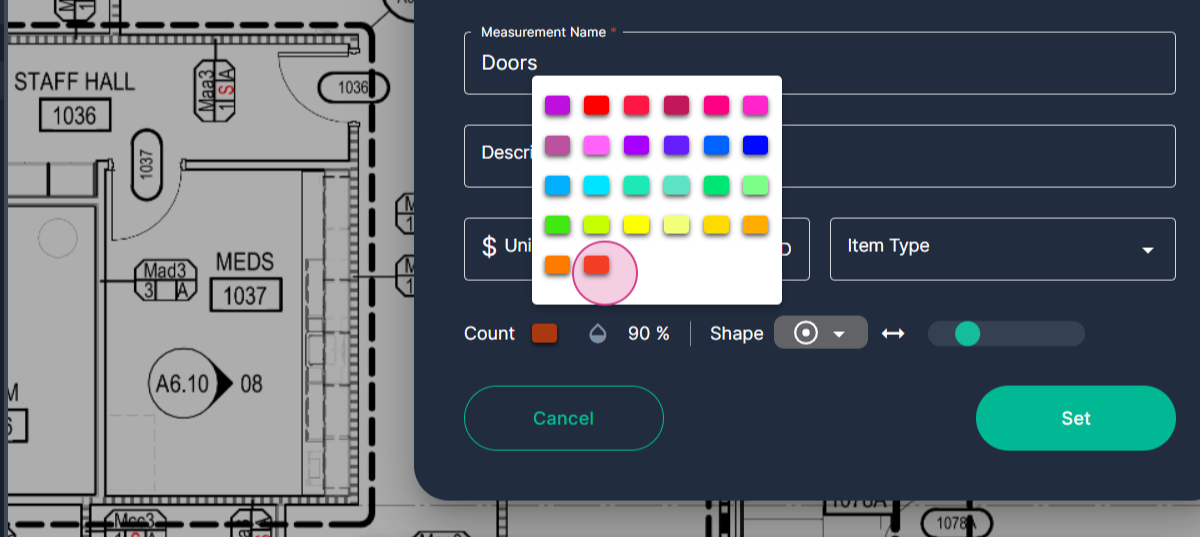
Step 3: Choose a color that stands out on the page. We're selecting a bright red for this example.
Step 4: Open the Shape menu by clicking it.
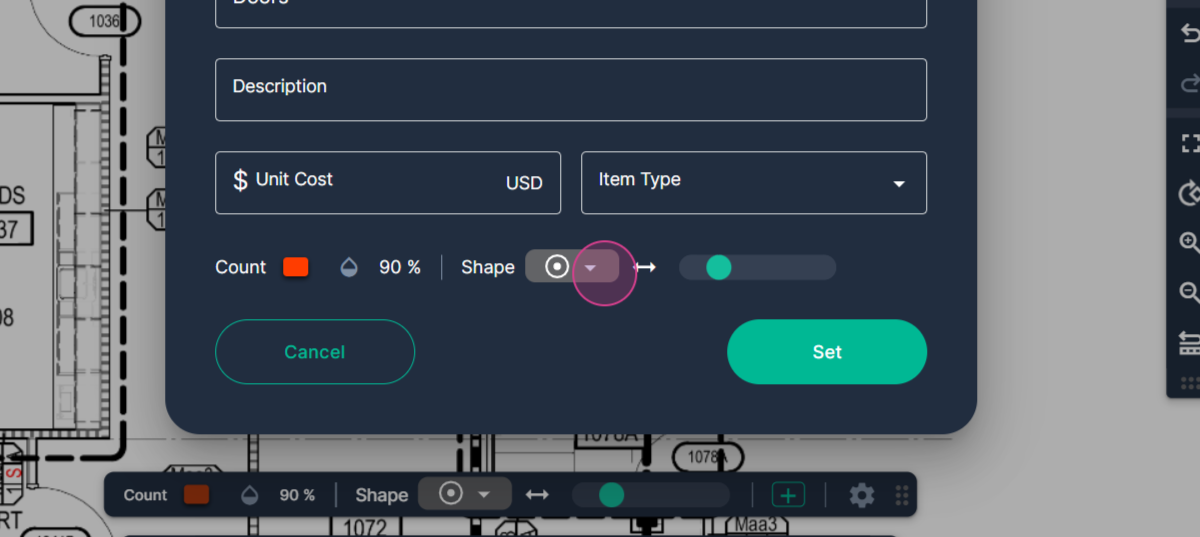
Step 5: Select the specific shape you want to stamp onto the page. We're using a red star for every door in this example.
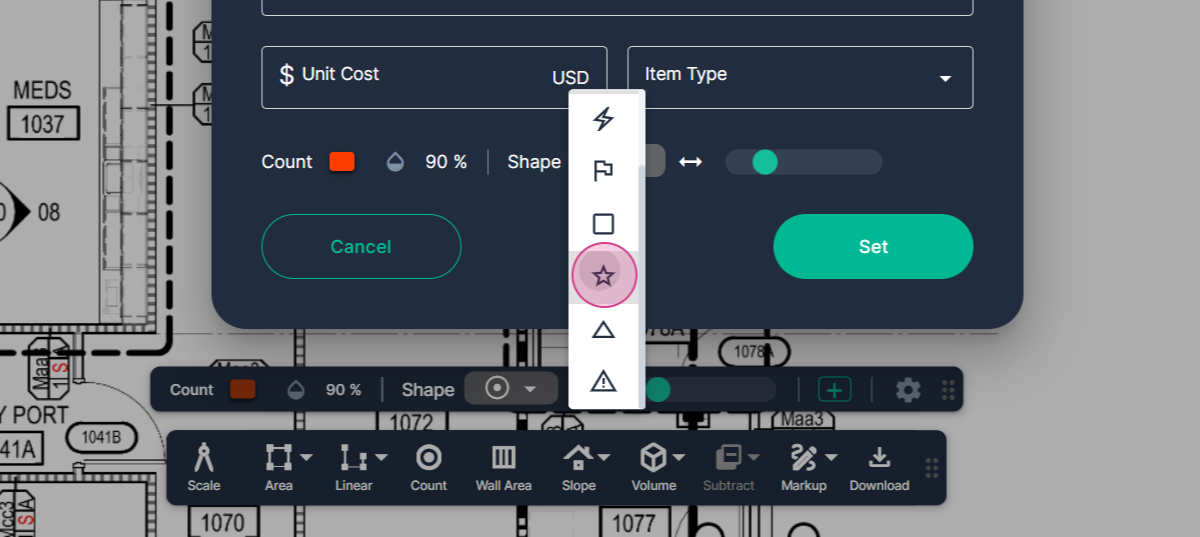
Step 6: Adjust the size of the stamp by moving the slider to the right or left. Once you're ready, click Set.
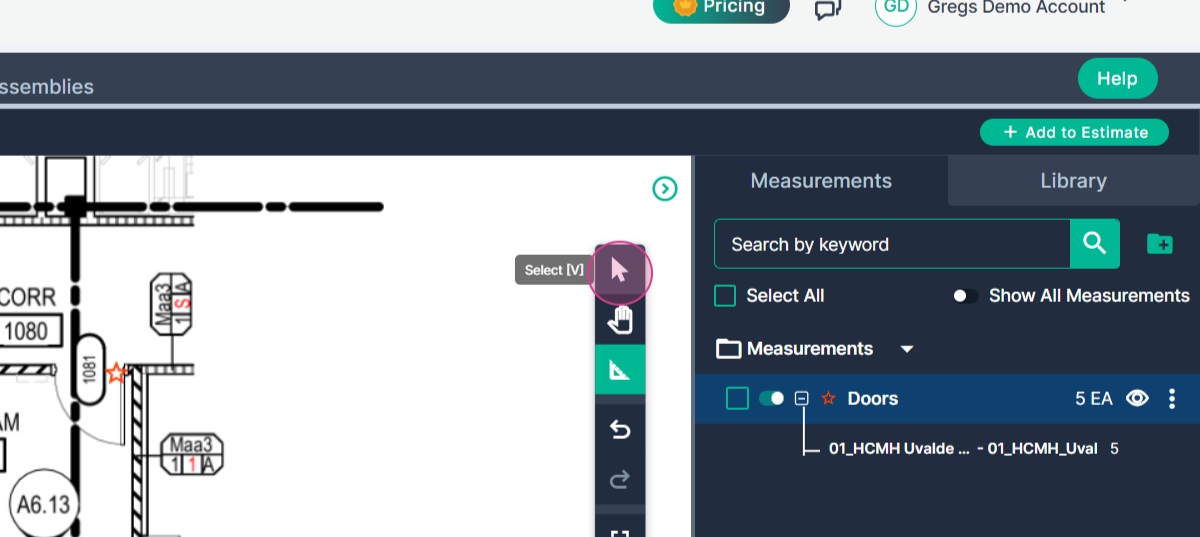
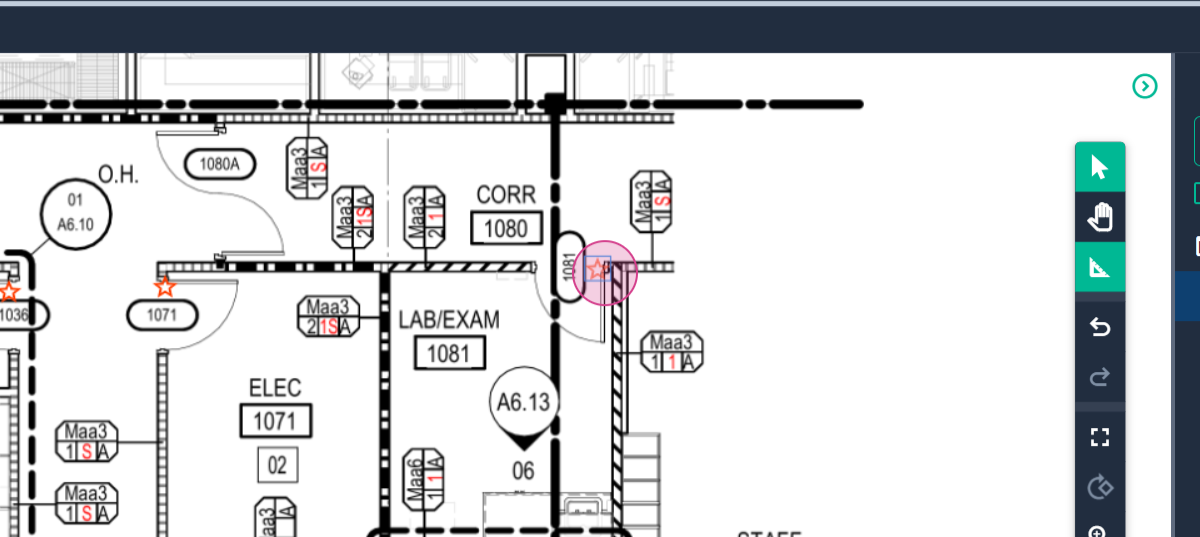
Step 7: Your cursor will change to a crosshair. Hover over the object you're counting and click to place a stamp.
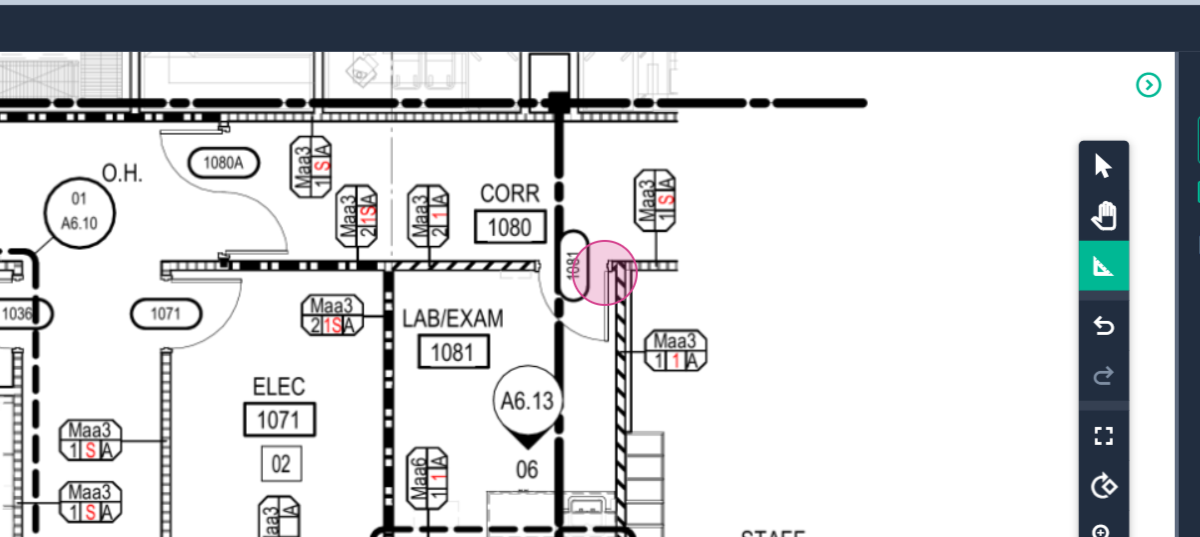
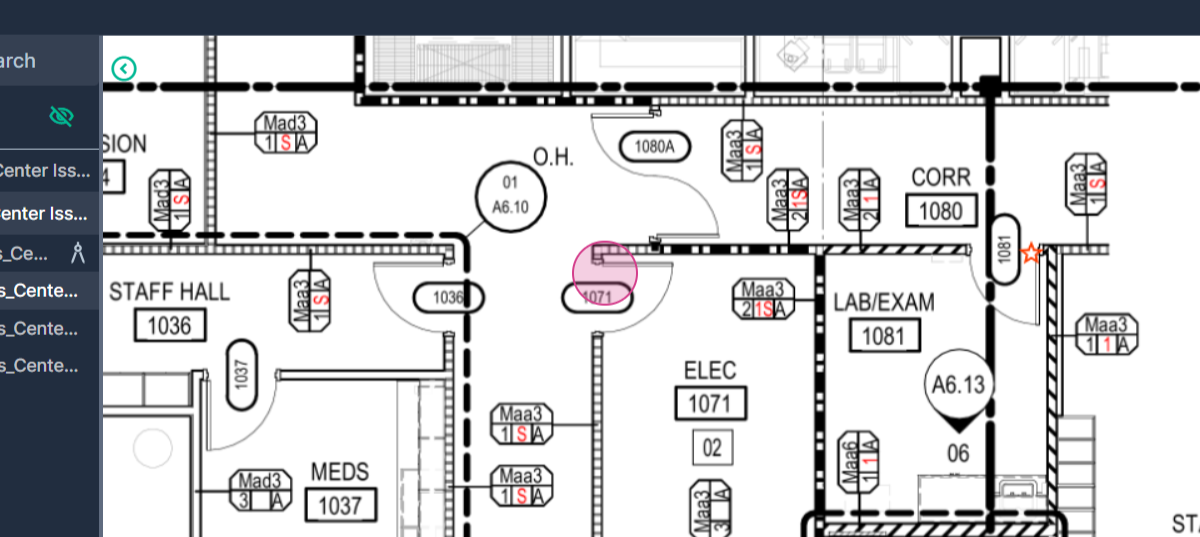
Step 8: Each click places a stamp and adds to the running tally on the right side of the page.
Step 9: To edit your measurements, click the Select Arrow at the top of the command bar.
Step 10: Click to select a shape. You can drag it to a new position by holding down the left mouse button.
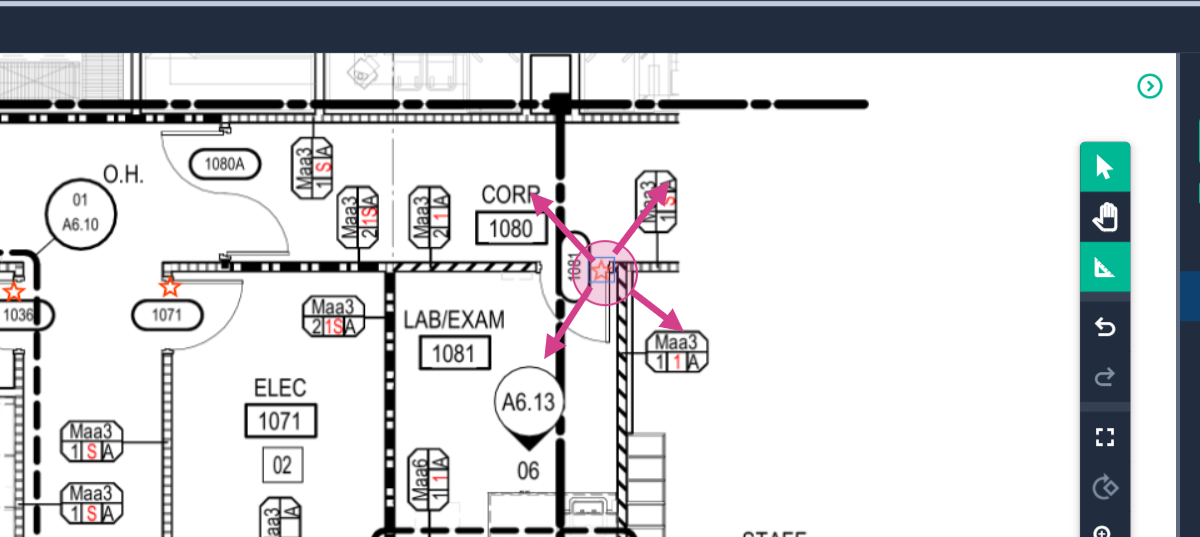
Step 11: To delete a stamp, select it with a click then press Delete on your keyboard. Note that deleting a stamp reduces your tally.
Step 12: If you need to restore a deleted stamp, use the Undo button on the command bar.

By following these steps, you'll be able to effectively use PlanHub's Count tool to tally objects on your plan page.
Next Steps
Once you have completed taking all your measurements, you can:
- Download the measurements in a table from the Project Measurements page
- How To Download Project Measurements From Takeoff
Add a legend and download the PNG of your takeoff page - Using Legend Markup in Takeoff
If you have purchased the Estimation add-on tool, send measurements into the Project Estimate page or push them into an Assembly you have built. - Estimation - Exporting a Measurement from TakeOff to Estimation
- Estimation | How to Create an Assembly
- Share your Takeoff with anyone using the Share button in the upper right-hand corner.
Troubleshooting
Contact us if you need assistance or to report an issue:
- PlanHub Contact Page: https://planhub.com/contact/
- Customer Facing Support Ticket Link: https://knowledgebase.planhub.com/knowledge/kb-tickets/new
- Schedule a Free 1-on-1 Takeoff Training: https://meetings.hubspot.com/zac-low/takeoff-and-estimation