Introduction
Manage your bidding workflow confidently with the Bid Board—your central hub for tracking, organizing, and managing all your active jobs. Use it to stay updated in real time, never miss a deadline, and strengthen your on-time bids with your whole team on the same page.
Adding Projects to Your Bid Board
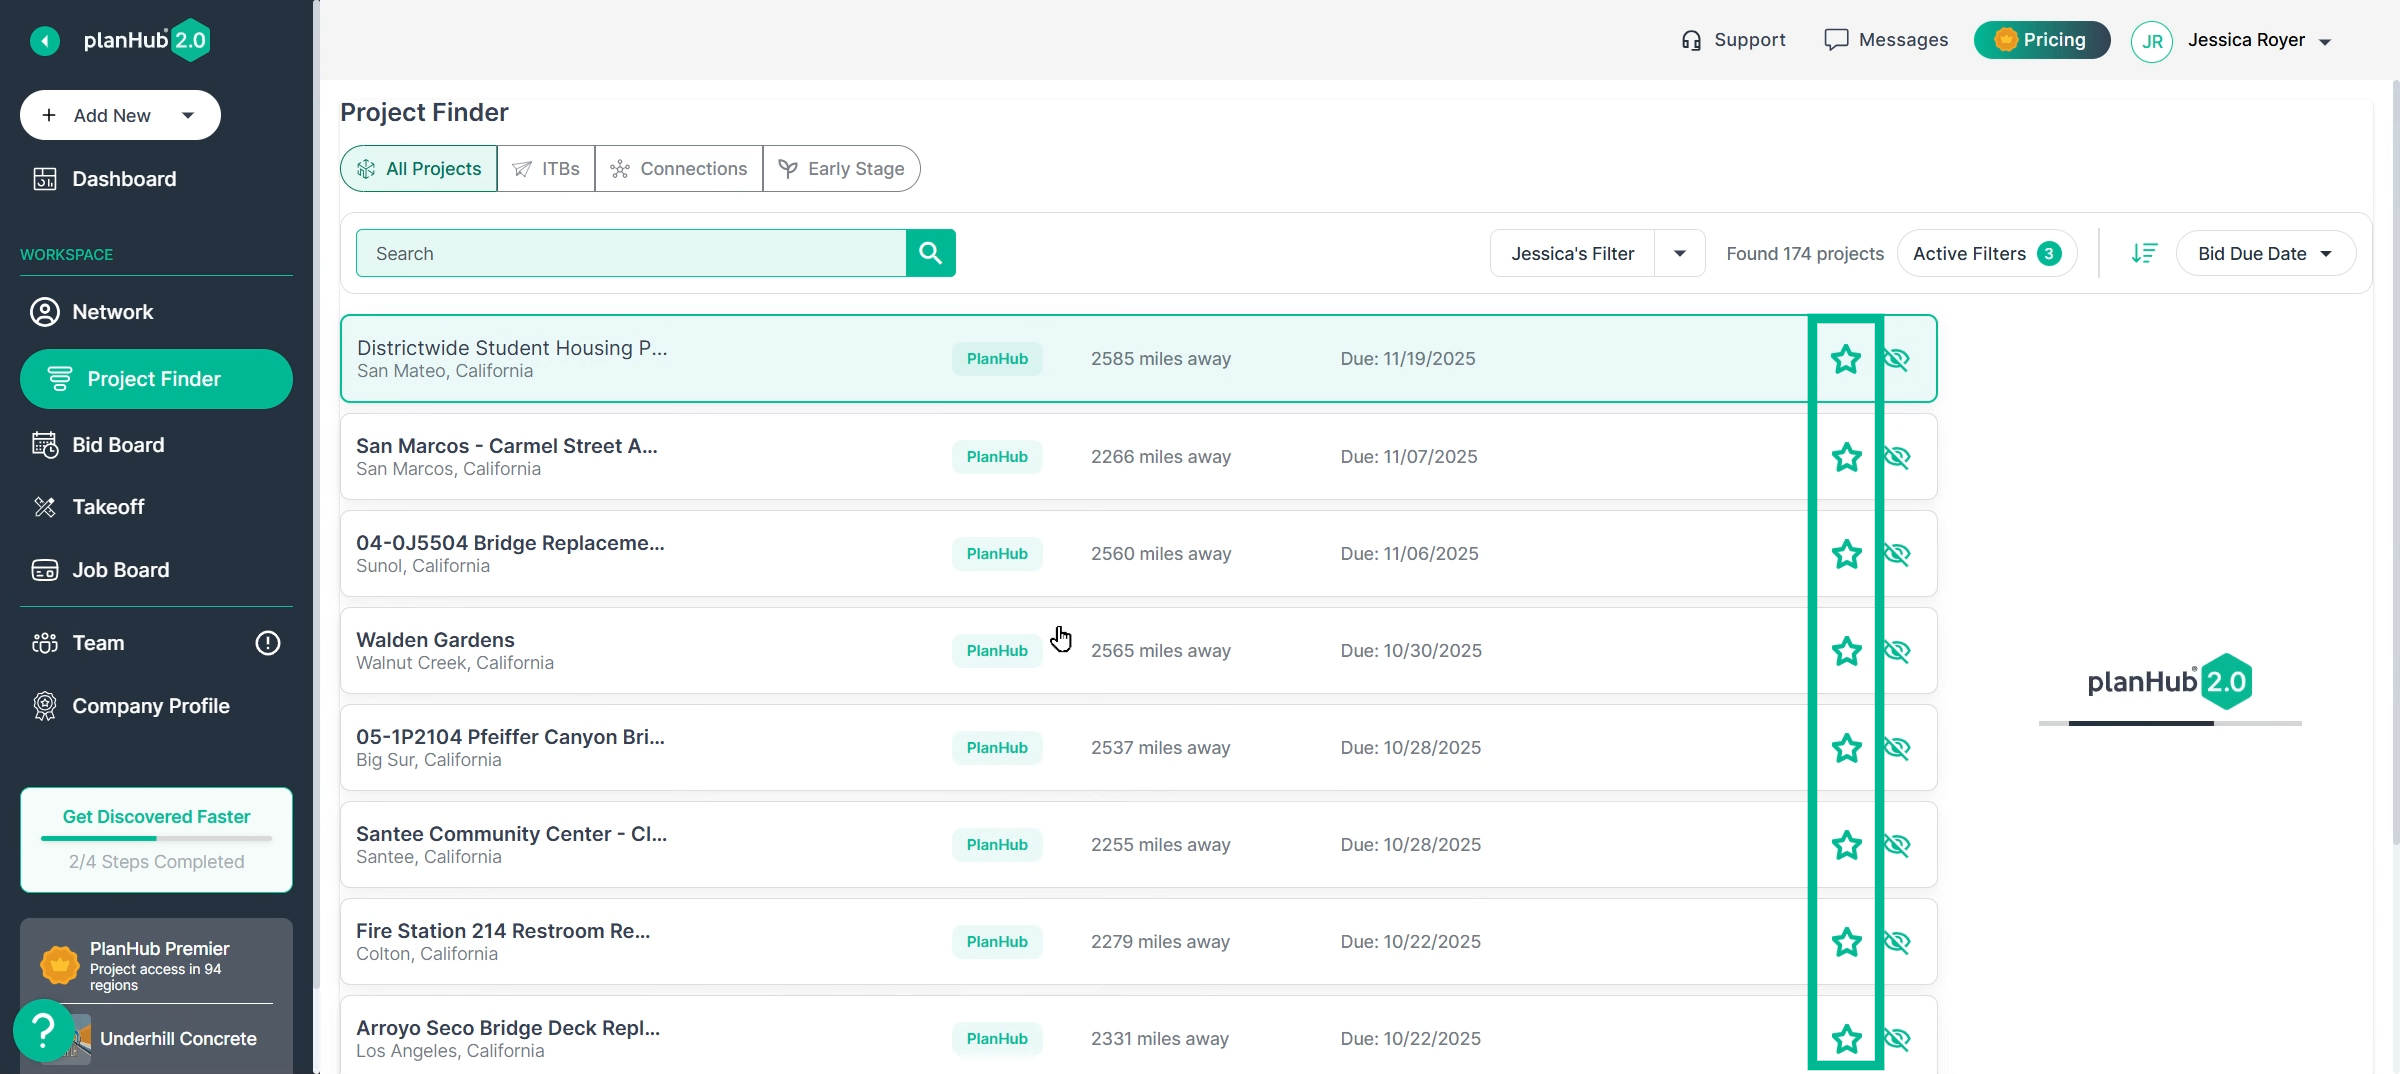
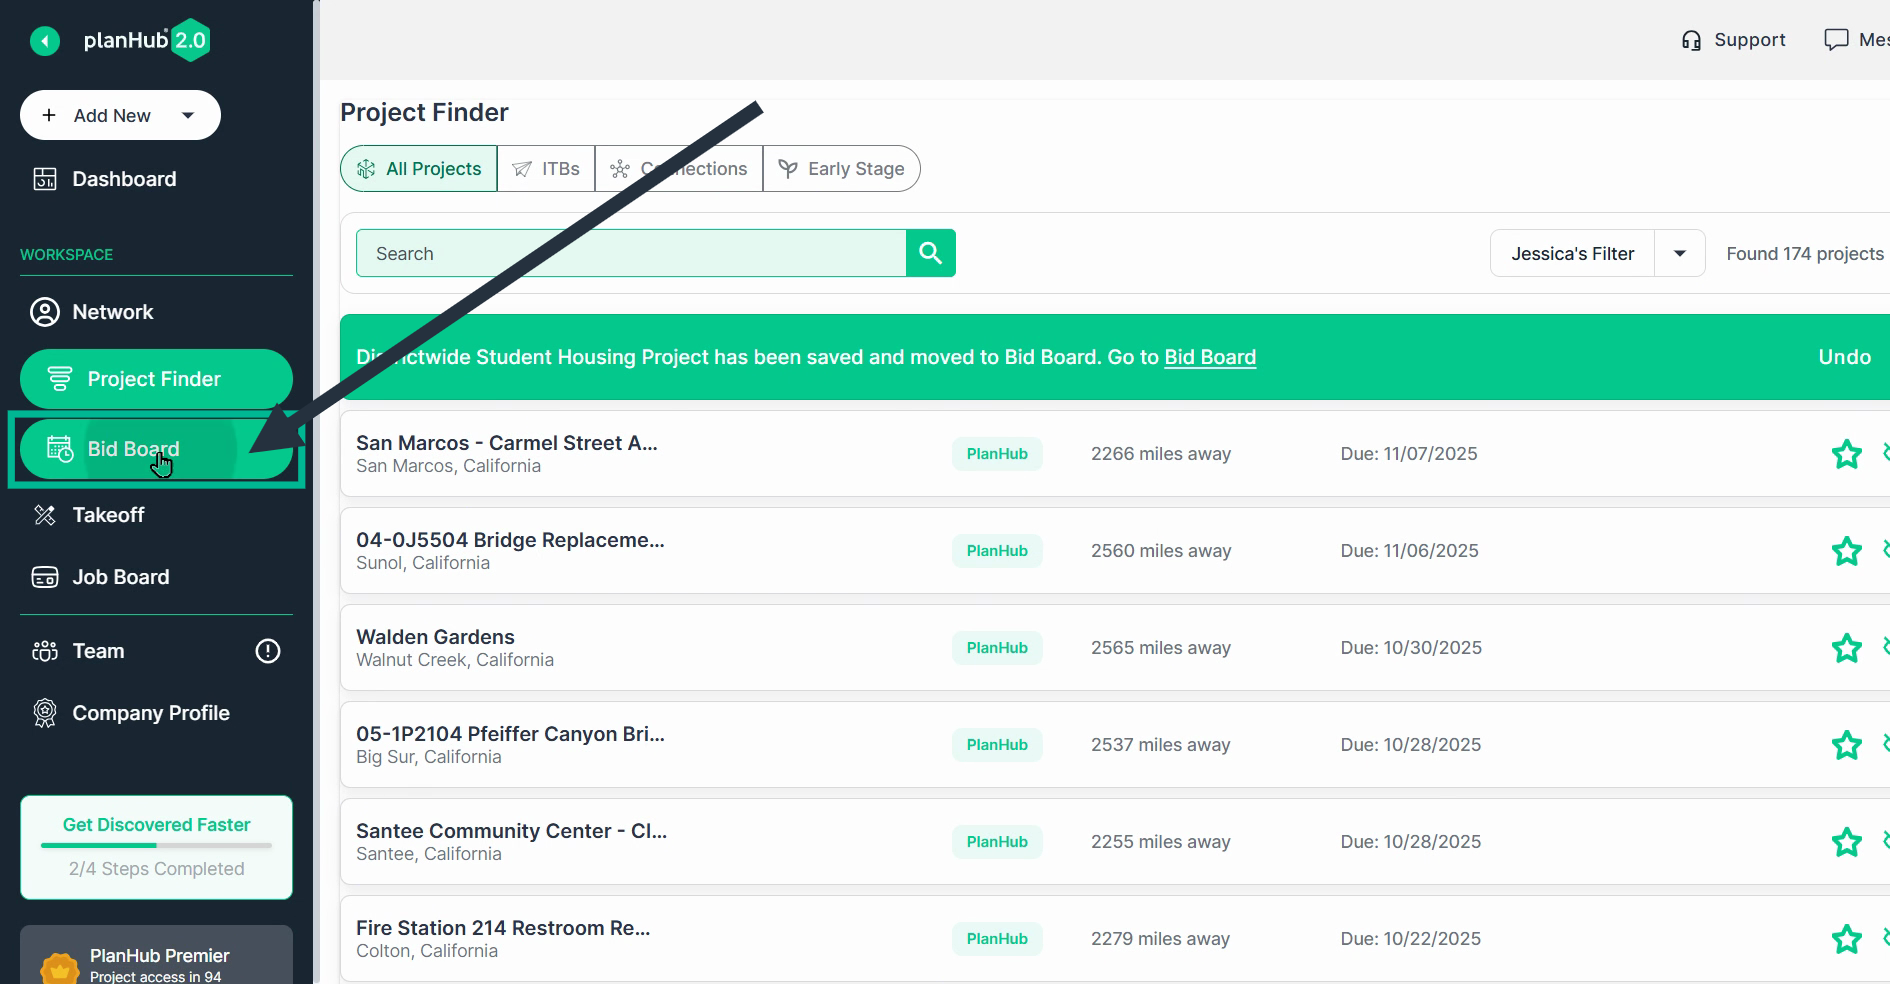
Step 1: Find a project you want to track. Click the star icon next to the project listing to add it to your Bid Board.
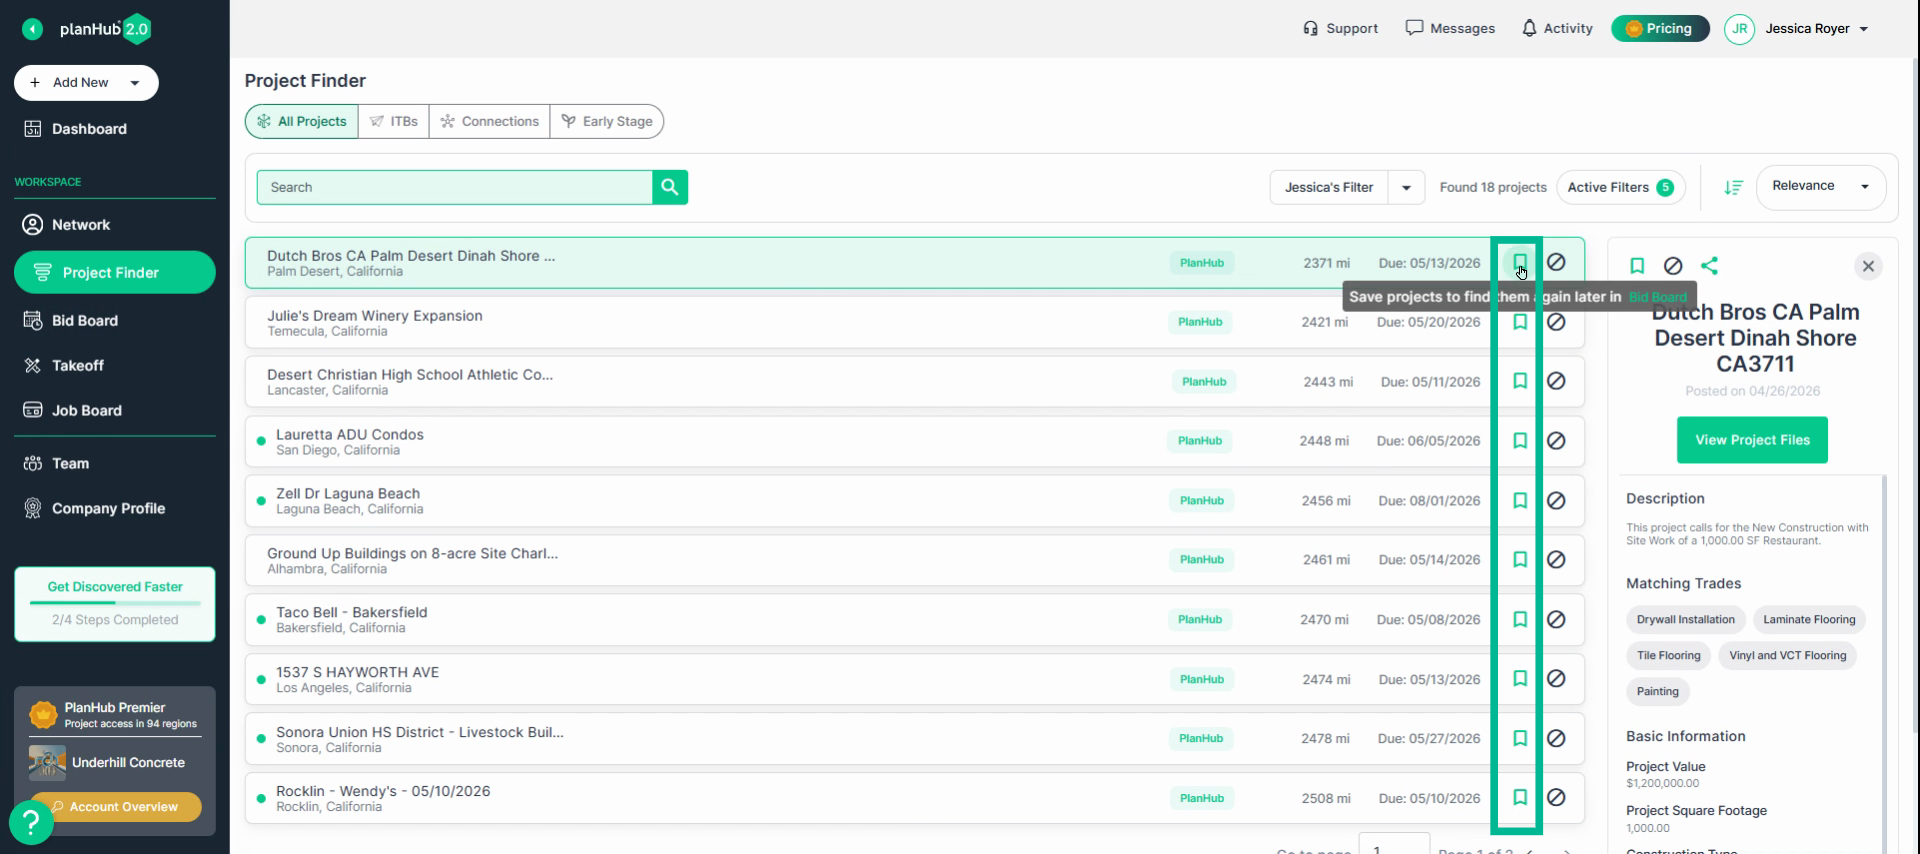
Step 2: If your version uses the new Save icon instead of the star, simply click that icon to save the project.
Importing Projects Not Listed in PlanHub to the Bid Board
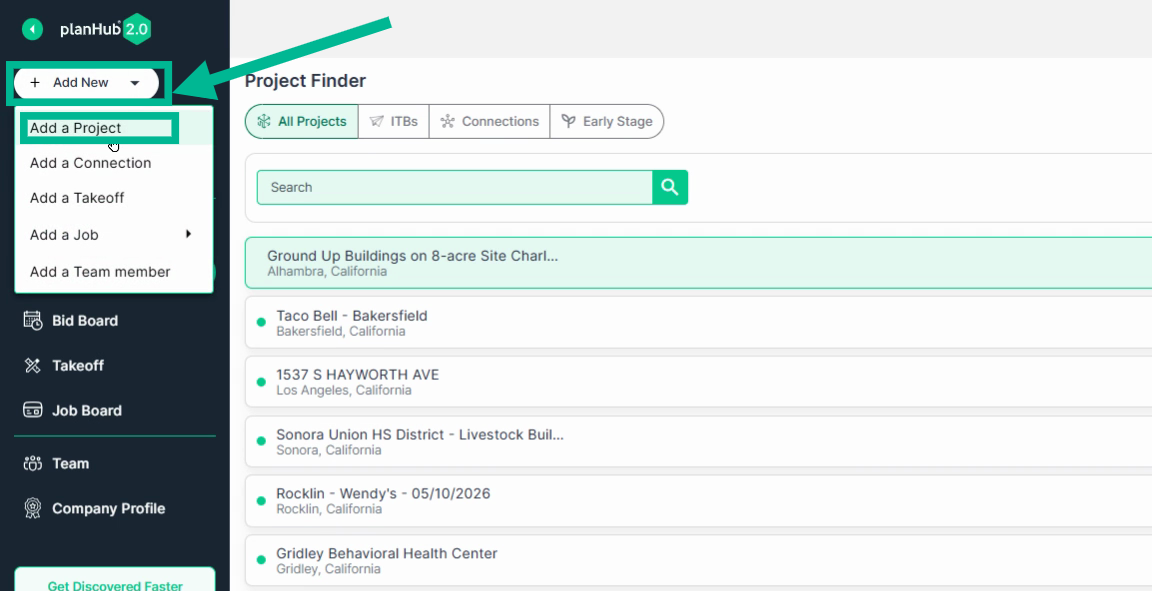
Step 1: Click the Add New dropdown in the main navigation.
Step 2: Select Add a Project.
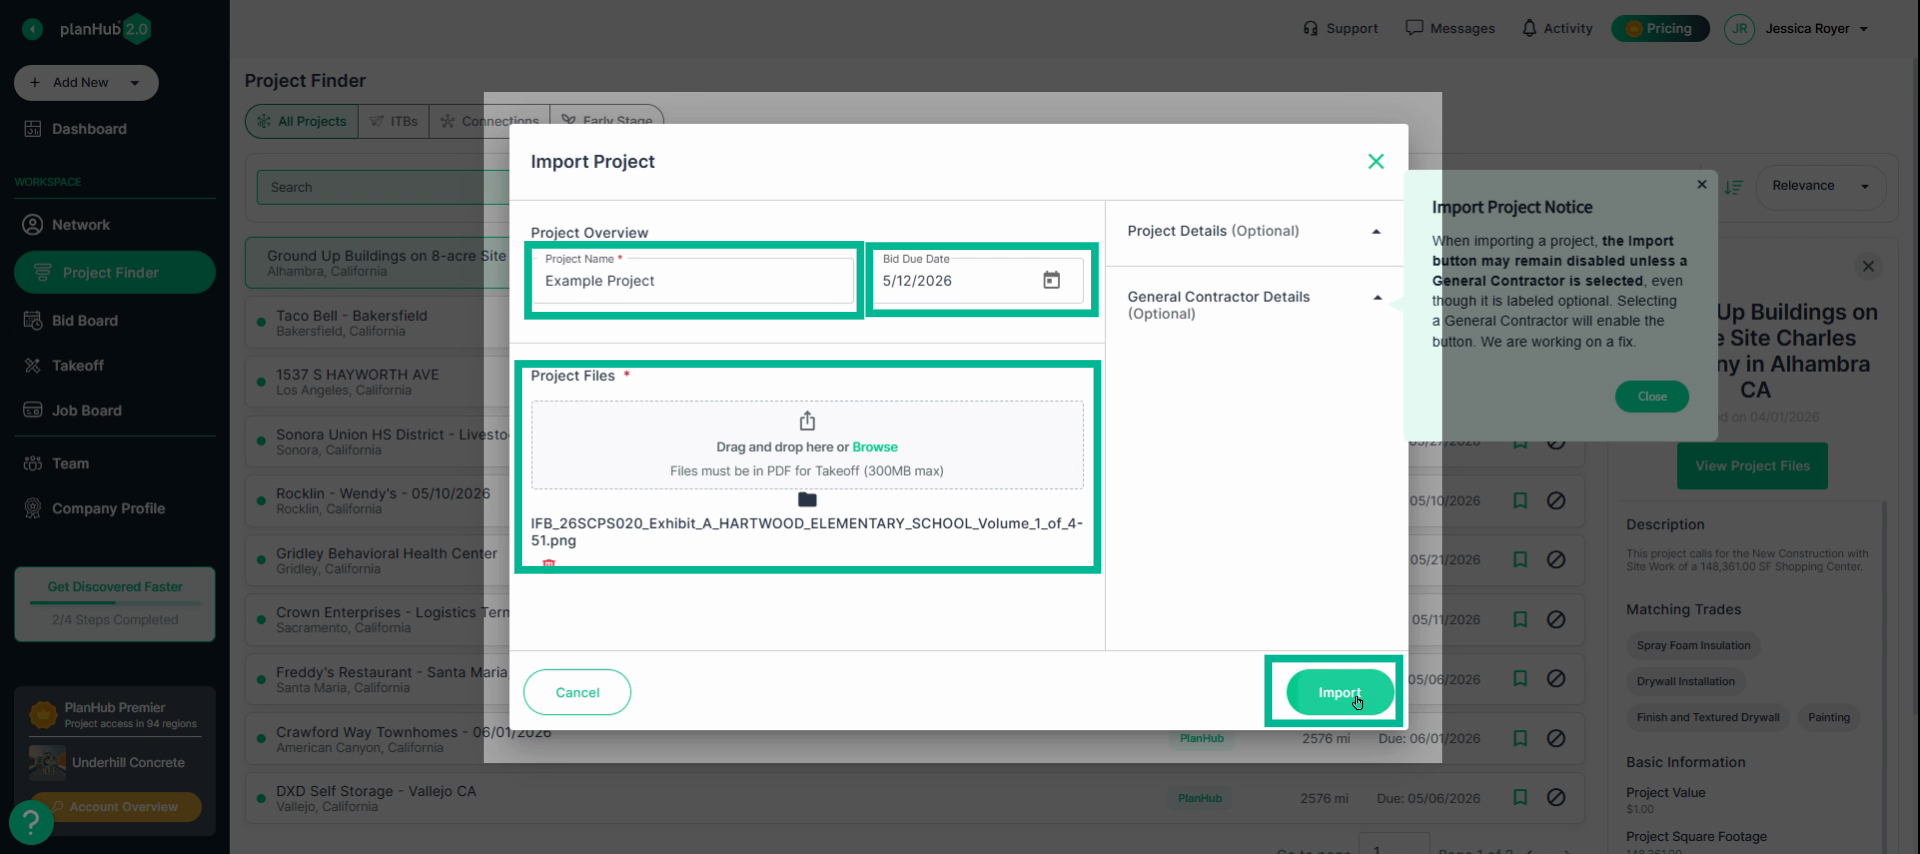
Step 3: Fill in Basic information.
Only basic info is required, but you can add more as needed for your team.
- Enter the project’s name.
- Add the bid due date.
- Upload any necessary files.
- Click Import to add the project to your Bid Board.
Navigating and Using the Bid Board
Accessing the Bid Board
Step 1: Open the Bid Board from the left-hand navigation menu.
Understanding the Bid Pipeline
The Bid Board displays two main tabs: Bid Pipeline and Bids.
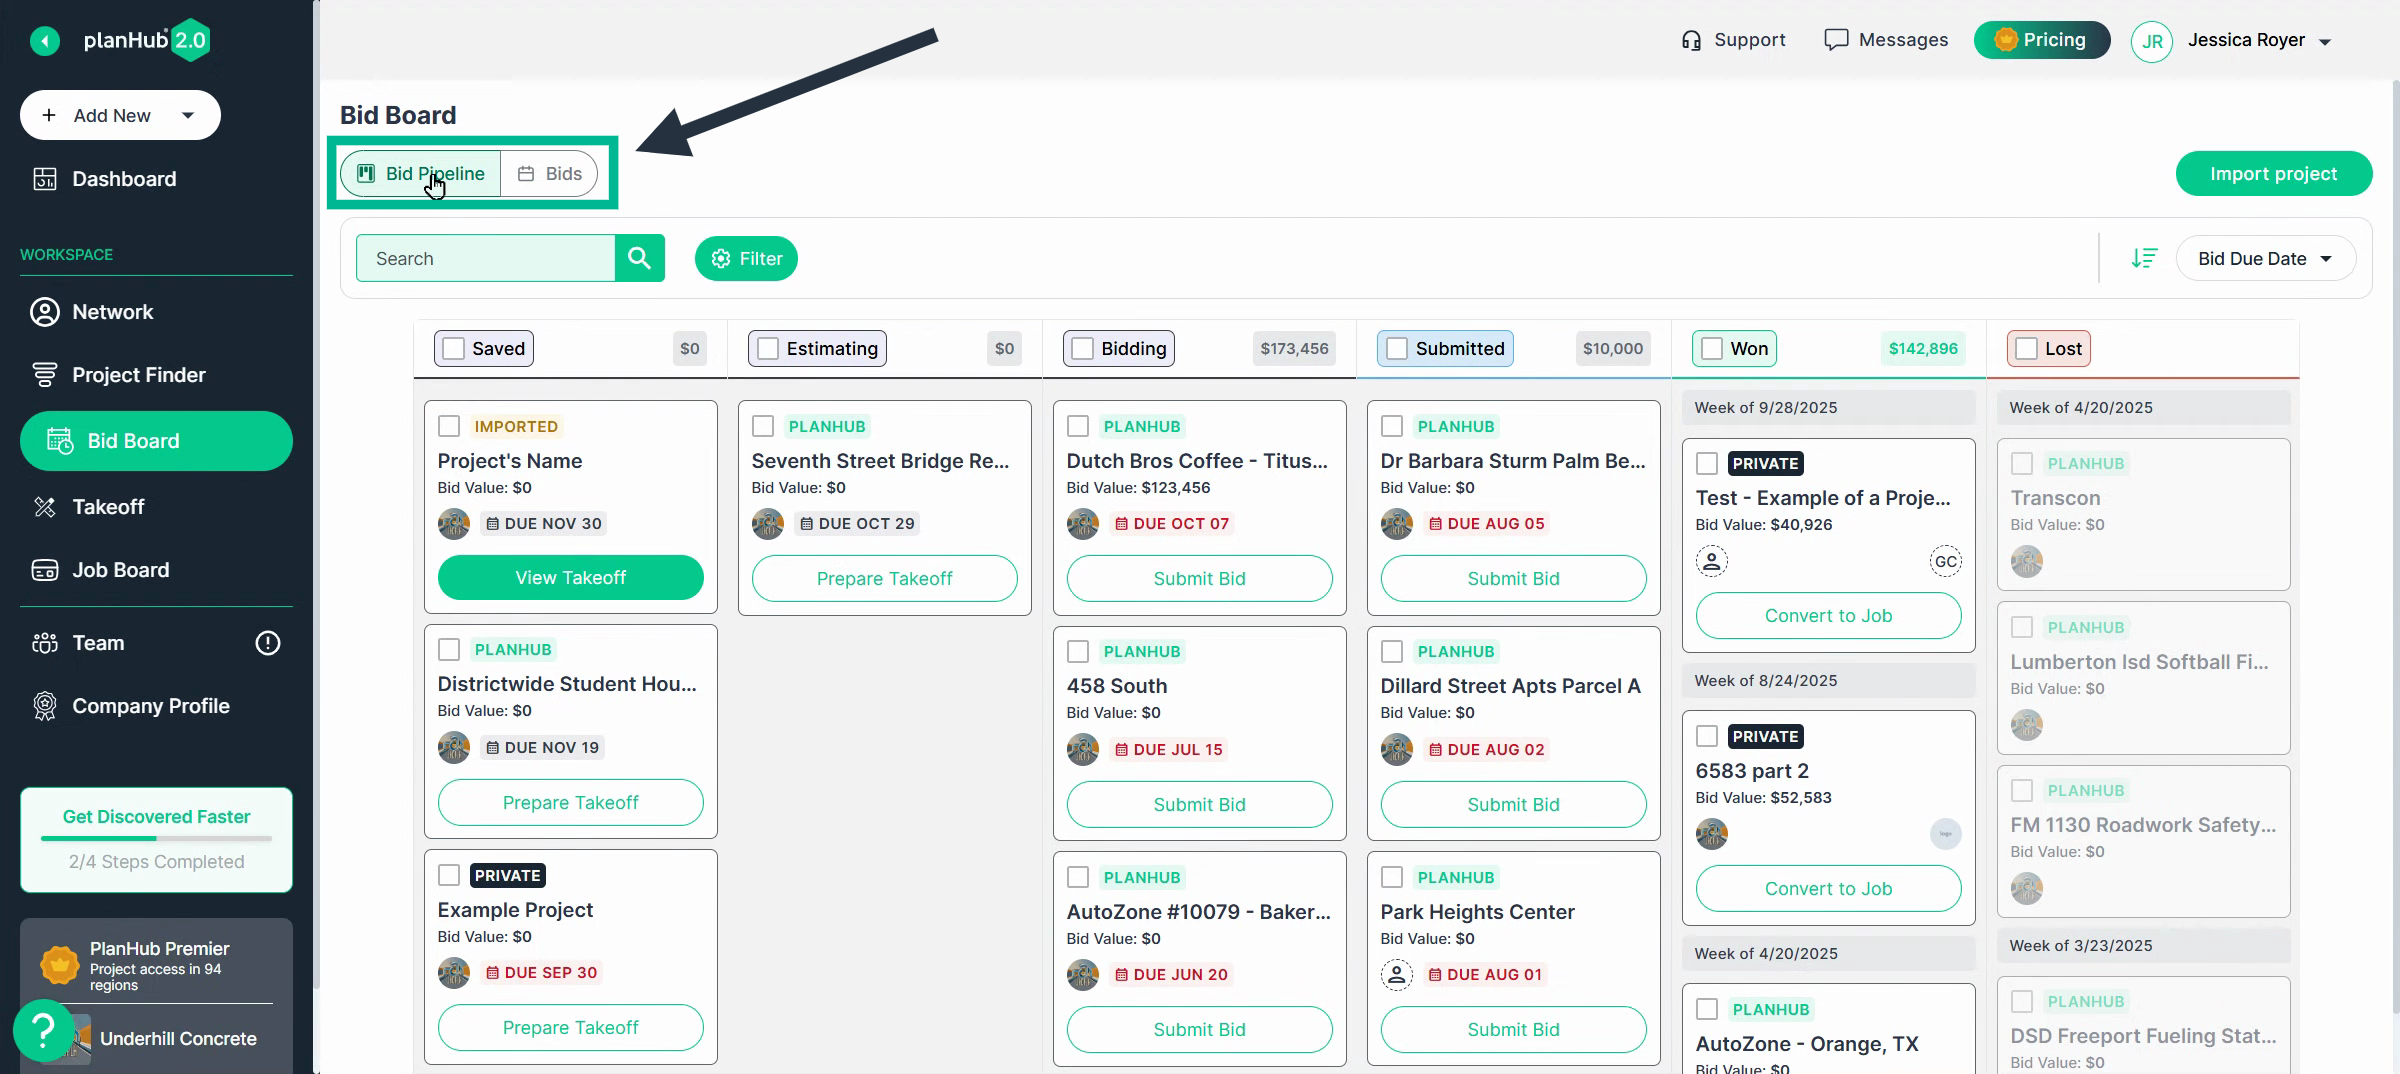
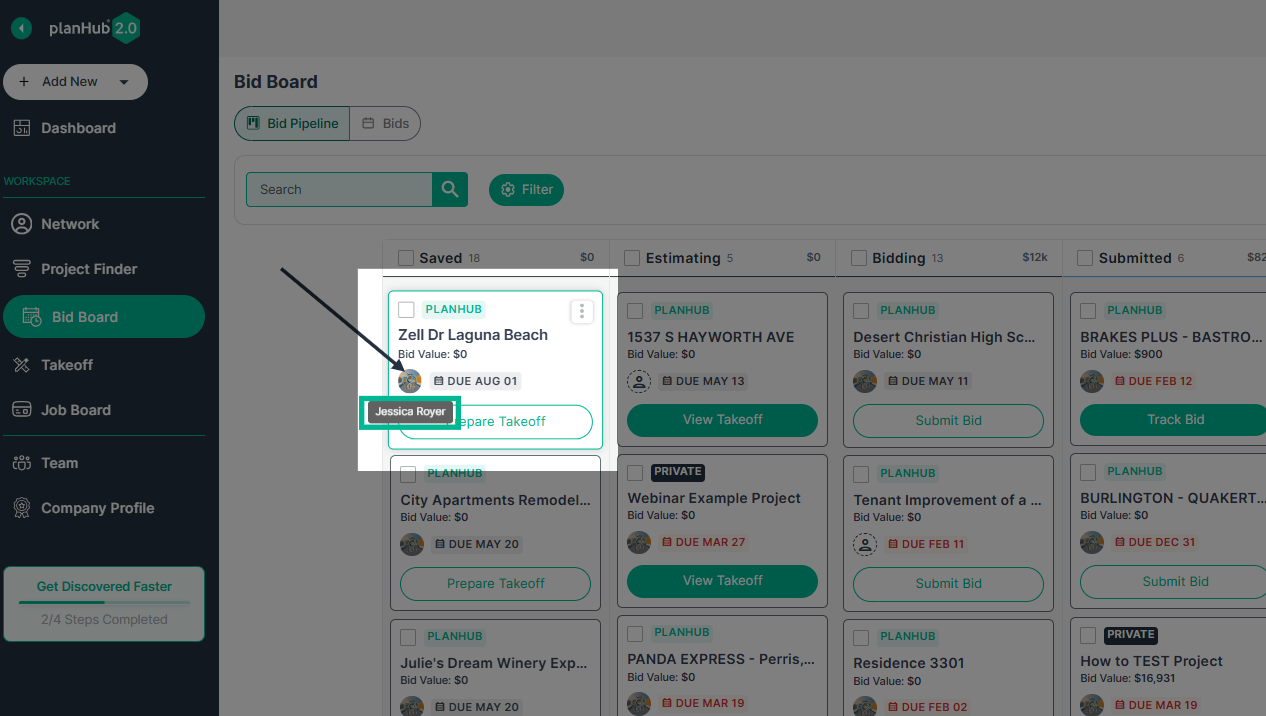
The Bid Pipeline tracks each project’s stage and displays projects from all team members unless filtered.
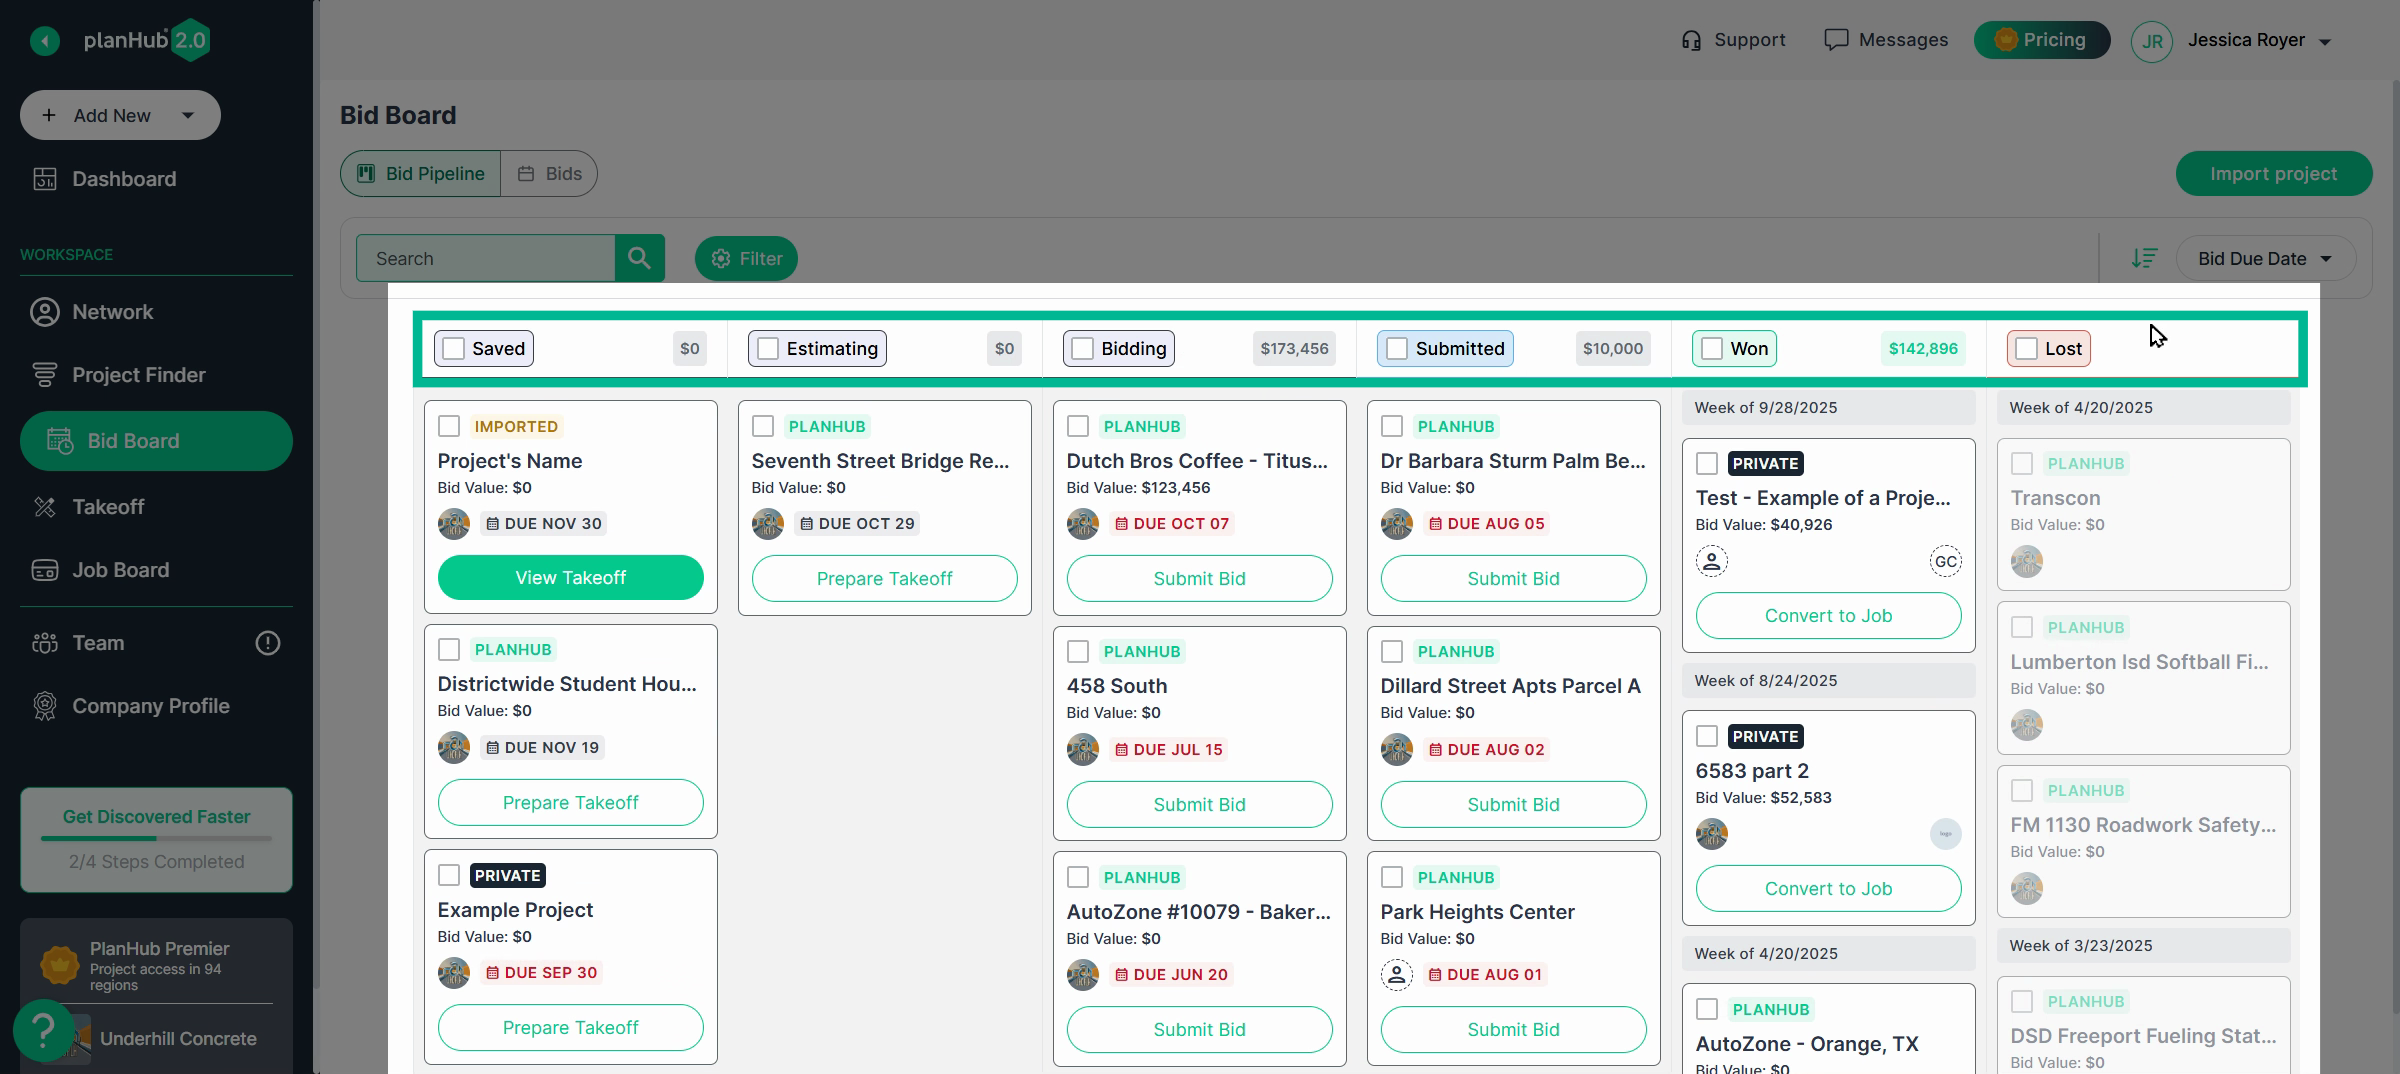
Pipeline stages include:
- Saved
- Estimating
- Bidding
- Submitted
- Won
- Lost
Moving Projects Through the Pipeline
Step 1: Drag and drop a project to another stage, or use the three-dot icon to update its status directly.
Step 2: Select multiple projects to manage them in bulk. Update status, assign, or remove them as needed.
Tip: Hover over the logo icon next to a project to see the assigned team member.
Searching and Filtering Projects
Step 1: Use the search bar to find projects quickly.
Step 2: Filter the pipeline by team member, project source, or bid due date. After selecting filters, click Save.
- Your Bid Board instantly updates to show only projects matching your filters.
Opening and Working on Projects
Step 1: Click a project’s name to open its details page and work on or submit a bid. Return to the Bid Board anytime from the left navigation panel.
Tracking Submitted Bids with "Track Bid" - A Premier Feature
Step 1: In the Submitted column, use the new Track Bid feature to monitor all bids submitted inside PlanHub.
Step 2: View all trades you’ve bid for and select any to see the submitted amount.
Step 3: All feedback is stored in the Feedback folder for future reference.
The feedback section lists which General Contractors received your bid. Request feedback if needed.
Keep results up to date—tracking wins and losses will help you improve your process and win more jobs!
Step 4: Manually update the Status of a bid by dragging and dropping it to a new status.
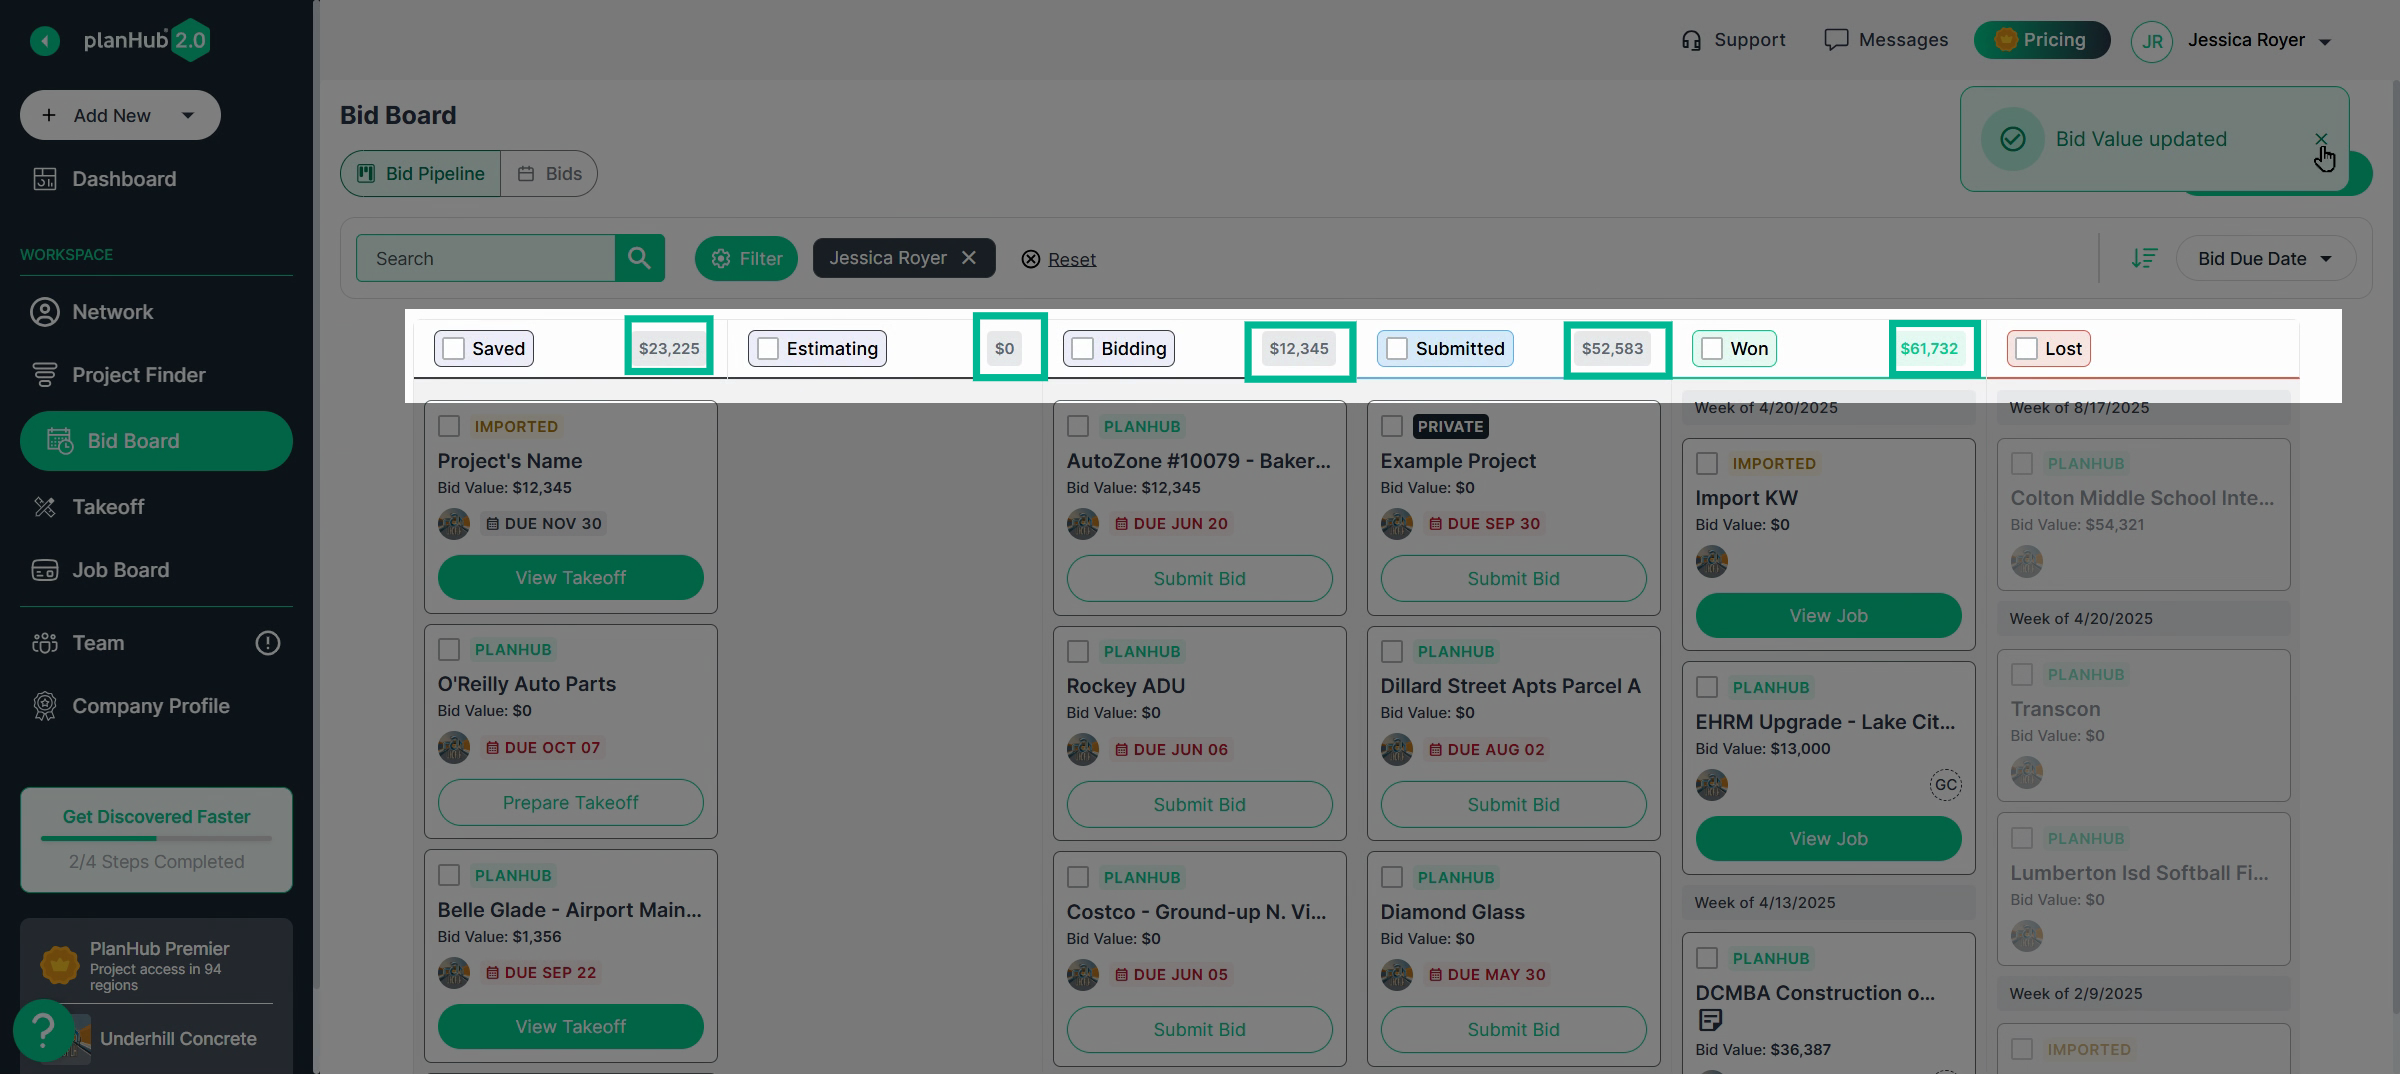
Adding and Tracking Bid Values
Step 1: Assign a value to each PlanHub project by clicking Bid Value and entering your number.

Step 2: See your total at the top of each pipeline stage for fast, big-picture value tracking.
Converting Won Bids to Jobs (w/ Job Board Add-on)
If you use the Job Board add-on, move winning projects directly from Won to your Job Board. Click Convert to Job—PlanHub will transfer details for you.
From there, edit, assign teammates, add tasks, and share files as needed on the Job.
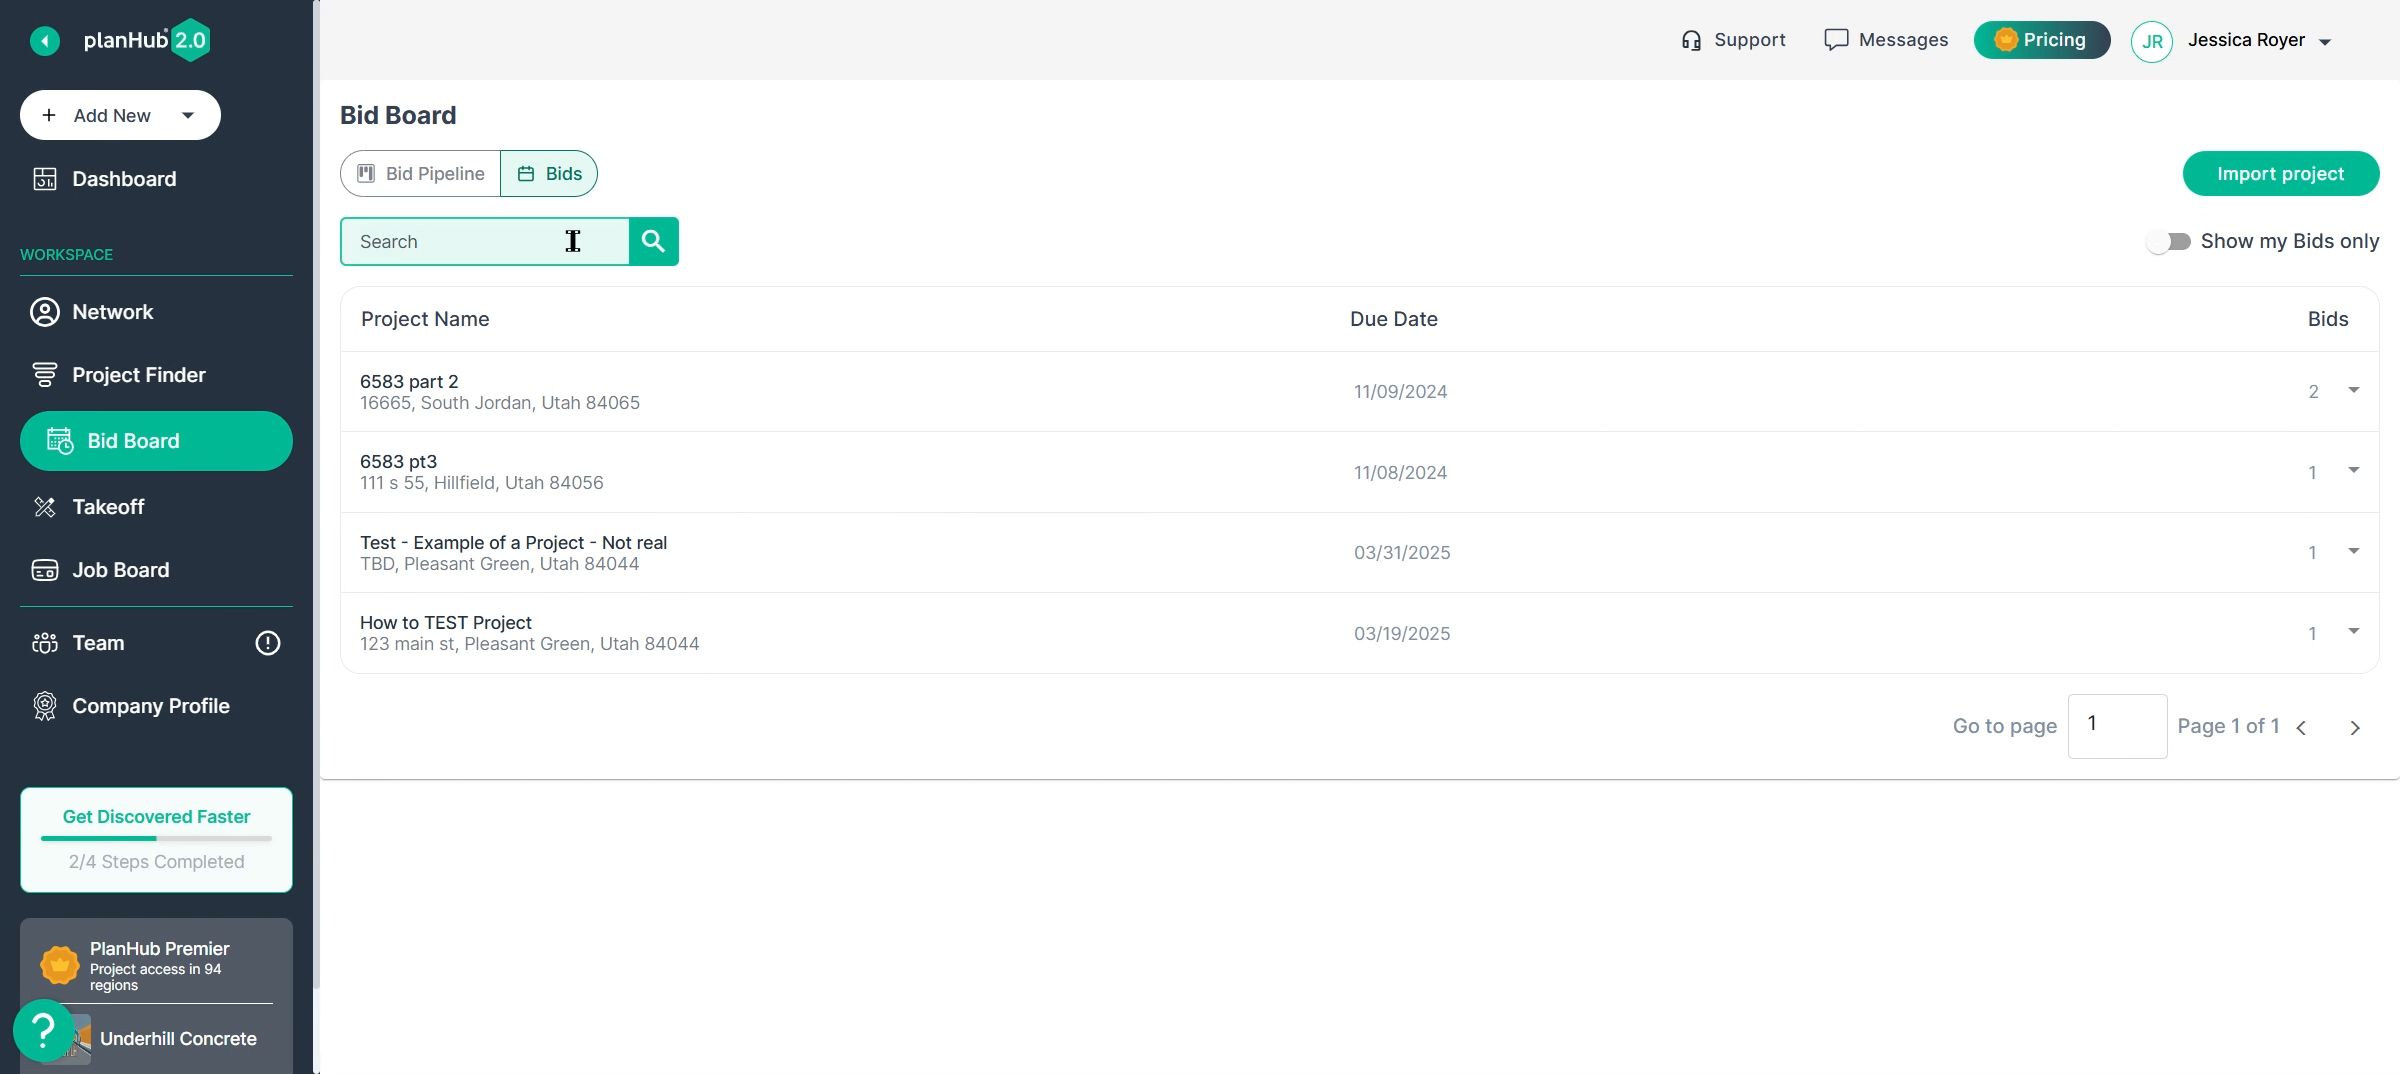
Reviewing Past Bids in the Bids Tab
Switch to the Bids tab to see all bids submitted by you or your team. Each entry lists the project name, address, due date, recipients, trades, and bid amount.
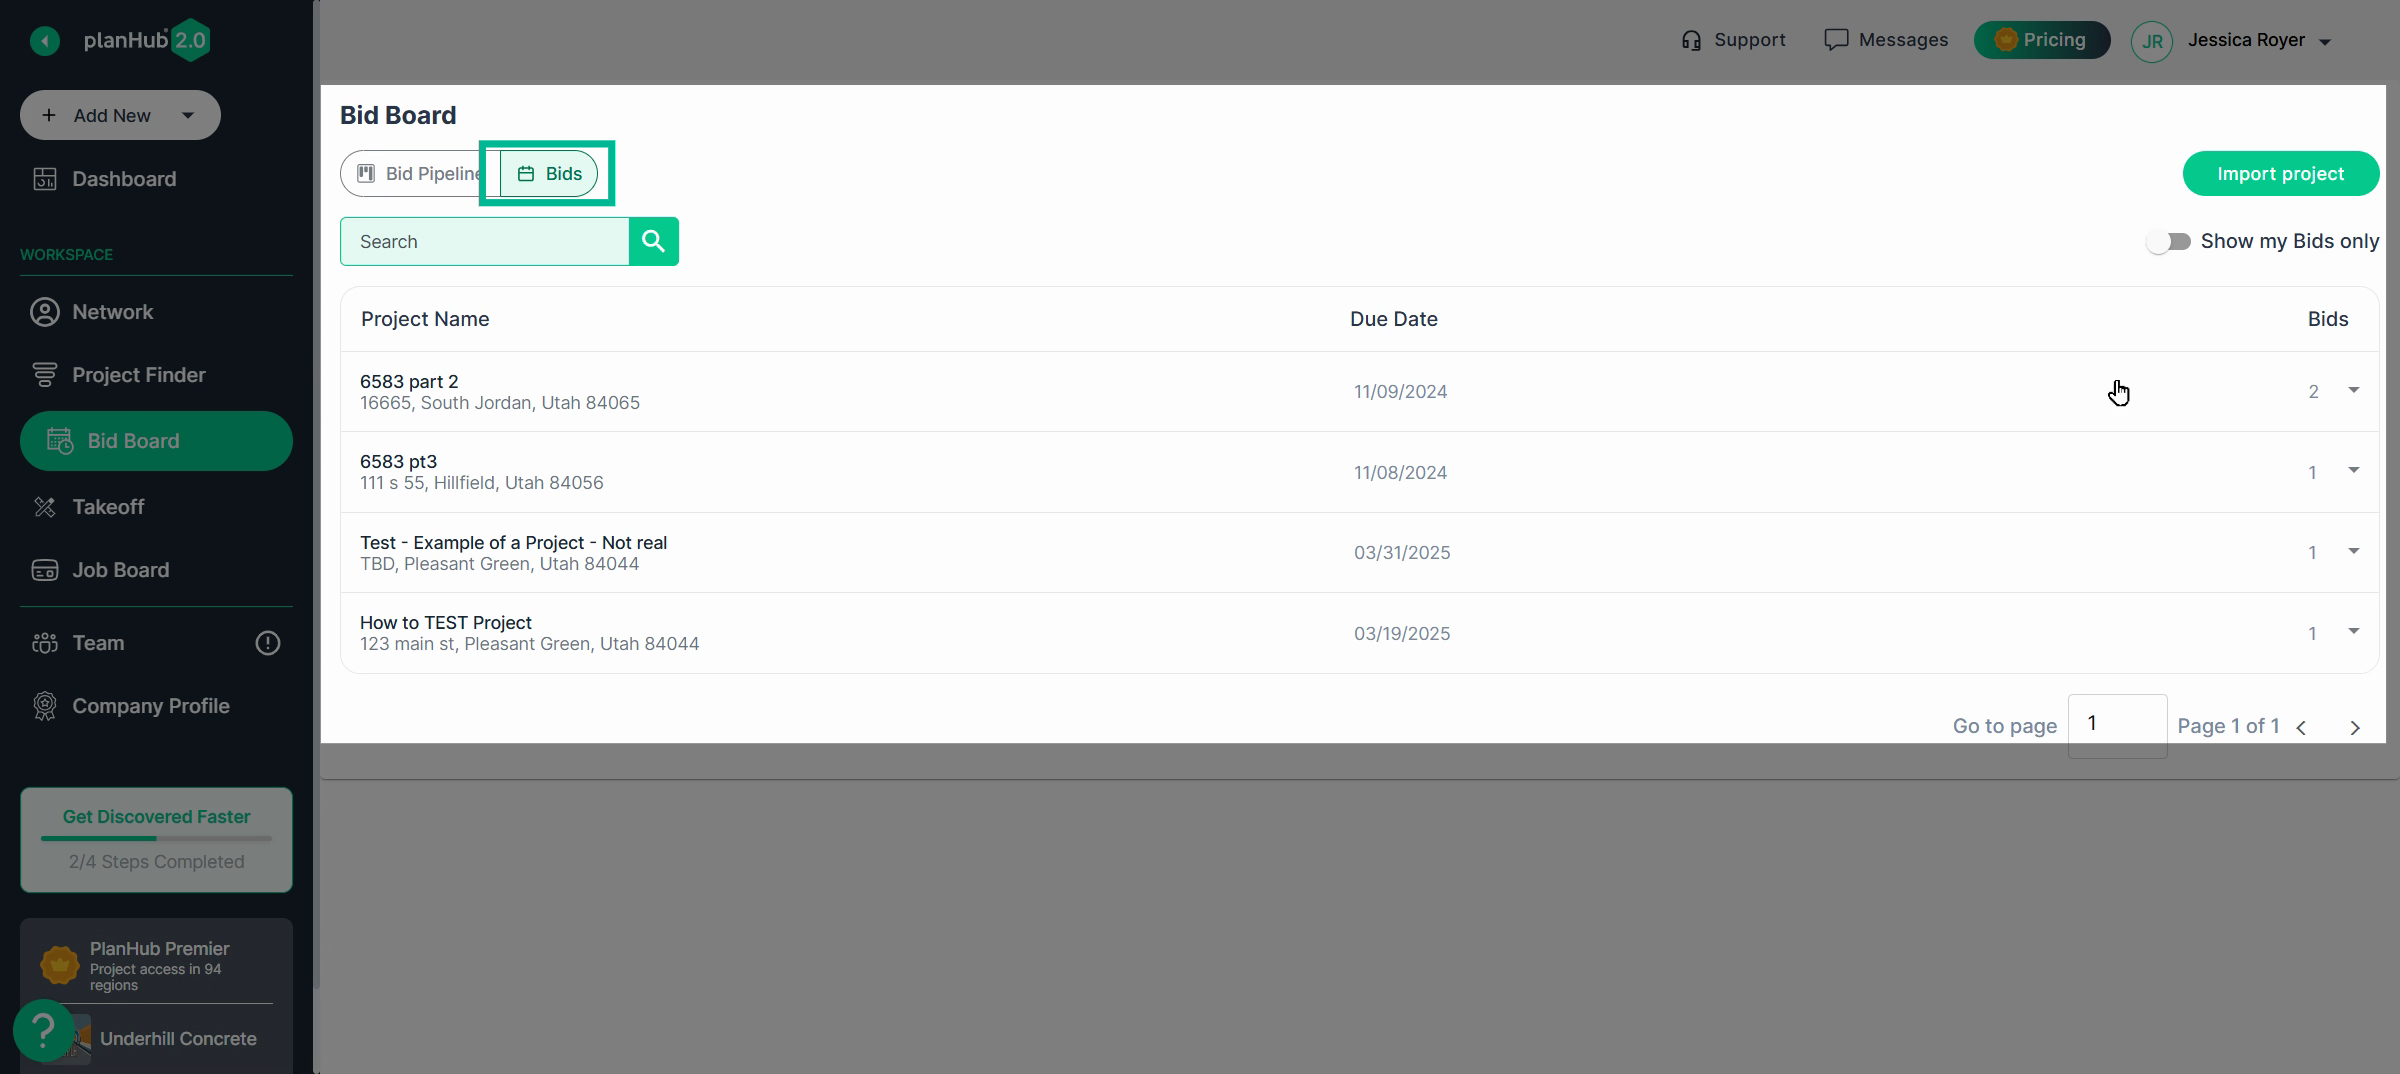
Expand bids for quick links back to the original post and your file for easy review or download.
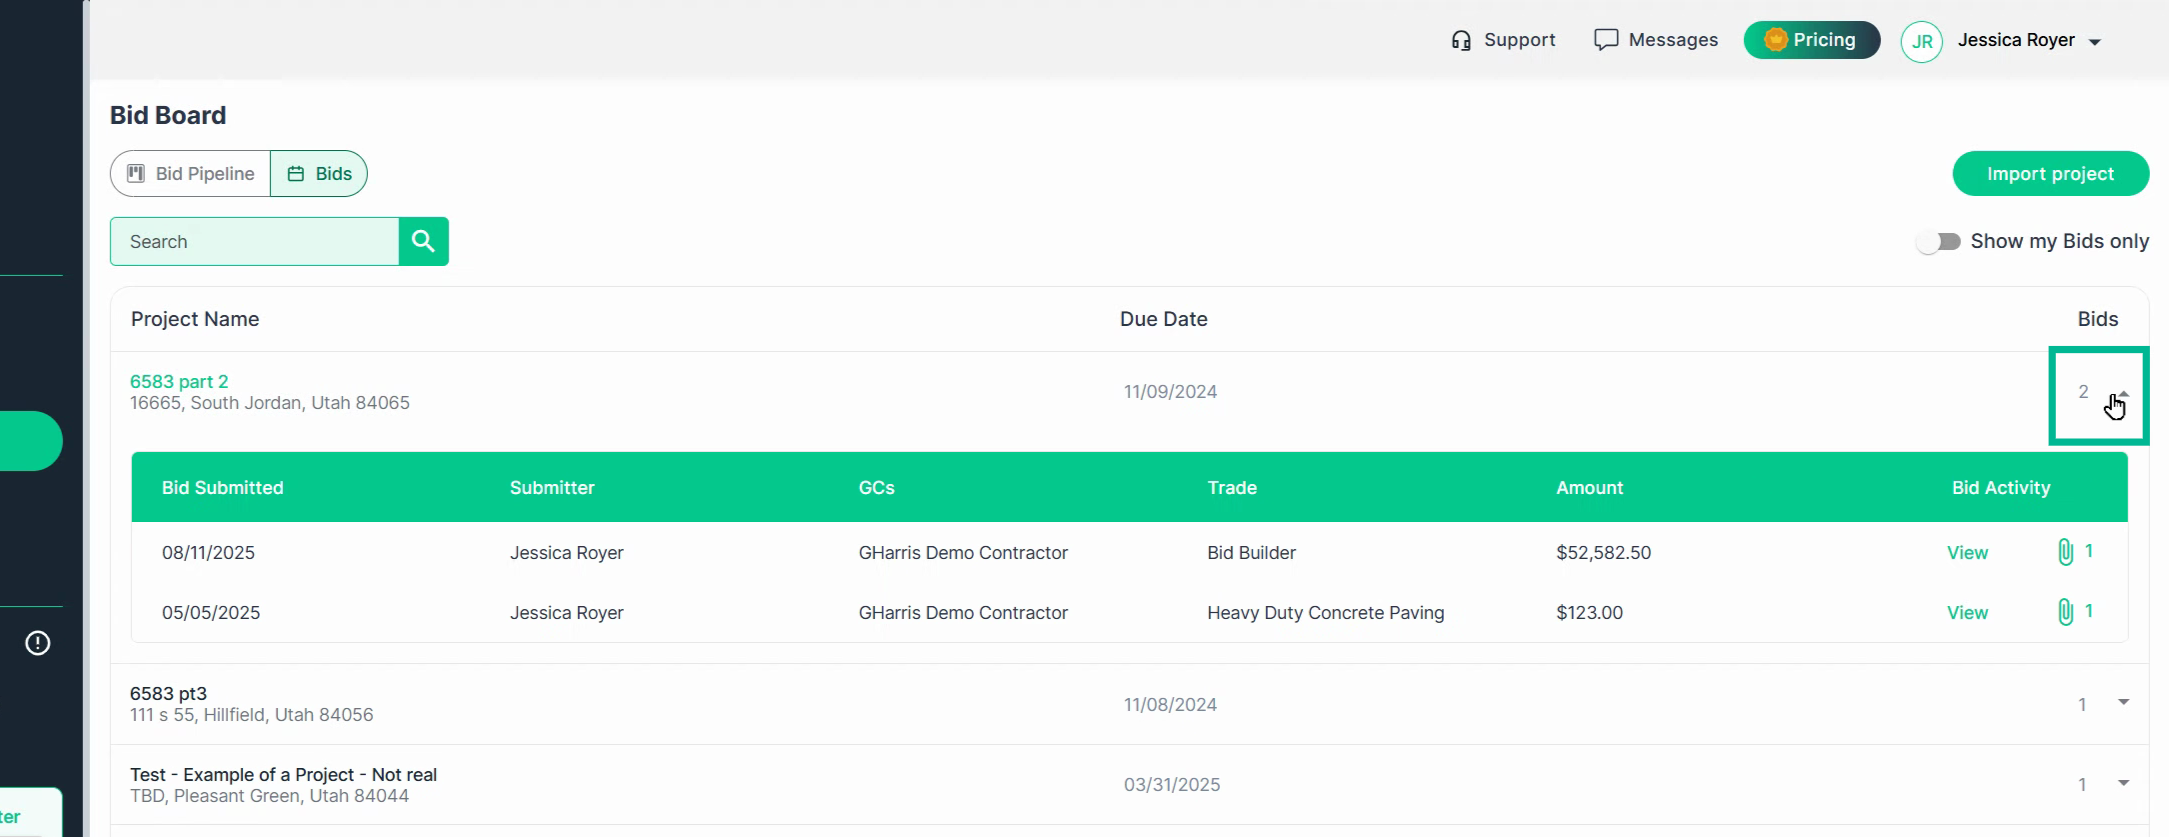
Search by keyword or turn on Show My Bids Only to create your personal shortlist.
Conclusion
Keep all your projects—PlanHub or external—organized and competitive with your Bid Board. Quickly search, filter, and track everything. Request feedback, build relationships, and manage your team’s entire bidding process in one place. Get organized for a smoother, more successful bidding experience every time.
Troubleshooting
Contact us if you need assistance or to report an issue:
- PlanHub Contact Page: https://planhub.com/contact/
- Customer Facing Support Ticket Link: https://knowledgebase.planhub.com/knowledge/kb-tickets/new
- Customer Success Team: CustomerSuccess@planhub.com