Step 1: Review the plans and specifications. Then, be sure to set the scale on your plan sheet before you begin your measurements. To learn more about how to set the scale in Takeoff, view the "How to Set the Scale in PlanHub Takeoff" article.
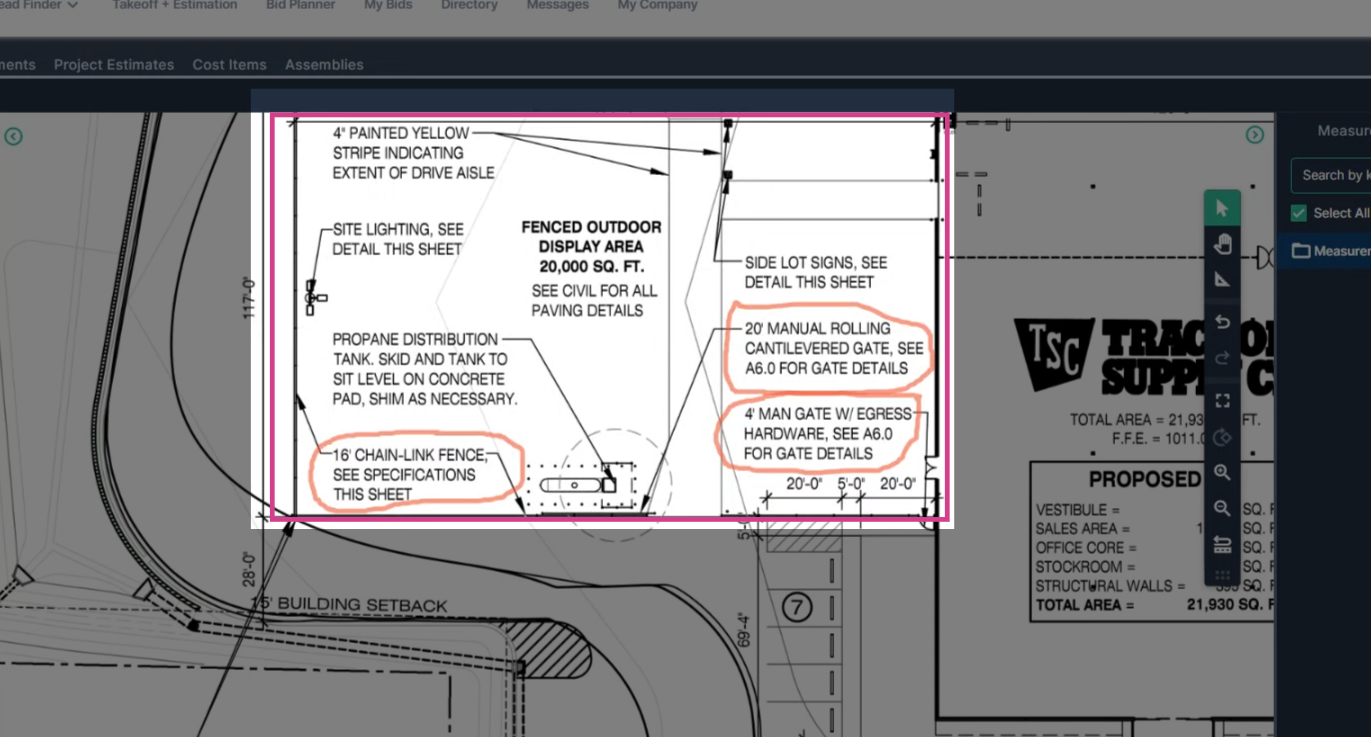
Step 2: Navigate to the area where you’ll be measuring the fence.
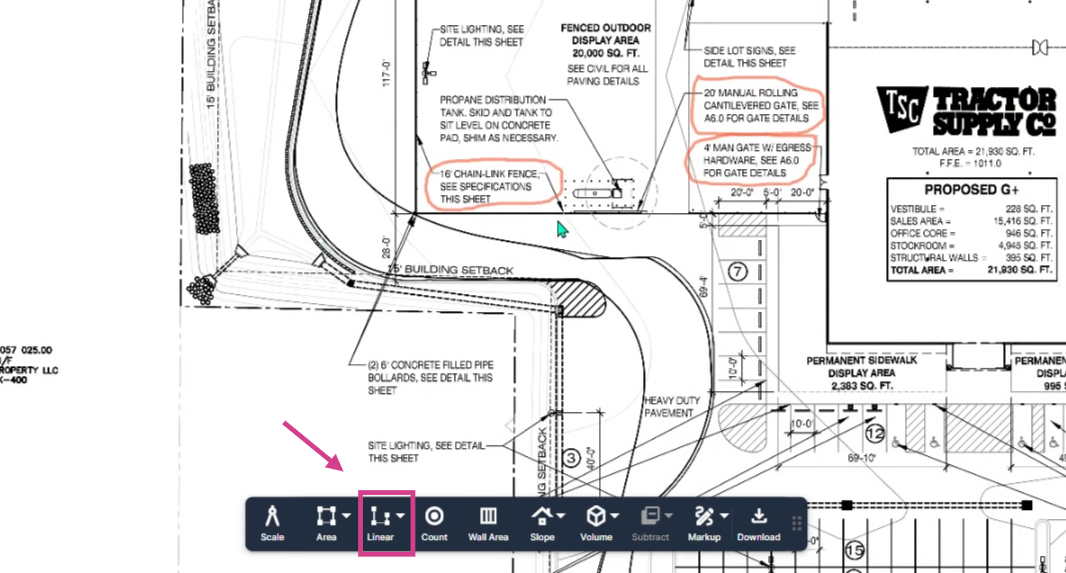
Step 3: Select the Linear tool from the toolbar.
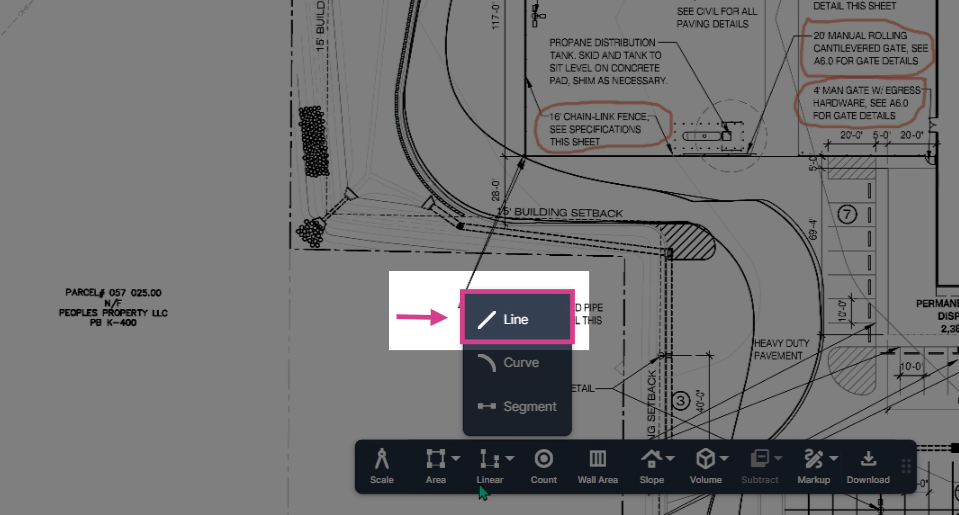
Step 4: Choose the Line option to measure a continuous line.
Step 5: Enter a name for your measurement, for example: “16-foot chain link fence” and a brief description.
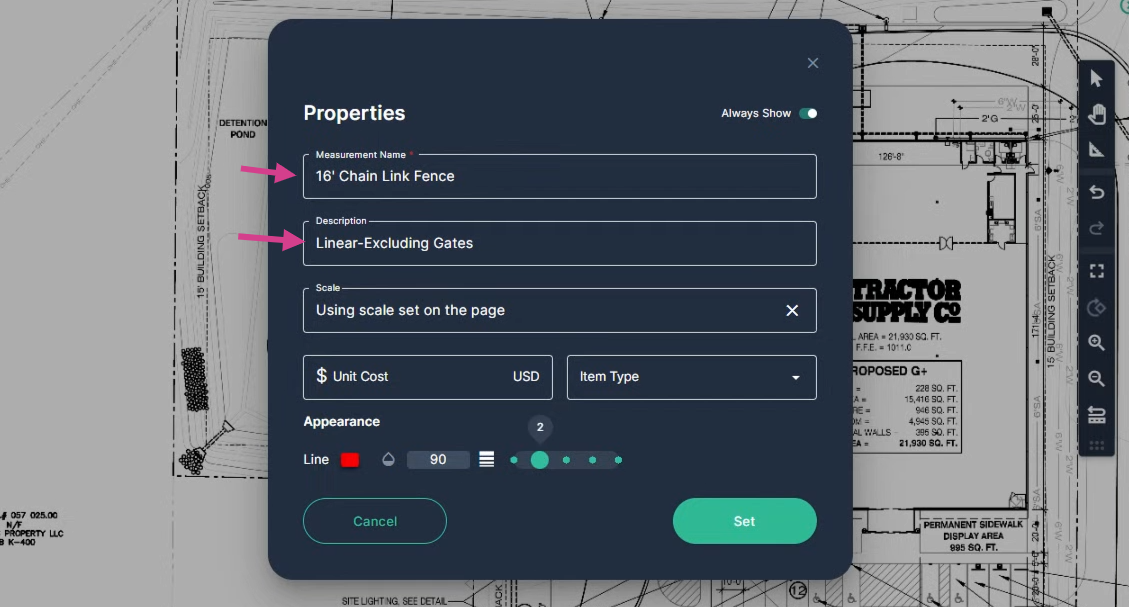
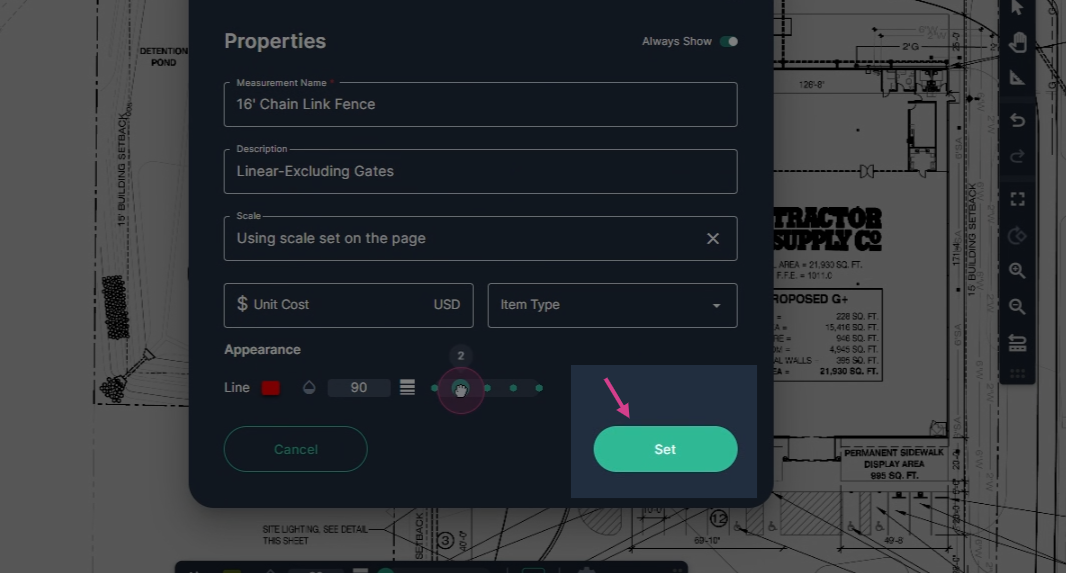
Step 6: Choose a bright, visible color and adjust the stroke thickness for clarity.
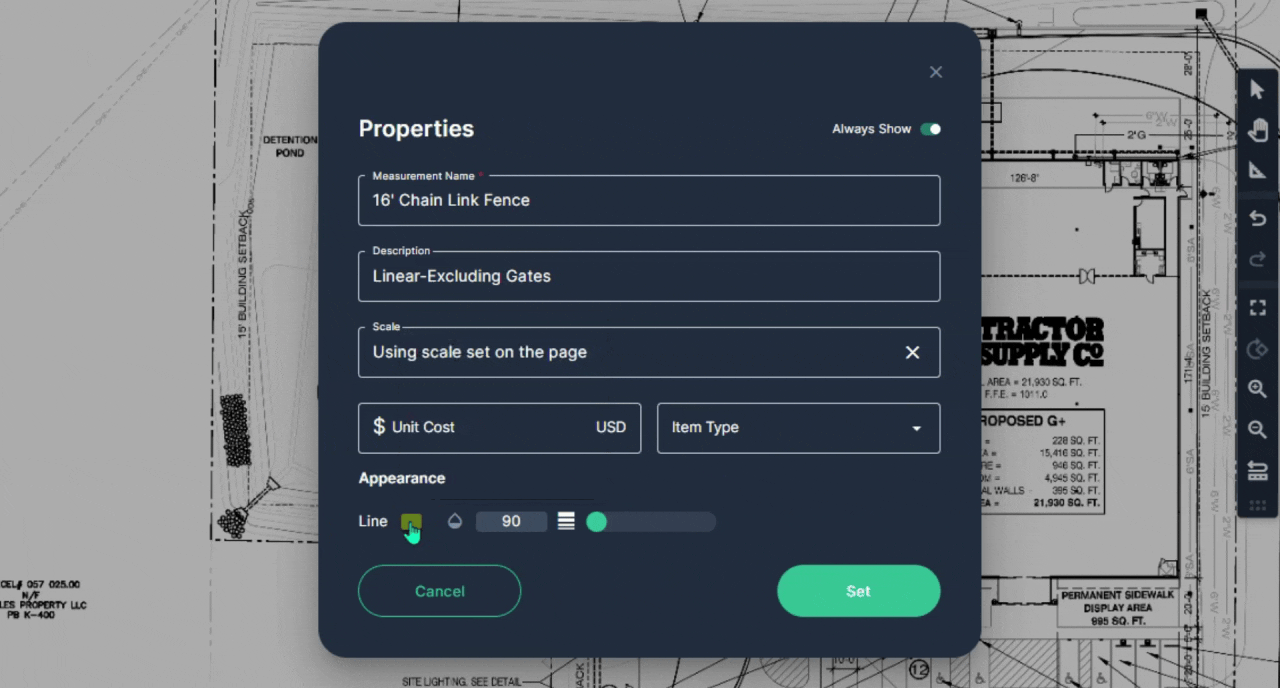
Step 7: Click Set to confirm your measurement setup.
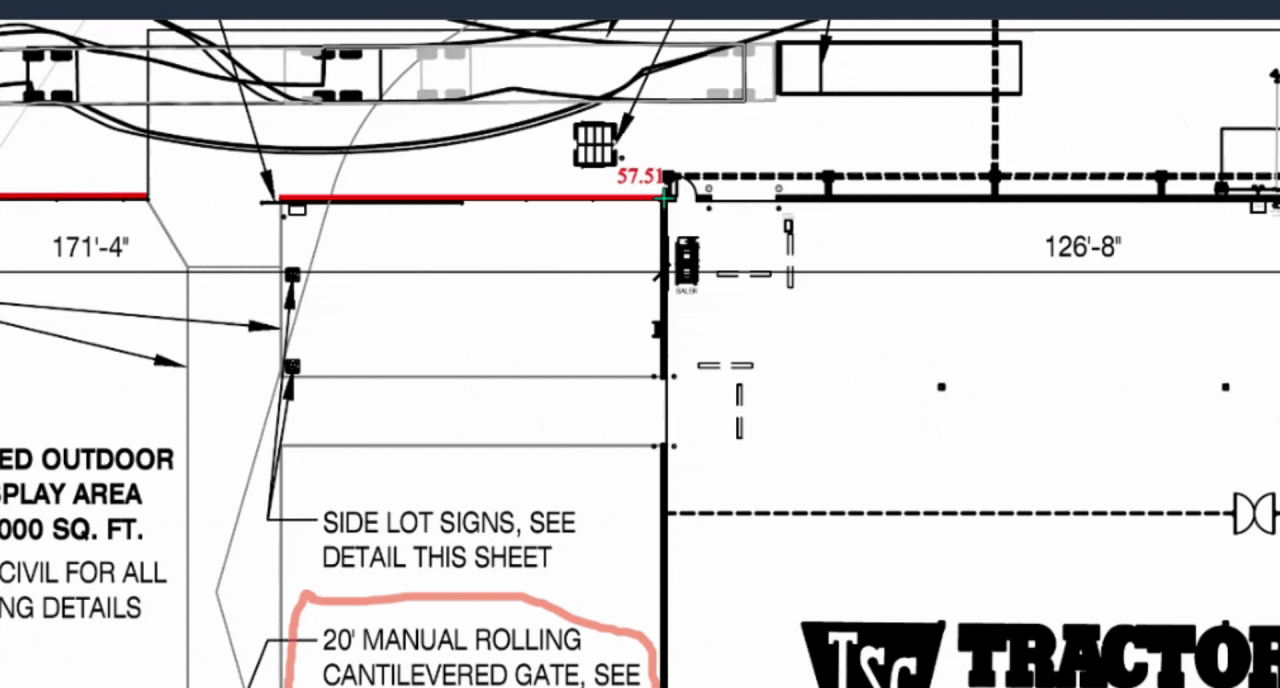
Step 8: Begin your measurement at one end of the fence. Left-click to drop the first point, then continue clicking to drop additional points as it turns along the fence line.
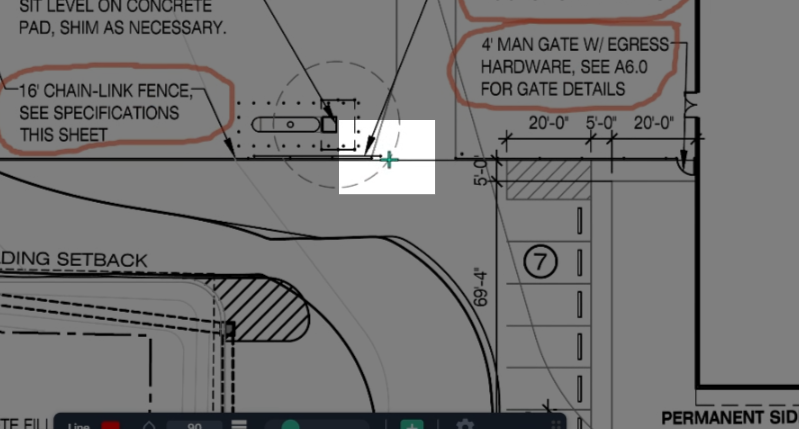
Step 9: Double-click the left button on the mouse at the end of the fence to end the measurement.
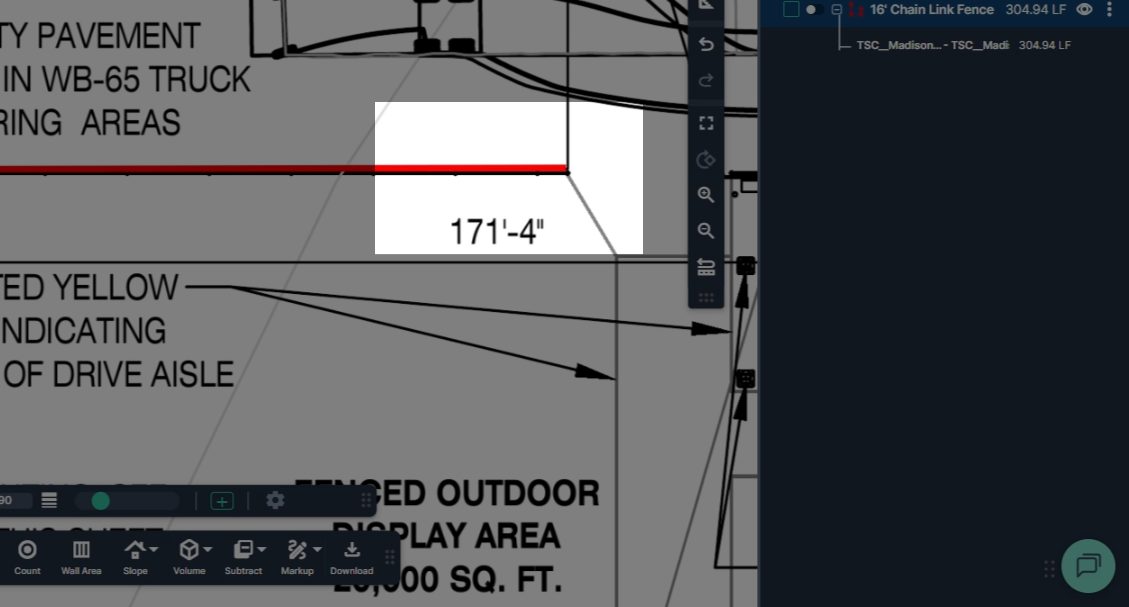
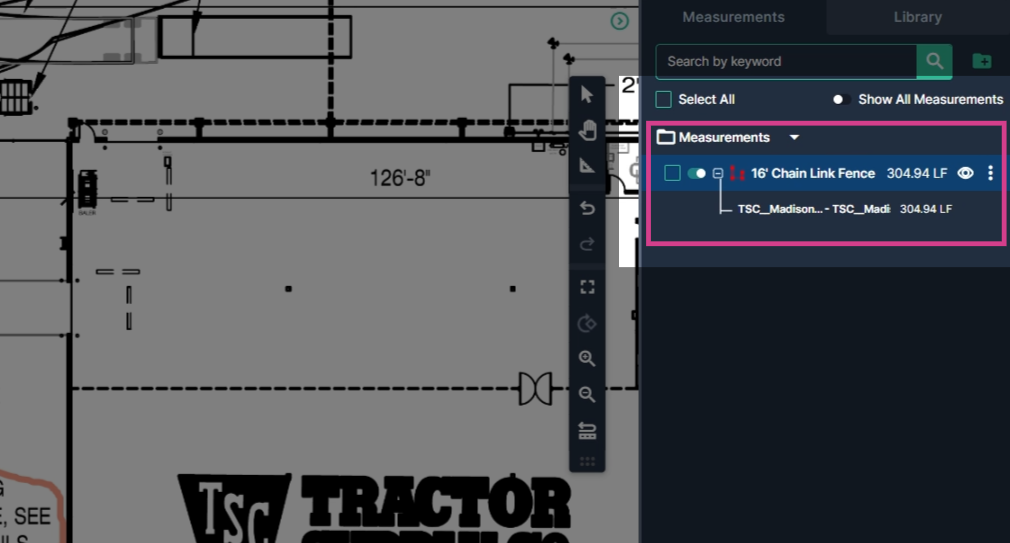
Step 10: View the Measurements panel on the right to view the total linear footage measured.
Step 11: To continue measuring additional fence segments, toggle the measuring tool on. When the toggle appears green, you’re ready to continue the measurement.
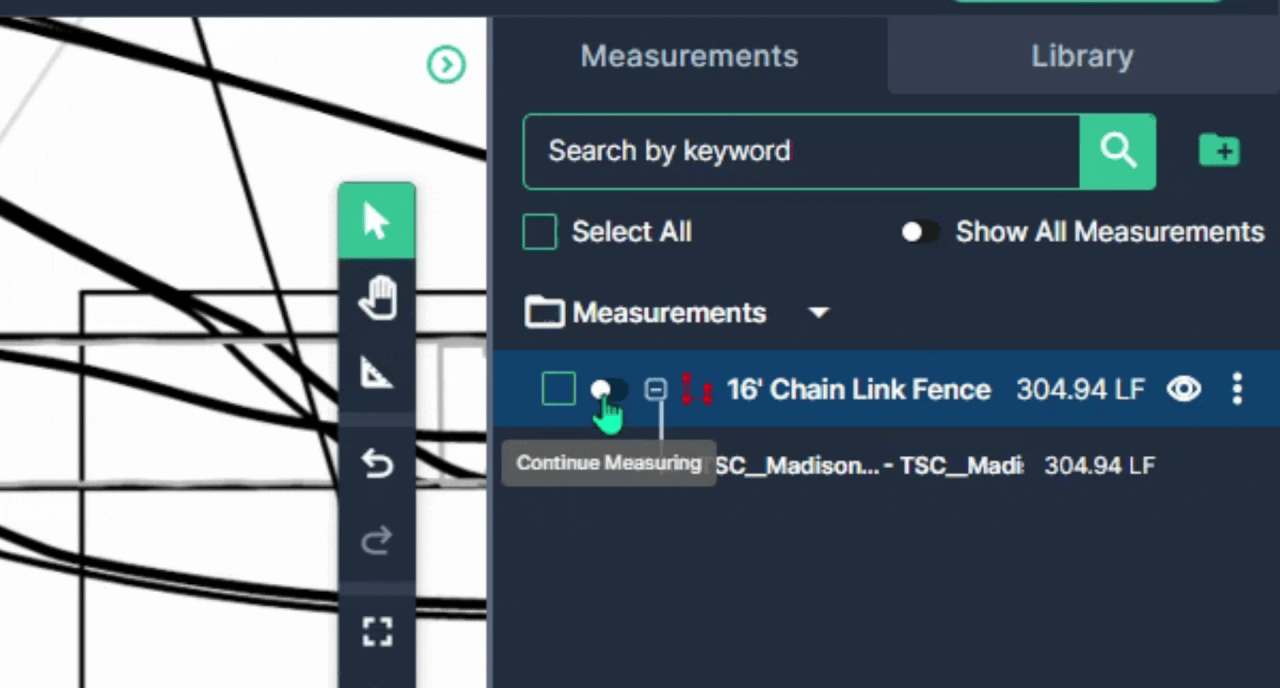
Step 12: Pan around your plan page with a right-click and hold of the mouse button, then left-click to drop points for each new segment. Double-click to finish each section.
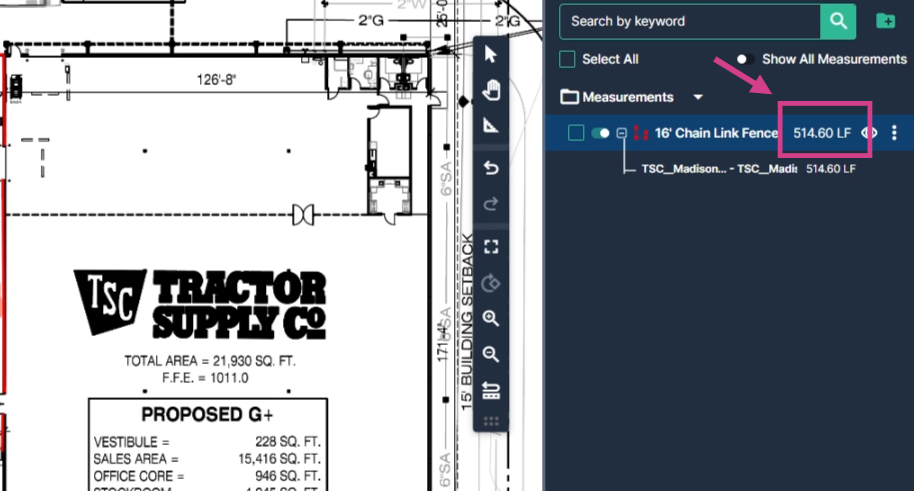
Step 13: Navigate to the measurements panel to view your total linear footage updates in real time.
Counting Gates with the Count Tool
Once you've measured your fencing, it's time to count the gates required for your project.
Step 1: Select the Count tool from the toolbar.
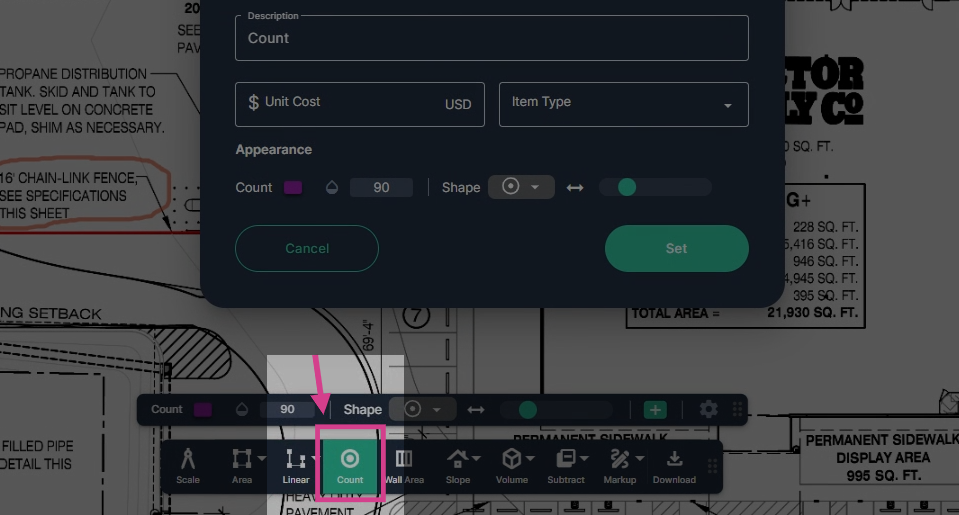
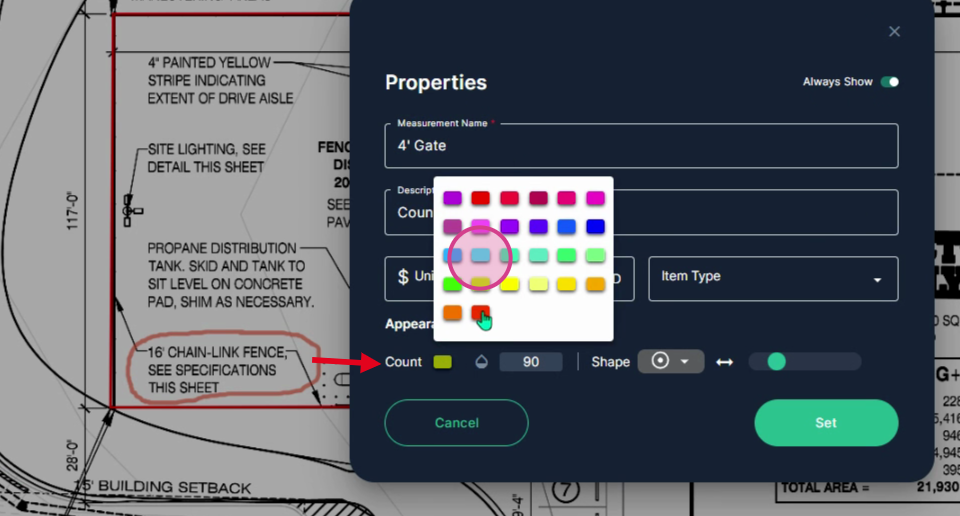
Step 2: Fill in the measurement name, for example: “20-foot manual rolling cantilevered gates,” then add a brief description.
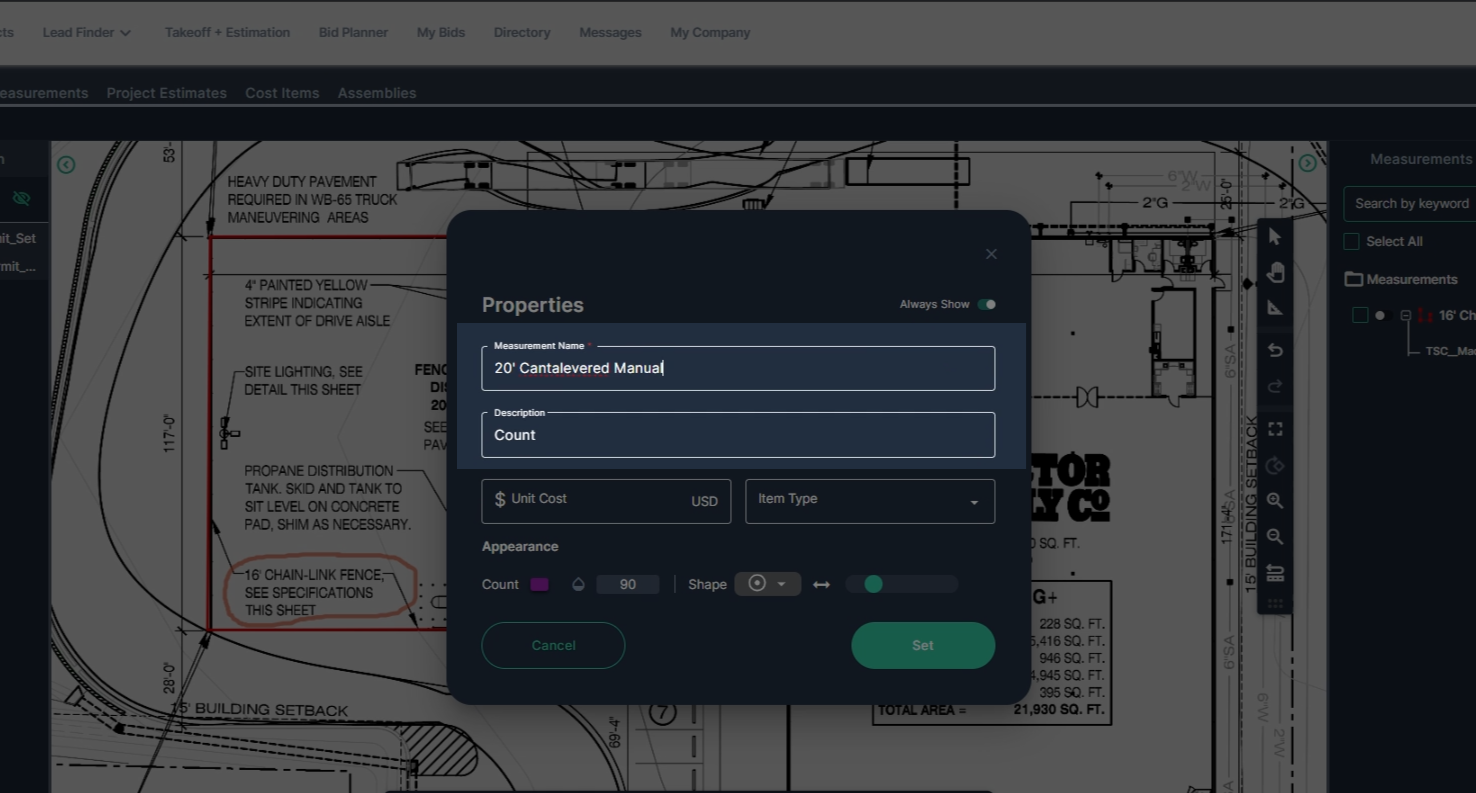
Step 3: Choose a bright color, shape, and stroke for the gate markers.

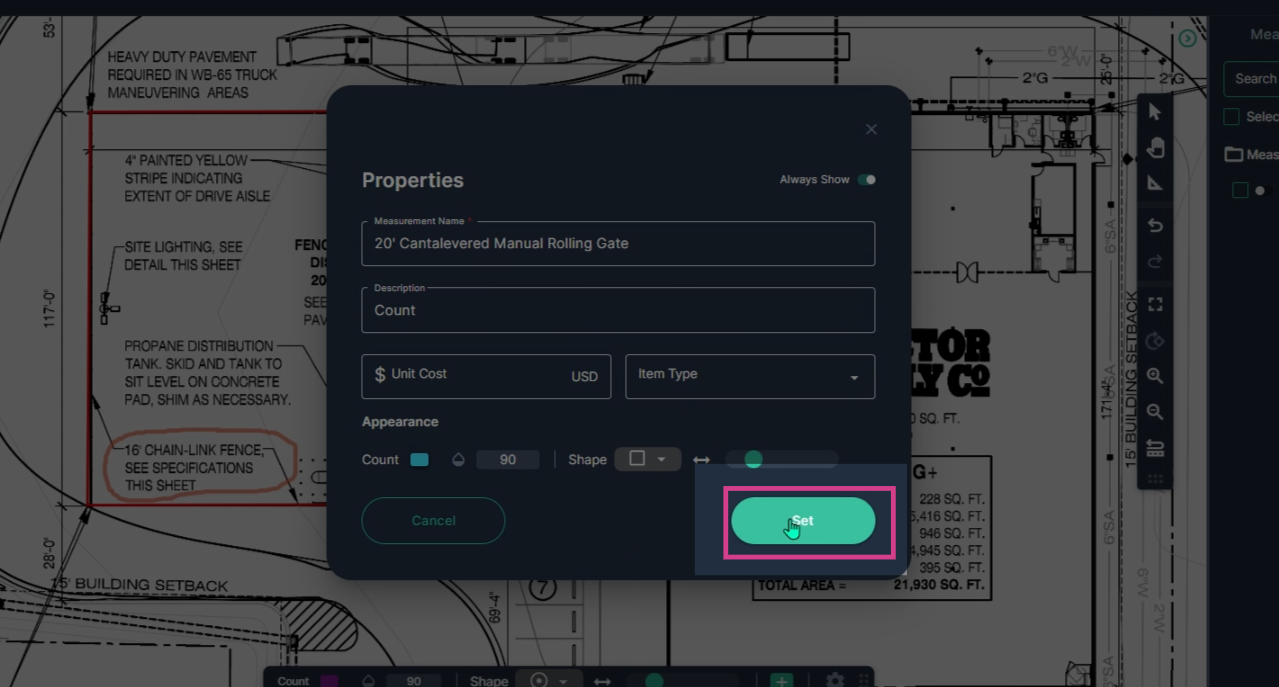
Step 4: Click Set to begin your count.
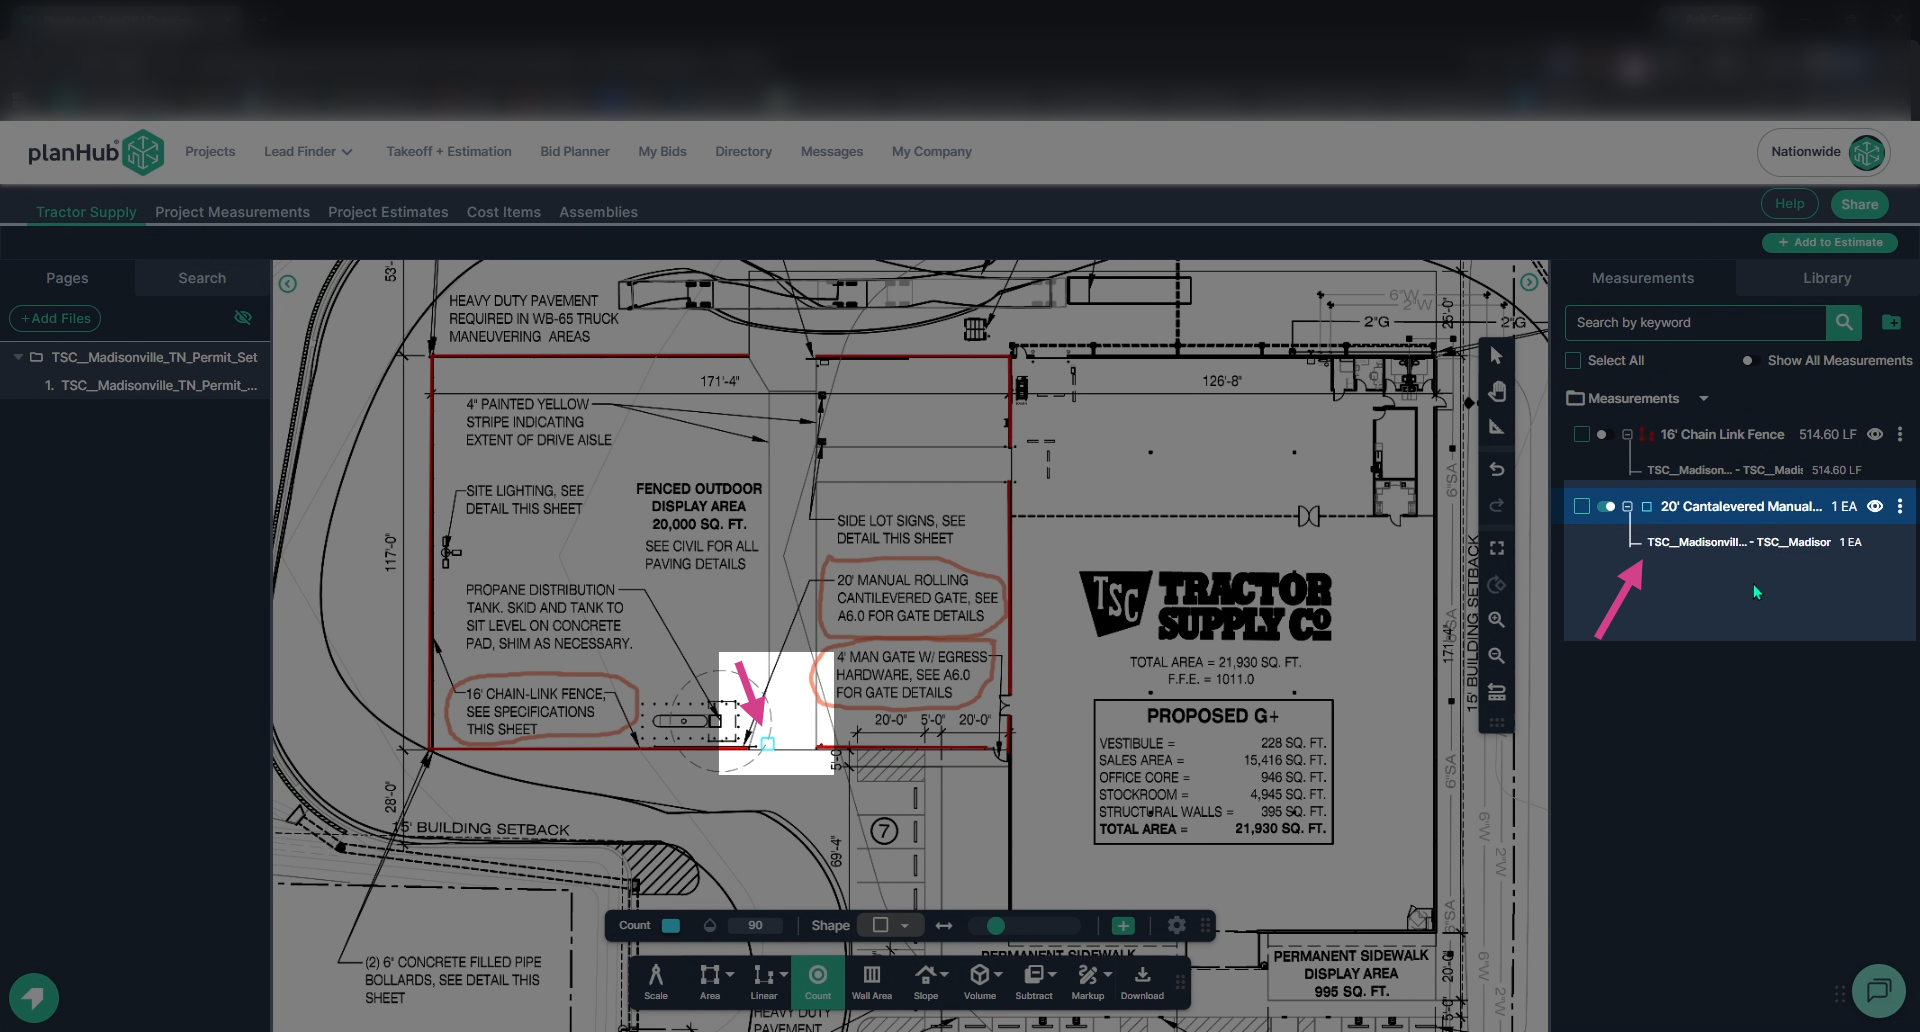
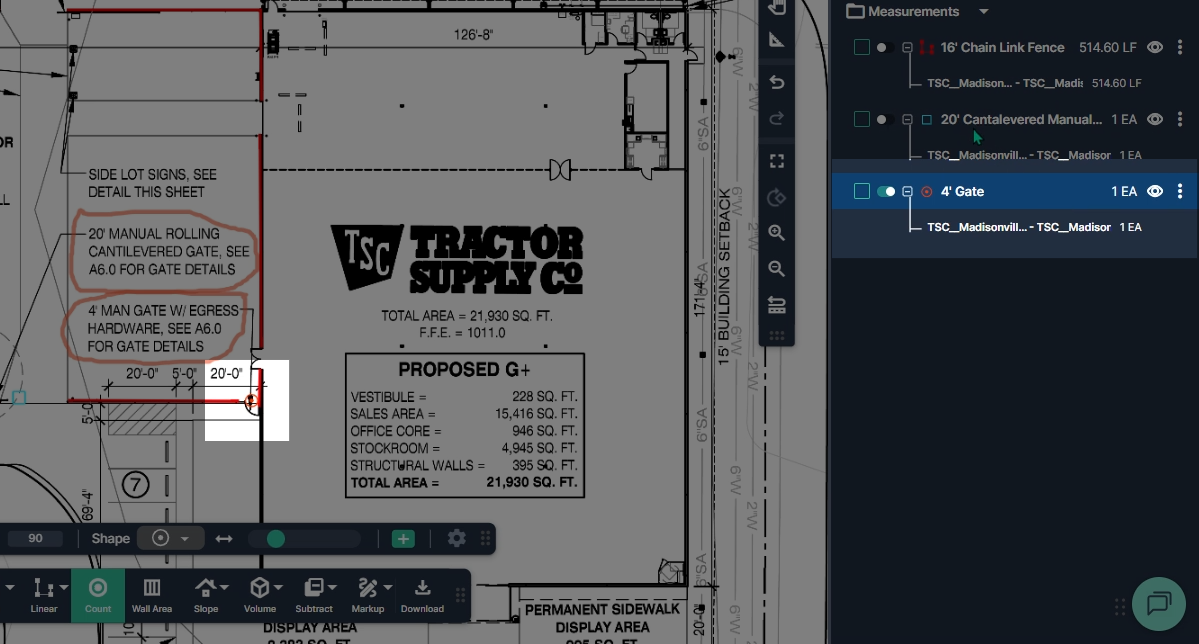
Step 5: Left-click on the plan to drop a count marker for each gate location. View the Measurements panel on the right side of the page. The gate count updates as you add markers.
Step 6: Repeat the process for additional gate types, such as the 4-foot man gate with egress hardware. Open the count tool, set the name, color, shape, and stroke, then click Set.
Step 7: Zoom in and left-click to add count markers for each gate of this type.
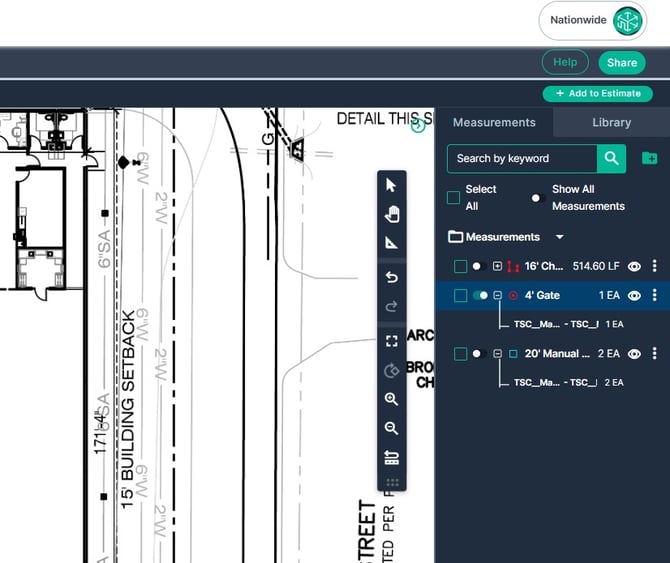
Step 8: Turn on the toggle next to each measurement to add more gates to the current count.
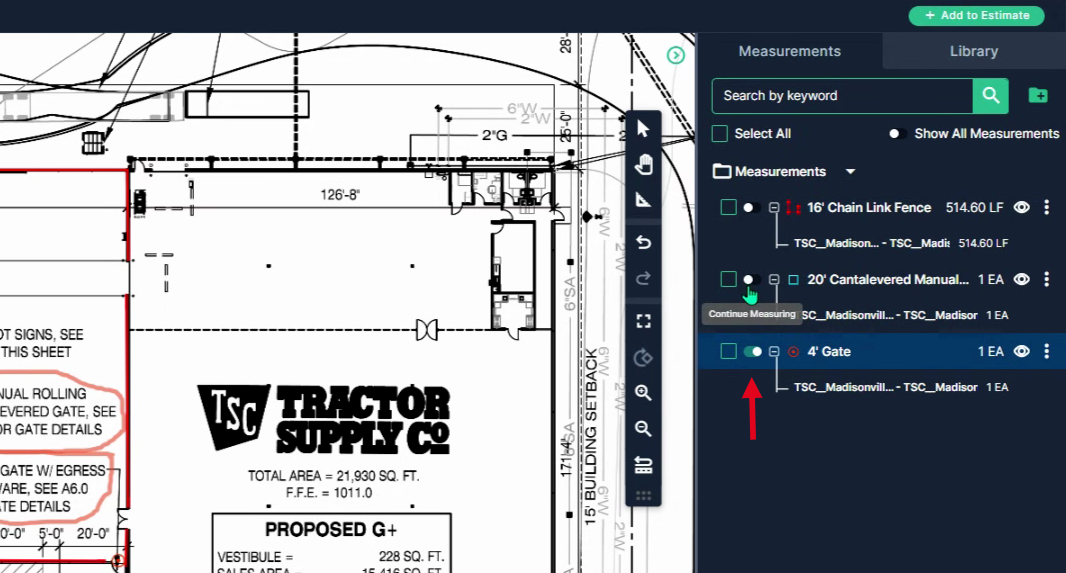
Step 9: Check the Measurements panel to review the counts for each gate type and the total chain link fence length.
By using PlanHub’s Takeoff tools, you can measure fencing more efficiently, improve estimate accuracy, and simplify your overall project planning.