Introduction to Project Finder
Project Finder gives General Contractors a curated list of early planning-stage project opportunities. These leads are populated and updated by PlanHub’s research team, and each one includes direct contact information. Engaging at this stage positions your company for upcoming bid invitations and builds powerful new relationships.
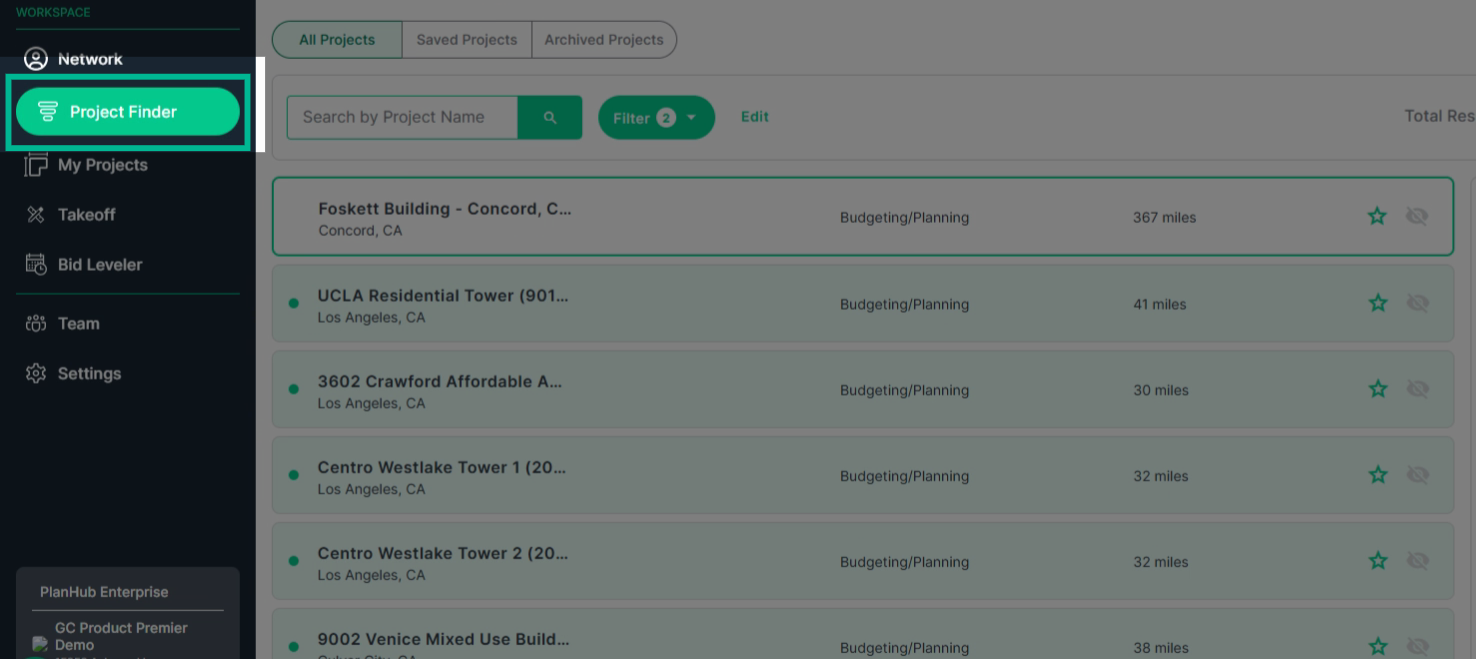
Step 1: Accessing Project Finder
Step 1: Log in to your PlanHub General Contractor account.
Step 2: Use the Pages bar on the left to select Project Finder.
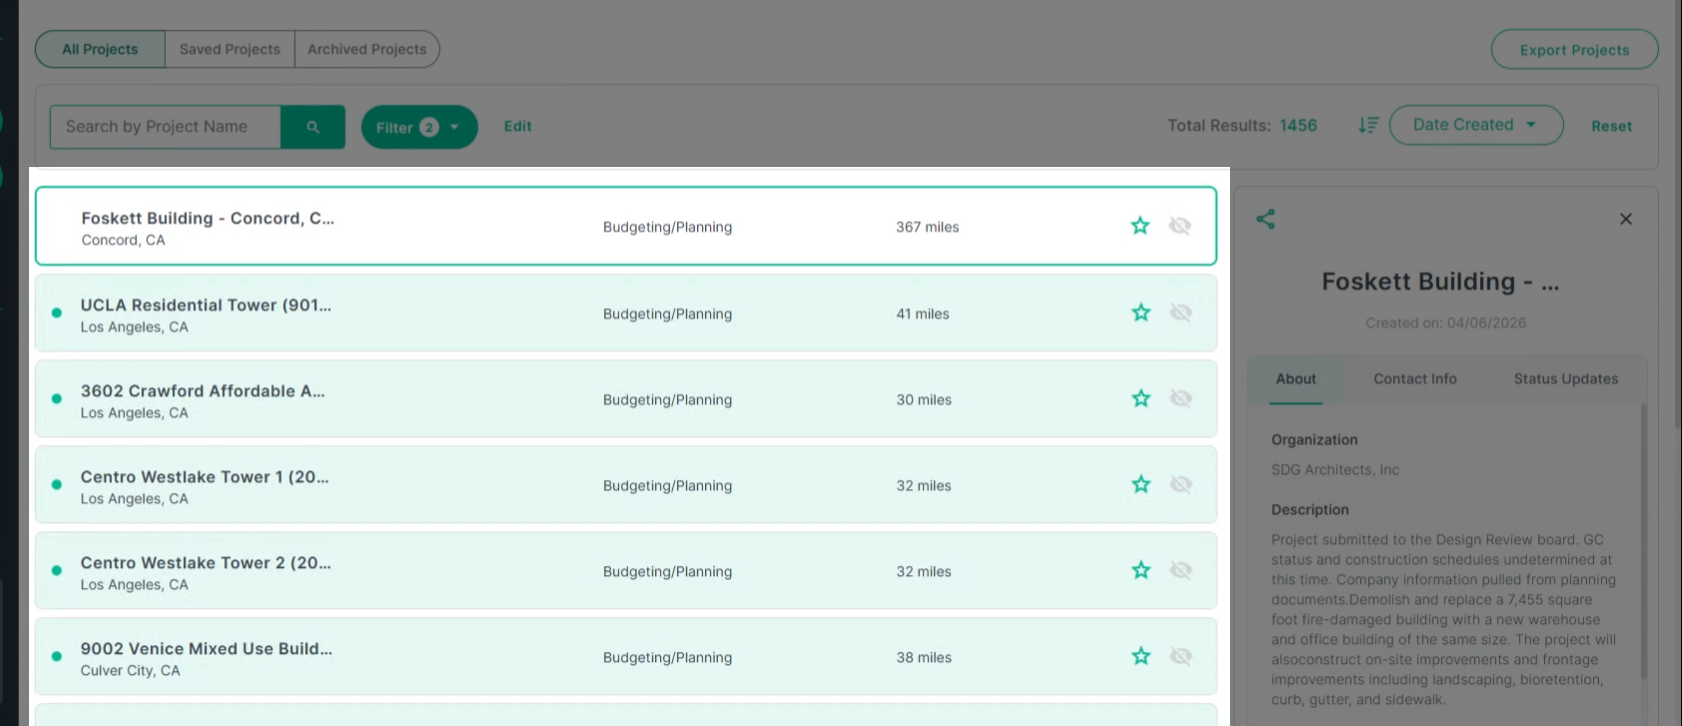
You’ll land on a page showing new project opportunities.
Step 2: Search and Filter Projects
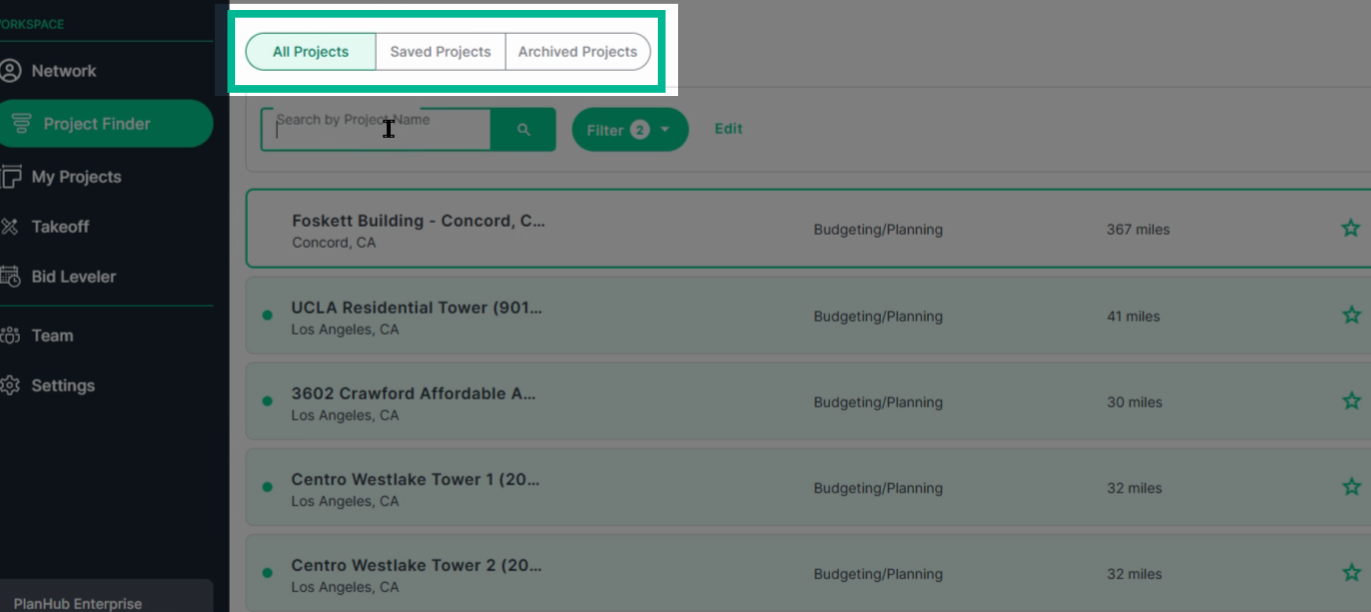
Navigating the Project List
At the top, you'll find several Views:
-
All Projects (not saved or archived)
-
Saved
-
Archived
Use these views to stay organized as you work through opportunities.
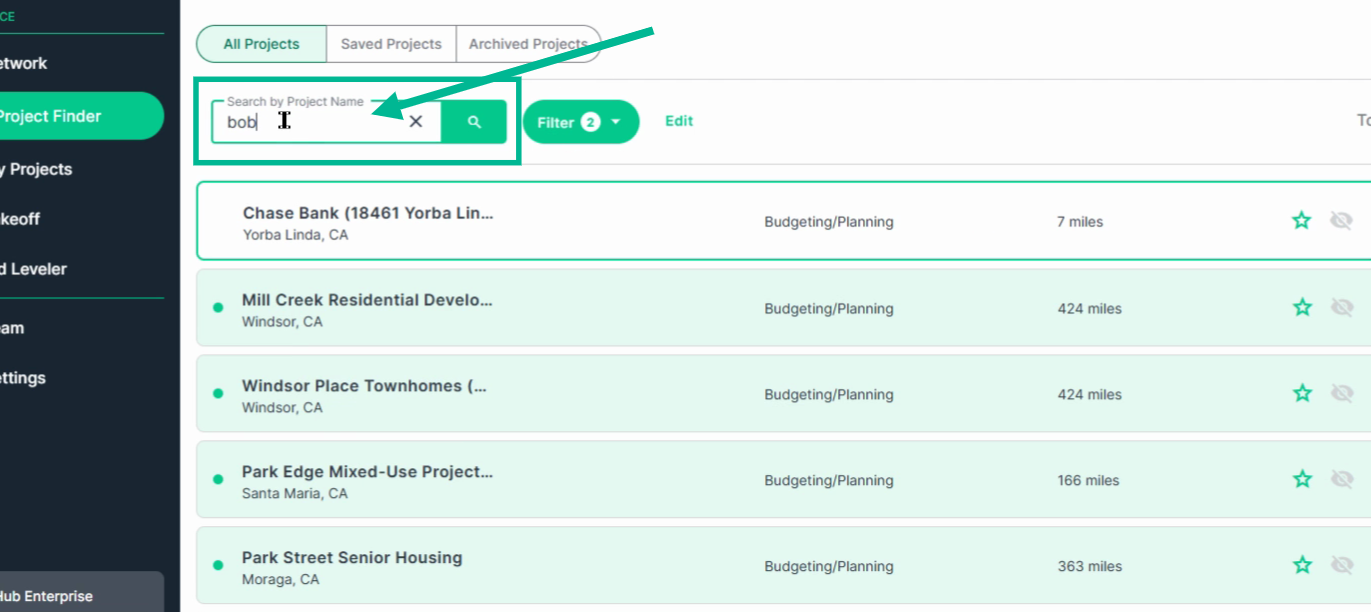
 Step 3: Using Search Tools
You can easily find projects or contacts by using the Search bar.
Search by project name or contact name.
Step 4: Applying Filters
-
Click the Filter button and select Create new filter.
-
The filter panel will open on the right side.
-
Select filters matching your target opportunities—such as project type or location.
-
Toggle Set alert for leads in filter settings to receive email notifications when new matches appear.
At the bottum of the filters:
-
Click Apply to update your results.
-
Name the filter and click Save and Apply to save the filter set for easy access later.
Step 5: View Results
View the updated list that matches your search and selected filters.
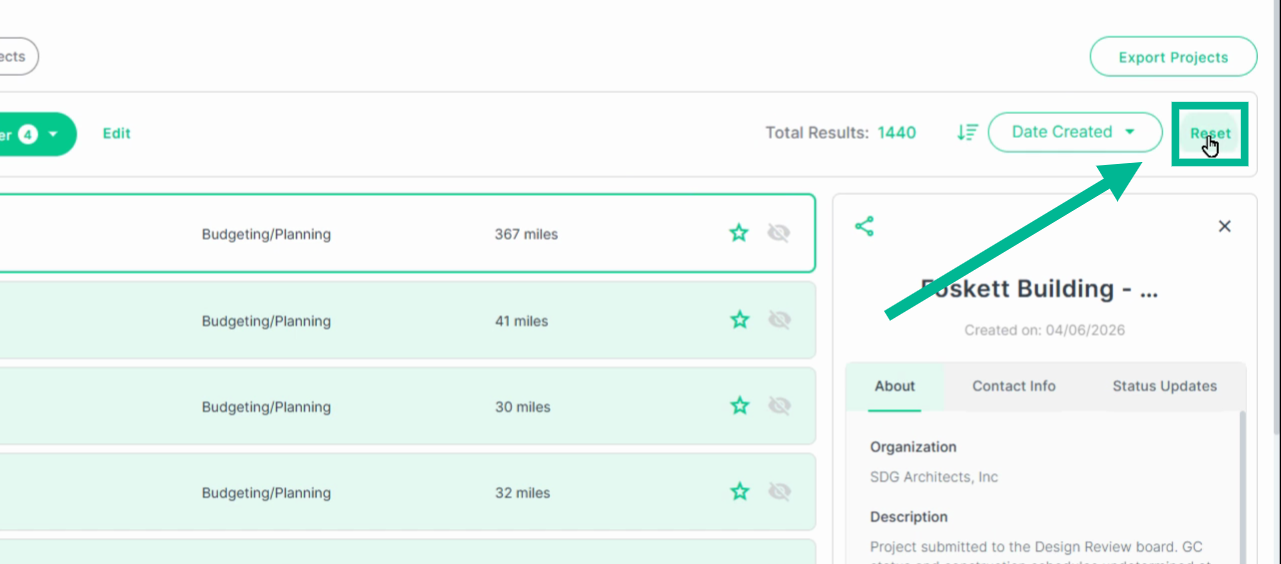
Step 6: Clear Filters
To clear all filters, click Reset.
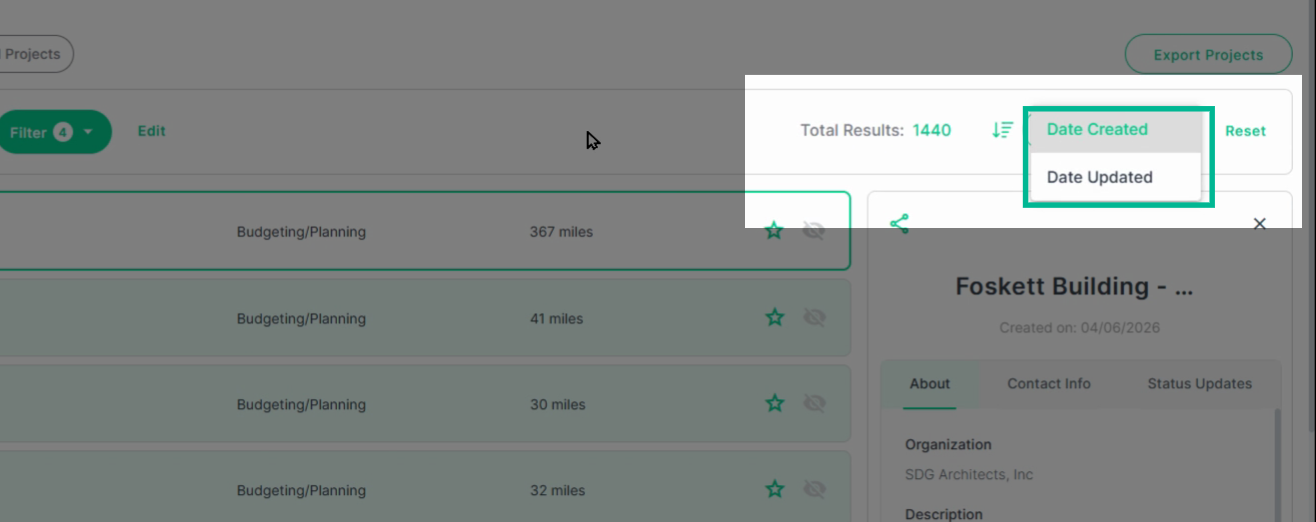
Step 7: Sorting Your Results
Organize project lists by date added or last updated for quick tracking.
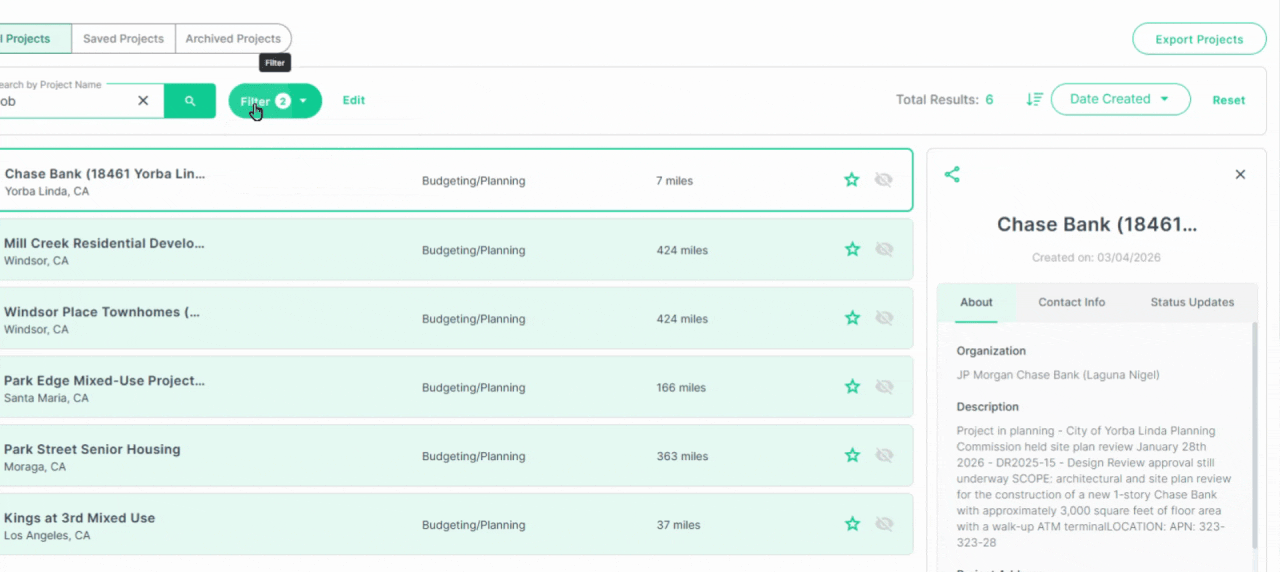
Step 8: Review and Manage Project Leads
1. Click a project in the list to view more details in the right panel.
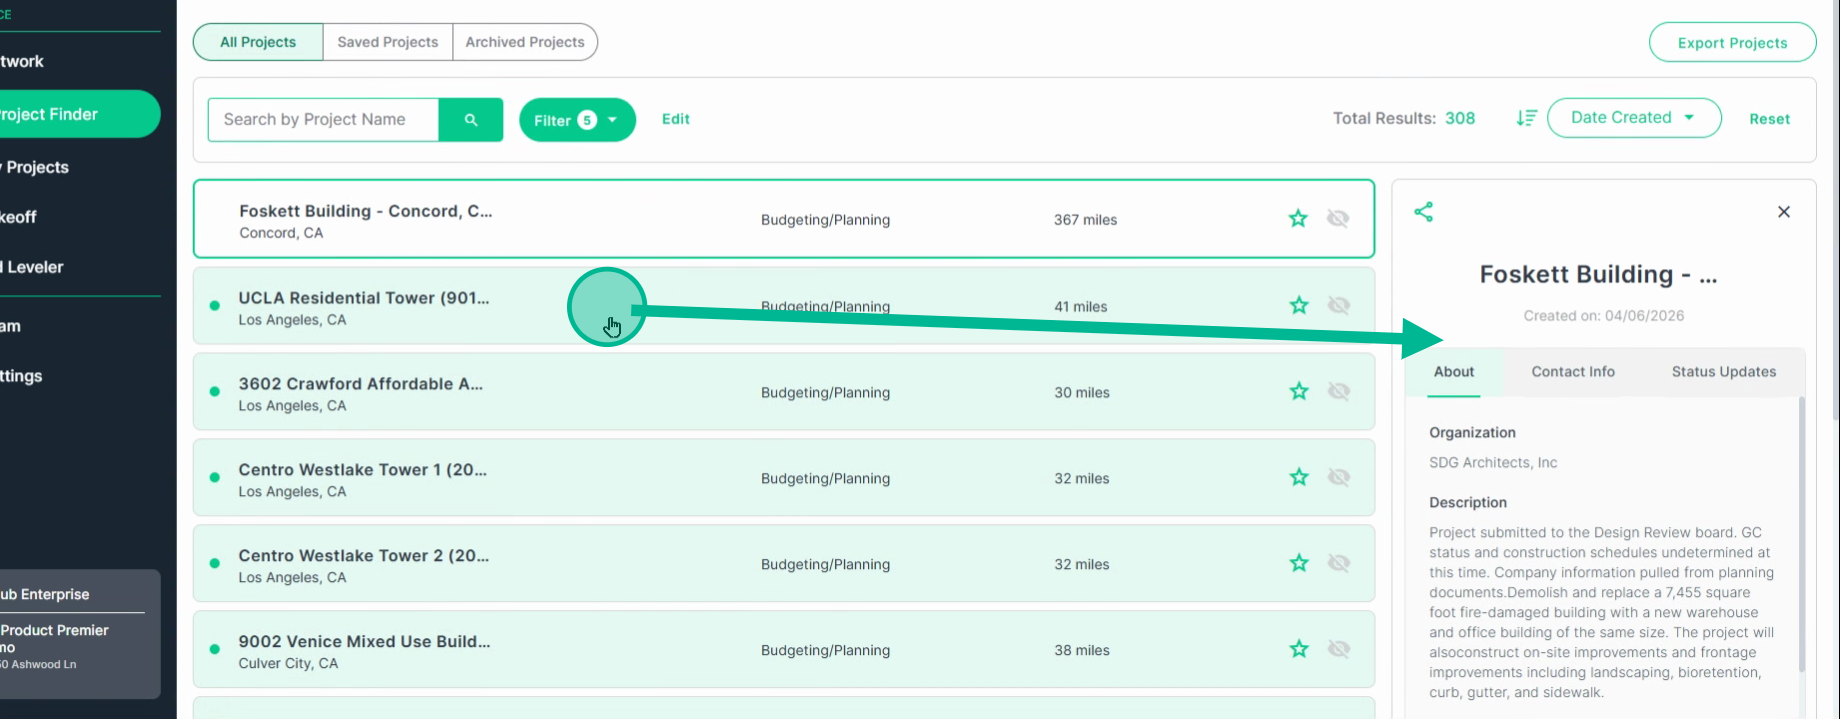
2. To save a project for follow-up, click the Star icon.
Saved and hidden projects appear under their own tabs—Saved Projects and Archived Projects—for easy organization.
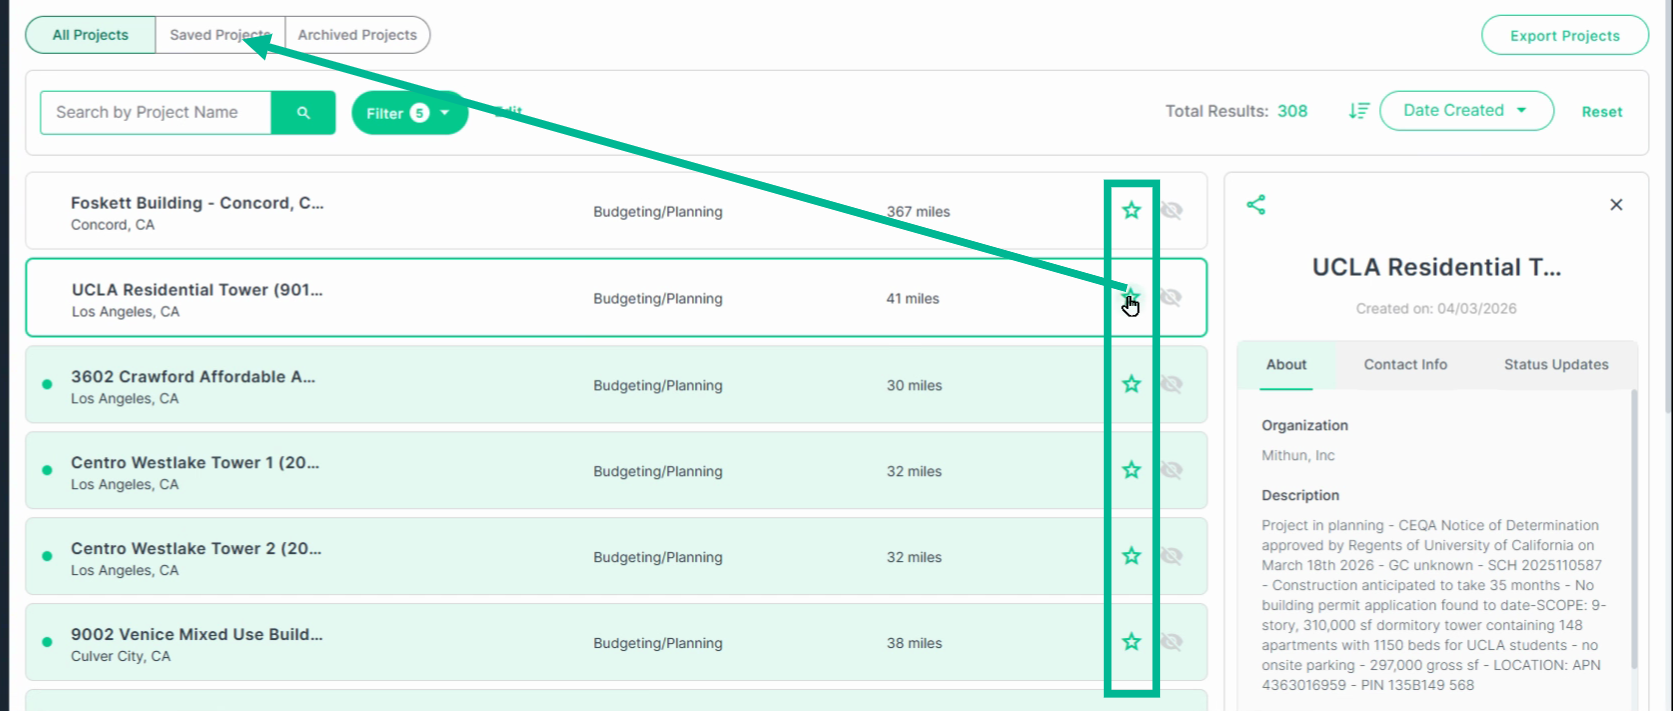
3. To hide a project from your view, click the Hide icon.
Saved and hidden projects appear under their own tabs—Saved Projects and Archived Projects—for easy organization.

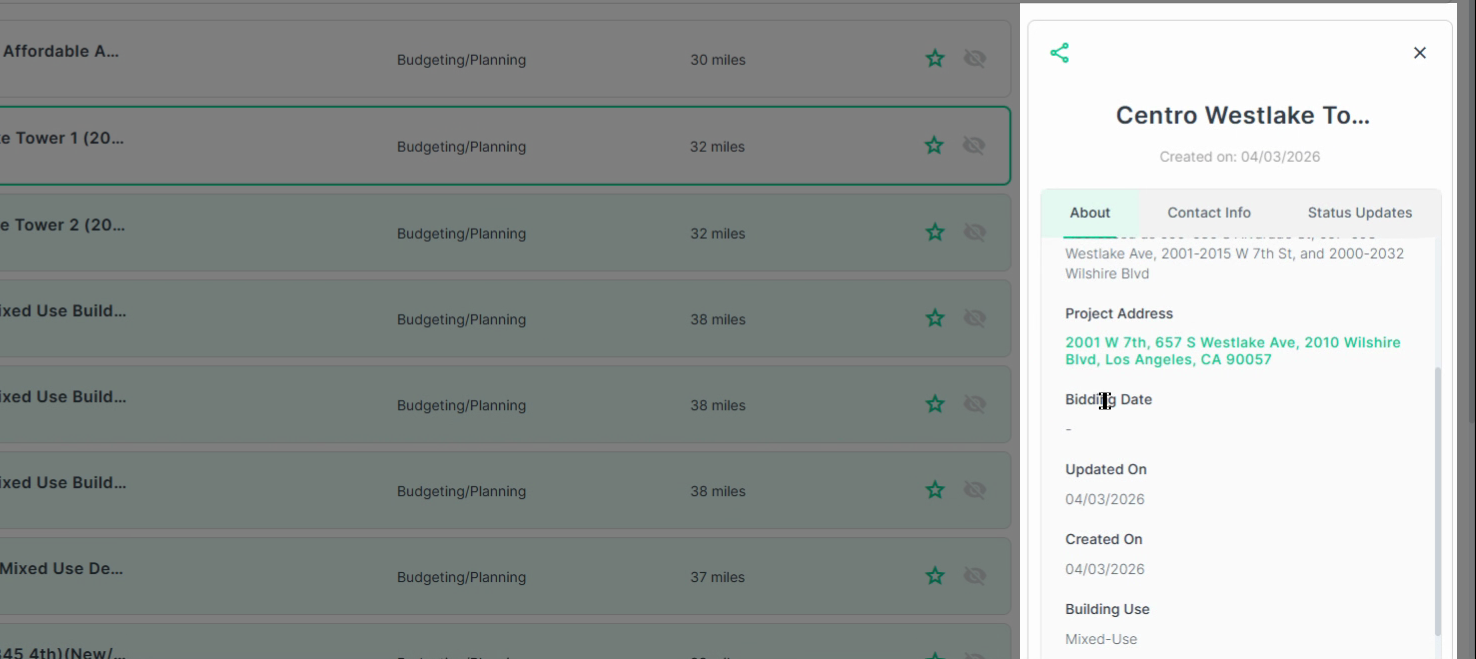
Step 9: Inspect Project Details
When reviewing a project, the right panel displays detailed information:
-
Description
-
Project address
-
Bidding date
-
Last updated
-
Creation date
-
Building use
-
Status
-
And more
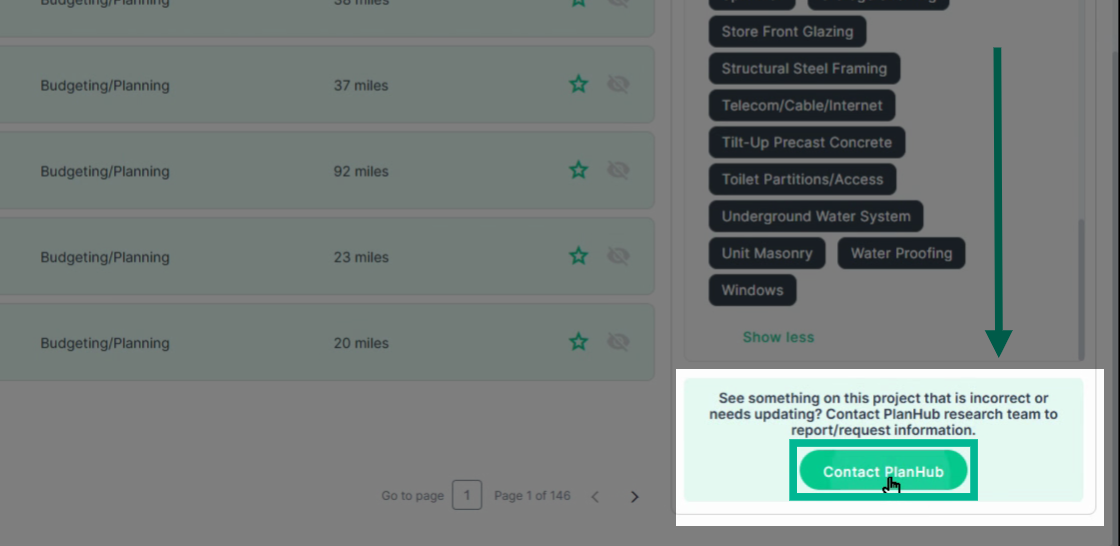
1. To reveal all expected trades for a project, click Show more.
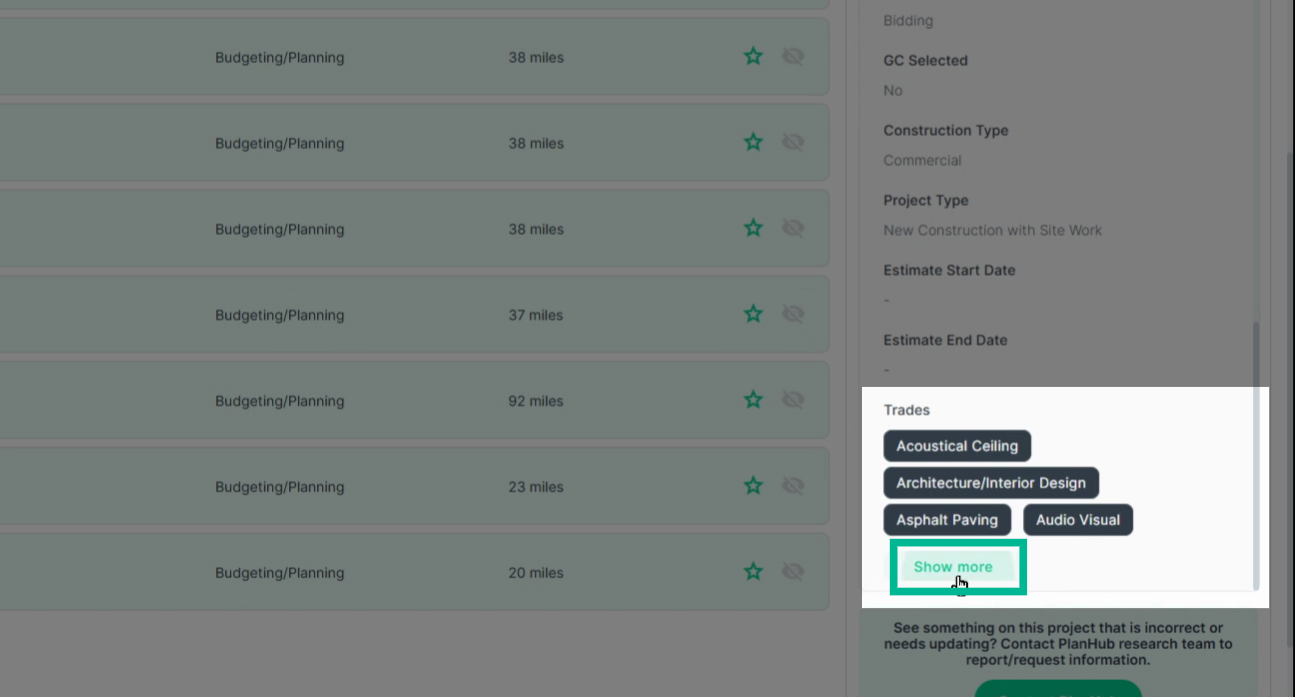
2. If project info needs updating, contact PlanHub’s research team. Click Contact PlanHub below the details. The form fills in project info for you; just complete the last two fields before submitting.
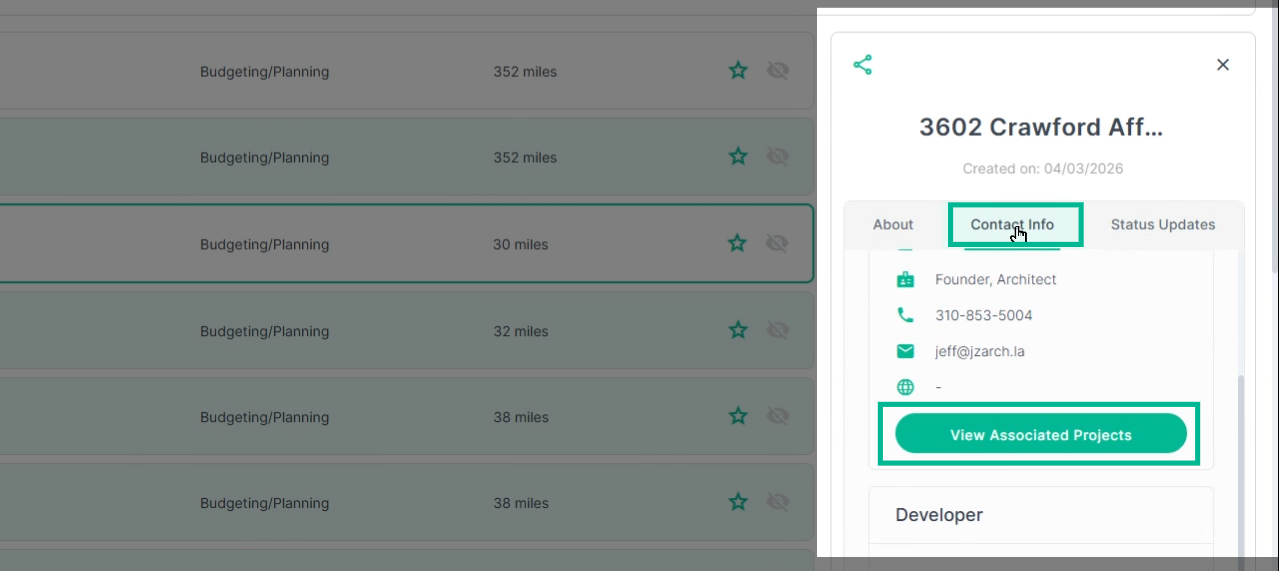
3. Switch to the Contact Info tab for a list of associated contacts.
To see other opportunities linked to a contact, click View Associated Projects.
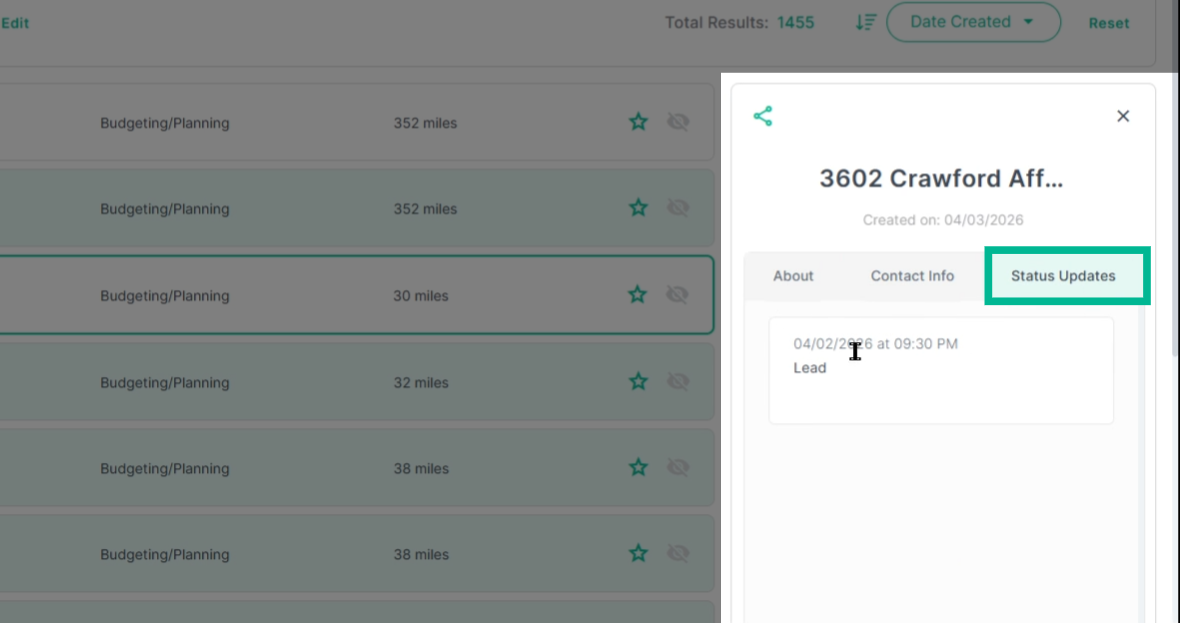
4. Use the Status Updates tab to stay informed of the research team’s latest findings for a project.
Conclusion: Build Relationships and Grow Your Pipeline
Use Project Finder to spot high-potential leads, organize them, and act fast on early opportunities. By tracking your outreach and engaging contacts at the planning stage, you’ll turn cold leads into lasting business relationships—and land more projects for your company.
Troubleshooting
Contact us if you need assistance or to report an issue:
- PlanHub Contact Page: https://planhub.com/contact/
- Customer Facing Support Ticket Link: https://knowledgebase.planhub.com/knowledge/kb-tickets/new
- Customer Success Team: CustomerSuccess@planhub.com