![NEW_PlanHub_Logo_Navy.png]](https://knowledgebase.planhub.com/hs-fs/hubfs/Design/PH%20Logos/NEW%202024%20PH%20Logos/NEW_PlanHub_Logo_Navy.png?height=40&name=NEW_PlanHub_Logo_Navy.png)
Prerequisites: To begin, you must have access to a General Contractor planHub account. Navigate to www.planhub.com to sign up for your free account.
Step 1: Log into your planHub General Contractor account.
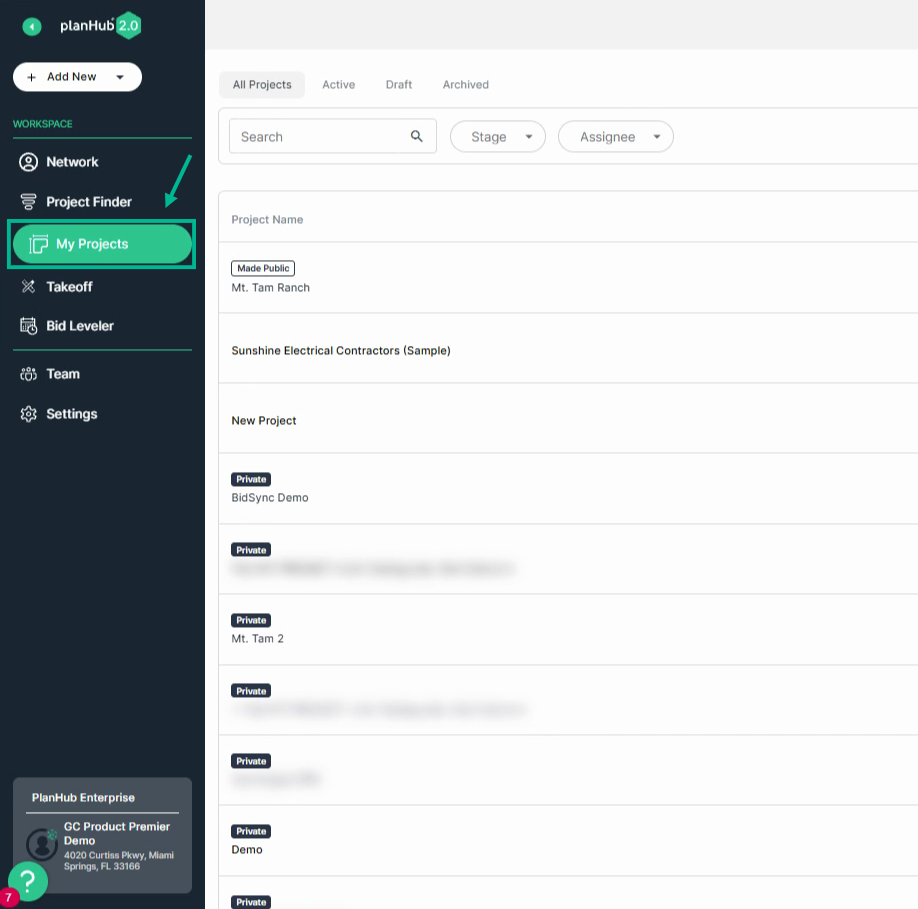
Step 2: Click My Projects in the left panel.
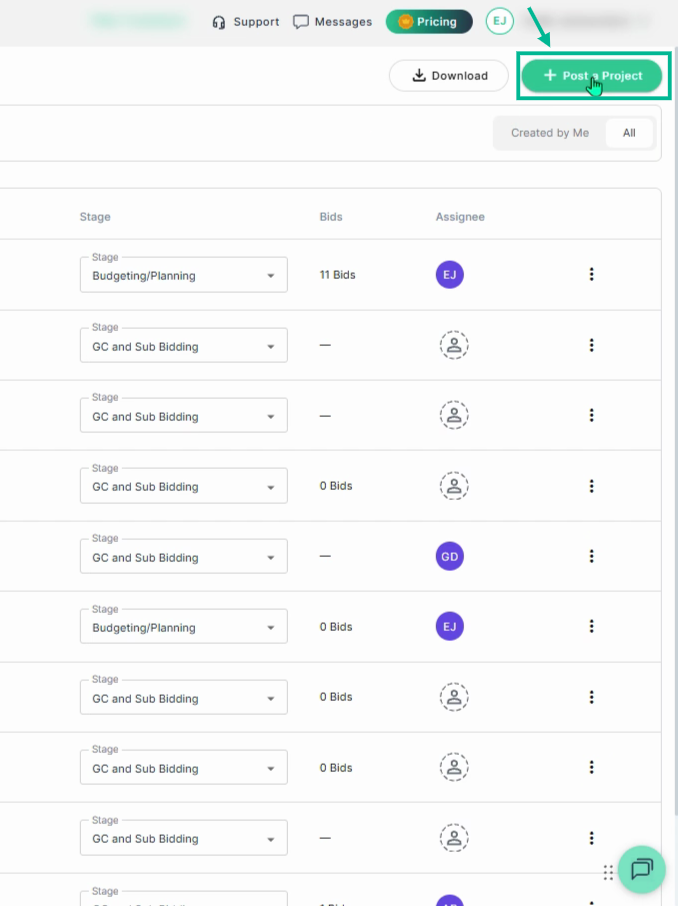
Step 3: In the upper right corner, select Post a Project.
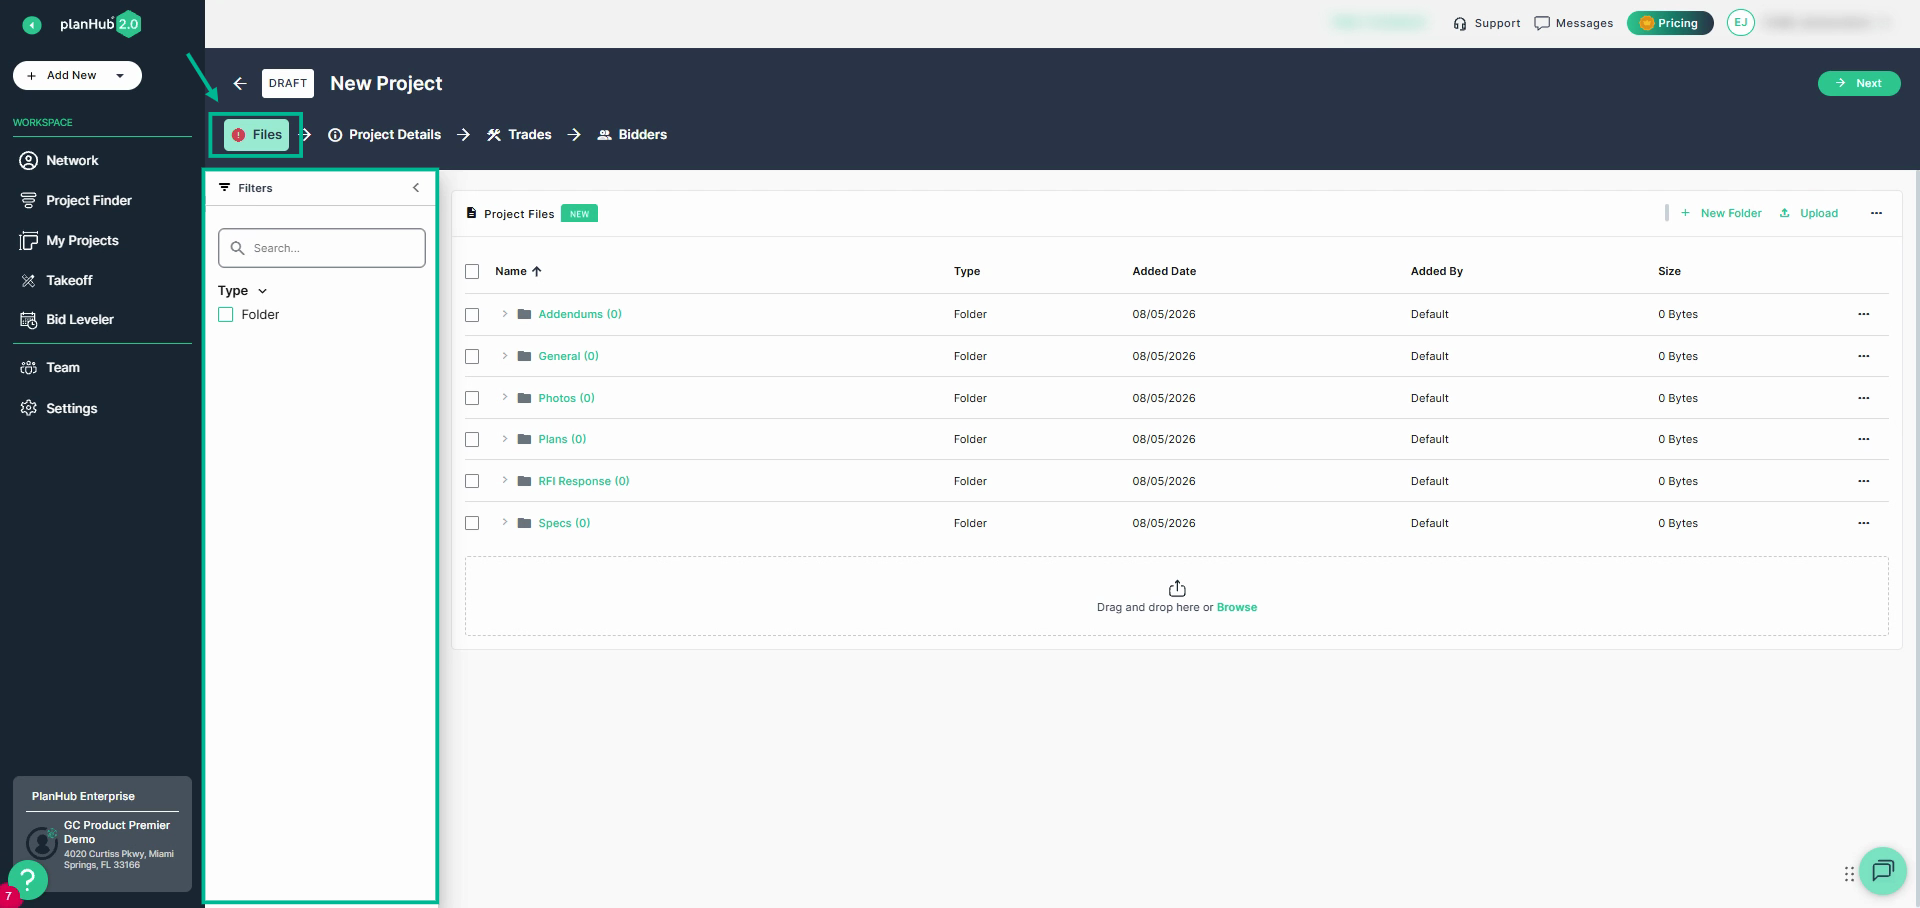
Step 4: Note: the Default folders are labeled as addendums, general, photos, plans, RFI response, and specs. Under the Files tab, use the filters in the left panel to sort through the saved documents and folders. One you have uploaded files, you can search files by keyword or filter by type.
Step 5: Add new folders by clicking the New Folder option or add subfolders by selecting a folder and then click the New Folder option on the next page.
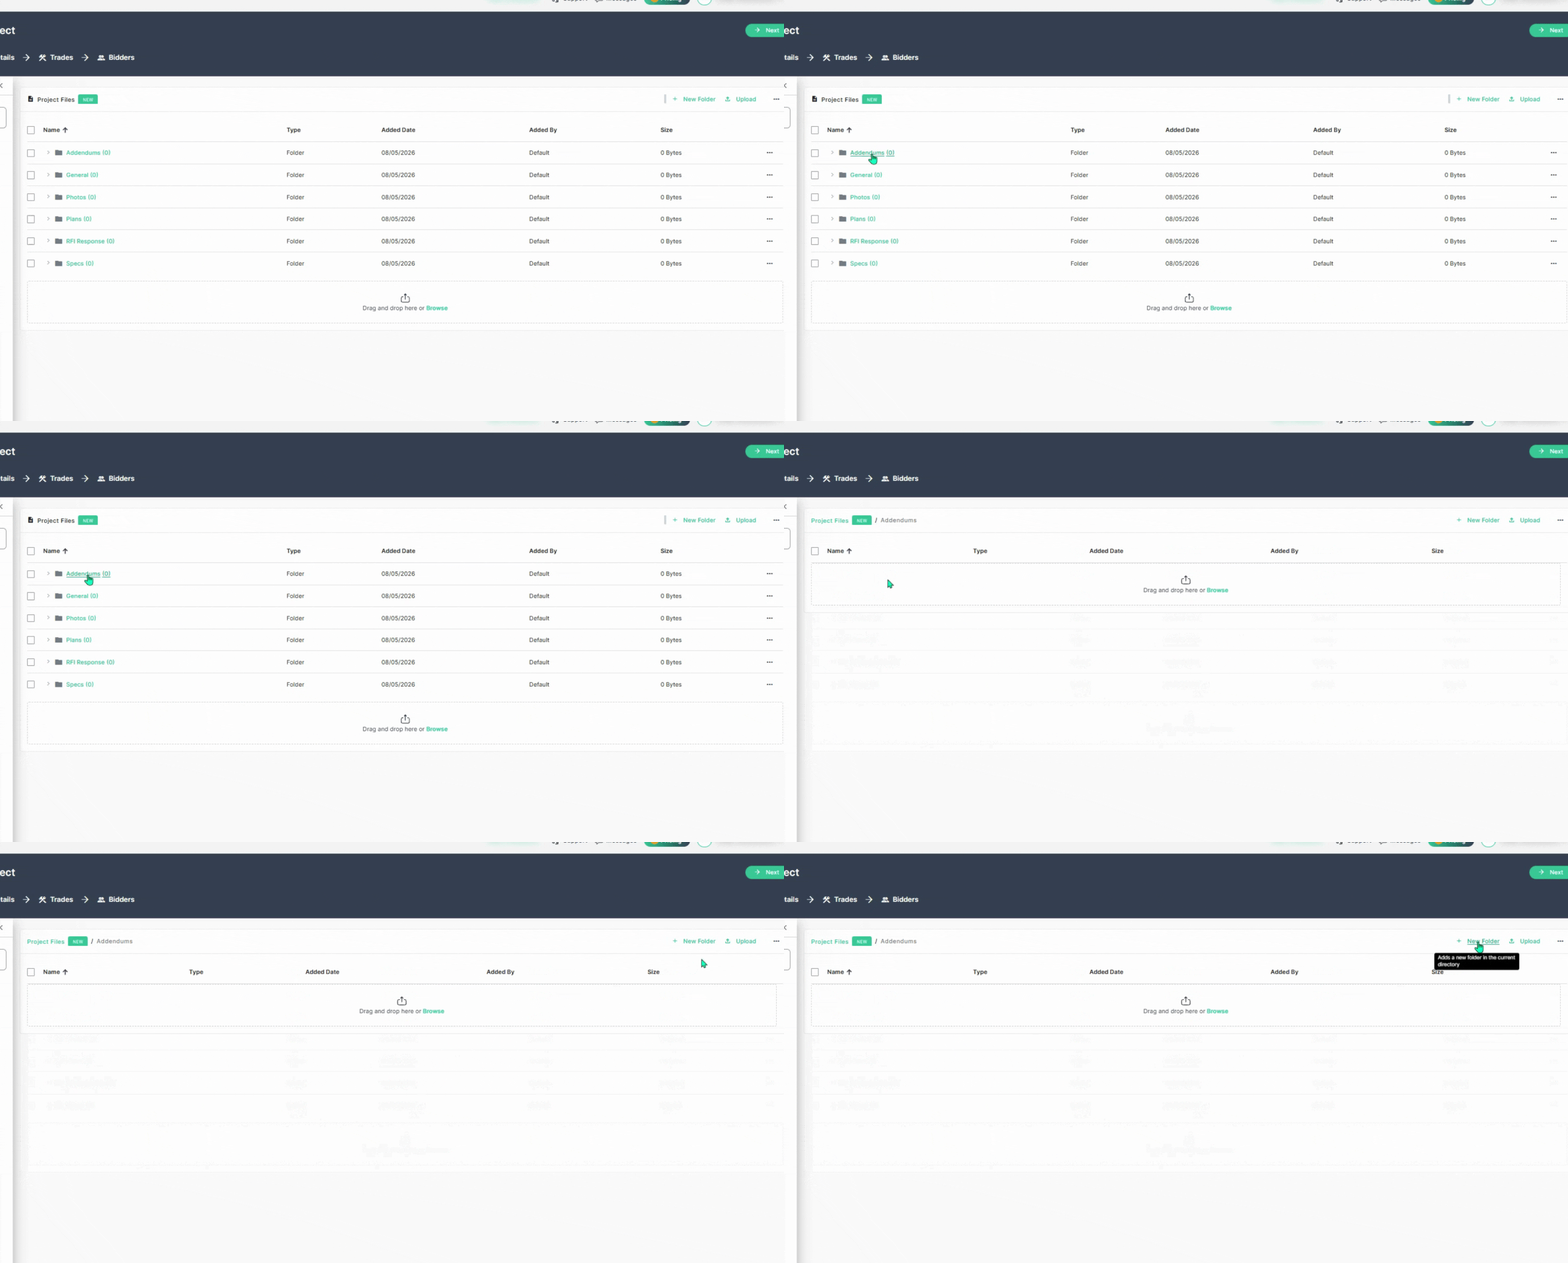
Step 6: Name your new folder and click Save.
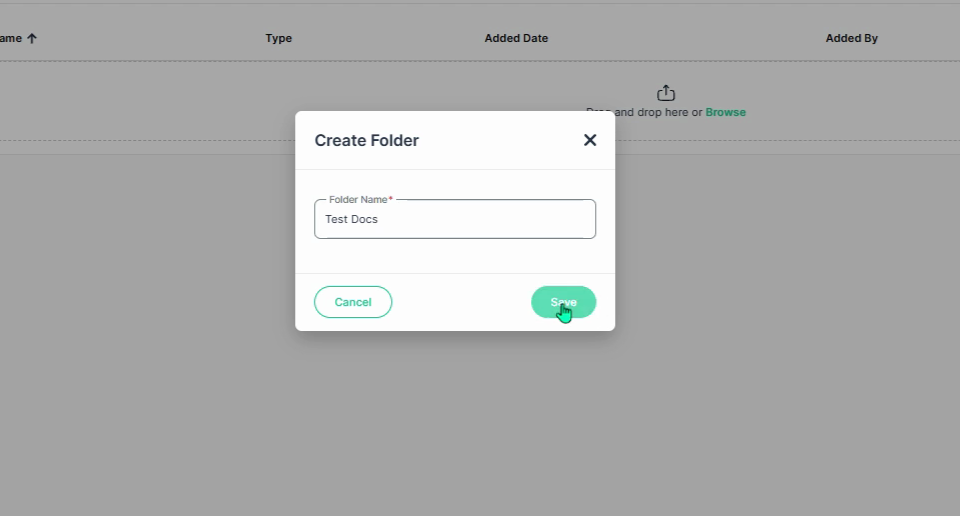
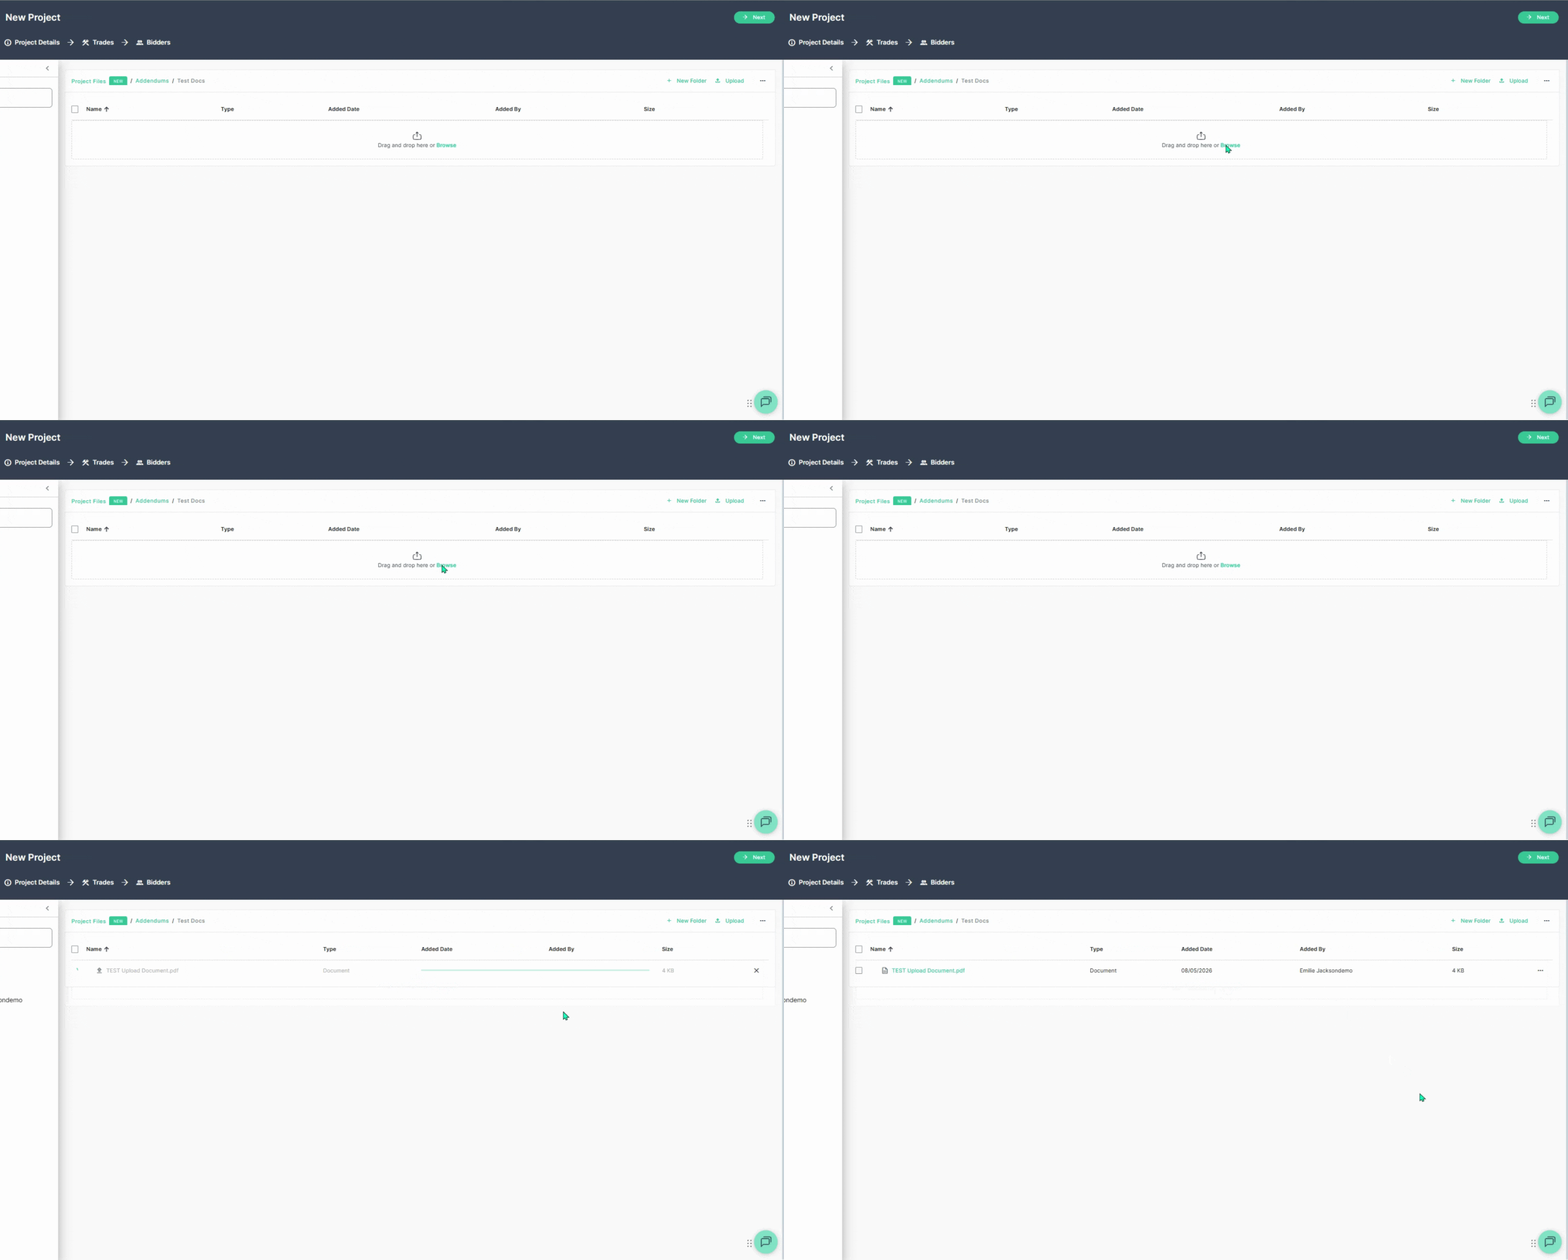
Step 7: To add documents, select a folder, then choose Browse and select files from your computer or drag and drop the files to add them to the folder.
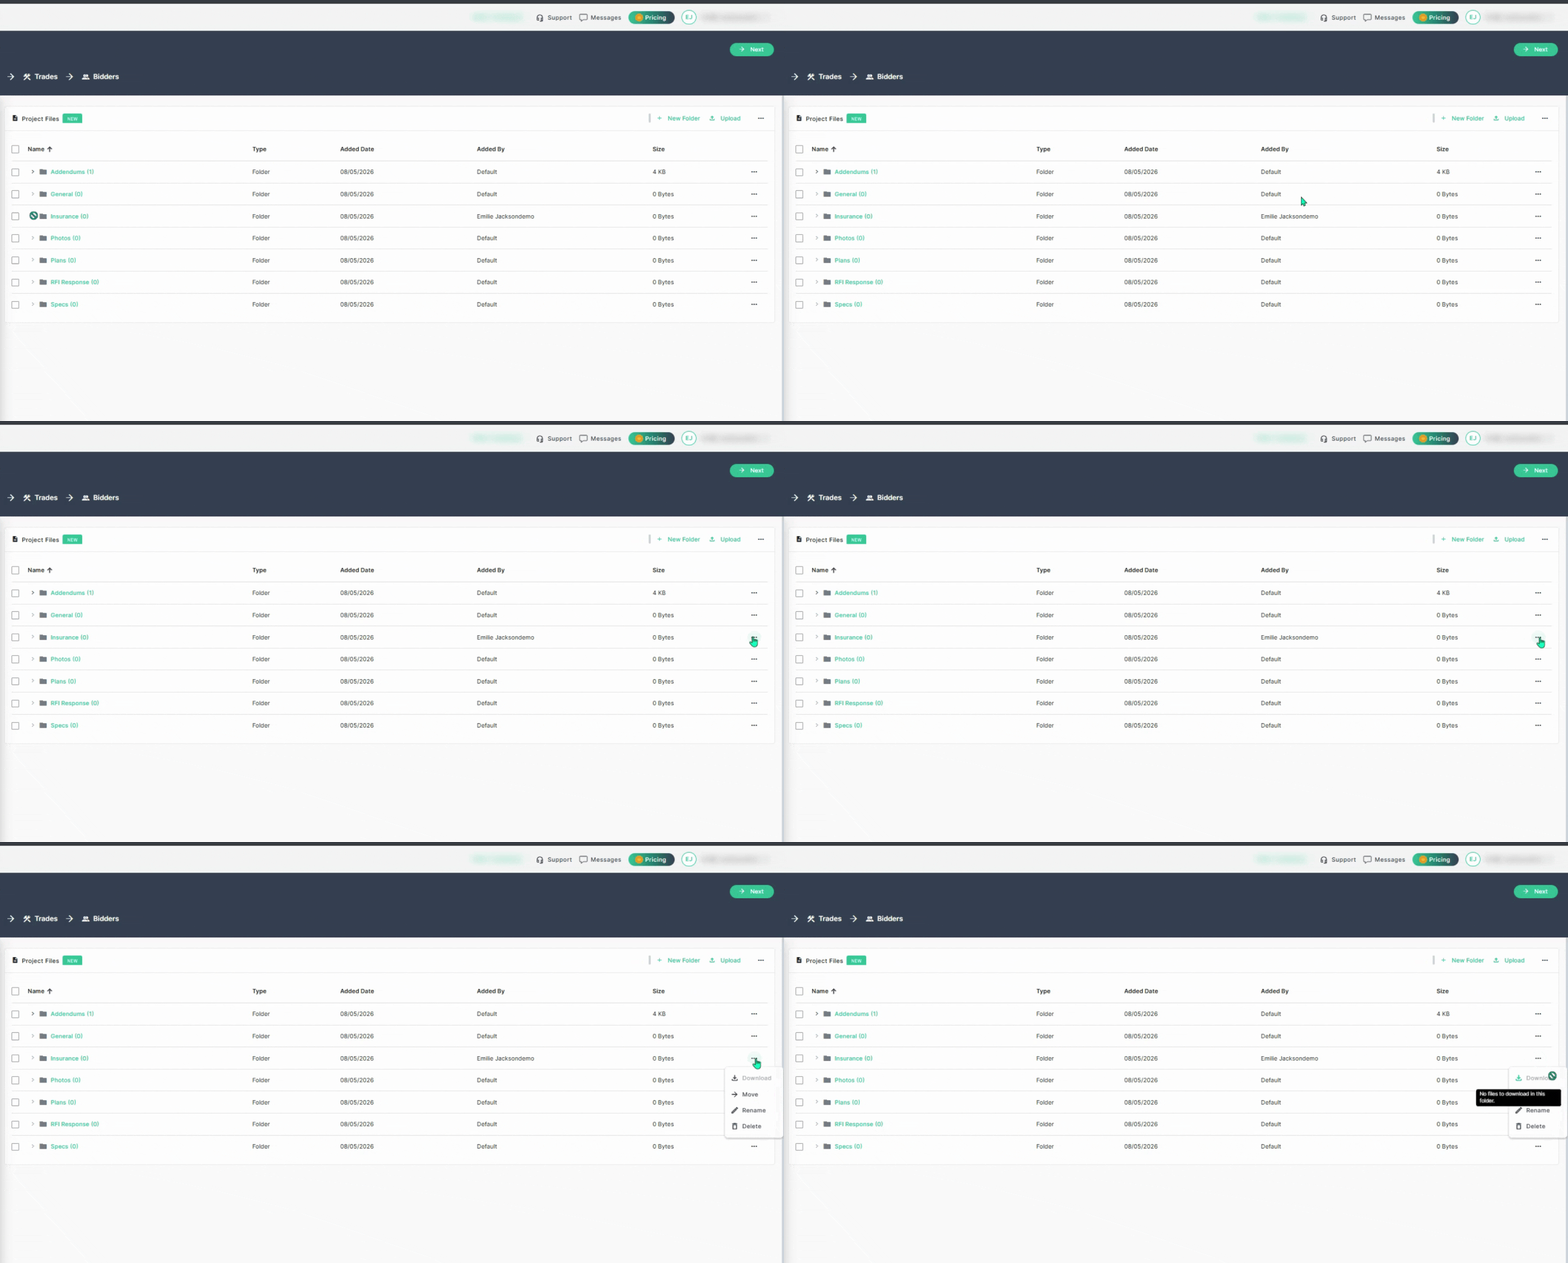
Step 8: Use the action menu (three dots) to move, rename, or delete folders that you’ve added.
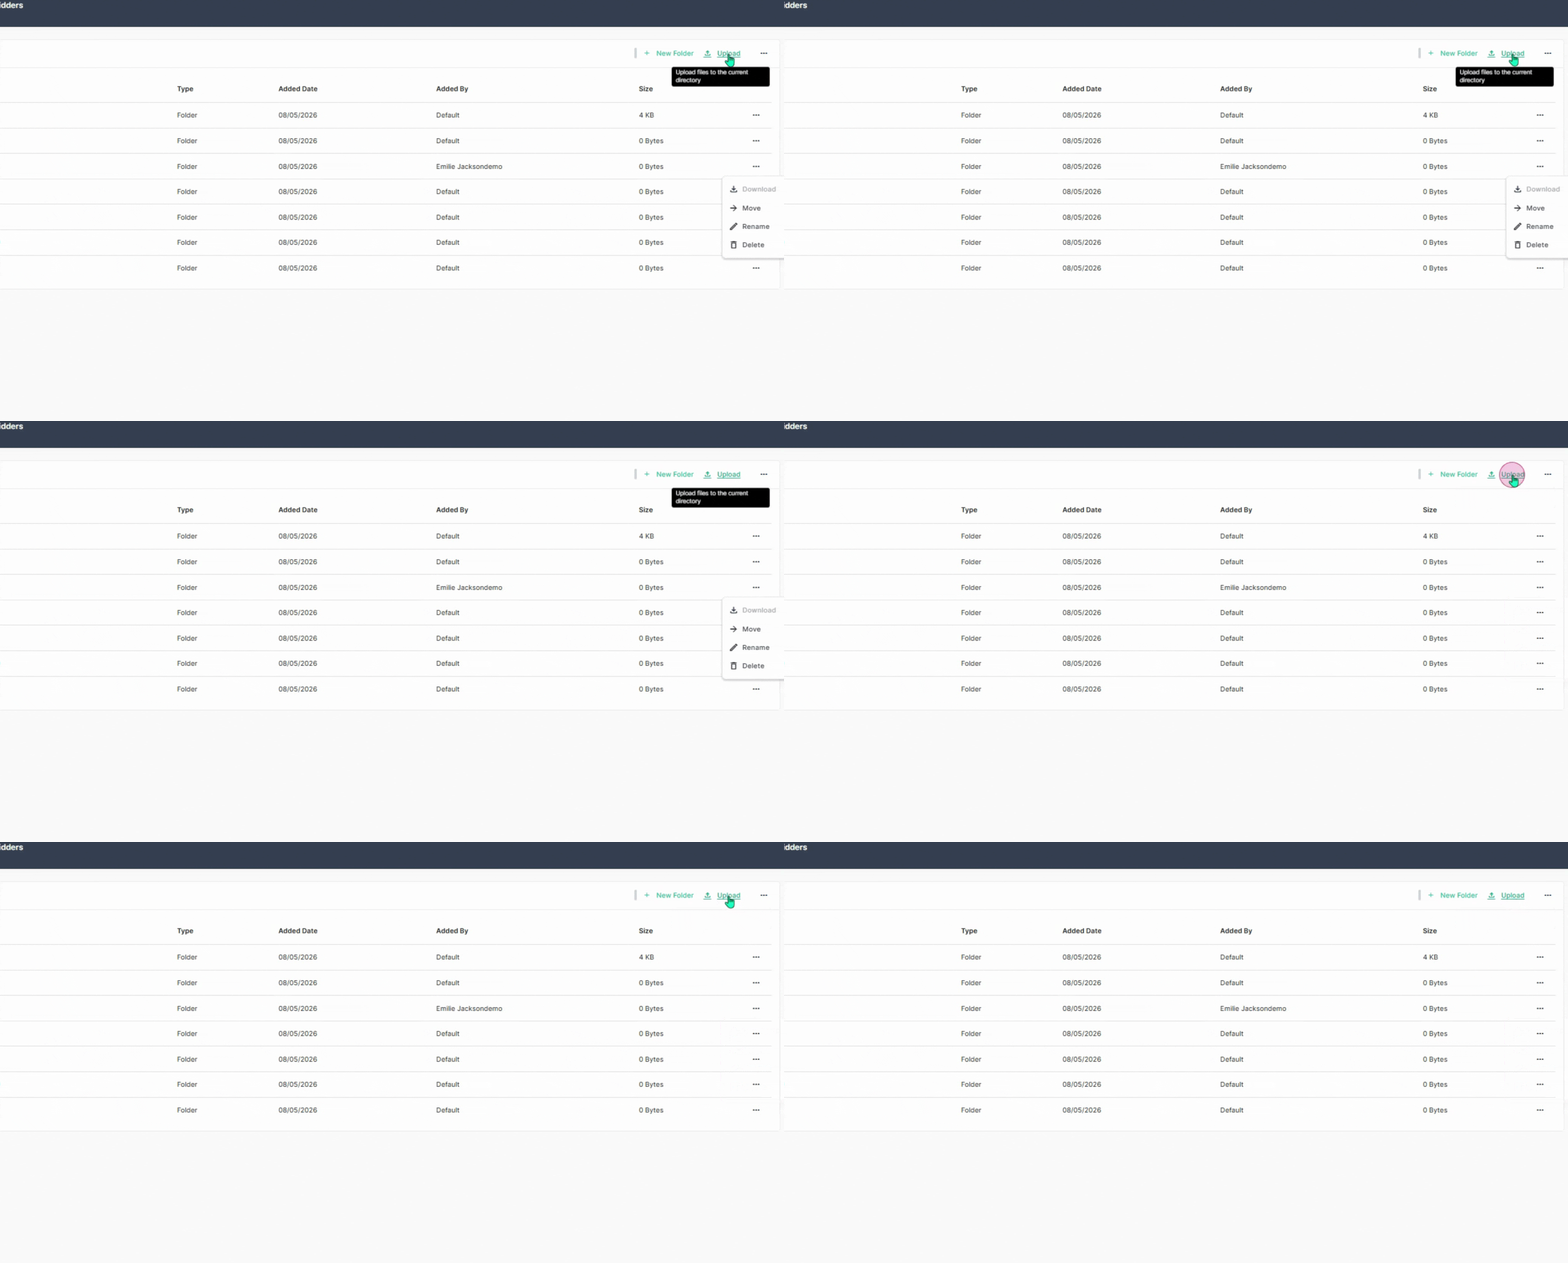
Step 9: To upload new documents, click Upload in the upper right corner, then select the files you want to upload.
Step 10: Sort folders and files by column headings such as name, type, added date, added by or file size.
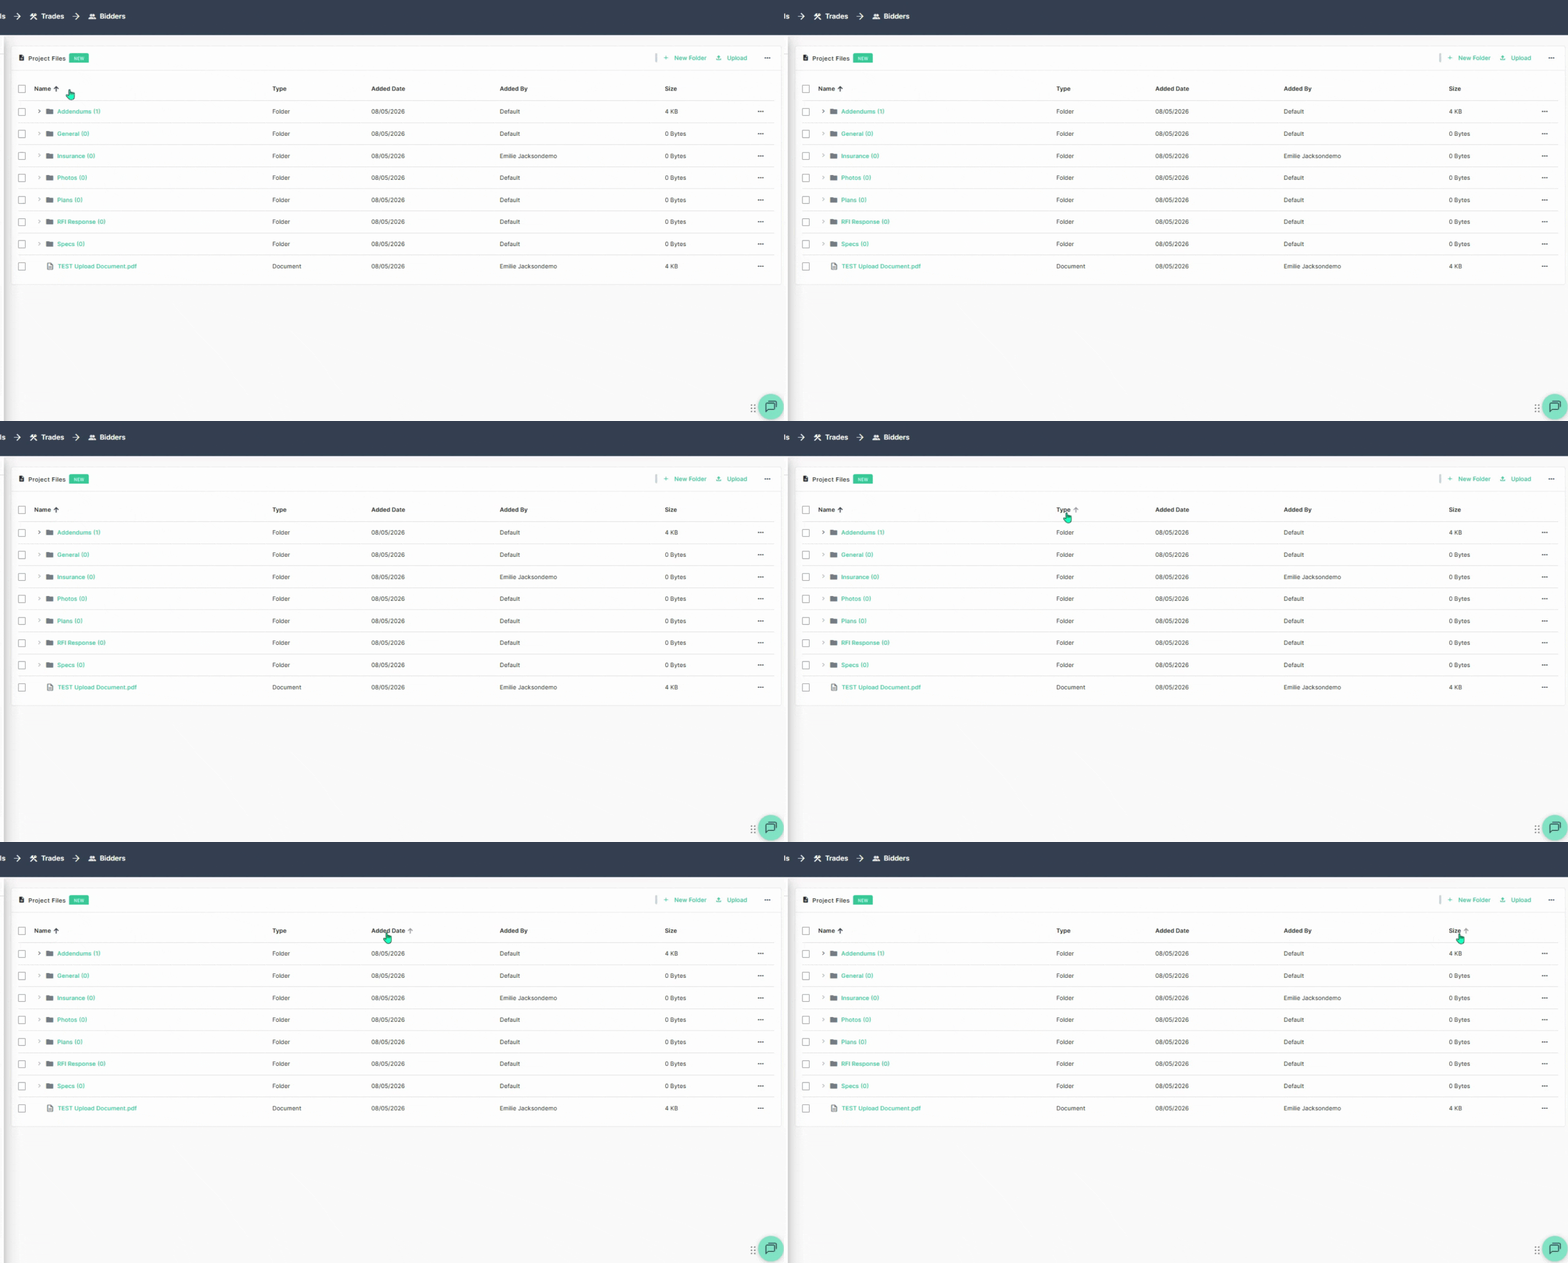
Step 11: To continue, select the Project Details tab or click the Next button.
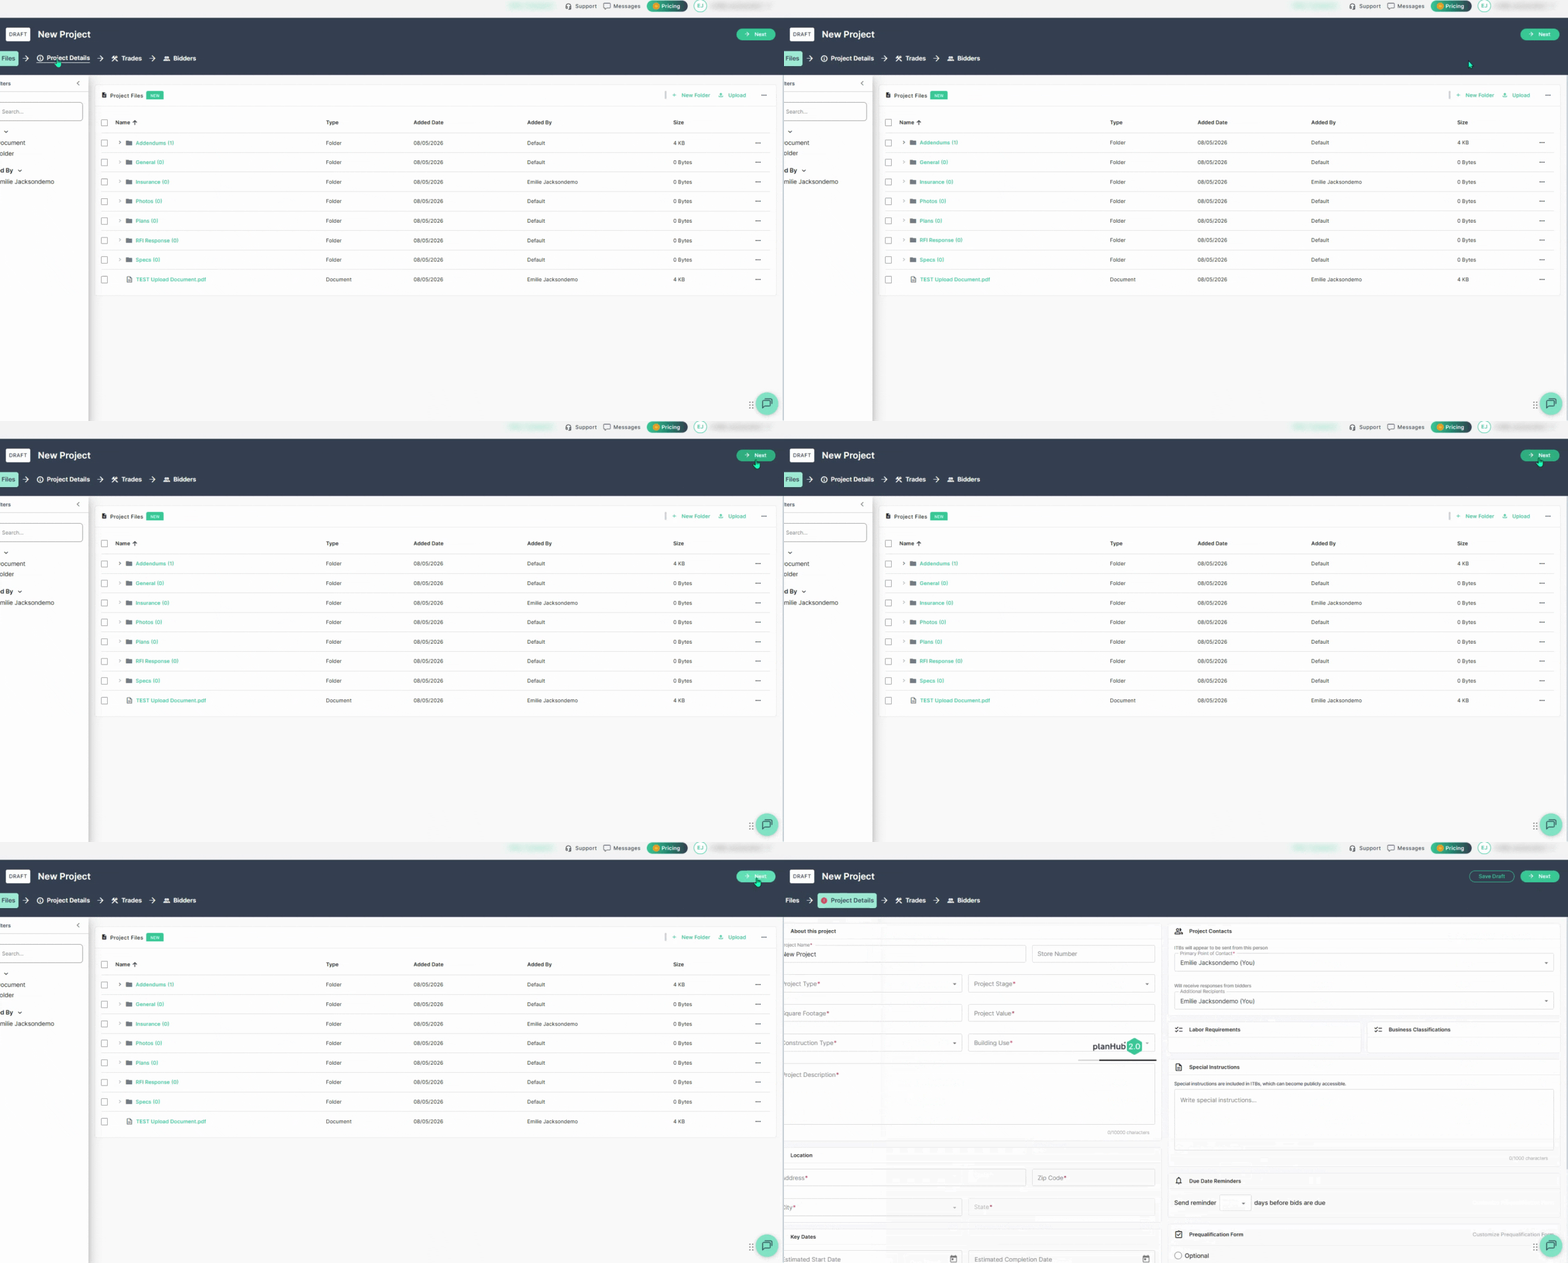
Step 12: About this project: Enter all project details, including project name, type, stage, square footage (or enter "1" if unknown), project value (or enter "1" if unknown), construction type, building use. The project description box will automatically update based on the options selected above. You can add any additional details to this section as needed.
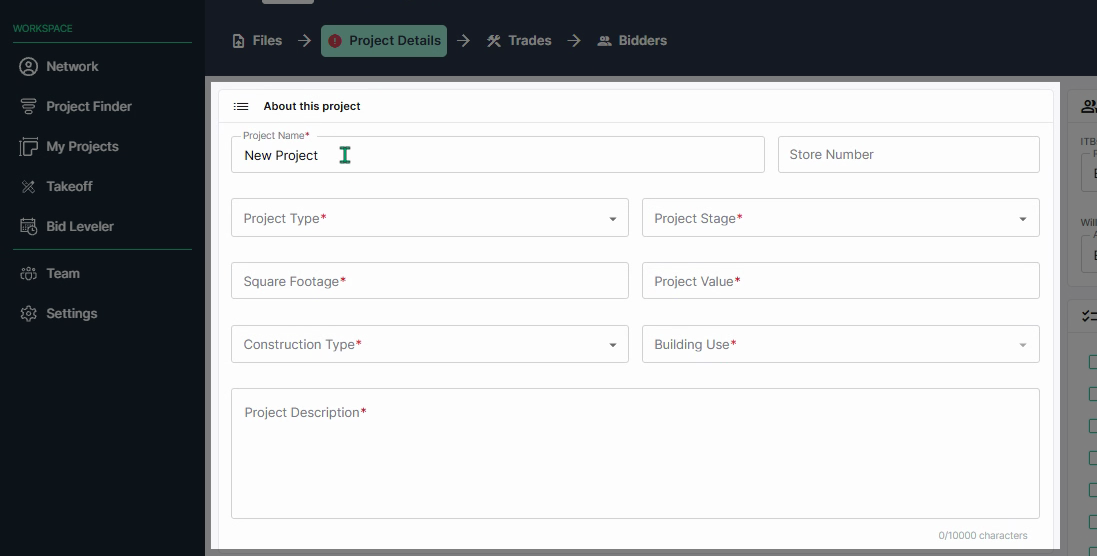
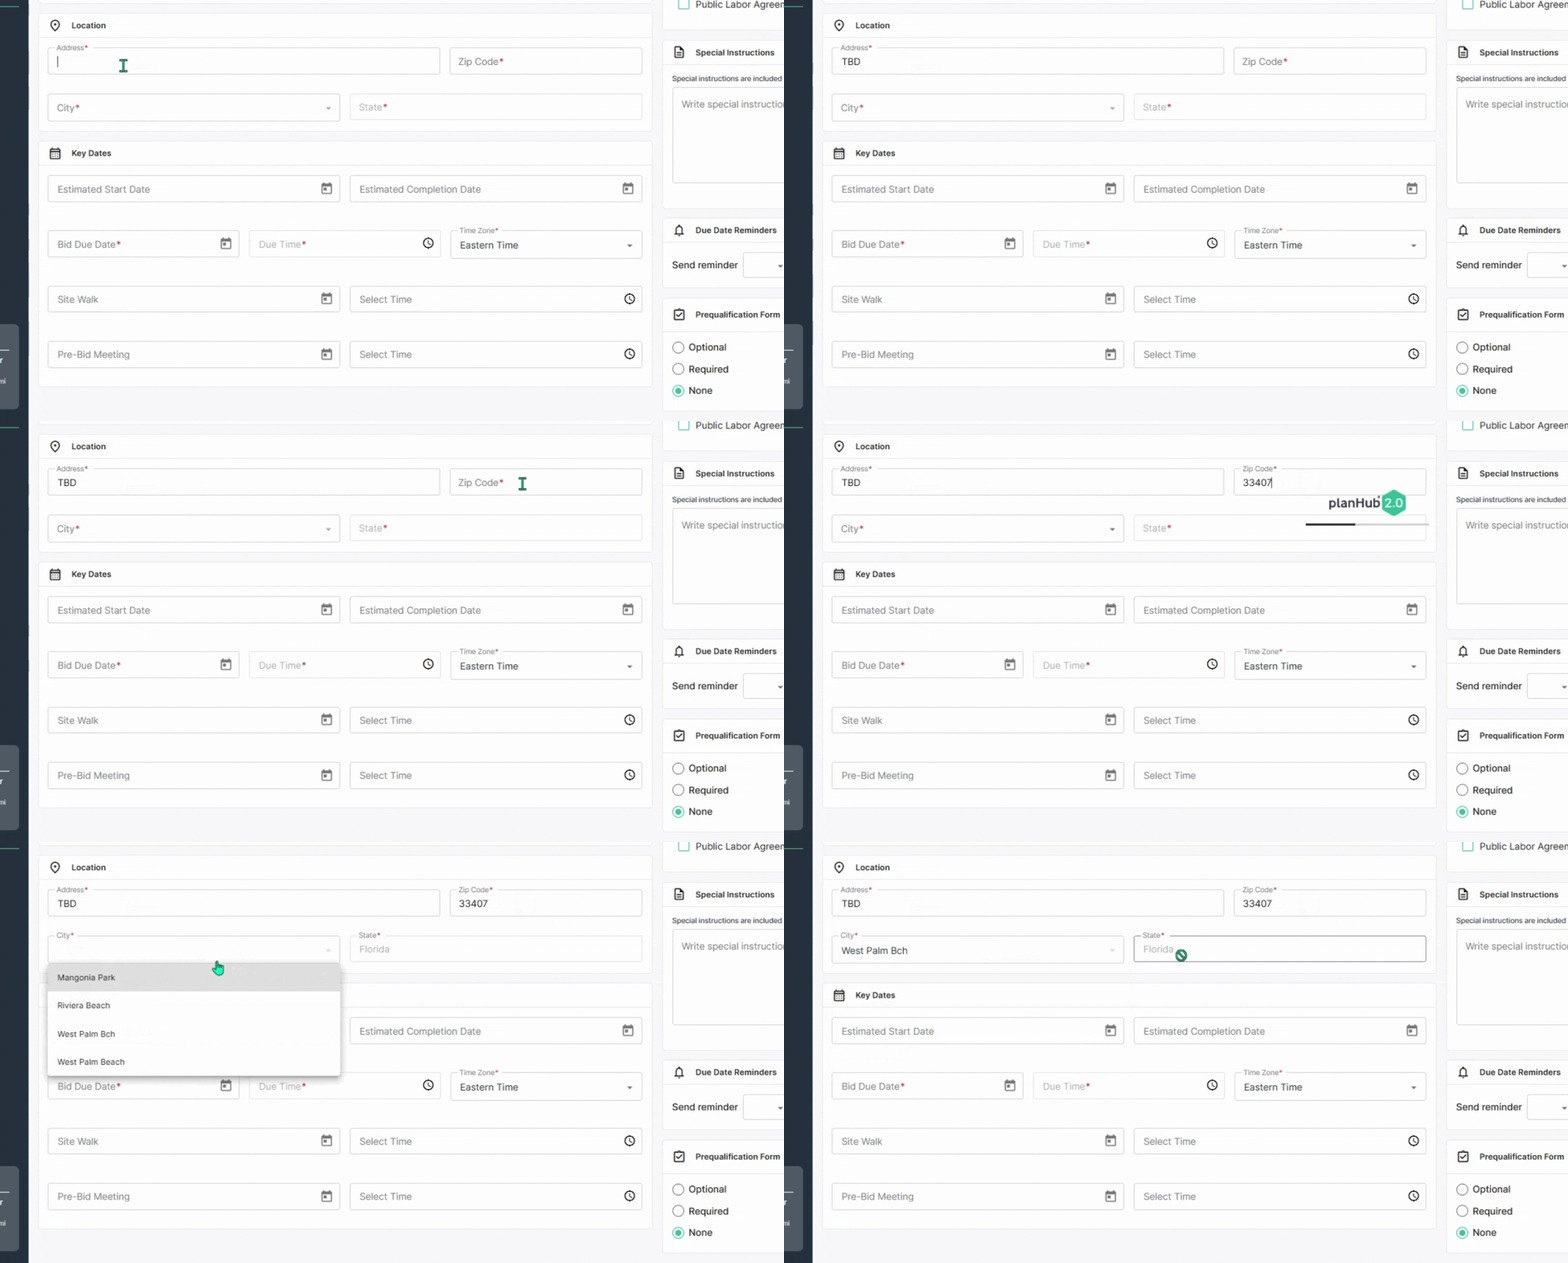
Step 13: Add the project location information, address (or "TBD" to be determined if unknown), ZIP code, (the state will prefill once the zip code is added) and select the city.
Step 14: In the Key Dates section, select the estimated start and completion dates, bid due date and time, and other important project milestones. Select the bid due date and time, for your time zone. The due dates will appear to the bidders according to their specific time zones. 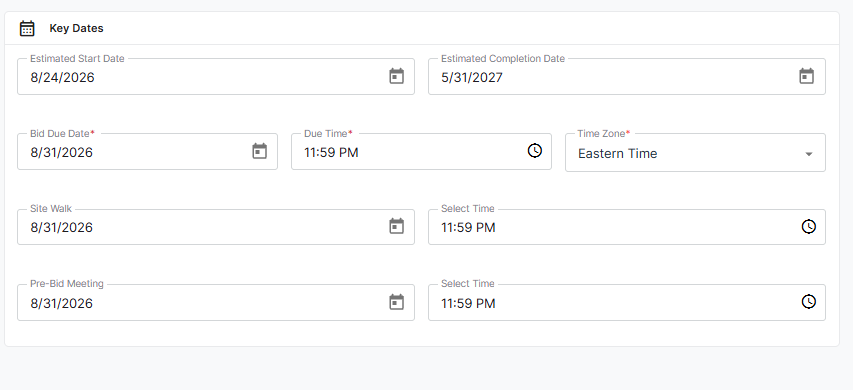
Step 15: Assign the primary Project Contact. ITBs will appear to be sent from this person. Then select team members below who should receive the submitted bids.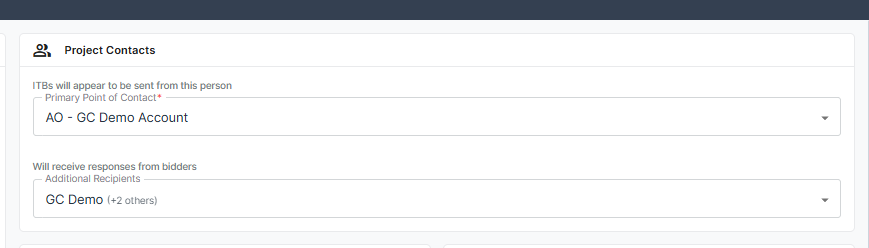
Step 16: Select labor requirements, business classifications, and add any special instructions.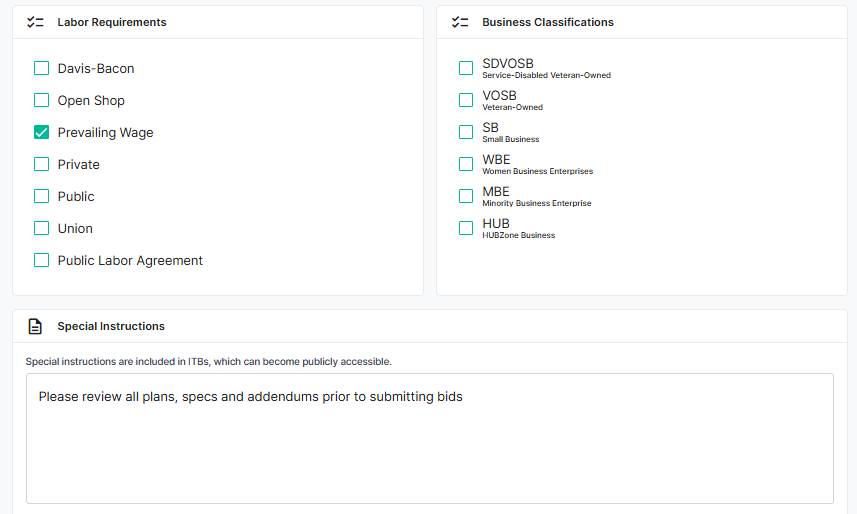
Step 17: Send bid due date reminders and specify when reminders should go out. It is highly recommended that you enable this option to automatically remind bidders to submit their bids before the bid due date.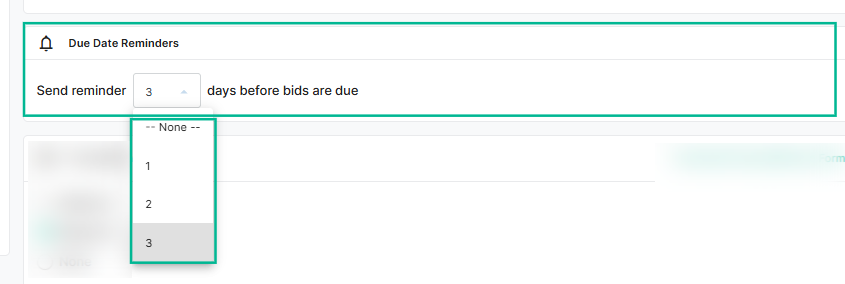
Step 18: Choose the option to request a prequalification form from Subcontractors. Select "None" if you choose not to request the prequalification form.
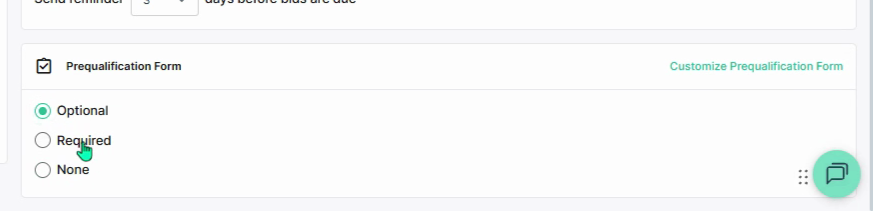
Step 19: If you choose Optional or Required, you can then customize the prequalification form. When done, click Apply to save your settings.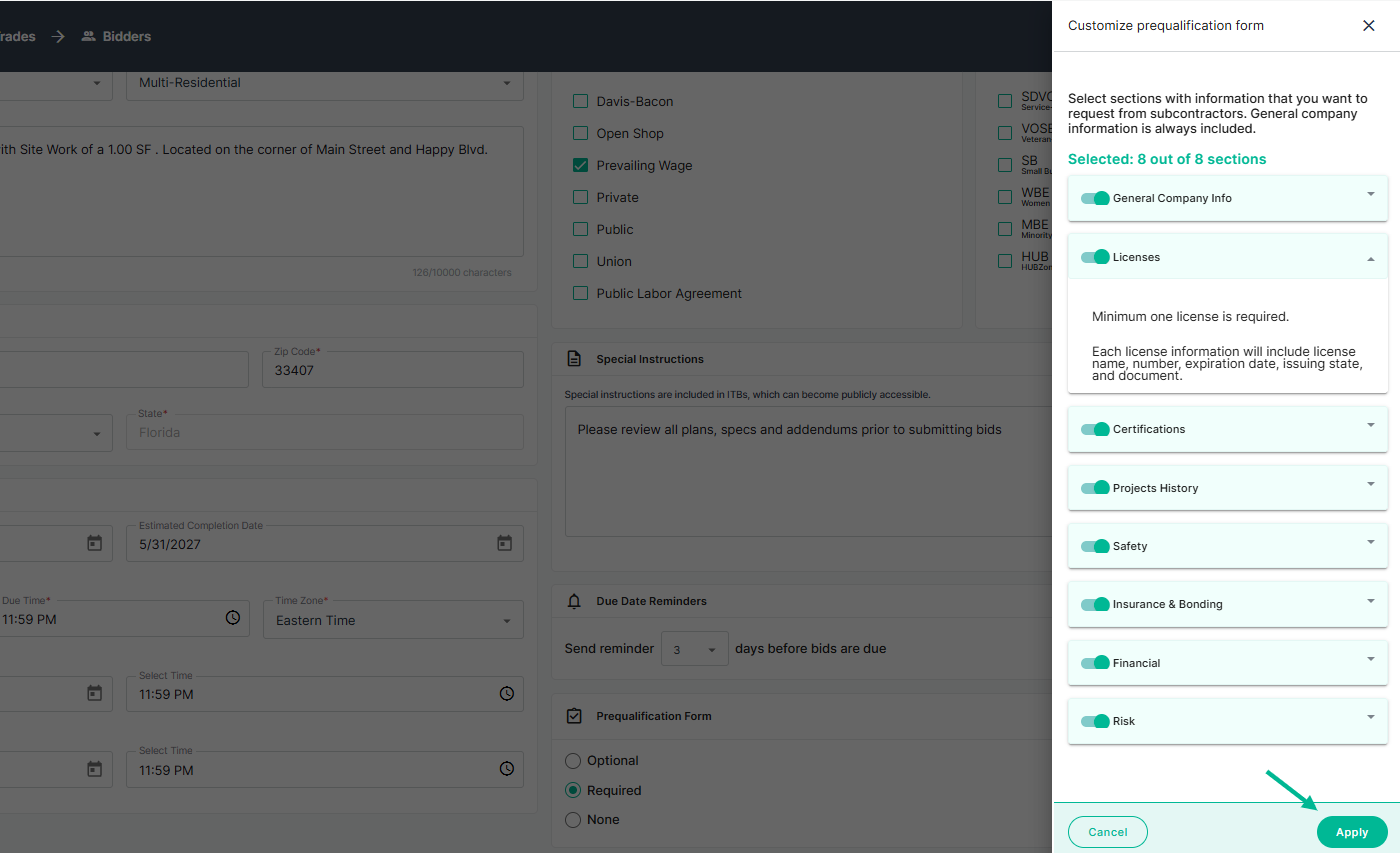
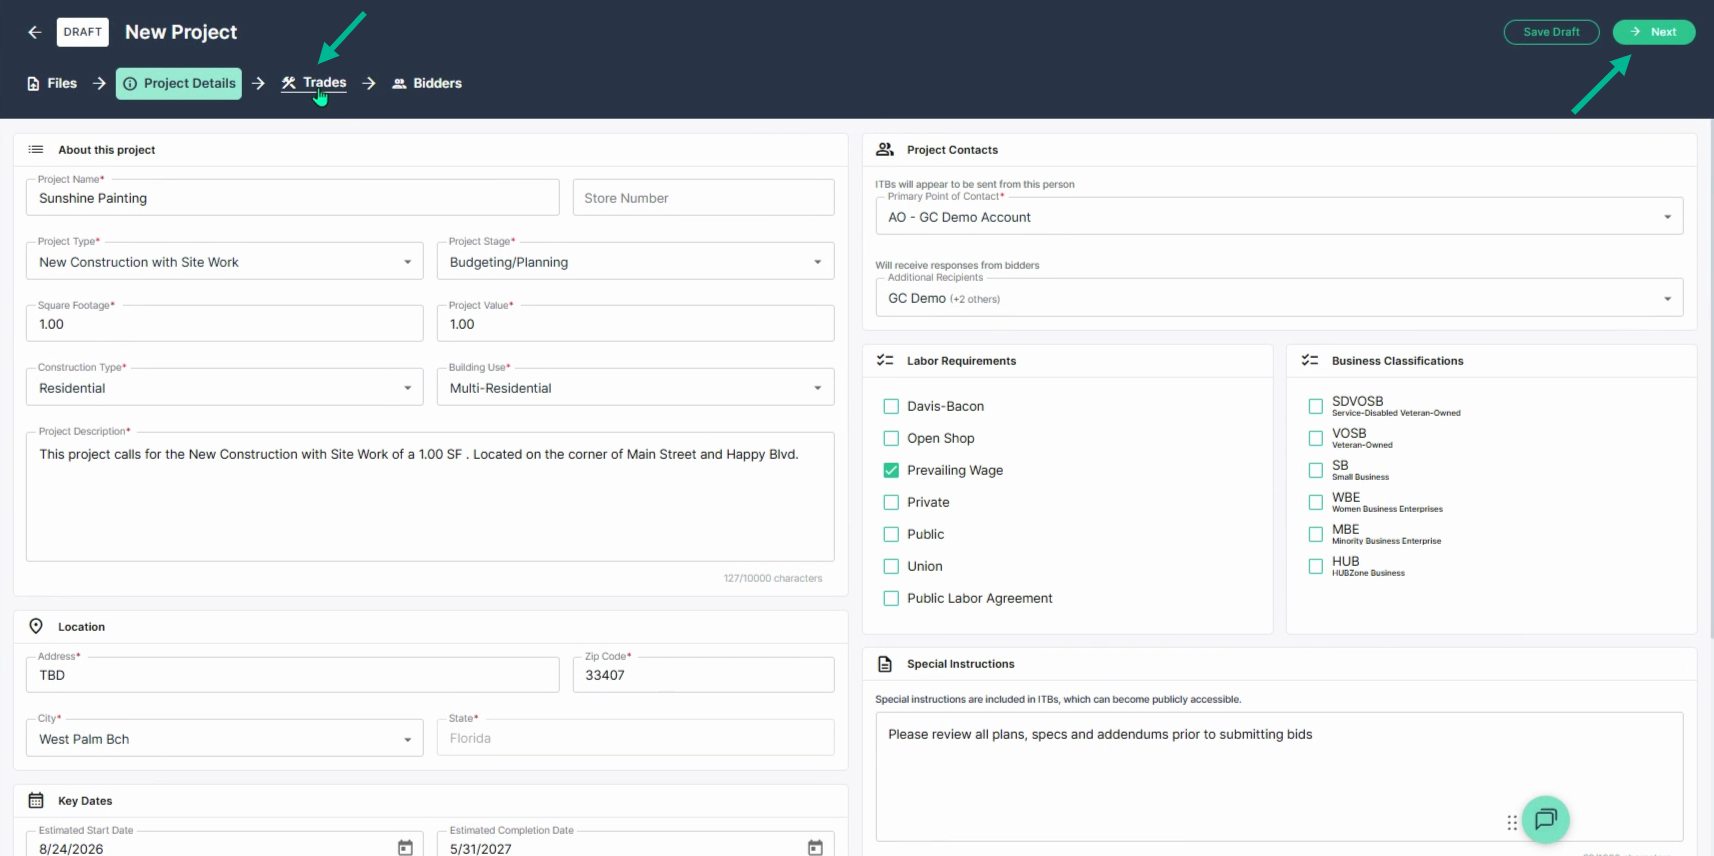
Step 20: Select the Trades tab or click Next in the upper right corner to continue.
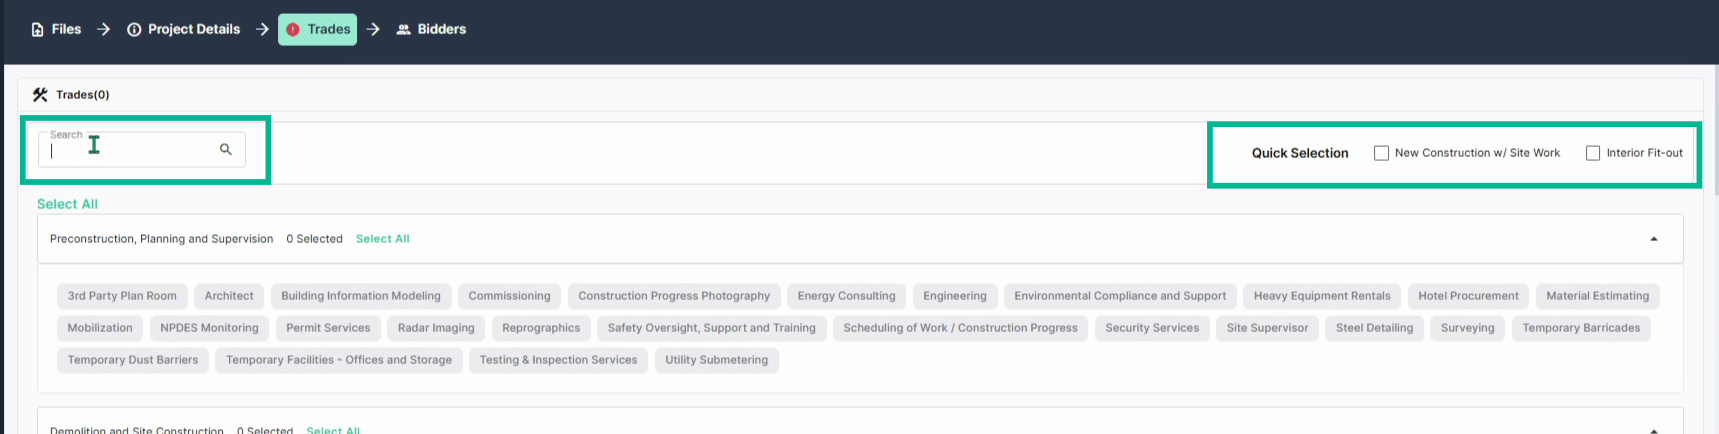
Step 21: Use the keyword search bar or quick selection options to add relevant trades. Review and adjust your trade selections for complete coverage.
Step 22: Once trades have been selected, select the Bidders tab or click Next to continue.

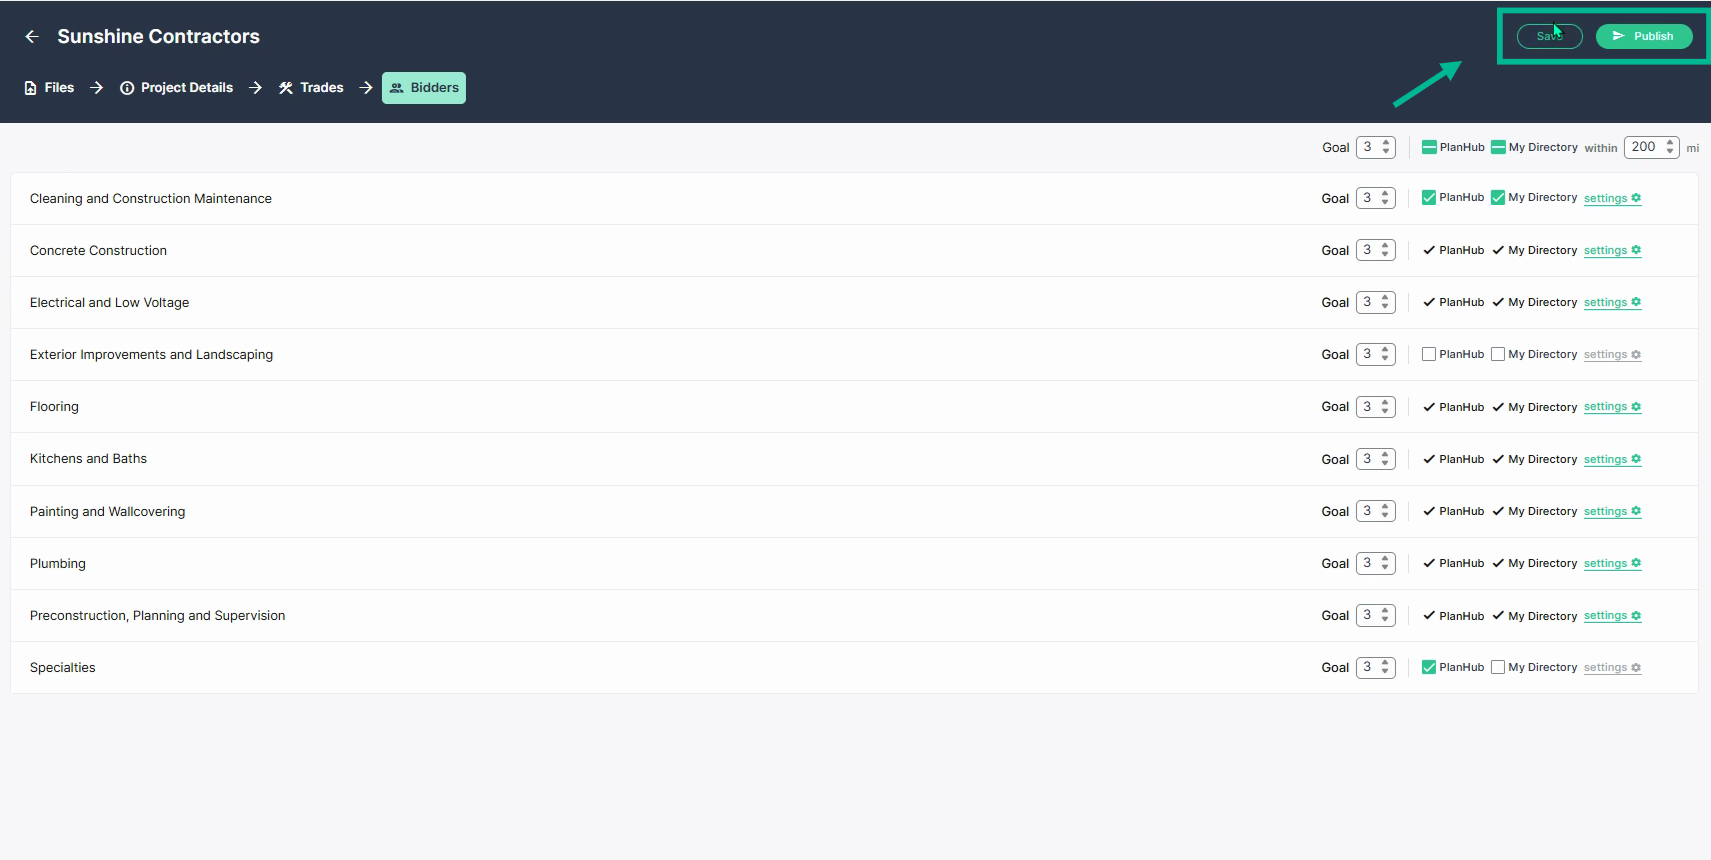
Step 23: Set your bid Goal and use filters to invite the right contacts for each trade. Choose the minimum amount of bids you would like to receive from each trade in the Goal column. Then select to send ITBs to the PlanHub network and/or from the My Directory option.
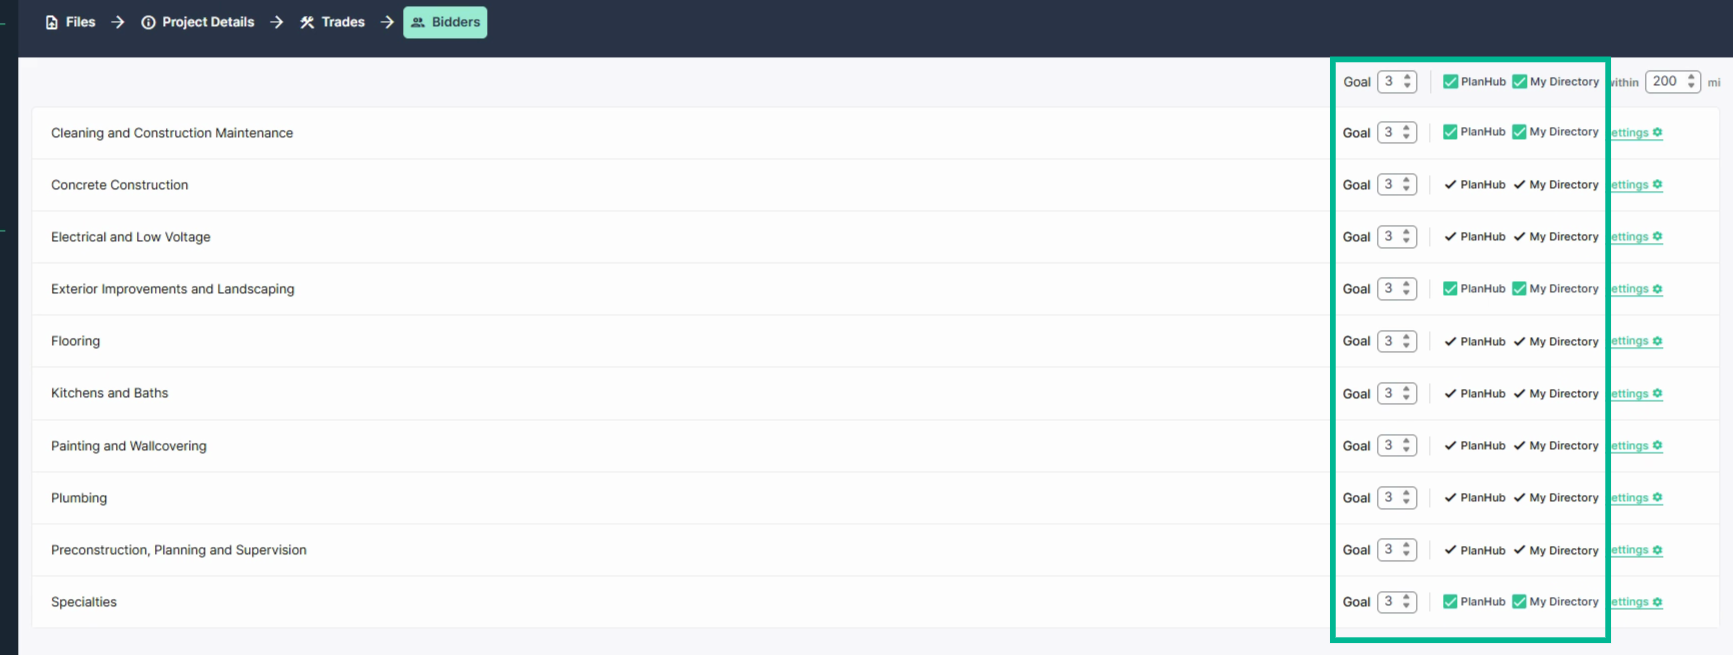
Step 24: Adjust public vs. private posting for your project. Public posts invite the planHub network, while private posts invite only your directory contacts.
Private: For a private project posting, send Invitations to Bid (ITBs) only to contacts listed in your company's Directory. This ensures your project remains private and is visible only to the contacts you have selected. If you have purchased the Network Directory, you can add contacts to your private directory, then add them to your list so the project remains privately posted.
Public (planHub platform): If you choose the planHub Network option instead, your project will be published as a public posting on the planHub platform, making it visible to the broader network of subcontractors and suppliers. Selecting this option provides the greatest exposure and typically results in receiving the highest number of bids.
To learn more about the General Contractor Network Directory, view the Knowledge Base Article: GC | Networking Directory Company Cards
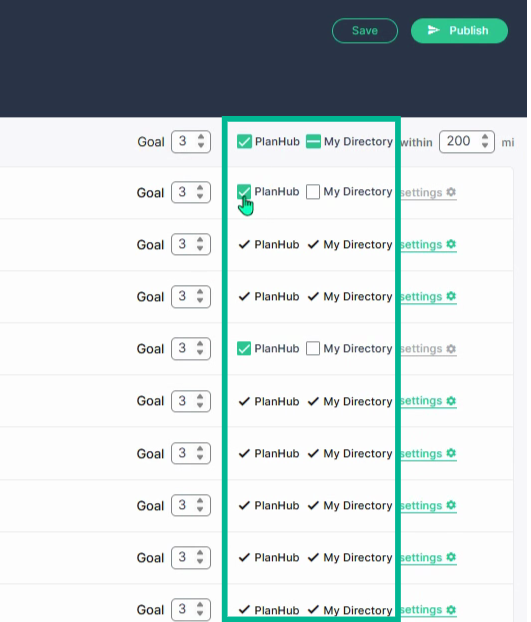
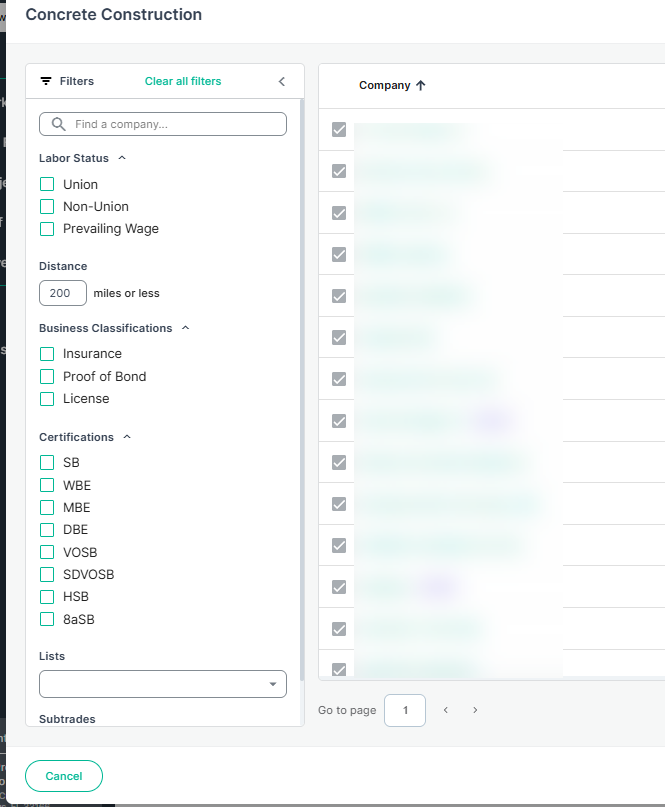
Step 25: Click on Settings for each division to narrow down your selected bidders list. 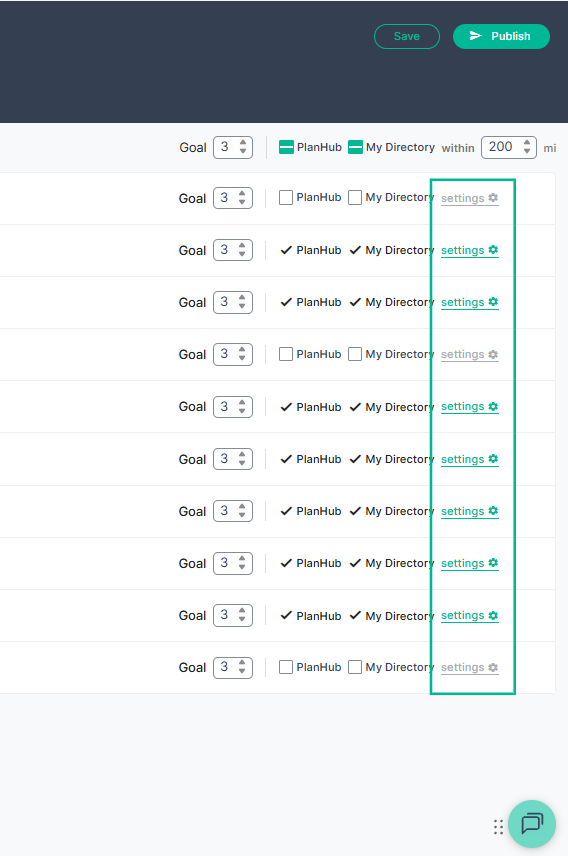
Step 26: For each trade division, according to your subscription access, you can change the mileage radius in the left panel, so that only contacts within that radius with matching trades will receive the ITB email invites. Otherwise, the default is a two hundred mile radius. These options help you narrow down the ITBs sent for this specific trade. Choose from the options by searching for specific companies, filtering by labor status, distance, business classifications, certifications, or by using lists that you have uploaded. Then, select subtrades if needed. Then click Save.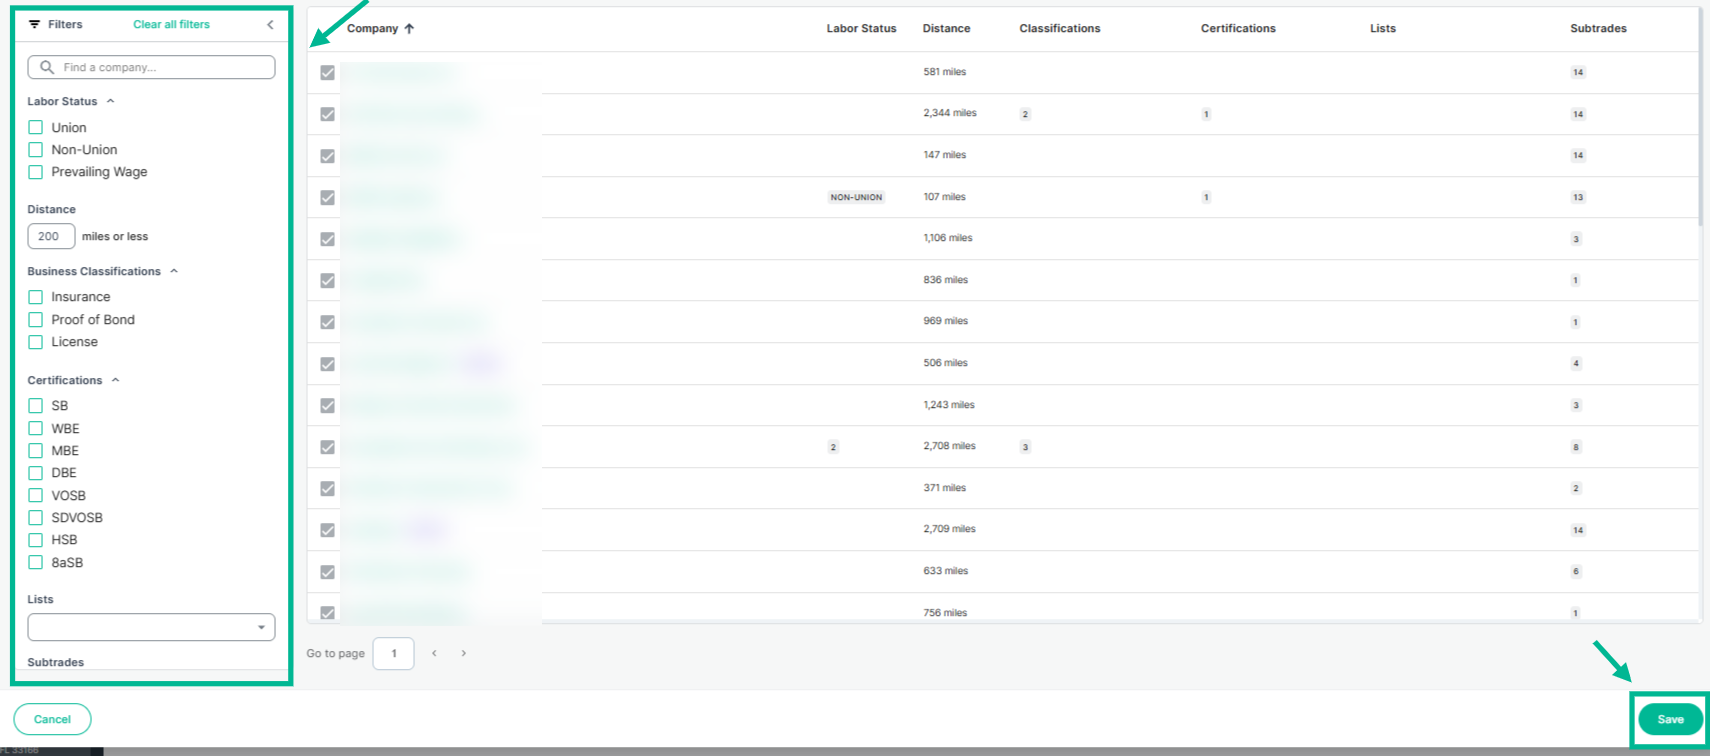
Step 27: When ready, Save as a draft or click Publish to post your project in planHub.
Using these tools and best practices will help you reach the right subcontractors and suppliers, save time throughout the bidding process, and improve your chances of receiving quality bids for your projects.